When can you sow dill in the spring. Planting and caring for dill in the open field
Dill - spicy greens, rich in vitamins, minerals, essential oils. In cooking, it is used for cooking, in folk medicine - to cure ailments. Landing and care open field carried out with early spring. But there are ways to plant dill for the winter to get fresh herbs. all year round.
When to sow dill
The culture is unpretentious, it can be sown all year round, in winter - in a greenhouse or at home, placing containers with a plant on a windowsill. Growing dill has several features, and you need to know them to get a crop.
When to plant dill seeds depends on the season:
- In early spring- after the snow melts. Seeds germinate at 3°C, greens grow at 15-20°C. Seedlings tolerate frosts down to -4°C. AT different regions In Russia, this may be mid-March - early May.
- In summer, dill can be planted as many times as necessary to obtain greenery or umbrellas, every 15-20 days. The problem may only be a lack of space, but it is easily solved by sowing greens to other crops. It is advisable to pre-prepare the seeds so that they sprout faster and have time to harvest.
- In autumn, winter dill is sown in open ground from mid-October to the first decade of November inclusive. There should be about 2 weeks left before frost, but no more so that the seeds do not have time to germinate.
- In winter, greens are grown in a greenhouse or on a windowsill. Sowing is practiced on soil cleared of snow. Top should be mulched with a nutritious insulation, such as dry manure.

Garden preparation
For landing, you need an open place, in extreme cases, partial shade. The culture does not tolerate waterlogging, so you can not sow next to groundwater or where water stagnates. Suitable predecessors are potatoes, garlic, cucumbers, cabbage, onions. It is advisable not to plant after carrots, parsley, parsnips, cumin.
Soils that are neutral in acidity are needed, on others the greens become either red (acidic) or yellow (alkaline). In order to get a crop of greens, you need to know how to grow dill in soil that is not suitable for it. The soil can be deacidified by adding additives such as chalk, dolomite flour, lime, at least 2 weeks before sowing.
Before growing dill in the open field, the remains of previous plants should be removed in the fall. If the organic matter is not damaged by pests, is not externally infected by anything, it can be burned, and the ash can be used as fertilizer or left on compost.
Before winter, add urea, potassium chloride, superphosphate to the soil. Until spring harmful substances neutralized, the soil will be enriched with nitrogen, potassium, phosphorus. Organic fertilizers (manure, humus, wood ash) are also applied to the beds in the fall.
Dill loves light, loose soil rich in nutrients. In severe, it will grow slowly, get sick, the harvest will be small. To change the structure of heavy soil, you can use river sand(1 bucket per 1 m²). Together with it, add compost to the soil, which will increase friability and increase fertility.
Before planting dill in the country, the soil must be dug up by 25-30 cm, having previously scattered fertilizer over the surface of future beds. Turn over large lumps, break. For dill, which is planned to be planted in spring in open ground with seeds, such preparation is carried out 2 weeks before winter sowing or as the beds are freed from plants growing on them.

Choice of dill variety
How to grow good dill- choose a variety suitable for given climatic conditions and seasons. Varieties differ in the time of cultivation and sowing, external characteristics, scope. There are 3 groups:
- Early - Gribovsky, Grenadier, Redoubt. They sprout quickly, fully develop in 35 days from the appearance of the first sprouts. Used for processing umbrellas for seasoning, getting early greens. They bloom quickly, but only 6-7 branches can be used for greenery from a plant. To get quick shoots, dill seeds are best sown before winter or early spring, as soon as the snow melts.
- Mid-season - Umbrella, Richelieu, Kibray. They ripen 10-12 days later than the early ones. This is universal varieties grown for greenery and umbrellas. New branches grow for about 3 weeks, then the plant throws out an umbrella.
- Late-ripening varieties - Alligator, Hoarfrost, Amazon. Bush, give greens for a long time, do not let out an umbrella long time. There is no need to sow the seeds because of the constantly growing new branches. Demanding on climatic conditions and soil fertility. For high yield it is better to first grow seedlings in a greenhouse, then transfer them to the beds.
Early varieties are used for growing dill from seeds on open ground before winter. They are very unpretentious, they will ascend quickly. The first harvest will be 2 weeks earlier than that sown in early spring, but the yield of dill is low, as it blooms quickly and stops releasing new branches.
On a note! The shelf life of dill seeds for planting is only 2-3 years, it is better to store no more than one year. good seeds have a strong smell, feel cool and moist.
Bush varieties are grown in greenhouses in winter. They can be used to grow dill from seed on a windowsill. Late-ripening ones are more demanding for care, so at home they give good harvest. A large branched bush grows on the window, giving more and more new leaves.

How to sow dill
To get a good harvest of dill on the open ground, you must follow the rules of cultivation and care. It is important to choose a suitable place (bright, not flooded), pre-prepare the soil (dig, fertilize), water abundantly.
In some cases, prepare seeds for planting first, for example, for growing in a greenhouse or on a windowsill, accelerating the maturation of plants planted in summer, obtaining an early harvest. But untreated seeds tolerate weather changes better.
For sowing dill in spring in open ground, seed preparation is optional.
With the formation of umbrellas and the ripening of seeds, the plant can be dispersed in the garden by self-sowing. It is undesirable to allow this, since it does not get along well with all plants, it may even harm some. In addition, there will also not be a high yield from the spice itself. To get a good harvest, you need to know how to plant dill correctly.
Preparing seeds for planting
Before planting dill, the seed material should be prepared. This will help speed up the appearance of the first shoots, reduce the time until the first greens. This is especially important for bush varieties. They need more time to develop, they are more demanding on growing conditions.
Seed preparation is also necessary in cases where you need dill to sprout faster. On the shell of the seed there are essential oils that prevent it from opening, protecting it from external influences. At preliminary preparation the oils are washed off, the seeds germinate faster. Accelerated germination is not required when sowing dill before winter.

The easiest way to prepare the seeds for planting so that they sprout quickly is soaking. They can be laid out on a plate and filled with water or folded into a bag of gauze, lowered into water. Water temperature 20-25°C, change every 4 hours, stir occasionally. You can use water at a temperature of about 50°C for disinfection. The duration of soaking is 3 days, the beginning of spitting of some seeds can also serve as a guide. Next, the seed material should be dried for about 30 minutes. and sow. If you soak the seeds before planting, seedlings will sprout earlier than when using dry seed material.
Important! Seeds suitable for sowing sink to the bottom when soaked. Pop-ups should be removed immediately, they will not produce a crop.
To speed up germination and disinfect the seeds, a different soaking method is used. Fill with water for 3-4 hours, periodically draining and pouring new water, then immerse for 2-3 hours in strong solution potassium permanganate. Rinse and dry before sowing.
For the same purpose, soaking dill seeds in hydrogen peroxide is used. To do this, place the washed seeds in 3% peroxide for 6 minutes, then rinse and dry. You can also use infusion wood ash. 2 tbsp. l. pour dry matter warm water, leave for 2 days. Stir occasionally. Drain the infusion, dip a bag of seeds into it, soak in the solution for 4-5 hours.
Seeding technology
Before planting dill in open ground, the seeds can be soaked, but not germinated, as this reduces the survival rate of the sprouts. The soil must also be prepared in advance. Many varieties do not require any preparatory measures, but pre-fertilization and digging of the soil significantly increase the yield.
Pre-soil should be watered abundantly and left for 1-2 days. Make furrows 5 cm wide, pour water. Instead of water, you can use a hot solution of potassium permanganate to disinfect the soil. Sow dill in a zigzag fashion along the furrow to a depth of 2 cm. The distance between future plants is 3-4 cm, and between rows 15-20 cm. Sprinkle on top thin layer loose soil or humus. Do not water, otherwise the seeds will go deep into the ground.
After planting, dill sprouts in 2-2.5 weeks. Additional fertilizers are not needed at this stage, the culture is growing rapidly. If, during development, the leaves change color to yellow-green, this may be a signal that there is not enough nitrogen in the soil. Applying the right fertilizer will correct the situation.
Important! Cannot be applied to soil a large number of nitrogen-containing fertilizers - the spice accumulates nitrates. Instead, the sown dill can be watered with nettle infusion fermented for 5 days.
In order for dill to sprout quickly in the spring, you need to sow before winter. You can also prepare the soil in the fall, and release in the winter small plot from snow, sow seeds, cover with compost or humus on top.
Sowing winter dill
It can be planted in autumn or winter, grown in a greenhouse or on a windowsill. In autumn, it should be planted with seeds in open ground. It is advisable to do this no earlier than 2 weeks before frost, so that it does not have time to ascend. Seed consumption is 1.5-2 times more than during spring planting. Do not soak the seeds, plant them to a depth of up to 3 cm. Mulch the soil on top to preserve moisture and protect the crop from frost. For winter landing dill use early varieties.
To plant a spice in winter, in the fall you need to prepare the ground. To do this, dig the beds, fertilize. Remove the remains of previous cultures. In winter, clear the area from snow, scatter the seeds over the surface without burying. Top with a layer of humus or loose earth with manure, you can additionally cover with a film. This method, like the previous one, is used to obtain an early harvest of greens. The amount of seed material is 2 times more than spring consumption. Do not prepare seeds for planting, sow dry.
The secrets of growing dill in the open field after seedlings emerge are watering, fertilizing, weed removal. Shoots withstand temperatures down to -4 ° C, so periodic temperature drops are not terrible. It is advisable to cover the top with a film if the frosts are prolonged or the temperature has fallen below the permissible level.

How to sow dill in a greenhouse:
- planting in autumn or winter;
- additional lighting will be required until the end of February, the lighting norm is 10-14 hours. If the daylight hours are longer than this time, the seed umbel is formed early;
- the temperature in the greenhouse should be 15-17°C;
- to speed up the germination of dill, pre-soak the seeds;
- dig, loosen and fertilize the beds (preferably 2 weeks before planting);
- make grooves 15 cm apart;
- sow seeds not very densely to a depth of embedding up to 2 cm;
- sprinkle with earth;
- water moderately but regularly.
In order for dill to grow in the greenhouse all year round, you need to use bush varieties. Sow new seeds every 20 days. There should be a distance of 15-30 cm between rows. Fertilize the soil as necessary, water it moderately. Thin out dill seedlings, remove weeds. Make sure that there are no pests and diseases on the crop.
dill care
Depending on the variety, dill grows from 30 to 65 days. Green twigs can be plucked before an umbrella with seeds grows. This period also lasts different time depending on the variety. Plant care consists in watering, fertilizing, loosening the earth, removing weeds.
Watering
Dill watering mode - as needed. Usually 1-2 times a week is enough, but in hot, dry summers, daily watering in the evening may be required. Avoid stagnant water and overdrying of the soil.

Nutrition
Fertilizers for dill are applied 2 weeks before planting. If the location is correct, additional top dressing not required. During the growth of the plant, if necessary, you can add organic fertilizers. For example, yellowing of the leaves indicates a lack of nitrogen, redness indicates an excess of potassium, waterlogging. early flowering starts with a deficiency in the soil nutrients.
How to feed dill in the garden: urea (1 tsp per 1 bucket of water), mullein (1:10), fermented nettle infusion.
The infusion is prepared as follows: pour nettle with water in a ratio of 1:8, add kvass or yeast. Put in the sun for 1 week, stir occasionally. The infusion is ready when there are no bubbles, the color of the liquid is dark. Dilute with water 1:10, can be used 1 time in 2 weeks.
Weeding and thinning
Caring for dill in the open field differs from greenhouse cultivation in the need to remove weeds more often, to protect the crop from diseases and pests. Weeding has great importance at an early stage of growth, so that weeds do not interfere with development, carry it out once a week.
When cutting branches, others do not grow back, but in the case of bush dill, you can cut the leaves, new ones will grow further. For further growth of the plant, you need to leave a few leaves. If the peduncle is not needed for salting or other purposes, you can also remove it, the plant will not die from this and will not waste energy on the development of an umbrella.
Pest and disease control
You can protect greens from aphids by planting several bushes of thyme in the neighborhood. Spraying with crude ethyl alcohol with fragrance is used (2 tablespoons per 10 liters of water). Fallen aphids should be sprinkled with earth.
Plant affected powdery mildew(fungal white color), should be destroyed, at the first sign of the disease, it can be sprayed with a suspension of sulfur. Phomosis ( dark spots throughout the plant) is not treated, diseased specimens are removed, sowing in this area can be resumed only after 4 years. From peronosporosis (oily spots from light to purple on the leaves) help spraying with copper chloride or blue vitriol.

Growing on a windowsill
Dill can be grown on a windowsill in winter. The capacity for sowing must be selected right size to allow the root system to develop well. Put a layer of expanded clay or pebbles on the bottom, pour a little coarse sand on top. The main filling of the container - garden soil mixed with neutral soil. You can use special soil mixture for dill or mix sod, humus and peat, hydroponics is also suitable.
For planting, pre-prepared seeds should be used. There are no features in preparing dill for sowing on the windowsill, you can use any of the above methods. Seeds must be disinfected.
Sow dill on the prepared soil in any desired order, you can make small holes or grooves and lay the seeds in them. Top with a thin layer of soil (up to 2 cm). Lightly moisten the surface with a spray bottle, cover with a film to create a greenhouse effect, leave for 2 weeks at a temperature of 20°C.
After sowing, the first sprouts will sprout in 7-10 days. Remove the film after the appearance of all sprouts. Once a day, the container should be turned so that the greens do not grow sideways, but upwards. It is necessary to arrange lighting for at least 10 hours. If there is not enough light, the sprouts will stretch instead of forming leaves. In winter and on cloudy days, it is useful to illuminate the boxes with a phytolamp.
Growing dill on a windowsill is the best way to grow herbs in the winter. It does not require a lot of work, difficulty can only arise with lighting. Watering is enough once a week, if necessary more often. Fertilizing with mineral fertilizers 2 times a month is desirable. Every 15-20 days you can add new seeds.
» Spices
Dill is a very unpretentious crop that can be quickly grown anywhere in the open field. The scope of its application is very wide. The plant can be used both in cooking and in medicine. But even for such non-capricious greenery, there are certain planting rules that allow you to enjoy the fragrant seasoning for a long time. Later in the article we will talk about how to properly plant, water and germinate dill.
Dill is able to withstand light frosts, so it can be planted as early as April.. But how long in this case to wait for the first shoots? The first shoots begin to appear when the air temperature reaches +3°C. Low temperatures inhibit the plant and contribute to growth retardation. It is best to wait until the air warms up.
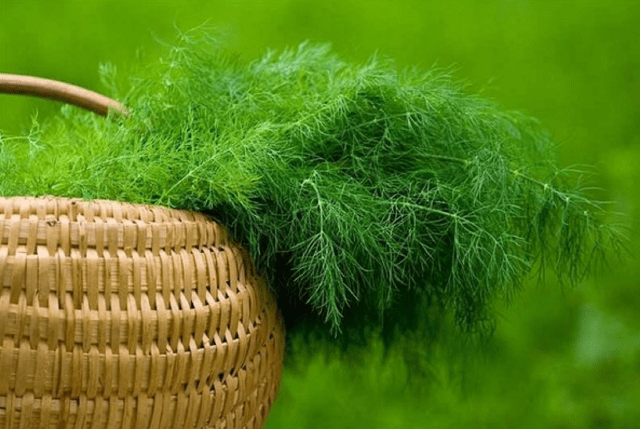
 Bunch of dill on the table close-up
 To obtain an early harvest, seeds are sown at the very beginning of April, when the snow is just melting. To be able to use greens for as long as possible, do not sow the entire garden at once. Sowing material is planted at intervals of a couple of weeks.
According to lunar calendar, better days for landing in 2018 will be:
What kind of soil does dill like
Greens grow remarkably on fertile soils rich in organic fertilizers. Before planting, it is recommended to apply a small amount of humus or fertilize the soil with a solution of mullein, bird droppings. From chemical fertilizers it's good to add the following:
- saltpeter;
- superphosphate;
- potassium group.
The plant does not tolerate acidic soil, therefore it will not be possible to get a crop. If there is no other choice, then all measures must be taken to reduce acidity.

Where is the best place to grow greens? She loves solar beds with large quantity sunlight. However, a direct hit of the rays on it is undesirable, since appetizing greens can spoil their appearance with burns. It is also advisable to avoid drafts. But the plant is not demanding on its neighbors: it can get along well next to any crops.
Summer residents claim that many of them grow dill right on the beds with potatoes, onions and carrots. True, in this case it is necessary to ensure that the landings do not create wilderness for each other.
Proper preparation of the beds for planting seeds
The preparation of the beds should begin in the fall.. This will make it possible to start sowing seeds in early spring, and, accordingly, to get early harvest. The earth must be dug up to a depth of 20 cm. In this case, both humus and mineral fertilizers should be applied. After these procedures, it remains only to properly level the soil, make grooves in it and sow the seeds.
Do I need to soak dill before planting?
Seeds need preliminary preparation only if they are planned to be sown not before winter. Preparatory activities should begin a week before the intended sowing. First of all, the seeds must be placed in gauze and moistened well. Gauze should not dry out, it must be constantly moistened. Thus, the seeds are kept for about a week.
 Dill blossom close up
When soaking seeds, they should be stored in a warm room with a temperature of at least 20 degrees.
Immediately before sowing, you need to dry the seeds for half an hour. After that, you can sow them in the garden. After a couple of weeks, shoots should appear.
If sowing is done before winter, then it is not necessary to soak the seeds. In the spring, they will already have enough moisture in the soil and they will sprout excellently.
Schemes for fast sowing and getting good shoots
Before sowing seeds, you need to prepare grooves a couple of centimeters deep. The distance between them is left at 20 centimeters. Between the seeds, the intervals are recommended to be equal to 5 centimeters.
You can use greens as a compacting crop and plant it among other vegetables in the beds. In this case, it is necessary to provide a sufficient distance for the development of both the dill itself and the crops adjacent to it.

Some summer residents use the zigzag method of sowing this plant in the beds and claim that it is much more convenient to care for it in this way. It is worth noting that this is a purely personal matter, everyone draws conclusions based only on personal experience and preferences.
Care does not cause much trouble. However, even this unpretentious culture has its pests. The main one is aphids. To combat it, it is good to use alcohol, with a solution of which the garden is sprayed. For 10 liters you will need 2 tablespoons of unpeeled ethyl alcohol. In addition, the pest does not tolerate growing near thyme bushes. Named it can be planted nearby and not worry about what rich in vitamins greenery will hit aphids.
After the emergence of seedlings, it is necessary to carefully monitor the color of the foliage of dill. At the first changes, you should take a closer look and take measures to eliminate the defect.
After all, this fact indicates, first of all, the lack of any trace element in the soil. Yellowness can be eliminated by applying saltpeter under the root, and red leaves are eliminated by applying phosphate fertilizers.
Dill is the most common and unpretentious spice grown everywhere. Harvest can be harvested almost all year round (as it grows). However, the leaves have the greatest aroma at the time when inflorescences begin to form.
Now on the market there are many varieties of dill, which differ from each other not only appearance and palatability, but also the peculiarities of agricultural technology: some varieties are easier to grow, some need to be soaked before planting, some will take a very long time to sprout. These cultures different dates maturation, which makes it possible to plan harvesting dates in advance and adjust them to suit your needs.
It is not necessary to allocate a separate bed for dill: it is possible to grow it together with other crops (for example, potatoes, tomatoes, carrots). This is very important for owners of small summer cottages who want to use their territory with maximum benefit.
Dill is considered an unpretentious crop. Often it grows like a weed, occupying any free areas: both on the paths and in the beds. However, not every gardener grows dill large, fragrant, with lush greenery.
Soil Requirements
Dill can grow on any type of soil, but it will be juicy and sprawling only on fertile, loose, organic-rich lands. Dill does not grow on acidic soils and with stagnant water.
Only on fertile soil will dill grow juicy, green, fragrant.
Preparing seeds for planting
Dill seeds are coated with essential oils, which is why they smell so good and grow slowly. Until all the oils are washed off the surface of the seed, the dill will not germinate. Therefore, very often the plant is planted before winter, and during spring crops, special seed treatment is carried out.
Due to the presence essential oils dill sprouts slowly, so the seeds must be washed before planting
Seed treatment for fast germination
for spring and summer plantings dill use special techniques, thanks to which the seeds germinate quickly and amicably.
- soaking for 2-3 days in wet gauze folded in several layers;
For better germination, soak dill seeds in gauze or any other cloth
- washing the seeds hot water(60 ° C) in a fine sieve, or after putting them in a gauze bag;
If there is no time for soaking, rinse the seeds in hot water.
- bubbling seeds for 24 hours in a jar where an aquarium compressor is turned on.
Seeds are placed in a jar of water and an aquarium compressor
Be sure to dry the seeds for 10-15 minutes before planting to a crumbly state, but do not allow overdrying if the seeds have sprouts.
Landing dates
Most often, dill is planted before winter, since this technique allows you to get greens 2 weeks earlier. In this case, the bed is dug up, fertilized with compost, grooves are made and sowing is carried out. Seeds are buried 1–2 centimeters, and sprinkled with compost on top so that the earth does not crust over. It is impossible to soak the seeds during winter sowing, and the garden bed is also not watered.
It is very important to choose the right time for sowing. Since dill is quite frost-resistant, it can be planted after the first frost so that the seeds do not germinate on warm autumn days.
When planting in spring, dill is planted immediately after the snow melts. In the south of Russia it is February-March, in the central part - April-May. The plant tolerates frosts down to -4 degrees, but dill is sown in cold soil only with dry seeds.
Is it possible to sow dill in June
June is a great month for re-landing dill. The day is still long, the heat is not very strong and there is enough time for the plant to grow, it will have time to give both greens and seeds. It is advisable to sow dill with seeds soaked or washed in hot water in order to get quick shoots.
Summer plantings of dill require additional watering
Is it possible to sow dill in July
July plantings of dill require frequent watering, otherwise instead of lush greenery you will get dry posts that have released umbrellas. Planting is also desirable with soaked seeds. If you have free space in the beds with cabbage or cucumbers, be sure to sow dill there - it will help drive away harmful insects and improve the taste of vegetables.
In summer, dill can be planted in a free place with other crops.
Temperature regime
Due to its cold resistance, dill does not require certain temperature conditions for landing. It will grow equally well in both autumn and spring planting. It is possible to plant dill even in winter.
- When planting in winter, you first need to remove the snow from the garden with a shovel.
- Scatter dry seeds on the surface of the frozen ground.
- Cover everything with two centimeters of compost mixed with soil.
- Top the bed with snow again.
Seeds sprout depending on the temperature in different ways. If the street is +5 ° C, then the dill will rise in 15–20 days. At a temperature of +20 ° C, it will germinate in less than 2 weeks. Pre-soaked seeds will show their leaves within a week after sowing.
Video: sowing dill
How to grow dill
Good precursors for dill are tomatoes, cucumbers, cabbage, potatoes, and legumes. If, after these crops, dill is sown in the fall, it will grow to a ready state by the end of May. It will be possible to plant seedlings of other plants in the vacant place - this way you will collect several crops from one garden bed.
Landing in open ground
It is very important to choose a landing site: it must be sunny. In the shade, the plant will turn out thin, with pale leaves and not commercial at all.
- Before planting, the bed is dug up and organic matter is added - rotted compost, usually about a bucket per 1 square meter. Then level with a rake and water.
Humus is poured onto the bed and everything is well leveled
- After 1–2 days, when the soil shrinks, grooves are made 2–3 cm deep and 5 cm wide, watered well. The distance between the grooves should be approximately 20 centimeters.
Grooves for sowing dill need to be well watered
- Dry or pre-soaked seeds are sown in the furrow in a zigzag pattern and then sprinkled with earth or compost. You can lightly pat the ground with your palm to compact the soil.
Seeds in the grooves are sprinkled with humus or compost.
- Seedlings must be thinned out, leaving 15–20 cm between plants.
Between shoots you need to leave 15-20 cm
If the weather is hot, dry, then the dill must be watered, otherwise it will quickly go into color.
For continuous production of dill greens, you need to do crops every 2 weeks.
planting depth
If you plant dill in a garden bed, then the seeding depth should not exceed 3 centimeters. When sowing in winter, you can simply scatter the seeds over the garden, loosen them with a rake and do nothing else - in the spring, melt water will pull the seeds deep into where they will germinate well.
Transplanting
For rare or very expensive varietal dill seeds, seedlings can be pre-grown. Seeds germinate on a windowsill or on a loggia in early spring, but with enough light. On the permanent place seedlings are planted at the age of 30–35 days.
Bush dill can be grown seedlings on the windowsill
Favorable Neighborhood
The best neighbors for dill are cabbage, strawberries, cucumbers, beets, potatoes. Try to leave all over the garden flowering plants dill: own strong aroma he attracts beneficial insects, for example, bees, and at the same time disorients harmful ones, because of which they cannot find the smell of other plants.
Do not leave dill in beds with carrots, basil, watercress and tomatoes. These crops will grow together, but the yield will be less.
Harvesting
Dill is very useful in fresh as well as dried and frozen. But for harvesting for the future, it is better to choose young plants that have not yet released umbrellas. You can cut both the whole plant and individual branches. Dill is dried in a well-ventilated area or in special dryers.
Dill retains more flavor when dried in special machines.
For preservation, flowers and unripe dill seeds collected in umbrellas are used - they give cucumbers, tomatoes, salads a unique aroma and taste.
Umbrella dill - an indispensable spice for canning vegetables
Dill transplant
Transplantation is most often used for bush dill, which can grow up to two meters. To do this, first plant seedlings in small boxes to a depth of two centimeters, be sure to maintain soil moisture. After the emergence of shoots, you need to wait for the formation of true leaves, only after that, transplant each seedling into a separate container - a pot with a diameter of at least 8 centimeters or into the ground.
Planting dill in individual containers allows you not to damage the roots during transplantation in the future.
Further care consists in regular watering, fertilizing and loosening.
To obtain a lush green mass, dill should be planted in fertile, loose, moist soil every 2 weeks. Pluck young leaves on the greens, and leave flowering umbrellas for pickling vegetables for the winter.
Fragrant, vitamin-rich fluffy bushes, unpretentious in cultivation and growing in any conditions - dill familiar to everyone. To obtain early fresh greens, especially valuable in a meager spring diet, you should know the nuances of planting in the open field and care. Knowing when and how to plant dill, at what stage of development and how to fertilize, will help to reap a rich harvest.
Varieties: which one to choose
Types of culture differ in many characteristics, of which the most significant is the ripening period. To continuously obtain a fresh product, a conveyor method of growing it from seeds is practiced. repeated crops every 10-14 days.
At the end of May, early varieties are sown in order to get the "umbrellas" necessary for conservation by mid-summer, and in July - late-ripening ones.
Knowledge of varieties is necessary, because you can grow good dill using only those that are zoned for breeding in a given region:
- the early ones include Dalniy, Redut, Gribovsky. The period from germination to the beginning of stalking under conditions middle lane takes them 35-40 days. The number of formed leaves is 4-6. They switch to flowering immediately upon reaching marketable ripeness (in heat and drought - faster);
- mid-season include Lesnogorodsky, Richelieu, Borey and others. Stem formation begins 5-10 days later than the early ones. Leaves also form more - 6-10 pieces. They manage to form everything - greens, umbrellas, seeds of wax ripeness;
- more leafy sockets late-ripening varieties contain more than 10 leaves. The period between germination and stemming takes 65-70 days, because the yield of late varieties of dill - Alligator, Hoarfrost, Amazon - is the highest. These are bush types of culture, therefore, the agricultural technique of their cultivation is different from early varieties: they are sown not so densely and must be thinned out, leaving a distance of 15-20 cm.

When to sow dill
In fact, there is not much difference when to plant dill: in order to obtain both greenery and seeds, it is sown in the fall before winter and in spring, as soon as the snow melts. Frosts are not terrible for a vegetable, it can withstand temperatures drop to -4 ° C, and it will germinate only when the thermometer steadily shows at least + 3 ° C. winter crop sown in open ground at the end of October - the first decade of November. Growing dill in this way allows you to get greens to the table in the early stages.
Read also:
How to grow tomatoes on a windowsill in winter
Vegetables can be sown throughout the season - plant as many times as you like until mid-August. It grows quickly, and although the total harvest of summer plantings is lower than in autumn-spring, it will have time to grow not only greens for eating, but also umbrellas used in conservation. late autumn, being touched by frost, it dries up and changes color, becoming brown-red.

Knowing how to properly plant dill of the selected variety is important: agricultural technology for growing vegetables on greens is usually focused on early, early maturing varieties. Their economic shelf life is less than a week, and therefore they are sown thickly and harvested quickly.
Late varieties are more productive, but require more planting, and therefore are more oppressed by weeds. So that it takes less effort and time to grow a vegetable and take care of it, after sowing dill on beds in open ground, it is useful to carry out pre-emergence treatment (a day or two before sprouts appear) with Roundup.
The shelf life of seeds for planting is 2-3 years.
Preparing the beds and seeds
Using the knowledge of how to grow dill correctly, you can get a pleasing look, a bountiful crop of culture with the least investment of effort.
Soil Requirements
When growing dill in open ground beds, it is advisable to choose a well-lit area. It will grow in the shade, but in the light the volume of greenery will be greater, its color will be saturated.
The plant loves neutral, loose soils, well ventilated and hygroscopic. The vegetable does not require fertility, being content with top dressing received by its predecessors last year - almost any vegetable, except for celery.
- organics - humus or compost, a bucket per square meter;
- mineral preparations - superphosphate, 2 tablespoons for the same area);
- potassium salt, a tablespoon is enough.
If melt water stagnates on the site in spring, it is advisable to make vegetable beds high.

Seed preparation
Podzimny sowing of dill is carried out with dry seeds (in autumn they do not need to germinate, but in the spring there is enough moisture in the soil), and for effective spring and summer sowing, you should know how to prepare it for planting.
The corresponding work aimed at making the dill rise faster begins six days before the sowing time:
- folded in a thin cloth or cheesecloth and soaked in hot water (50°C) for 3 days. At least 5 times a day, change the water to fresh;
- lay out the seeds on a cloth moistened with water, sprinkle a little with wet sawdust and leave for another 4 days at room temperature+20°C;
- dry a little and start sowing.
Read also:
Vegetable garden without chemicals

Treating seeds additionally in hydrogen peroxide not only promotes them accelerated germination, but also disinfects, strengthens the immune system and the ability to tolerate temperature changes, increases germination. A tablespoon of a 3% peroxide solution is diluted in half a liter of water. The seeds are wrapped in cloth and dipped in the solution for 12 hours. It is advisable to change it to fresh every 4-6 hours.
Such preparation allows you to speed up germination and get seedlings in 5-6 days, and knowing how to plant dill will allow you to do it correctly and efficiently.
Spring sowing technology
When planting dill seeds in open ground, they do it on a prepared flat surface grooves about 2 cm deep. Leave 20 cm between them. To facilitate the care of the vegetable, it is better to make the grooves wide and lay the seeds in a zigzag. For fast germination, sow in moist soil.
In order to avoid excessive thickening, no more than 1 g of seeds is consumed per square meter, and even less for late varieties. Sprinkle with loose earth and do not water for the first 2 days, so as not to wash off the streams of water and not to deepen the sown material more deeply.
How long dill sprouts sprout after planting depends on the depth of their embedding. Subject to agrotechnical rules, they will appear in 5-10 days.

Podzimny sowing of dill
Even beginners in gardening know how to sow dill before winter: they do it with dry seeds in open ground in the fall, at the very end of it. There is no exact date for the winter planting of dill - you need to have time to finish it before frost. Shoots in the spring appear among the first, giving an early harvest of greenery.
A few secrets of growing dill before winter, which will speed up germination and increase yield:
- seeds are laid in the soil a little deeper than in spring, deepening them by 3-3.5 cm;
- their consumption is increased by a quarter;
- the beds after sowing are mulched with loose material.
dill care
The culture is unpretentious and requires little care. She needs nutrition, loosening and watering. Bushes should also be inspected for early detection of diseases and pest attacks.
How to feed dill
The plant is responsive to feeding, however, it accumulates the nitrates necessary for its own to a harmful level, so it is better to use natural, natural supplements. Fermented nettle infusion will become a harmless nitrogen fertilizer for dill.
Read also:
Growing pepper seedlings and planting in the ground
Cut plants are almost flush with water and insist 5 days, after which the beds with vegetables are watered. After such feeding, it grows more actively, and the greenery acquires a particularly rich emerald hue. An additional plus of such a fertilizer is that aphids do not like it.

Watering and loosening
Dill is responsive to watering, but with constant dampness it is susceptible to fungal diseases that flourish especially brightly in nitrogen-saturated soil.
Outdoor care also includes weeding and loosening. Late, most productive varieties require more frequent planting to provide each of the plants with a sufficient amount useful substances. The absence of the usual dill thickening inherent in early species, provokes the growth of weeds.
The technical maturity of early dill is 10-14, and late - 14-25 days. All this time, it is permissible to cut off only individual branches from it.

Growing on a windowsill
In winter, dill can be grown at home, although it is hardly worth doing this for the sake of saving electricity. Additional lighting, which the culture needs, eliminates the benefit of self-forcing. Nevertheless, for those who want to get their own grown greens in the cold season, which is guaranteed not to contain nitrates, this will not be difficult.
Use a deep container with soil mixture (any fertile, but not acidic soil) and drainage, into which prepared seeds are sown immediately in a permanent place in the usual way. So that they sprout faster after sowing, they are soaked, as indicated above.
You can sow dill for home distillation at any convenient time. Despite the fact that all indoor greens grow more slowly in the winter months than in spring and summer, there is no need to adjust fertilizers: their excess is more harmful than a lack. Top dressing is carried out with any liquid complex preparation for domestic plants no more than once every one and a half months.
The lack of light for dill in winter is evidenced by its color - light green. The best way illumination of greenery - with a special phytolamp or an ordinary fluorescent lamp, setting it at a distance of 50-60 cm from the vegetable.
Growing dill in the open field, like growing a house on a windowsill, is a simple process. Having provided the culture with its main requirements - light and water, you can harvest and have fragrant fresh greens on the table all year round.
Dill refers to spicy green crops. It is cultivated both on industrial plantations and in garden plots. It is indispensable for canning, for preparing fresh snacks and salads, it is well stored in the freezer, does not lose its properties during the drying process. Dill seed extract is used in medicine, preparations with dill and its closest relative - fennel relieve intestinal colic even in infants.
Planting dill seeds is not difficult, it is much more difficult to choose a place and prepare a loose fertile soil. It's an annual herbaceous plant comes from the dry regions of Asia, where it grows under scorching sun and often in the absence of moisture.
What are the conditions for growing?
For dill, the type of soil does not really matter. It performs equally well on sandy and loamy soils. However, the seeds are poorly fixed and difficult to sprout on infertile sandy soils. Light and medium loams are most suitable. The acidity of the soil also matters. Dill does not develop well at a pH below 6.3.
To get green good quality plants need regular watering and fertilizing with mineral fertilizers. Seeds and young plants tolerate frosts down to -3 ... -5 o C. This feature of dill makes it possible to make winter crops.
Important! Plants need plenty of sunlight and heat to keep them healthy.
Optimum temperature air for the growth of greenery is formed at an average daily temperature of 16-20 o C.
How to grow dill outdoors?
Neighborhood with other cultures
Dill is generally compatible with many vegetable crops. It is believed that only celery is not suitable for him as a predecessor and neighbor. If you need to get seeds from the bushes, then the plant should not be planted next to fennel, since these two crops freely pollinate with each other.
Dill feels good next to,. However, the proportions of areas should be taken into account when planting vegetables together and should not be planted in the root nutrition zone of the main crop.
Important! In the joint plantings of dill with other vegetables, take into account the competition in the food area!
When should you plant dill?
Young greens are ready for use already 25-30 days after sowing, so they can be sown throughout the growing season, from early spring to winter crops in October.
Planting in the spring begins in April, when the average daily air temperature will be at the level of 14-16 ° C. On average, such conditions occur from April 20. Dill sown during this period will give well-made seeds already in July, when it is time for pickling and canning cucumbers and tomatoes. For an uninterrupted supply of fresh herbs to the table, it is recommended that dill planting in open ground be carried out by a conveyor with an interval of 10-14 days.
Soil for planting
The soil for planting dill should be prepared in advance. If spring planting is planned, then the beds should be prepared in the fall. The complex of works on soil preparation includes: 
- cleaning the beds from the remnants of the previous crop;
- the introduction of organic matter in the form of humus and mineral fertilizers, including potassium and phosphorus;
- deep digging of all components.
AT winter period it is good to carry out snow retention in the garden, this will help save more moisture in the soil, which is so necessary for dill seeds during the germination period.
The complex of works on soil preparation in spring includes:
- easy loosening and leveling of the beds;
- cutting furrows with a depth of 1.5-2 cm.
If little moisture has been accumulated over the winter, then the bed should initially be well watered with a hose or watering can.
Manure is not brought directly into the bed with dill. Well, if the previous crop was cabbage, potatoes or peppers. In this case, manure was applied under them and its effect will be continued for plants. If the soil on the site is clayey, heavy, then it is advisable to add river sand. This measure will contribute to better seed germination.
Important! You can’t bring fresh manure under dill!
Selecting the best variety
When choosing a variety, indicators of the timing of the formation of stems, as well as the length of the leaves, and hence the amount of greenery obtained, are important. According to the timing of stem formation, the following varieties and hybrids of dill are distinguished:
- early;
- medium;
- later.

In early varieties, an umbrella is formed on the stem after the formation of leaves (twigs) in the amount of 4 to 6. In medium varieties, from 6 to 10 branches should be formed, and in late varieties, the formation of an umbrella takes much longer with an equal number of leaves. Among the totality of varieties, there is a variety with constant growth - Grenadier.
Early group of varieties: Gribovsky, Dalniy, Umbrella, Redut. They are suitable for growing on a windowsill at home, especially the Gribovsky variety.
The group of mid-season varieties includes Kibray, Alligator, Max, Richelieu, Moravan.
Late group of varieties: Superducat OE, Salyut, Kutuzovsky, Uzory. Distinctive feature varieties of this group - the formation of a sprawling bush with elongated leaves, which give axillary branches, which makes the bushes look very lush. These varieties and hybrid forms are called bush varieties. They have some growing features:
- require more fertile soil;
- the landing pattern for them is increased to 25 cm due to thinning.
Planting dill in open ground
 As soon as the soil or the sequence in the planting conveyor is ready, they start planting the seeds. Beds are suitable for dill different type: simple, high boxes, geometric, mobile.
Good way – joint landing dill and parsley in alternating rows.
Planting seeds
In order to accelerate the germination of seeds, they are soaked in warm water or wrapped in a damp cloth. A jar of soaked seeds can be left in the bathroom on a heated towel rail for 2-3 days. Water in a jar or on a cloth should be added as the rate of evaporation is high.
Attention! Seeds with seedlings should never be dried!
Sowing seeds is carried out to a depth of 1.5-2 cm. The scheme for planting dill after thinning should be 10x20 cm, and for bush varieties 25x25 cm. When sowing, seed consumption is 1-2 g / m 2.
Watch the video! How to grow fluffy dill
Planting seedlings
The method of planting dill seedlings allows you to get fresh greens already at the end of April. The timing of planting seeds is the first or second decade of March. For sowing, cells of 4x4 or 5x5 cm in size are used, plastic greenhouses with a transparent lid are suitable, but in this case the seedlings will be more difficult to take root, since it is possible that the earth clod at the root will be damaged during transplantation. Seedlings are transferred to open ground under temporary greenhouses on April 15-20.
dill care
The main measures for the care of dill: 
- timely watering;
- fertilizers;
- loosening the soil;
- weeding as needed.
Dill bushes, from which greens are already taken for cutting, should be watered every other day. The next day after watering, the soil in the aisle is loosened. For the growth of greenery, dill is fed nitrogen fertilizers every 10-14 days. Fast-acting fertilizer for green crops – ammonium nitrate. The number of dressings - no more than two for the period of growing greens.
Attention! In order for dill greens not to accumulate nitrates, the amount of nitrogen supplements should not exceed twice per season.
As flower stalks form and seeds mature, the greens become unsuitable for cutting, fibrous and not juicy. It is recommended to leave several plants on the site to collect seeds at the end of summer, add them to conservation and use for medicinal purposes.
Diseases and pests
A feature of dill plants is a strong susceptibility to powdery mildew. Different varieties are more or less susceptible to this fungal disease. The main measure of struggle is prevention. Complex preventive measures includes:
- choosing a sunny landing site;
- regular watering and loosening;
- unthickened crops;
- observance of the alternation of cultures.
 Fungicides can only be used on plants that are grown for seeds. If the cut is carried out less than once a week, then the bed can be treated with 1% copper sulphate. Of the biological preparations, Alirin B is suitable. If blackening of the shoots is noticed, then the plants are affected by another fungal disease - phomosis.
Of the pests on dill, bugs and some types of aphids can settle. To combat them, mechanical removal should be used and pests should be washed off with a strong jet of water.
Greenhouse cultivation of dill
In a greenhouse, dill can be grown throughout the year. He's had enough average daily temperature air is not lower than 16 ° C. From the end of September to the end of March, dill needs to be illuminated. With a large area of \u200b\u200bthe greenhouse, it is better to choose sodium lamps for illumination. For small areas, the industry now produces LED bulbs blue-red.
Reference! For illumination, it is enough to artificial light turned on for 2-3 hours in the morning and 3-4 hours in the evening.
Potentially, the yield of dill in the greenhouse is higher than in the open field. Maintain high soil fertility, add new soil before each sowing. However, with high humidity in the greenhouse, powdery mildew may develop.
Watch the video! Growing dill in a greenhouse in autumn. Harvesting by thinning
winter sowing
Sowing dill before winter is carried out in mid-October, before a stable snow cover falls. It is better that the seeds do not have time to germinate. In early spring, as soon as the snow melts, these seeds will germinate quickly and produce greens faster than when sown in spring.
If the sprouts have sprung up, the bed should be covered with foliage or straw, the greenery will safely endure the winter, and in the spring it will quickly start to grow. Young branches will be especially fragrant!
How to plant dill on the windowsill?
When growing dill greens on a windowsill, plants are often oppressed due to lack of light and nutrients. Sprouts are thin and pale, grow very slowly and sluggishly.

Thus, growing dill on the windowsill has a number of features:
- In autumn, winter and spring, sprouts need additional lighting;
- The soil for growing greens must be highly fertile;
- It is more convenient to use a container for sowing;
- Greens on the windowsill should be fertilized more often with compositions based on biohumus and microelements.
For a more complete development of the technology of growing dill, it is recommended to familiarize yourself with the video.
Conclusion
Thus, planting and caring for dill is not too burdensome. It is important to choose the right place for the beds and regularly perform all activities. The result will definitely be, and the plants will give a lot of tasty fragrant greens and valuable seeds. And if desired, dill will grow on the windowsill!
Watch the video! The subtleties of growing dill. How to sow dill in open ground