How to make a chandelier with your own hands. Original do-it-yourself chandeliers: lighting fixture ideas, detailed instructions with photos
Find out how to make a lamp out of wire, building mesh, so that flowers grow inside it. How to turn a snag into a lamp, and tree branches into a floor lamp?
How to make an original lamp?

Very interesting designer thing obtained from the simplest materials, most of which remains from the picnic. If you went with friends, relatives to nature, you must definitely remove the garbage behind you. This not always desirable job will be made more enjoyable if you ask to fold the plastic spoons separately. If you have children traveling with you, arrange a competition to see who can throw more and faster spoons into a separate garbage bag or bag.
You will also need water canisters. After a fun picnic, after arriving home, after some time, you can make original lamps from the containers left after the feast. Hand them to your friends, leave them for yourself to hang in the hallway, in the kitchen or in the country.
So, here's how such a chandelier is created with your own hands or with the help of your home. First put side by side:
- 5 liter oval plastic bottle;
- disposable plastic spoons;
- cable with cartridge and plug;
- low power LED bulb;
- pliers;
- glue gun;
- screwdriver
- stationery knife.
So that such original lamps do not lead to a fire, take LED, and not an ordinary light bulb"Ilyich".
For information: 4–5 W of LED bulbs correspond to 40 W, and 8–10 W to 60 W of conventional electric ones.

Carefully, so as not to cut yourself, remove the bottom from the canister with a knife.

Also, observing safety precautions, so as not to get hurt, cut off the handles of each plastic spoon completely. Applying a little hot glue from a gun to the cuts of the “blades”, glue them to the bottom tier of the bottle. Usually 17 pieces go here. Then, overlapping, attach the second and subsequent rows, arranging the elements in a checkerboard pattern.

To cover the neck, glue 10-12 spoon blades together, forming them into a ring.

Pass the cartridge with a light bulb and cable through the cut bottom hole in the bottle. If this "electrical" part causes difficulty for women, call the husband. If you don't have one, buy a cable from the hardware store with the socket and plug already screwed to it. You can borrow this working part old lamp.

Put a “ring” of spoons on top of the canister, screw on the lid. To do this, let the husband drill a hole in it with a drill, and you yourself can do this manipulation with a hot nail or self-tapping screw, holding it with pliers. The original lamp is ready.

3 models of designer lampshades with your own hands
Ideas are in the air. If you are in the country and this piece of furniture is not there, it is easy to make it yourself from what is at hand. Take:
- hollow dishes;
- wire;
- mounting foam;
- gloves;
- paint;
- brush;
- pliers.
As a basis, you can use unexpected things: an old pot, a planter, an already unnecessary children's pot.
Turn over any of these auxiliary items, put on a plane upside down. Wind the wire, its turns repeat the shape of the future product, should be the same as the lampshade. With your own hands, but with gloves, pick up a can, squeeze a little foam out of it onto the frame, close the wire, let it dry.
After that, make the contours more even with a knife, cutting off the excess. Paint in your favorite color, white looks airy and elegant. Such a lampshade, made with your own hands, will decorate a country gazebo. You can make a few and hang them here. By avoiding big expenses, this way you decorate the space.

This lampshade looks stylish and modern, while the next one has a classic look. For it use:
- thick wire;
- pliers;
- small plastic water bottle.
Now roll the large outer ring from the wire. We will fasten it. To do this, cut 4 identical pieces of wire with pliers, fasten the first end of each to the small, and the second edge to the large ring. Top part lamp is ready.
The size of the lampshade depends on whether it is made for hanging from the ceiling or for a table lamp. The first is greater than the second.
Roll the bottom ring out of the wire, it is the largest. Connect it to the second top five pieces of wire, distributing them evenly. It remains to decorate the frame of the lampshade. To do this, pass the wire through the second ring, twisting it in a wave and twisting it through the base. Do the same for the second ring.

It remains to sheathe it with fabric. Attach the flap from the second top to the bottom ring, cut to size, adding to the seam. Hem the large sides of the resulting rectangle. Sew the canvas on the side right on the frame, decorating this place with braid. That's it, you made a wonderful lampshade with your own hands.
If you want to see for yourself modern ideas on this topic, please! in capable hands and building mesh turns into a stylish lampshade.

With your own hands or, having called on a man, cut a rectangle from it with metal scissors. To fix the cartridge, twist a circle from the wire, fix it on top of the lamp with four pieces of wire.
If you do not have coarse mesh, use pliers to cut off the excess sections so that the distance between the strips of wire becomes greater. Paint the lampshade, and its frame is ready.
And now the magic begins. You can make an original lamp, which will benefit not only people, but also plants. Attach a planter with a flower at the bottom of the lampshade. You can tie, woven using the macrame technique, for the lower turns of the wire with a thick rope. Check that the fastening is secure.
If there is a man in the house and welding machine, call on this tandem to make a metal ring with "beams" that need to be welded to the bottom of the lamp.

If you have a home climbing plant, such as ivy, pass its lashes between the cells of the lattice. The original lamp will become a house for a flower. It is better not to use ordinary electric bulbs, as they are very hot and can burn the leaves of plants. In addition, the air around the flowers will be too hot. Screw in an LED or fluorescent light bulb.
For such original lamp, you need:
- construction mesh or strong wire;
- brush and paint (optional)
- pliers;
- light bulb with cartridge;
- flower.
You can well fix cups with seedlings on such a lampshade, thereby finding an additional place for growing it and conditions for lighting in the evening.
We make a floor lamp, a table lamp with our own hands
Walking in the forest, do not pass by a rolled ornate driftwood. Put it in a bag, take it with you. Wash at home, if there is bark, peel off with a knife. Go over the surface with fine sandpaper, if required. Finish with wood varnish.

In order for the table lamp to hold well, the snag must be screwed with self-tapping screws to a solid pedestal. It should be heavy enough. Oak is suitable for him. If you find a broken branch of this tree in the same forest, saw off a circle 5–7 cm thick from the thick part.
It will also need to be sanded and varnished. When these wooden blanks dry, connect them with self-tapping screws of sufficient length, passing them first through an oak stand, and then, sticking them into a snag. You can also use nuts and bolts.
How to make a lampshade with your own hands, you already know. Therefore, make it and attach it to a snag, wrapping it with wire.
If the old floor lamp stand is no longer happy or you just want to decorate it, also use wood for this. See how good the birch racks look. Attach a branch of this tree to the lamp and see what kind of floor lamp you could make with your own hands.

How to crochet a lampshade?
If you are fed up with an old floor lamp, you can transform it with your own hands, giving it a "zest". Take the openwork braid, sew it on the top and bottom of the fabric lampshade. You can decorate with glitter by gluing them in the form of a pattern, evenly or randomly.
A floor lamp or a chandelier will turn out unique if you knit a lampshade for them with your own hands. This can be done with a crochet or thin knitting needles. For the first option, you will need:
- hook;
- cotton threads;
- pattern for knitting napkins;
- water;
- starch;
- ribbons.

Measure the top circumference of the lampshade, we need its diameter. Tie a chain from the air loops. Next, knit in a circle, based on the napkin pattern. Measure the height of the lampshade and the diameter of its bottom circle. Based on these data, draw a trapezoid or a rectangle (depending on the shape of the lampshade). untie this figure crochet. Sew on the side.
With single crochets, tie the upper circle of the lamp and this trapezoidal or rectangular part.
Boil a glass of water, stirring, pour 200 ml here cold water, in which 1.5 tbsp. l starch. Boil for 1 minute, remove from heat, cool. Drop a knitted lampshade here, soak well, then wring out, let the water drain, and the fabric will dry, but remain slightly damp.
Put it on the plafond. In order for the knitted lampshade to hold well, you can skip several ribbons or ribbons between the loops and tie them.

Plafonds look very nice if they are decorated with crocheted flowers.

A solution of starch or PVA will help shape the knitted lampshade. Put it on the frame, apply glue, let dry.
In the second case (when knitting needles are used), you need to make calculations for knitting, draw a pattern according to the standards of the lamp, knit a trapezoidal or rectangular lampshade. Similar models are suitable for floor lamps, chandeliers of a strict form. If you need to crochet a semi-circular lampshade, make wedges first, and then connect them with single crochets.
Here is another openwork chandelier. It is pleasant to make kisei with your own hands and decorate the bottom of the product in a circle. But first you need to create the lampshade itself. The crochet pattern for this beautiful thing is presented right there.

On the bedside table a table lamp will look amazing if it has such a lampshade on it, the knitting pattern of which is also given.

If your son or daughter does not let you finish the work, demanding attention, invite the children to make a lampshade too, let them twist strips of paper into tubes with their own hands. Better wind them on a thin pencil go on wooden stick for sushi, and then glue the free edge so that it does not unfold.

Now you need to glue the resulting blanks, using an object of a suitable shape as a frame, for example, a 5-liter canister. Making the first inner layer, let the child go to the second. There should be several of them to close the gaps. When the PVA is dry, cover a table lamp with this lampshade or hang it from the ceiling. Looks original and extravagant.

If you are interested in other ideas on this topic, watch the video:
Very interesting option disk lamps:
Sooner or later, the moment comes when the homeowner is firmly convinced that the interior of his apartment needs to be adjusted and certain changes will be made to diversify it and place the necessary accents. What, in your opinion, is the most successful interior detail in terms of decorative and functional indicators? Undoubtedly, these are original lighting fixtures. You can do this by organizing proper lighting room, setting the tone for the entire interior, an integral element of which are shades for lighting fixtures. It is they, being the central element of the interior, that give the room originality, and the lighting - unusual. If you have not carried out repairs in the room for a long time and have not planned the budget, including the cost of lighting fixtures, you can make ceiling lamps for the chandelier yourself. To do this, it is enough to develop the concept of the interior, choose the design of the lamp and make it with your own hands from improvised materials. And so that you can carry out your plans as efficiently as possible, in our article we will tell you how to make a ceiling lamp for a chandelier with your own hands.
Do-it-yourself chandelier shades: a variety of ideas and materials
At all times, things made by one's own hands were valued. They will become not only an original interior decoration, but also the best souvenir for your friends, acquaintances and relatives. What will be required to create a lamp? The basis of any handmade product is an original idea. If you have already decided on the concept of a future product, it is enough for you to make an original frame for a chandelier and stock up on improvised materials, using which you can realize your ideas. Fortunately, there are enough such materials. As a decor for a future exclusive product, you can use the most unexpected materials:
- woolen threads;
- wire;
- Balloons;
- lace;
- molds for cupcakes;
- paper;
- wine bottles;
- glass jars and many other improvised materials.

If you encounter difficulties when choosing fixtures, you cannot choose a ceiling lamp for a chandelier that matches the style of the interior, or you have found required model, but its cost exceeds the cost of a crystal chandelier, we offer you a selection of step-by-step instructions for making designer lamps. As you could see, there are a sufficient number of original ideas, and if you wondered: “How to update the ceiling lamps on the chandelier with your own hands?”, We advise you to adopt the ideas proposed by our experts.

Plafond for a chandelier made of wine bottles
To start implementing some ideas, only desire is enough. A person who has firmly decided to implement his plan, without fear, crosses the boundaries of the unknown and successfully implements his plan. If you have no experience in building a frame for lighting fixtures, but you really want to do it yourself, you will need a sufficient amount of information, which you can find in our article. Below you will find step-by-step instructions for creating designer chandelier shades that were made by ordinary people who previously had no idea how to make them from improvised, at first glance, unnecessary materials.

So, let's look at how to make a ceiling lamp for a chandelier from wine bottles.
- The first step involves trimming the bottom of the bottle. To do this, you need to draw a straight line on the bottle. It will be required in order to cut off the bottom of the bottle using a glass cutter;
- In order not to subsequently injure your hands with cut glass, grind the sharp edges with sandpaper;
- Pull the wire through the neck of the bottle. After it is inside, connect the cartridge and lamp;
- Choose a base for mounting and connect the bottles to the selected frame;
- You can decorate the bottle with various materials or leave it in its original form;
- The number of bottles taken for a chandelier is variable and can range from one to five to seven or more bottles.

Do-it-yourself ceiling lamp for a chandelier made of threads and balloons
The simplest lamp can be made from threads. The instructions for making such a lamp are so simple that even a child can handle it.

- Threads. It can be ordinary jute twine or thick cotton threads, the total length of which is no more than 100 meters. Color selection is based on your taste preferences and color concept of the interior;
- PVA glue and a brush, using which you will apply it;
- 2 balloons. You will need one of them for work, and the second for testing. It is recommended to use a round ball, which will ensure the correct shape of the lamp;
- Petrolatum.

To make a lamp from threads, follow the step-by-step instructions below:
- The balloon is inflated to the correct size. It is important to remember that the finished thread lampshade will repeat the shape of the ball. Using a marker, draw one or two circles (top and bottom). In this case, the circumference below can be larger. They are necessary in order to delimit the area of winding threads;
- PVA glue is poured into a container and the threads are carefully processed. Using a brush, coat the ball with Vaseline.

Important! Do not apply glue along the entire length of the thread. Lubrication is best done as it is wound.
- Taking into account the holes obtained after you drew two circles on the ball, wind the threads. Please note that the appearance of your future lampshade depends on the winding density;
- After you have wrapped the ball, leave the future chandelier for at least 24 hours until completely dry;
- After the ceiling of the threads has dried, the ball bursts, and its remains are removed from the lampshade that has become durable. The result of this work is a lampshade made of solid threads;
- A hole is cut in the upper part of the ball for the cartridge;
- Finally, check the strength of the lampshade. To do this, insert another ball into it and inflate it. With this technique, you can appreciate the flexibility of the design.

Having made several lamps in accordance with the presented step by step instructions, you can install local lighting in the kitchen or hang a thread lamp in the dining area.
Important! As additional decor chandeliers, you can use the original coloring, artificial flowers or butterflies, beads. A non-standard idea would be to make several balls that are fastened in such a way that they resemble a bunch of grapes.
Using the considered principle of making lamps, you can create original ceiling lamps decorated with lace.

Do-it-yourself plafond for a chandelier photo


Shabby chic chandelier shade
You can create spectacular room lighting by making a lamp out of fabric or beads. The result of your work will be a chandelier-chandelier or lamp in the style of shabby chic.
For this you will need the following materials:
- Wire, a hanging metal planter, an old hoop or a garden basket, from which you can make a frame;
- Cartridge with a lamp;
- Decorative chains and strong threads;
- Various beads and seed beads.

The ceiling, made according to the technology discussed below, is a two- or three-level structure of several rings, which are located one above the other and connected by wire or chains. Depending on the size of the rings you choose, the style in which your ceiling will be executed will depend. If you take the rings different sizes, you can create a ceiling in the style of vintage classics, and by giving preference to rings of the same size, you can become the owner of a lamp in modern style.
Important! Before proceeding with the decorative design of the lamp, which involves stringing beads, color and wind the frame with decorative materials.

Consider the consumption of beads in the process of implementing this project:
- In the process of making the lower part of the lampshade, you will need beads with a diameter of 16 mm in the amount of 15 pieces per thread;
- In the process of making the upper part, you will need beads with a diameter of 12 mm from a consumption of 31-32 pieces per thread.
- By stringing beads on a thread, you can vary the number of threads and the degree of their tension.

Similarly to the described method, you can make a lampshade for a chandelier from artificial fruits. To create the effect of subdued lighting, it is necessary to use a dense fabric for covering the frame. A lampshade made using this technique will become an original addition to a country or Provence style kitchen.

Plafonds for chandeliers in the style of minimalism
Plafond for a chandelier from plastic cans or bottles becomes one of the most original lampshades made from waste materials. By making a ceiling lamp in this way, you are betting not only on beauty and cheapness, but also on environmental friendliness.
Due to the fact that the manufacture of such a chandelier shade does not require additional decorations, such as beads or threads, it will be made in the style of hi-tech or minimalism, and you will not face the question: “How to decorate a chandelier shade with your own hands?” . In order to make such a ceiling, which will become the main element of the subdued lighting of the room, you only need colored or matte white plastic.

To make it, you will need the following materials:
- Base from a 5 liter plastic bottle;
- A large number of disposable spoons;
- Cartridge with lamp and wire;
- Glue necessary for the implementation of high-quality fixation of the elements of the product;

To make a lamp out of plastic materials in the style of minimalism, you need to cut off the bottom of a plastic bottle, and the handles of plastic spoons, and this must be done in such a way that they have a small stalk. Using glue, fix the cut spoons on the bottle that acts as the base. To achieve the greatest attractiveness and organicity of a homemade lampshade, arrange them in an orderly manner, in rows. Each next row must be overlapped, leaving no gaps that can spoil the appearance of the lampshade.

When the chandelier is ready, you will notice that it resembles fish scales. At the same time, it is important to remember that the design of the ceiling is characterized by a sufficiently high density, and therefore, the lighting will become so dim that, most likely, you will need to place additional lamps in the room.

The shape of the lamp may be different. One option involves a lamp in the shape of a lotus. However, other equally original decorations can be made from plastic spoons.

Another option for lighting fixtures made, one might say, from waste, is a ceiling lamp for a chandelier made from the bottoms of plastic bottles. It will appear lacy and, at first glance, consist of many small flowers.
Important! The lampshade made of plastic bottles can be not only white, but also colored - therefore, you will need to choose colored bottles or paint the finished product in the desired color: from gold, copper and steel to pink and black. If you hang a finished lampshade in the kitchen above the table, it will be a great addition to the dining area.

A variety of ideas for decorating do-it-yourself chandelier shades
How to dim the light in the room?
One of the “tools” for creating an intimate atmosphere in a room is the organization of subdued lighting, and lampshades, which first appeared more than two hundred years ago and replaced their predecessors - shutters for candles and torches, become the main way to implement this undertaking. If earlier they were made only from fabric, today for their decorative design it is common to use crystal and broken glass. Today, design art has reached its apogee of development, as a result of which the decorative design of hand-made products can be carried out using almost any materials.
Important! Today, the designer in the course of his work is not limited in the choice of materials for decoration - in the process of making lampshades, he can use any details. At the same time, it is important to maintain a sense of proportion and taste by creating harmonious combinations of decorative elements.

A cozy lampshade, decorated with hand knitting, will be the best gift for mom or grandmother.
Original lampshades for handmade sconces
Sconces are multifunctional wall lamps. Thanks to the diffused and subdued light they create, they can be placed in recreation areas and not be afraid for your eyesight. Today, there are modern sconces that involve regulating the flow of light into the room. Such models must be installed in rooms during the operation of which it is necessary to change the direction of light flows. If you want to become the owner of designer, unusual sconces, create them with your own hands. Handmade Wall lights, in the process of creating which you can show your individuality, will most successfully fit into the holistic concept of the interior of your room.

Branch sconces are distinguished not only by fast and simple manufacturing but also original appearance.
The style of do-it-yourself ceiling lamps can be different and depends on the stylistic concept of the interior in which you plan to place them. In this regard, we can safely say that the answer to the question: “How to paint the chandelier shades with your own hands?” strictly individual.

If you complement the interior of the children's room with sconces, you can diversify the room, making it bright and perky. By hanging a sconce in the bedroom, you will make it more comfortable, bringing a touch of peace. Dinner in the kitchen, decorated with sconces, will become more romantic.

The baby's room can be decorated with a sconce in the shape of a birdhouse. To do this, it is enough to fix the birdhouse on the wall and bring a lamp with a ceiling into the middle.
DIY decorative LED lamps
Due to the growing popularity of LED lamps, they are used not only in work, but also in domestic premises. One of the advantages of LED lamps is the possibility of making them yourself. To make an LED design at home, you will need separate LEDs that are installed in the body of a faulty lamp equipped with a power supply.

To replace a traditional incandescent lamp with an LED one, you do not need to dismantle the lamp or make adjustments to its design. Self-made LED lamps are most often part of decorative lighting, more often - the central element of ceiling lighting.
For the manufacture of stylish LED lamps, you can use a variety of materials:
- metal;
- the cloth;
- beads;
- LED Strip Light;
- old lamps.

Variety of LED lamps
Fabric LED lights can be used for decorative design premises and even clothes shown at fashion shows. The use of LEDs allows you to place the necessary accents on your tapestry.

This DIY beaded LED lamp will become a work of art, eye-catching and enthralling. From beads, you can make both small table lamps and large-scale decorative panels of illuminated beads.

If you plan to use a handmade lamp as a decorative detail in interior design classical style, in the process of its manufacture, it is recommended to use metal elements for the base.

The procedure for manufacturing an LED lamp from an LED strip
The LED strip is a flexible board with built-in LEDs and current-limiting resistors. To make a lamp, you can cut a section of tape to the required length. The supply wires are soldered to the contact pads located next to the cut lines. There is an adhesive film on the back of the board. To cut the tape, you can use ordinary scissors.

As a housing for a homemade lamp, you can use an old, used lamp.
The procedure for manufacturing an LED lamp from an old lamp is not difficult.
Disassemble the old lamp by gluing on it inner surface led strip. printed circuit board, removed from the old lamp, can be used as a power supply for a new lamp. The instruction for the manufacture of the lamp, presented in our article, involves the use of a transformerless power supply equipped with a ballast capacitor.

A lamp made in accordance with the presented scheme is suitable for illuminating the work area.
Having made a selection of circuit elements, place them on the board. In this case, unnecessary parts from the old lamp must be removed. After that, connect the tape to the power supply, assemble the lamp and connect it to the network.

LED lights are more relevant than ever. They can become both the central lighting element of the room, and its decorative component. After reviewing our article, you are convinced that making lamps with your own hands is a fairly simple and, at the same time, creative event, and as for the use of home-made lamps, you can find it yourself.
Interior design is incomplete without lighting design. The right light fixture can completely transform a room. To show your individuality and creative inclinations, try to make a chandelier with your own hands. There are no restrictions on the choice of materials. Get inspired by lighting ideas handmade in different styles, three detailed master classes will help to make a unique piece of decor with your own hands. And tips on connection and installation will help with installation.
The first step is to decide on the material that you will use as a basis:
- old chandelier;
- all kinds of rings, hoops, frames - for the frame;
- elementary paper lampshade;
- natural materials;
- other.
The easiest way is to use an old unnecessary chandelier as a base, which has already served its purpose. Such restoration will help to look at this rarity in a completely new way and extend the life of the lamp. There is a clear advantage in using old frames: the main elements, such as the frame, fastening and the entire electrical part, are already ready. All you have to do is design, without thinking about any technical issues.
The rest of the materials will require more attention to the connection of wires and cartridges. Homemade chandeliers and lamps on a flat round or other shaped frame can be of any size, made in different styles and techniques. The manufacturing principle is simple: various decorative elements: beads, fringe, paper and cardboard figures and various unusual things. It turns out effectively.
Another easy way to make a DIY chandelier is to use a paper lampshade that you can buy at the store. Lampshades come in different sizes and colors, you need to choose in accordance with your idea. You can use several identical lampshades to create one lamp - fantasy will be where to roam.
A paper lampshade costs a penny, and there are hundreds of ideas for its reincarnation!
The use of natural materials has become a new trend in interior design. creative ideas with the use of branches, roots, cones and other improvised means are becoming more popular and find a place in different design styles.

An ordinary branch in skillful hands turns into a Scandinavian-style lamp
If there is no suitable frame, you can always take a coil of wire and make a base for a chandelier of the desired shape from it. Another option is not to use the frame at all, replacing it with a balloon for a while.
Video: do-it-yourself chandelier-ball of threads
What chandeliers can be made with your own hands
You need to choose ideas for creating a lamp on the ceiling, depending on what style you have chosen to decorate your home. Approach the issue responsibly, look at the photo of the original hand-made chandeliers, and choose the lamp that you like the most suitable for your interior.
Homemade lamp in boho style
The now popular boho style is the most suitable for hand-made lovers. This is a free style that is distinguished by a variety of materials, colors, textures and shapes. In such an interior, everything is possible, and the chandelier should be its highlight.

Artificial flowers will decorate any craft

A little fringe and hot glue - fresh and original
Fringe is a favorite element of boho lovers. When creating a chandelier with your own hands, this material will come in handy. Moreover, all kinds of braid with fringe are found on sale, which further simplifies the process.
In order to make a boho ceiling lamp, take several rings of different sizes, connect them in decreasing order and decorate each with a braid. The original chandelier is ready, it remains to fix the cartridge with a wire.
Alternatively, instead of a ready-made factory fringe, you can use colorful or plain ribbons, ribbons and threads. It will take a little longer to tinker, but as a result you will get one-of-a-kind homemade chandeliers.

Even old T-shirts and dresses cut into strips are suitable as a braid.
Retro and vintage
Homemade chandeliers and lamps fit quite organically into the vintage-style interior. The most suitable option in this case is a converted chandelier of those times. It can be found in your grandmother's house or at a flea market for a penny. The main thing is that the device works. But even if it does not work - it does not matter, you can always fix it.
Suitable for a vintage lamp decorative ornaments:
- crystals;
- beads;
- lace;
- feathers.
Remove the old shades and decorate the frame with the prepared plastic crystals.

Important! To make the picture whole, use light bulbs in vintage style- depicting candles. A retro chandelier will lose its charm if spiral housekeepers are screwed into cartridges.
A fringe with feathers glued onto a paper round lampshade around the perimeter will turn the lamp into something weightless and airy. Such a handmade chandelier for a vintage-style home will become the center of the composition. Start gluing from the bottom tier, gradually rising up. Your task is to hide the attachment points with the next layer of feathers.

Such a lampshade is suitable for both retro interiors and modern design Houses
Another essential attribute is lace. But how to make a lace chandelier with your own hands? A balloon, PVA glue and grandmother's lace napkins come to the rescue. If you know how to crochet, you can make some lace doilies specifically for this purpose.
Take a few knitted elements, soak them abundantly with PVA glue. Do not worry, after drying, the glue will become transparent and will not be noticeable. Take a balloon of the desired shape and size. Lubricate the surface of the ball with a fat cream or oil and carefully glue the napkins.
Your ceiling can be in the shape of a ball, then you need to start gluing from the bottom. Central element the first napkin should be strictly in the center of the lamp. If you need a slightly open ceiling, you should start with the side surfaces.
After the glue has completely dried, air must be released from the ball. Remove the ball and the ceiling is ready.

The idea is ridiculously simple, but how effective!
Experiments with lamps in the nursery
Often, when making repairs in the nursery, parents cannot choose a chandelier that the child would like and look good in the interior. If you find yourself in this situation, learn how to make a DIY chandelier and create the light fixture your child dreams of.
Many girls dream of a room that looks like a fairy or princess bedroom. A magical chandelier made of rose petals floating in the air will be a good addition to a fabulous nursery. As a base, use an old lampshade from a floor lamp or make a frame from steel wire.
As a decor, ready-made petals of artificial roses, which can be found on sale, are suitable. Another option is to make the petals with your own hands. You will need thin fabric for this. desired color, which will not crumble at the edges. Of the tools, scissors and a needle and thread are enough.
Cut round petals according to the prepared template. Connect them with a thread to make garlands. Attach the resulting threads to the frame around the entire perimeter. In the center of the frame, make a wire base for the cartridge and a suspension for mounting on the ceiling.

This chandelier is as light as a ballerina and as delicate as a feather.
If you have a glue gun, making your own lamps will not be a problem. Cool idea for the nursery - a colorful chandelier from plastic cups. Glasses should be made of durable and transparent plastic. These are often found in the party departments next to balloons and caps.
The work on connecting the elements is quite scrupulous. Start from the middle. Choose diameter and connect right amount cups around the circumference. Cast on rows one by one until you reach the top of the lampshade. Then turn the piece over and repeat on the other side. The bottom of each glass should face the center of the sphere. In the middle there will be a fairly large space where you can easily put a light bulb.

DIY children's lampshade - everything is very simple
Ideas for simple lamps for a couple of dollars
A very simple, but at the same time cute idea is a plywood night lamp. The choice of form is limited only by your imagination. A plywood figure is attached at a short distance from the ceiling or wall, and behind it is a light bulb. The result is a muted diffuse glow around a dark silhouette.
A popular option is the cloud. Cut out a cloud from plywood or chipboard, for beautiful composition you can make a few more reduced clouds. Paint the clouds white with non-toxic acrylic paint. Attach to the cloud with reverse side metal elements in the shape of the letter "P". Pull out the wires and connect the cartridge. Then screw your cloud to the wall, hiding the wiring and light bulb behind it.

You can make such a chandelier-night light with your own hands in just a couple of hours.
IMPORTANT! Please note that any homemade chandeliers can only be used with those types of light bulbs that do not heat up during operation. Diode bulbs work best. They do not heat up, shine brightly and consume little electricity. In addition, a variety of shapes allows you to choose a light bulb even for the most original lamp.
simple and traditional way- lampshade-cylinder. These are often found on old floor lamps. From two identical circles form the upper and lower edges of the ceiling. A fabric or paper is stretched between them. Depending on the color and the presence of a print, the same chandelier model can be presented in completely different styles - from ethnic motifs to minimalism.

Such a lampshade can even be made from a piece of wallpaper
A simple but effective idea is a spider chandelier (photo below). Its highlight is in long wires that are not hidden anywhere, but on the contrary, serve as decoration for the ceiling. They resemble the long legs of a spider, which is why this model is so named. A cartridge is connected to each wire, and a light bulb is screwed into it. The wires spread along the ceiling in all directions, are attached at the anchor points and hang down. Bold and extraordinary, very simple to perform.

The lamp really resembles a large spider with thin legs.
The most original ideas for the brave
In principle, to make chandeliers for the home with your own hands, you can use any object without exaggeration as a basis. Turn on the imagination, and you will understand that any thing can be creatively beaten.
Old wooden clothespins? Why not an idea for a homemade lamp! The principle is the same: frame, decor, cartridge mount, fixation on the ceiling. The result will exceed your expectations. Such a chandelier will decorate the interior in the loft style. Looks very original.

Wooden clothespins - stylish and eco-friendly
A skein of thread and a flower basket? Wonderful! Don't be afraid to experiment. Cut the threads and tie them to the top edge of the basket. Tie a knot from below, straighten the drapery a little, decorate with beads to your taste and attach to the ceiling, where the wiring has already been brought out and the light bulbs have been connected.

Everything ingenious is simple, and this idea is proof of that.
Pompoms, origami figurines, Christmas decorations, beads, dishes, tea-set, cutlery, CDs, all kinds of scraps, trimmings - if you wish, you can transform this trash into a breathtaking lamp.
Chandelier making step by step tutorial
For those who want to try to make chandeliers with their own hands, we offer original ideas And step by step guide. The most popular and successful lamp ideas are discussed in more detail. If you follow the recommendations and make a little effort, it will turn out the same as in the photo, or maybe even better.
Chandelier from plastic bottles
Some people think that used plastic bottles should be sent to a landfill, in extreme cases - to a recycling plant. But some needlewomen do not think so. Lampshades of incredible beauty are made from ordinary green, brown and transparent bottles from drinks.

Fantastic lamp you can do it yourself
Such a chandelier made of plastic bottles in the form of leaves can also settle in your home. To do this, collect necessary materials and tools:
- bottles of several colors;
- scissors;
- thin wire;
- awl;
- soldering iron;
- wires;
- cartridge;
- switch.

Tools and materials
Instructions for the manufacture and assembly of the chandelier:
- Draw a stencil in the shape of a leaf. It is better to do this on thick cardboard.
- Cut out the resulting sheet.
- Place the stencil on the plastic and circle it with a pen. Find the optimal arrangement of templates so that there are as few scraps as possible.
- Cut identical leaves from plastic of all colors. The edges of the leaves may seem too sharp and sloppy to you - don't worry, we'll fix it soon.

chopped leaves
- When the stock of leaves is ready, we proceed to processing. This is where a soldering iron comes in handy. Warm it up and run along the edge of each element. The plastic will begin to melt and the leaves will begin to round.

Turns out pretty neat.
- Process all the details in this way.

Leaves need to be prepared a lot
- Using an awl, make holes in each sheet at the base.
- Collect twigs from wire and leaves. Use different shades to make the branch more voluminous and brighter. Fasten the wire in the holes of the plastic, try to make the branches thick to hide the wire behind the leaves.

Branches of wire
- Let's start assembling. From small branches, collect large ones, connecting them together with the same wire as if you were weaving a wreath. Form a lampshade of the shape you need. The wire is flexible, if something went wrong, it can always be corrected and trimmed.
- At the base of the chandelier, make a wire mount for the cartridge.

- Put the shade on the chandelier.
Luxurious glass chandelier
From glass bottles from under the wine you can create a unique chandelier for the living room or bar. Big idea - powerful wooden base and a dozen bottle-plafonds for light bulbs. All this bulky structure will be suspended from the ceiling.

Can a real connoisseur of wine have another lamp?
What you will need to make a DIY bottle chandelier:
- wine bottles - yes different color and stamps, but similar in shape and size;
- boards;
- chains for suspension;
- self-tapping screws with loops - for fastening;
- glass cutter;
- jigsaw;
- grinder;
- drill;
- stain;
- cartridges and wires.
The master class is quite complicated, but detailed instructions will help to cope with the task:
- Prepare the bottles: clean them from the labels, wash, dry. Make a mark at the same height on each bottle. Cut off the bottom of each with a glass cutter.

Sometimes labels have to be soaked in water for better peeling.
- Take care of the boards. Cut them with a jigsaw into segments of the desired size - be guided by the area of \u200b\u200bthe room and the number of bottles (in the example there are 10 of them).

sawing boards
- Finish the edges with a grinder. The ends should be as smooth as the rest of the surfaces.
- Stain the wood with a stain. The color depends on your interior. The author chose a dark shade.

Get a deep noble color
- Mark the places for installing bottle-plafonds. They will be installed symmetrically in two rows of 5 each.
- Using a drill with a 25 mm wood core bit, drill holes in each mark.

Hole drilling
- At the corners and perimeter of the base, screw the screws with loops from above for fastening to the ceiling. Measure the lengths of the chain of the desired length and connect to the base.
- Insert the necks into the bottle holes.

bottle opening
- Prepare 10 rounds and connect them to the cables. Pass each individual wire through the bottle so that 10 wires remain on top of the lamp.
- The cables are connected in a circuit and insulated. Hang the chandelier by chains. Connect electricity.

Finished wine bottle lamp
Pearl strands - a chic idea and implementation
Glamorous shabby chic chandeliers or sparkling Swarovski - lamps made of stones and beads attract attention and make any interior festive. Making a chandelier of beads and rhinestones with your own hands seems to be something out of reach, in fact, the technology for creating it is very simple.
For such a bright and massive model, prepare:
- ready-made garland beads (sold in any department for decoration) or a large number of beads, fishing line and patience, if you decide to collect the threads yourself;
- garden hanger for flowers or other similar basket;
- acrylic paint in a can;
- knitting wire or special wire for making jewelry;
- glue gun and rods for it;
- wire cutters.

Necessary materials
How to make a lamp from beads with your own hands:
- Prepare beads. It is better to take ready-made beads (for example, to decorate a Christmas tree), otherwise you will have to tinker with stringing. If the color does not suit you, paint them with spray paint.
- While the beads are drying, take care of the basket. If it is rusty, brush over the metal. If in normal condition or a new one - just paint it.
- The beads are dry. Now from several garlands you need to assemble one large length. Connect the outer beads with hot glue.
- Cut the wire with wire cutters into pieces of 5-7 cm. You will need several hundred of them for such a chandelier.

The work is monotonous, but it goes fast
- Take a garland and one piece of wire. Attach the beads to the basket at the bottom. Continue beading the basket, securing the result with wire so that the decor does not move to one side.

DIY decor for the bottom of the lampshade
- When the lower part of the basket is completely ready, proceed to decorate the upper half. Long threads are passed through the top of the lamp and pulled over the top edge of the basket. Do not pull the garlands, they should hang freely. Fix them on every turn.

Almost done - it remains to remove the remnants of the wire
- If you did everything right, the beads completely hid the basket and hanging chains. You can decorate the resulting masterpiece with ribbons, rhinestones or other elements.

Beautiful with and without a ribbon - it's a matter of taste
Subtleties of installation and installation
With the design of the lampshade, everything is clear - there is a place for fantasy and fiction. But what about the electrical part? After all, even the most luxurious chandelier will not work without a correct and safe connection.
We really hope that if you decide to make an electric lamp yourself, then you are familiar with the intricacies of installation and safety rules. But just in case, we list all the important little things again:
- Never spend electric installation work(even the banal replacement of a burnt out light bulb) with the power on.
- Do not hang the chandelier by the cable. The design should be based on a suspension: a chain, a rope, a cable - anything, but not a working cable.
- The light bulb should also not hang on the wire - because of this, breakdowns most often occur. Provide a mount-support for the cartridge at the base of the lamp, so you will remove the load from the cable.
- Use an indicator to identify the phase of the wiring. You do not need to do this "by experience", connecting the device at random.

The yellow wire usually means "ground"
- Use 3-wire double-insulated wire. The cross section is selected depending on the total power of the device. For a lamp up to 60 W, an area of \u200b\u200b0.35 mm 2 is enough, up to 120 W - 0.5 mm 2, up to 300 - 0.75 mm 2.
- Make good contact at the joints. A bad connection can cause the wiring to heat up, which is very dangerous.

Use a screwdriver to fix the cable in the chuck
- Incandescent lamps are incompatible with paper lampshades - this is a fire hazardous combination.
As you can see, subject to simple rules safety and creativity anyone can make a homemade lamp. Photo ideas inspire the search for creative solutions and an extraordinary approach. Your lamp will become a reflection of your personality and decoration of the room.
What could be more beautiful than the satisfaction of creating an original craft with your own hands, which will become a bright accent in a gray everyday life? We offer several simple models, the manufacture of which does not require professional skills and financial costs. Go ahead, get to work!
Every day we have to throw away empty tetra packs, but meanwhile this is an excellent basis for openwork chandelier. We cut strips 5 cm wide, fold them into the desired shape and begin to carefully glue. So that the structure does not fall apart prematurely, it is possible to assemble it on a round piece of suitable sizes.


From disposable spoons it turns out quite a decent lampshade. We take a 5 liter plastic container and cut off the bottom. We break off the cuttings and mount the remaining parts with a glue gun on the base, imitating a pineapple peel. It is better to use a low-temperature light bulb for safety reasons.


Ordinary wooden hangers are transformed with a creative approach. By simply cutting them in half and placing them in a circle, we get a modernist chic lamp from the 30s era. A completely surreal option is also possible - pass a strong thread through the attachment point of the suspension and simply string the shoulders, unfolding a little.


Funny Gummi Bears - perfect solution for children. The difficulty lies in the accuracy of placing individual figures, so we recommend making a template with radial holes through which we lower the white threads. Do not try to use lollipops - these are acrylic figures!


The effect of a dense forest in the bedroom is achieved by bizarre chiaroscuro. A few stylistic roots, wire, skillful hands - and the original ball under the ceiling will plunge the room into the world of the unknown. Or gather the rhizomes, peel, dry and weave as you like. The finished product is better to varnish.


Has the drum set lost its former attractiveness and is gathering dust in the garage? From the bored musical instrument an extravagant chandelier is mounted without problems - good, that's all fasteners originally included in the package. Original and beautiful, and most importantly - quiet!


If you are the owner of a bicycle workshop, then you probably have a container with unusable spare parts in the corner. A little creativity and a welding machine - you get a unique product, similar to the ancient inventions of the crazy Mechanicus. Of course, you can’t hang it in the living room, but just right for a nightclub.


Leaky galabash (a bottle of African gourd) lends itself well to engraving. Intricate patterns, contrasting transitions of textures from shiny to matte, elegant perforations scatter ethnic ornaments of the Black Continent on the walls.


It's in the hat - a funny tandem of top hat and bowler hat creates a solid entourage of a cigar club for gentlemen. If you are not an English dandy, do not despair - an old Stetson, a bright sombrero or a straw bryl will also work. It is important not to be a hostage to sanctimonious dogmas.

Paper cups for cakes will become an elegant accent of your interior. It’s not difficult at all - we glue them two by two, straightening the bottom one, and we connect the resulting “flowers” with a thread in a spiral. We cover the original night light with glue or varnish for strength.


Banal iron graters look very original above the bar counter. You need 4 tubes with electric cartridges and a meter length of 2-core wire. Do not forget about fire safety - metal shades are seriously heated.

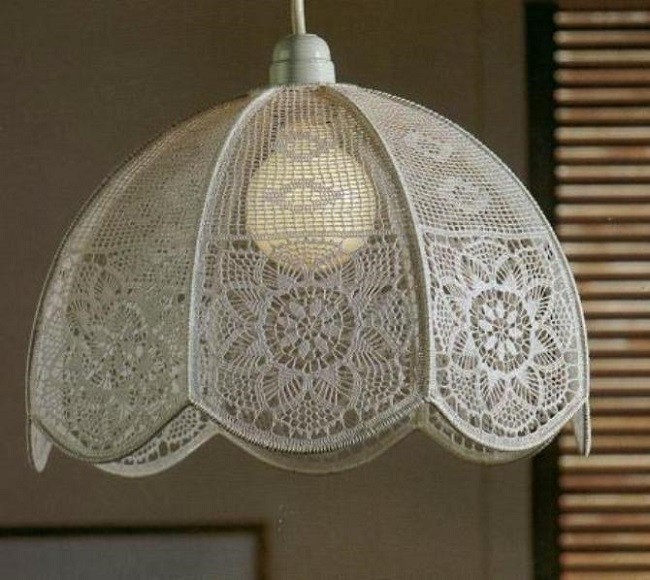
Have your lace doilies done their job? Do not rush to part with them! Inflating a balloon white color, we find a brush and PVA, straighten the matter on the surface and coat it abundantly. An hour later, the elegant lampshade is ready for use.


Cutlery can decorate a meal not only with serving. The spoons collected in a bundle resemble a silver tulip. And connoisseurs of Kandinsky or Dali will appreciate the avant-garde cube, constructed from knives and forks. Bon Appetit!

An interesting effect in the children's room is created by small light screens in the form of a cartoon cloud. A light bulb located behind it dimly illuminates the walls without blinding the eyes. Adding some more funny clouds, we get a romantic sunset.


Several brightly glowing globes will dynamically enliven the space above the stairs. Oceans and continents will light your way - an original and charismatic solution with deep connotations. Correctly select the proportions of the unique installation and charge yourself with positive.

Don't know where to put the miscellaneous remnants of services? Drill holes in the cup and saucer, place the cartridge in the middle and connect with a hollow tie - as in a conventional lamp. White porcelain scatters light wonderfully - hang the composition over a coffee table and enjoy a fragrant drink.

A ball of yarn can be successfully used as a chandelier. Several skeins of thread, a white balloon, electrical fittings and glue - we randomly wrap the base and generously spread it with a binder. Wait until it dries completely - and a unique masterpiece is ready. They cannot play football, but the product is quite reliable.
Can you make a table lamp out of beer cans? It turns out yes! Only a lot of them will be needed - after all, we use only valves for opening. We connect the frame of the desired shape from a rigid wire and begin to braid the base. It turns out something like a shiny chain mail. Unfortunately, the exact amount of raw materials is unknown.


Charming lamp in the shape of a cute alien animal is very easy to make. The most time-consuming process is cutting narrow paper wedges. We connect several wire rings together to get a semblance of a sphere, and with the help of adhesive tape we fasten the prepared parts in layers. Everything!


An option with pronounced charisma will appeal to hardened bachelors and lovers noisy parties. Having seen an impressive installation above the table, guests will immediately understand what awaits them in the next couple of hours. Cheap and cheerful, but with soul...

Where to put endless plastic bottles? If you are tired of fighting them, we suggest you turn their myriad to your advantage, at least partially. Cut off the bottoms, and you will have a lot of small parts in your hands. Arbitrarily connect them with threads - there are no restrictions on the form.


I've always been amazed at how inventive people can be! I myself have no illusions about my ability to transform old things, but I can appreciate the work of others. The main danger of any handmade is that you can create an interior Frankenstein, which will be scary to look at, but you won’t raise your hand to throw it away, because you have invested so much time and mental strength in it ... So, here you need to be objective: homemade things can be stylish, or they can be bad. It is important to soberly evaluate the result and understand whether it decorates your interior or not. We have collected for you 10 worthy ideas for transforming old things into chandeliers. With proper performance, they will not be painfully ashamed, but, on the contrary, you will proudly tell the guests: “I made this luxurious lamp. Yes, yes, you heard right!
Bottles and jars
Many things, especially glass ones, have an intricate fate. First, they store drinks or jams that make people a little kinder, then they are sent for processing, and they start traveling again. You can break this cycle by turning champagne bottles into stylish chandelier. Many designers have already guessed to do this and are now selling their creations for very large sums. We offer you some examples of homemade chandeliers from cans and bottles. Maybe they will inspire you for interior experiments?


Bike
This is my favorite of the entire collection. He is incredibly stylish and youthful. There is only one problem: the bicycle wheel is, in principle, not too small, and, of course, such a large chandelier is only suitable for apartments with high ceilings. Otherwise, there is an option that you will touch her head. Agree, when a wheel passes over the head - it's very insulting.

Hangers
A very popular idea for lamps. Chandeliers look best wooden hangers in eco style. Such homemade lamps can also decorate the Scandinavian style.


Kitchen appliances
In all the following examples, starting with this one, need to use led bulbs as they heat up much less than traditional incandescent bulbs. For luminaires where paper or metal parts- this required condition, which will help you avoid fires and your own burns if accidentally touched. Fixtures from kitchen appliances look fun and unusual. You can make your own, or you can buy ready-made ones. True, such a chandelier made of silver spoons will cost a quarter of a million rubles. In my opinion, the design option can serve as inspiration.


Plastic spoons
A very simple and budget version of the lamp, for which you will need a base, a light bulb, a glue gun and big package disposable spoons that will have to be dissected. If you paint the resulting creation in yellow, you get a pineapple, if in brown - a cone, and if you leave it white, it will glow the brightest.


Grater
Another option that calls you with interest and attention to look around your kitchen in search of things for creativity. The usual kitchen grater, as we have already told, can be a great stand for jewelry, and it also casts such beautiful reflections of light!!! A grater lamp is ingenious, and the way it looks in combination with wood and plants is a perfectionist's paradise.


tubules
A strange, unusual and definitely very creative lamp made of colored straws for cocktails. It is necessary to cut long tubes into several parts and attach them with glue to the lampshade base.

globes
You have already finished school a long time ago and, perhaps, even traveled half the world, and the globe is still on your shelf somewhere idle? Make a lamp out of it! Here is a tutorial on this topic. The globe can hang alone, or it can form a whole series of planets, as in the picture below. Similar solar system just mesmerizing.