How to lay tiles on a wooden floor: preparing the base in the normal state of the floor, if there are logs left, pour the screed on chipboard or plywood. Laying tiles on a wooden floor: is it possible to lay? How to lay floor tiles on wood
Ceramic tiles are placed on a specially prepared base. It must be distinguished by a high level of strength and reliability, because it must be able to withstand a lot of weight. The best option, perhaps, could be a leveled base of concrete screed.
Can you put tiles on a wooden floor? Masters will unequivocally say: "Yes." However, we must not forget that wood is a living material and is highly dependent on environmental influences, which imposes special requirements on the preparation of the base. So, start by preparing the foundation. The scope of the upcoming work directly depends on the state in which the wooden floor is located.
Work begins with a quality check of the base. Ideally, the boards should not sag or creak, they should be even, without dents or notches. The type of future coverage also matters.
How to assess the condition of the coating
A correct assessment of a wooden coating can only be made if it is “bare”, that is, without a paint layer. There are three possible ways to remove paint or varnish:
- thermal. The surface is heated to about 600 ° C with a building hair dryer, after which the paint layer is easily removed using a conventional spatula;
- chemical. The paintwork is dissolved using special compounds or solvents
- mechanical. A layer of varnish or paint is removed using power tools with metal nozzles, say, brushes. The cleaned surface is sanded with sandpaper.
It will be much more convenient to work if the emery is first screwed onto a small bar.
After cleaning, the condition of the floor is assessed.
The first sign of poor condition of floorboards or lags are noises and creaks when walking. Before laying tiles on a wooden floor, they should be removed using the following technology.
- The condition of the beams is checked. If mold or fungus is present on the surface, it is necessary to replace it.
- Subfloor level adjustment. For this, special gaskets are installed under the logs.
- Warming. It is done if the level of heat loss is high. As a material, you can, or mineral wool.
- Possible replacement of the rough coating. Before laying tiles on a wooden floor, it is necessary to check its ability to withstand mechanical stress. An alternative to standard boards can be sheets of fiberboard or DSP for the floor. It is important that they are waterproof.
How to put a tile on the floor with your own hands, if its wooden surface is not adapted for the adhesive composition? To avoid premature destruction of the rough base, it is necessary to prevent direct contact of the natural material with glue or concrete mortar. This can be done in several ways.
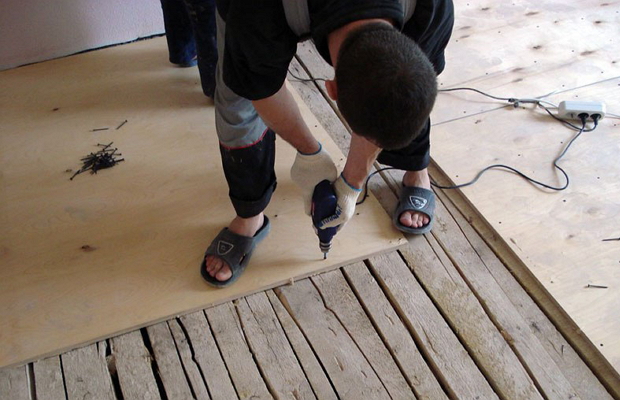
Often, floor boards change their configuration during operation. To level the floor surface, you can increase their pressure to the beams by hammering a few additional nails.
Formation of a damper layer
The main problem with this type of base is its thermal expansion. Under the influence of external factors, it can change its size or curvature. Therefore, it is impossible to lay tiles on a wooden floor without installing an intermediate layer.

It should have a soft base to compensate for possible floor movements. Most often, rubber or a similar material is used for this. The top has a hard surface. On it, you can correctly lay the tile on the floor without fear of possible shifts.
The technology of subsequent installation consists in performing the following actions:
- Fixing the damper base.
- Pouring concrete screed. Its minimum thickness can be 2 cm. Before laying tiles on a wooden floor, you should wait for the screed to dry. This process may take 7 to 20 days.
- Ceramic decorative elements are being installed.
The advantage of this technology is the minimum likelihood of shifts of the wooden surface. The disadvantage is the increase in floor height. If this indicator should be minimal, it is necessary to lay tiles in a different way in the bathroom, kitchen or hallway.
An air gap is left between the insulation and the floor boards to remove moisture. Its size is usually 7 to 10 mm.
Foundation preparation
Good condition

Suppose the assessment showed that everything is in order with the subfloor. Then, chipboard sheets are laid on top of it, providing for deformation gaps between the flooring surface and the wall.
- The chipboard layer is treated with a special impregnation or heated drying oil. Heat the drying oil very carefully, as it is quite flammable.
- The flooring needs to be reinforced. First of all, latex is applied. The latex layer is supposed to be thick enough. It is more convenient to do this with a wide brush. Without allowing the latex to dry completely, a paint grid is laid out on it
- When the structure is completely dry, the mesh is additionally fixed with self-tapping screws so that it fits more tightly to the floor.
- It remains to carry out additional leveling of the surface. There are several options for the mixture: simple, or home-made, the main component of which is coarse sand and water in a ratio of 2:2:1. It is impossible to continue installation work immediately, since it is possible on a wooden floor only if the previously prepared surface is completely dry.
Satisfactory condition

This category includes floors in which there are no special claims to lags or draft boards, while the finish coating creaks and flexes slightly when walking. How to carry out work in this case, how to prepare the foundation? The sequence of actions is as follows:
- dismantle the old finish coating and substrate.
- it is assumed that the old base does not creak and can be left after being leveled: the subfloor must be carefully lifted and the logs leveled using a level.
- wooden surfaces are impregnated with various compounds, antiseptics, fire retardants to prevent premature damage.
- when the impregnation dries, the interlag space along the entire height is filled with fine-grained expanded clay.
- lay the floor on self-tapping screws, keeping a gap of 3–9 mm between the boards. The wooden one is sealed by spreading impregnated parchment paper over the surface, after which a GVL or DSP substrate is laid. Sheets are placed in a checkerboard pattern and fixed with self-tapping screws in increments of 150–200 mm. A mandatory requirement is the presence of a gap between the flooring and the walls of about 10 mm, which is filled with mounting foam.
- the final stage is the primer. It must be dry when proceeding directly to the installation of a tiled floor on a base of wooden elements.
Bad condition
- The floor is completely dismantled and the joints between the floor and the wall are sealed. For example, you can lay a cement-sand screed. Before the screed hardens, liquid glass is applied to its surface.
- The concrete floor is primed, and then leveled along the beacons. The alignment process is performed in a certain sequence:
- marking for beacons is carried out according to the level, laser or water. They are installed at a distance of 0.9–1.0 m from each other with a minimum indentation from the wall of 100 mm;
- beacons are attached to plaster marks;
- pour in the leveling compound.
Screed options

After the preparatory stage for the adaptation of the wooden floor for the installation of a decorative coating, they begin to pour the screed. It will serve as the basis for the final formation of the plane. One of the conditions is whether the minimum weight, as it can affect the strength of the plank surface.
At first glance, the best option would be backfilling with a dry screed. It is easiest to lay tiles on the floor with your own hands on it. However, one must take into account the height of the base, which is formed due to the wooden flooring. Therefore, summarizing the above, we note that in the case of a wooden floor, such indicators are achieved in three ways:
- classic cement screed. It is laid in a thin layer - only 30 mm, so that it does not overload the wooden coating too much. The screed is poured onto a metal mesh fixed with screws to the subfloor. To reduce the likelihood of cracks during the drying process, the surface must be moistened with water from a spray bottle;
- universal glue, the main component of which is liquid glass, or polyurethane. In both cases, it has a denser structure than the concrete mixture. In small rooms, on an adhesive base, you can lay tiles on a wooden floor without first arranging a screed. In addition, it has a good indicator of elasticity, and can compensate for temperature shifts in the base without damaging the decorative surface. The solution can be prepared independently - for this you need purified sand, water and liquid glass. The proportions are 1:2:2;
- in rooms where the percentage of moisture is low, another option is used - DSP or GKLV. They are laid "in a row" at an angle of 30 ° to the direction of the location of the draft boards. Laying tiles on the floor in the bathroom using this technology is prohibited.

Installation can begin only after the final drying and hardening of the base. If additionally installed, it must be disabled at all stages of preparation. Including - during the laying of tiles.
Regardless of the chosen type of concrete screed around the perimeter of the room, it is necessary to install a damper tape.
How to lay tiles correctly
Installation of a tiled coating involves the implementation of processes in the following sequence:
- make surface markings
- preparing the adhesive
- lay tiles,
- rub the seams.
There are several installation methods:
- diagonally,
- scatter,
- parallel,
- with a specific pattern.
As a rule, the desired option is chosen before the installation work begins and, in accordance with it, the floor is marked.
- To begin with, they find the center of the room: connect the middle of the opposite sides with a coated cord and draw lines. The center will be at the point where these lines intersect.
- The next step will be the direct laying of the ceramic floor. The layout is performed by taking these lines as a guide. Installation begins with a right angle at their intersection. The adhesive solution, prepared according to the manufacturer's instructions, is evenly applied to small areas of the prepared wooden floor with an area of \u200b\u200babout 1 sq. m. with a spatula or a special spatula. Glue is also applied to each element of the floor separately, then it is pressed against the base with the rough side.
- Laying continues until the entire area with the applied adhesive is finished, adhering to the marking line. Not everyone has the skill to ensure the evenness of the seams, therefore, it is recommended to insert construction crosses between the individual elements of the coating: two on each side. Having finished one half of the room, they move on to the second.
- Slots remain near the base of the walls, which are sealed with pieces of tile cut to size.
- The canvas is left for a day to dry and covered with a primer.
When buying ceramic flooring, be sure to read the instructions first, as some models are already primed.
- The last step is grouting. In all tile gaps evenly applied with a thin line. To do this, use a scraper, on which there is a rubber pad or spatula. In the latter case, an acute angle of the tool is used. Excess solution is removed with a damp sponge while it is still fresh, then the surface is polished dry.
Watch the video instruction for more.
Expenses
How much does work usually cost? Prices may vary, but in any case it will be more expensive than tiling on concrete. This is due to the costs that usually accompany the preparatory phase. As for the final stage itself - directly laying the tiles, its price can also vary. The cost depends both on the material used and on the installation method. The most expensive floor is lined with a pattern, or from an exotic type of material.
You can learn about the features of laying in rooms with high humidity from the video.
The process of laying tiles on wood flooring has changed a lot in recent decades. If earlier tiles were laid on top of wood on cement mixed with sand, and such a mixture heavily loaded the wood base, today everything has become easier. Here is a step-by-step sequence of work for different options for the state of the base. The amount of work and, of course, their cost depends on the quality of the foundation.
Laying tiles on a wooden floor - scheme
Case 1. If the wood floor is in good condition
We inspect and process the surface under the tile - the base must be rigid. We check the boards, fix the floor, eliminating the creak. We treat the surface with a sanitary composition from mold.
We lay a waterproofing layer: PVC film or roofing material with bitumen.
The prepared surface is covered with sheets of gypsum fiber. They are screwed to the floor with screws. Further, directly laying ceramics on GVL. Drywall must be moisture resistant. You need to lay it apart, then compress it with self-tapping screws around the perimeter, step 15 cm.
We glue GVL at the joints with special glue, drill arbitrary holes for ventilation, prime GVL (deep penetration primer) and let it dry.
We apply glue suitable for working with drywall on the finished surface and lay the tiles as on a regular surface.
Laying tiles: prepare the tools, dilute the dry adhesive mixture. Now you need to choose the most illuminated corner and apply glue to a small area. Lay the tile on top, not forgetting the crosses, press it firmly to the surface. Tap the tile with a rubber mallet to remove excess adhesive. Check the horizontal laying level. After completion of work, wipe the ceramic coating from the adhesive. The seams are overwritten in a couple of days, when the solution dries. Crosses are removed first.

Case 2. How to lay tiles if there are only logs and the floor is rotten
If the floor is rotten or the boards are worn out, you need to replace them and then lay the ceramics.
We remove the old top layer (linoleum, parquet board, etc.), remove the middle layer - chipboard (there may be DSP \ plywood, meaning any coating), then we remove the plank surface with a nail puller, which is attached directly to the logs.
We check the bearing bars for integrity, cover them with a moisture-proof composition, set them according to the level. Between the lags we lay a waterproofing layer (film, coating), leaving allowances.
We pour expanded clay on the coating between the lags, with a layer equal to the height of the lag, fasten the boards on top. This guarantees heat and good sound insulation.
We attach the boards to the screws across the bars, always remembering the gaps, on average, 5-10mm. Then we foam the cracks at the joints. We cover the base with a hydrosubstrate, lay the GVL, and then everything, as in the first case.

Case 3. Screed instead of an old wooden floor
This is the most expensive option for preparing the base for tiles - more details here - floor screed with expanded clay. If it is possible to make a screed, instead of the previous coating that has become unusable, then the sequence of actions is as follows:
we dismantle old materials to the cement itself. We coat the joints of the walls and ceilings, covering them with a sand-cement mortar.
we mark the space, exposing the "beacons", priming the concrete.
we fill the space to the very top of the beacons with a screed (it can be pure concrete, a sand-cement mixture is also used in the ratio: 1 to 3). One batch from 15 liters.
in the case when the screed is planned to be thick, expanded clay is backfilled between the layers (the height can reach up to two-thirds according to the level indicated by the beacons). After a day and a half, clean the base so that the expanded clay on the surface does not interfere, and pour again.
after 3 days, you need to prime the screed or use a self-leveling mortar.

Case 4. There is chipboard on the board base, the floor surface can be used
Chipboard can become the basis for tiles if processed. For this:
The butt points where the wall and the DC-plate meet are foamed.
The top of the plate must be oiled or impregnated twice with a special compound.
We process the DS-plate with latex sealant, fixing the paint grid there, let it dry. Then we fix the mesh with self-tapping screws, ensuring a snug fit to the DS-plate.
It is necessary to cover the mesh with the composition: part of the water + a couple of parts of sand and a couple of parts of liquid glass.
Then follows the usual laying of ceramics.
The service life of the tile depends on how well the tile laying works are carried out. Tiles and tiles are laid on a concrete base, as a rule. But sometimes there is no possibility of arranging a concrete screed. Therefore, many are interested in: is it possible to lay tiles or tiles on a wooden floor?
Ceramic tiles in the kitchen in a wooden house - the dream of the hostess
Preparing a wooden floor for tiling
To lay tiles on a wooden floor, the first step is to prepare it. At this stage, the defects of the plank base are corrected, given strength and protected from moisture.
 Laying tiles on wood is possible
 The key to a reliable ceramic tile floor is the foundation, so you should start by checking the condition of the old wooden floor:
- Remove the old floorboards to get to the joist system.
- If the logs are outdated, rotten, then replace them, and treat those suitable for further operation with antiseptic agents.
- Check for evenness.
- On top of the lags we put old floorboards, those that are not deformed. Replace warped floorboards with new ones.
- Do not forget that there should be a damper gap between the subfloor and the wall.
- To protect the floorboards from rotting, treat with an antiseptic.
- Boards to the logs need to be screwed with self-tapping screws, not sparing the fasteners. A secure fit of the boards will keep the tiles from damage.
Attention! Moisture-resistant plywood 12 mm thick is placed on the logs, which will provide a reliable and durable foundation.
Surface leveling
Laying tiles directly on plank boards will not work. The floorboards can start to play with time, so a leveling layer must be used. Various materials can serve as this layer.
"Dry" leveling
For wooden floors, an effective way to level the surface is to use moisture-resistant plywood or other similar material.
 Cover the old plank floor with sheets of moisture-resistant plywood
 Sheets of wood materials allow you to distribute the load across several subfloor boards at once. This protects against the failure of old plank structures.
To provide a reliable base under tiles or tiles, various dry-based leveling methods are used:
- complete adjustable floors with plastic screw regulators. With the help of such structures, laying tiles and preparing a smooth and durable surface is facilitated many times over.
- a duplicating plywood layer on an existing moisture-resistant plywood flooring;
- OSB sheet, etc.
Using a plywood base for installing tiles is convenient and financially beneficial. Chip-based wood derivatives are not as susceptible to dimensional change under the influence of moisture, so laying tiles on them is an option.
It is worth noting that tiles on top of plywood sheets must be laid on a special two-component polyurethane adhesive, and not on ordinary tile adhesive. Polyurethane adhesives have the proper elasticity to maintain a secure fit of the tiles with an unstable base.
After the plank floor is covered with plywood sheets, their joints must be sanded and filled with a special sealant or adhesive. Then the seams are primed.
The advantages of using the "dry" method of leveling the surface is that:
- it allows you to make an additional soundproof and heat-insulating layer under the plank floor from mineral wool and other types of insulation;
- distribute the load on the individual floorboards over the surface;
- fast laying deadlines that do not require technical breaks.
But this does not mean that this method does not have disadvantages. Leveling a plank surface will require the use of additional room heights, which will require decorating and joining various coatings using thresholds.
Given this fact, it is necessary to provide that in the bathroom the floors should be a couple of centimeters lower than the level of other rooms. In the event of a water leak, it should not be distributed along the corridor and other rooms, but should remain in the bathroom. Therefore, a plywood base plus the thickness of ceramic with adhesive can seriously elevate the floor above others. In this case, the use of the "dry" method is not a desirable solution.
"Wet" screed
Wet leveling methods can also be used over plank floors. We are talking about sparing volumes of use of the screed, which will ensure a flat surface with small loads on the wooden base.
 Laying tiles on a concrete screed is easier
 The floor screed for ceramic tiles in a wooden house should be cut off from the wooden base, including from the walls. It turns out that it is necessary to make it in a "floating" way with damper gaps around the perimeter. A similar method is necessary so that the wooden floors can change dimensions without harming the tile coating, and the leveling layer retains a strong, unchanging structure.
Attention! According to the advice of experts, it is undesirable to cover a wooden floor with a screed with a thickness of more than 3 cm, because this can cause deformation due to weight gain. But you can not do less, so that the screed does not lose reliability. It turns out that the optimal thickness is 3 cm with slight deviations.
The procedure for preparing the base for a screed on a wooden floor is as follows:
- the old plank floor is being dismantled, the lag system is being revised. If there are bars whose strength is in doubt, they must be replaced.
- the distance between the lags should not exceed 50 cm. With a large step, strengthen the floor with additional bars.
- we must not forget about the damping gap between the ends of the log and the wall 1 cm thick;
- antiseptic treatment of wooden bars is carried out;
- a wooden floor is laid over the fortified system of lags. You can use old boards 4 cm thick. Deformed and lost strength should be replaced with new ones.
- boards are laid with a ventilation gap between them of one and a half centimeters;
- on top of the boardwalk, make a layer of moisture-resistant plywood with a thickness of at least 12 mm. Other boards made of pressed wood shavings are also suitable. The sheets should be overlapped, and fixed with self-tapping screws in increments of no more than 20 cm.
- gaps of 3-4 mm are left between the sheets;
- then lay a layer of waterproofing. Paraffin or bituminous paper, glassine can be used as a material insulating from moisture. Is it possible to use thick polyethylene - the answer to this question is yes.
- waterproofing should be a monolithic structure. To do this, the rolls are overlapped on top of each other by 15-20 cm and fixed together with adhesive tape. Waterproofing should go on walls with a height of at least 10 cm.
- stick a damper tape 8-10 mm thick and 10 cm wide around the perimeter of the wall.
After the work on preparing for pouring the solution is completed, they start pouring the leveling mixture. It is not necessary to level the self-leveling floor, because it itself is leveled on the surface, it is necessary to direct the mixture in the right direction and maintain the required thickness.
You can use another leveling compound. To prepare such a composition, you will need:
- 2 parts coarse sand;
- 2 parts of liquid glass;
- 1 part water.
After the solution is ready, it is poured, leveled and left to dry completely. Only after it has completely hardened can tiles be laid on the floor.
Express option
There is another option for leveling the surface of a wooden floor - the use of moisture-resistant drywall, which is fixed to the surface of wooden floorboards with a two-component polyurethane adhesive.
 Laid drywall will allow you to stick tiles even easier than on a plywood base
 Carrying out a coverage revision and updating the necessary lags has been described in other alignment methods, so you do not need to dwell on it again.
To give reliability to the coating of drywall sheets, they can be laid in two layers. Moreover, the seams of the upper layer should not coincide with the seams of the lower one, because the layers are overlapped.
Attention! Laid flooring on a non-moisture resistant drywall base can be deformed. You can recognize moisture-resistant floor drywall in the store by the blue color of the plates.
A damper gap is left around the perimeter of the room, so leveling with drywall has common features with a “floating” floor system. The joints between the sheets are filled with sealant. The entire area of the drywall surface must be primed to ensure a secure fit of the ceramic tiles.
 A tile on a wooden floor will look the same as on a concrete base.
 It is possible to lay tiles on a wooden floor, while taking into account the characteristic of wood for dimensional changes due to changes in humidity and insufficient strength.
In order for the tile laying to be successful, it is worth watching this short video on how to properly glue ceramics on a plank base:
Ceramic tiles are considered an ideal material for walls and floors in rooms exposed to moisture and temperature changes. These are, as a rule, kitchens, bathrooms, baths. True, the very process of laying it is fraught with certain difficulties, due to the need for an appropriate foundation and some experience of such work with a home master. As for the second, skillful hands and a desire to carry out the plan will come to the rescue at all costs. But regarding the foundation - a moot point. One cannot do without proper knowledge, all work must be carried out in accordance with the requirements of the technological process, non-compliance with which is fraught with the fact that as a result the floor covering will turn out to be of poor quality and will not be able to perform the necessary functions. In principle, today, self-repair is an occupation, one might say, even fashionable, so that many home craftsmen have at least rudimentary knowledge in this regard regarding the technologies for carrying out certain works. Nevertheless, sometimes there are situations that baffle the originality of the question. For example: "Can I lay it on a tile?" Agree, this will not come to everyone's mind, because, as a rule, laying ceramics is usually carried out on a concrete base. And not for wood. However, sometimes there are still situations when it is literally vital to lay tiles on a wooden floor - in a bathhouse, for example, or in the kitchen of a private house. What to do in this case? Is it just a whim of the owner who does not understand anything in the finishing work, or is this really possible? Let's try to answer this difficult question. So, is it possible to lay tiles on a wooden floor?
About the compatibility of ceramics and wood
In principle, here you can get by with just a few words. These two materials are practically incompatible. And it is possible to “make friends” between them only by creating special conditions. The tree cannot stand the instability of the temperature background, constantly changing its dimensions with its changes. It is not difficult to imagine what will happen to ceramics, under which, so to speak, sawn timber lives its own, special life, being in constant motion. The tile, of course, will begin to crack, move away from the base, chips will appear on it under the influence of loads. In turn, a tree tightly “packed” under ceramics will not be able to receive much-needed air, which will begin to rot and deform. In general, it turns out a kind of vicious circle. Can it be broken? How to lay tiles on wood or in the kitchen of the owner of the same private house, who can no longer watch without tears how his wood flooring becomes less and less attractive every day from constant exposure to moisture or temperature changes? Let's just say: it can be done. But you need to do it only if there are really good reasons, because the procedure for preparing a wooden base will take a lot of time, in addition, it will require very substantial expenses, effort and money. Ready to part with both the first and the second? Well, good luck. As they say, nothing is impossible. If you really want to, why not try it. True, you will have to thoroughly study the technology of the process and choose the option that is suitable for your case.
When the procedure is not possible
Our home masters are sometimes quite capricious and stubborn. A person needs ceramic tiles on a wooden floor - and that's it. And the last one was mounted quite recently, the house was almost settled the other day. Here is the option when, unfortunately, you will not be able to please yourself. In any case, such an undertaking will have to be abandoned. Because a new wooden flooring will acclimatize for at least three years, getting used to unusual conditions, and shrink, the end of which you will certainly need to wait. And only then to carry out the plan.

A few words about the base
So, what does someone who sets out to lay tiles on a wooden floor have as an asset as a base? We have already said that the new coating is not subject to such arrangement. This means that the home master will most likely have three types of flooring as a base. These are worn out and lost attractiveness boards lying on relatively strong logs, a floor made of plywood or fiberboard, which also causes despondency in its appearance, but still amenable to reincarnation, and a relatively strong plank flooring that is in a normal state, on which tiling is required due to existing circumstances. Regardless of which option is available, the home master will have one task: to create a strong and even base suitable for laying ceramics. The difference will be the type of repair work and their volume. Therefore, before laying tiles on a wooden floor - in the bathroom, bath, hallway, in the kitchen, it doesn’t matter - you need to carefully study the existing base and choose the appropriate method of preparation. As a matter of fact, there are two of them. This is dry leveling and wet leveling. But in any case, you need to remember one thing: laying tiles on a wooden floor without a screed and careful preparation of the base will not work. As a matter of fact, difficulties, especially those created with one's own hand, will have to be overcome in any case. And to make it easier for the home craftsman, then we will tell in detail about all the preparation options.
Dry leveling
Its principle is to create an additional draft layer for cladding on an existing base. This can be done by mounting sheets of plywood - necessarily moisture resistant - directly on the existing "native" base, creating an additional floor covering on the logs with a gasket between the old and new insulation floor and using ready-made sets of adjustable floors mounted on top of the existing worn out base. In addition, today there is another material at the disposal of those who want to lay tiles on a wooden floor - GVL-plates. They will not only successfully replace plywood, but also, thanks to their special composition, will contribute to the creation of a normal microclimate for base boards.

Pros and cons of the dry method
This option for tiles is considered the most common. Which is not surprising, since it has a lot of advantages and only one drawback. The first is primarily the speed of work. You can level the floor in this way quite quickly, without interruptions between stages, which most often slow down the repair process. In addition, if the option with lags is chosen, then by laying a heater, it is possible to significantly increase the insulating qualities of the surface. Well, the third plus is the creation of a minimum load on the already not distinguished by special quality characteristics. As for the minuses, as we have already mentioned, there is only one - this leveling method “eats up” the height of the room. Therefore, in rooms with low ceilings, it is sometimes impractical to use it.
wet way
In fact, this is the same screed, the difference of which is that it is made on a wooden surface and with some reservations. The latter include the fact that, firstly, it should be lightweight (no more than three centimeters) due to the not very good condition of the wooden floor and its inability to bear significant loads, and secondly, it is made not over the entire surface, but with gaps along the perimeter. Such a kind of floating option. Thanks to this trick, the ceramic coating will not suffer from the movement of wooden elements, which in any case cannot be calmed down in any way.

Advantages and disadvantages of the screed
Here, in principle, everything is rather conditional. An undoubted advantage of the method can be considered that it will practically not affect the height of the room, and a huge disadvantage is that the procedure itself is quite lengthy, requiring significant breaks between stages. But sometimes someone who is looking for an answer to the question of whether it is possible to lay tiles on a wooden floor does not have to choose. If a screed is the only acceptable option, then you will have to put up with temporary losses.
Well, now that we have dealt with the theory, let's go directly to the process itself.
Preparing the old floor
Whatever leveling method the home master prefers, the old plank base in any case requires preparation. Laying tiles on a wooden floor in a bathroom, and even in a room less exposed to moisture, without carrying out preliminary work to repair and clean the underlying surface, will not succeed.
First of all, you need to check the integrity of the floorboards and the lag itself. If any elements have become unusable, they must be replaced. Then you need to remove all the paint. If you plan to make an additional floor covering on the logs, then the basic leveling is not required, but if plywood, GVL, chipboard or a wet screed is used, you will have to arm yourself with a grinder and diligently cut off all the humps. Then the old floorboard should be treated with an antiseptic and the existing cracks should be puttied if possible. And then be sure to drill the ventilation holes. And only then proceed to alignment.

Leveling process without screed
In principle, there is nothing complicated here. If an additional floor covering is created on the logs, then supports are first installed with a step between them of 30 cm, then insulation is laid, after which everything is sewn up with moisture-resistant plywood. If it is planned to level the prepared plank base simply with plywood or GVL sheets, then they are attached directly to the base surface with self-tapping screws. All resulting seams and cracks around the perimeter must be sealed. Foam is excellent for these purposes. Upon completion of the installation work, the new surface is primed. Experts advise not to save money and purchase Betonokontakt.
Note!
Important point! If the master decided to put the tiles on the wooden floor in the bath with his own hands or in the bathroom, that is, in those rooms that are most exposed to moisture, then before leveling it is necessary to lay a waterproofing layer on the plank surface. It can be thick polyethylene, and bituminous paper, and roofing material.

Filling the screed
In this case, regardless of the room in which the work is carried out, a waterproofing layer is required. After that, a reinforcing mesh is applied to it, and along the perimeter of the room, the sides are mounted from a special tape, which in the language of specialists is called damper. Remember, we mentioned that the screed should not be monolithic, but floating? This limiter will create the necessary conditions. After that, you can fill in any suitable mixture for the screed. It is best, of course, to take a leveling composition. After drying (at least two weeks should be taken for this process), the surface is primed. At this point, the question “is it possible to lay tiles on a wooden floor” is considered closed. Now you can. What, in fact, is the time to proceed after the primer has dried.
Laying tiles
So, on a wooden (see photo of the final result below) floor? Yes, exactly the same as the usual for everyone Now, after competent preparation, there will be no problems. The only nuance that you should pay attention to: it is better to buy tile adhesive not ordinary, but more durable, designed for porcelain stoneware.

Choose the laying scheme that you like the most (traditional, diagonal, brick, etc.) and start the process. If a diagonal is selected, then start from the center. If there is another way, then from the most prominent angle, so that the trimming is not noticeable. The adhesive composition is applied directly to the base, the rows are laid strictly under level control. Try to keep the adhesive layer not too thick, as it creates an additional load on the already insufficiently strong base, which is the wooden floor. After laying, grouting is carried out. You can do this a day after the end of the whole process.
Conclusion
What can be the conclusion? As we found out, it is possible to lay tiles on a wooden floor. The main thing is to competently carry out all the necessary preparatory work and create a reliable and even base for the tile.
Porcelain stoneware and tiles are traditionally considered the best flooring for toilets, hallways and baths. Laying tiles on a wooden floor is much more difficult than on a concrete one. This guide covers options for subflooring and tongue and groove tiling.
Self-laying tiles on a wooden floor is dangerous with mistakes. The home master should take into account the nuances:

The main problems of incompatibility of wood, tile adhesive and tiles are as follows:
- the service life of plywood, sheet pile, chipboard and OSB is lower than that of tiles, so the maintainability of the structure is very low;
- internal stresses in wood cause warping and other deformations;
- the rigidity of the cured tile adhesive and porcelain stoneware/tile facings is by default higher than that of wood-based boards, tongue and groove boards;
- in ceilings along beams, a wooden black floor is practically the only structural solution;
- in the secondary housing stock, wooden floors are made along the logs over the slab, in this case, the structure should be simplified by dismantling the floorboards and logs, pouring the screed for tiling.
Tiles are glued to a wooden floor with special compounds of increased plasticity. However, the developer will not receive 100% guarantees in any case:
- wood can dry out or warp, that is, change linear or spatial dimensions;
- with a deflection of a less durable base, a thin layer of tile adhesive will crack or split, the tile will fly off.
To ensure the main condition - the rigidity of the base floor is higher than the finish coating, several methods are used for the specified operating conditions:

Cladding technology
The most difficult technique for gluing porcelain stoneware to a tongue and groove, the simplest is a self-leveling floor screed over DSP sheets, which is not difficult to tile. It should be remembered that for the safety of rooms adjacent to the bathroom at the time of possible flooding, the height of the finish coating in them should be at least 2 cm higher.

The floor level in the bathroom should be 20 mm lower than in the hallway.
The conflict between wooden structures and ceramic cladding on top of them is caused by the following factors:

Therefore, the operational resource of load-bearing beams and wooden decking is sharply reduced.
Tiles on the black floor
If the project includes ceilings along beams, a binder is attached to these supporting structures at the lower level. Insulating materials and insulation are laid on it as necessary, then the subfloor is lined.
The budget option is edged board flooring, but in order to lay tiles on top of the subfloor, it is better to increase the construction budget, make the subfloor from board materials (plywood, OSB, DSP). The number of seams will decrease, the stability of the geometry and the overall resource of the structure will increase.
Due to the high humidity of bathrooms, a dry screed as a base for laying tiles on a wooden floor is not the best option:
- expanded clay sand is highly hygroscopic, and it cannot evaporate the accumulated moisture through the waterproof lining (dangerous in case of leakage);
- the design has a solid weight, respectively, heavily loads the beams of wooden floors.
However, the practice of operating such structures exists, so you need to know how to properly make it yourself. The technique consists of several operations:

Advice! To correctly lay the flooring, you should consider the placement of plumbing, the geometry of the room and the format of the tiles. Either a solid tile or pieces of more than half of its format should adjoin the walls to ensure a normal bathroom interior.
Gluing on a special mixture
Most of the leading manufacturers of dry mixes have special compositions of increased elasticity for decorating wooden load-bearing structures with tiles. Most popular products:
- Lacrysil - packaged in red buckets;
- Kreps - Super modification;
- Litokol - Litoflex K81 or Superflex K77;
- Ceresit - a mixture of SM-17.
It is possible to lay tiles on two-component mixtures based on polyurethane resins Bona R770, Utsin MK-92, Stauf PUK 440 or Kiilto Slim. They have high adhesion, both to the lower layer of wood and the upper one - to ceramic tiles. However, the life of these compounds is low, they should be diluted little by little in order to have time to develop a solution before setting begins.

Advice! It is not recommended to glue tiles with ordinary tile adhesive on wood, as it is intended exclusively for mineral substrates.
The technology for laying tiles on a black floor is as follows:
- sealing the seams of plywood, chipboard, DSP with putty;
- applying special tile adhesive to the base;
- leveling the pastel with a notched trowel;
- laying tiles using SVP systems or standard crosses.
Usually one-piece cladding elements are mounted according to the layout scheme. The next day, cutting and stacking of pieces is performed. Then the seams are rubbed and the plinths attached to the walls are mounted.
The flatness and horizontality of the base is leveled by lags. Small defects are hidden with tile adhesive. Additionally, puttying the surface of the black floor is not necessary. First you need to get rid of the squeaks and replace the beams / logs if necessary.
Unlike most wood-based boards from which the subfloor is made, OSB is coated with wax. Which provides additional costs to the developer - the impregnation will have to be cleaned off with angle grinders, artificially increase the adhesion of the base with tile adhesive and reinforce this layer with a polymer mesh. Therefore, it is worth choosing DSP / chipboard or plywood.
Tiles on grooved board
The technology for decorating a tongue and groove with tiles is very complicated due to the following nuances:

Advice! A layer of self-leveling floor, glue and cladding will dramatically increase the structural loads on the timber floor beams. It is highly desirable to make a new calculation for the deflection and bearing capacity of structural elements using the method of rigidly clamped single-span beams.
Revision and strengthening
Before gluing tiles on a wooden floor, it is imperative to revise the supporting structures:
- add logs to reduce the distance between them and / or increase the thickness of the floorboards;
- eliminate creaking, stretch self-tapping screws or add additional fasteners to an existing structure;
- replace, if necessary, vapor barrier and insulation materials;
- pull off the tongue-and-groove board to eliminate cracks;
- remove the paintwork completely with a grinder;
- treat the tongue with an antiseptic or fire and bioprotection (the composition additionally includes a flame retardant that increases fire resistance).
Initially, only the first, every fourth and last row of floorboards are attached to the joists. After tightening with self-tapping screws, all boards are fixed to the lags.
More details about the laying of the grooved board were discussed.
self-leveling floor
To level the boardwalk in a wooden house, budget modifications of a cement-based self-leveling floor are used. They have self-leveling properties, which makes it easier to work with these compounds. The main nuances of the technology are:

For walking on a liquid solution, paint shoes with a needle sole are used.
Unlike wet concrete screed, the minimum thickness of which is 3 cm, self-leveling floors can be leveled "to zero". However, at the same time, separating layers of hydro-, vapor barrier films, sound insulation and insulation are prohibited.
Tile decoration
Regardless of whether the tile is laid on a wooden base or a screed, you should adhere to the standard cladding technology:

Advice! Floor plumbing is best mounted on top of the tiles. This will reduce the amount of trimming, provide an even solid base, and allow you to save the pattern of the seams.
Since the height of the flooring in the bathrooms is lower than in adjacent rooms, the tiles are laid close to the door frame. There is no interface with other facing materials, no threshold and plinth are needed.
Thus, tiles in rooms with high humidity can be laid independently, both on a wooden black floor and on grooved board floorboards. In this case, the recommendations of specialists should be followed to ensure maximum operational life.
Advice! If you need repairmen, there is a very convenient service for their selection. Just send in the form below a detailed description of the work to be done and you will receive offers with prices from construction teams and firms by mail. You can see reviews of each of them and photos with examples of work. It's FREE and there's no obligation.