Fast wallpapering. What are the stages of wallpaper pasting technology
Alexander Dragun, Ph.D., site expert
Pasting the walls with wallpaper during the repair process is the most popular type of decoration. This is facilitated by the availability of materials and not too sophisticated technology. In order for the work done to be truly pleasing to the eye, it is necessary preliminary preparation walls for wallpaper. This is the most difficult and time-consuming stage in the process of changing the interior of the premises of the apartment, whether it be a hall, a corridor, a toilet, etc.
The preparation of walls in a new building and a residential apartment is somewhat different from each other. In a residential apartment, work begins with the dismantling of the old type of finish: paint, whitewash, old wallpaper. After that, the walls are inspected. If necessary, the old plaster is removed and the walls are repaired.
The new building is being completed installation work installation of door and window units, electrical wiring, floor screeding, ceiling whitewashing. After this work and new apartment, and in the old one, match:
- the surface of the walls is being prepared for plastering: notches are stuffed, primed, beacons are mounted;
- walls are plastered with gypsum (cement-sand) mortar or dry plaster ( OSB plate, drywall, plywood);
Attention: rooms with high humidity - bathroom, kitchen and bathroom - must not be plastered with a solution containing gypsum.
- the plaster layer is puttied (if the finishing grout is made on high level, and the wallpaper is planned with a relief pattern, the operation can be skipped);
Important: on GKL in without fail applied thin layer putties, which will subsequently allow you to remove the pasted wallpaper without destroying the drywall sheet.
- a primer is applied to ensure adhesion of the wallpaper adhesive to the wall.
Step by step, the entire process of preparing walls for wallpaper is discussed in the articles “How to prepare walls for wallpapering” and “”.
Selection and preparation of glue
The quality of wall decoration with tapestries is primarily affected by the type of wallpaper glue. Right choice composition allows you to glue the walls without bubbles and air pockets, with invisible joints, uncontaminated canvases.
When choosing an adhesive composition, it is necessary to take into account the type of wallpaper base. Yes, for paper wallpaper suitable CMC glue firms "Metilan", "Moment", etc. For vinyl wallpapers are produced special types glue, as indicated on the package. non-woven can be glued with a special adhesive mass for interlining.
About the types of glue, methods of their preparation and application, as well as compliance different types wallpaper can be read in the material "".
The choice of wallpaper depending on the room
A huge range of wallpapers allows you to choose them for the type of wall, and for a specific room in the apartment. For example, for concrete base walls, even and without flaws, smooth wallpaper will do. Volumetric (embossed) are suitable for all types of wall material. They mask small bulges and depressions well, hide slightly parted seams.
In the rooms south side buildings it is best to use cool colors: gray, blue or green. By the way, they visually increase the rooms in Khrushchev, with their small dimensions - area and ceiling height.
 Warm tones.
 From the north side it is necessary to choose tapestries of warm colors ( beige color with variations) or golden color. In the hallway and corridor dark washable wallpapers in rich shades are suitable. Living room looks great in light colors, and in the dark. Here the main idea in choosing trellises is to maintain general style interior.
In the bedroom should be calm semitones. The harsh color is annoying and keeps you awake. Photo wallpapers with views of nature look good here and functionally fulfill their role.
Wallpapering technology
Many apartment owners, when replacing tapestries on their own, believe that they know how to glue wallpaper correctly. Indeed, simple single-layer paper wallpaper they will be able to stick on the wall without much problem. However, when working with other types and types of wallpaper, questions begin to arise. So how to glue the wallpaper yourself?
wall cladding technology modern wallpaper is not complicated and consists of several interrelated steps. It can be presented step by step as follows:
- calculated required amount wallpaper;
- buy wallpaper and glue;
- being prepared necessary tools and fixtures;
- the place for gluing the first sheet of tapestries is selected;
- the scheme is determined according to which the wallpaper should be glued;
- cutting sheets of wallpaper;
- adhesive mass is being prepared;
- tapestries are glued to the wall.
Materials and tools
For continuous and high-quality work, you will need materials and a set of tools with fixtures.
Materials. For pasting the walls you need to buy:
- wallpaper (non-woven, photo and glass, paper, vinyl, etc.);
- wallpaper glue (preferably specialized).
Tools and fixtures. You can stick wallpaper with a minimum set of tools. But in order for the work to be done quickly and beautifully, you must have at hand:
- ladder;
- plastic bucket - 2 pcs. (for glue and clean water);
- cuvette (bath) for glue;
- roller 250 mm wide and paint brush (brush for wallpaper edges and corners) for applying the adhesive mass;
- metal spatula for cutting wallpaper on the wall;
- plastic wallpaper spatula (wallpaper brush) for leveling thin wallpaper or tapestries with a three-dimensional (embossed) pattern;
- plumb or laser level to find the vertical;
- ruler with a pencil for drawing a vertical starting line;
- construction knife (scissors) with replaceable blades for cutting wallpaper to length;
- roulette;
- rubber roller for pressing the wallpaper to the wall;
- rubber roller, narrow, cone-shaped, for smoothing seams (joints);
- foam rubber sponge for removing glue from the front side of the wallpaper;
- napkin (towel) for hands;
- screwdriver for removing sockets and switches;
- insulating tape for working with electrical wires.
Buying wallpaper
Going to the store for wallpaper, you must strictly observe two conditions:
- buy the required number of tubes;
- buy tubes of the same shade.
Material Quantity Calculation
1. The height of the wall surface to be glued is measured (it may not coincide with the height of the ceiling due to the non-removable plinth and baguette). Then the length of the roll (10 m) is divided by the result of the measurement, resulting in the number of full trellis panels in one roll.
After that, the length of all walls is measured, the results of the measurements are added up - the value of the perimeter in meters is obtained. The resulting number is divided by the width of the wallpaper tube (0.53 m, 1.06 m) and the number of sheets in it. The measurements taken can be written by the formula:
T = P/L x H/K, where
- T is the number of wallpaper tubes, in pcs.
- P is the length of the perimeter of the walls, in m.
- L is the width of the wallpaper tube (0.53 m or 1.06 m).
- H is the height of the pasted wall surface (the length of the pasted wallpaper sheet).
- K - the length of the wallpaper roll (10 m, 15 m and 25 m).
Attention: professional finishers advise not to take into account windows and doors when calculating the amount of wallpaper purchased.
The result obtained must be rounded up and add 1-2 tubes of wallpaper to match the color, for an unforeseen marriage and a reserve (repair of trellis sheets damaged on the wall).
2. The length of the perimeter of the walls is measured, after which the required number of wallpapers is taken from the finished table below.
Attention! If the height of the pattern (rapport) is more than 0.6 cm, it is necessary to add 1 more roll of wallpaper for every 6 tubes to all calculations.
It already takes into account all the nuances of calculating the required number of wallpapers, but without taking into account the fit of the picture.

wallpaper requirements
In the production of wallpaper, machines are filled with paint for a certain batch. When refilling, the tone may be disturbed. At the same time, at the point of sale, the difference in shade may not be seen, but on the wall it will be clearly visible.
Therefore, you need to buy tapestries of the same production batch, one production date and one article number. You can see this data on the insert (label) that wraps each tube of wallpaper, which is clearly visible in the photo. Practice shows that not everyone knows this, and many ignore it. The result is clearly visible on the walls - the different tonality of the tapestries is conspicuous.

 Wallpaper markings.
 Buying glue
The adhesive mass is bought according to the type of wallpaper purchased. The number of packs (tanks) of wallpaper adhesive is easy to determine - the packaging indicates the consumption in rolls with a length of 10 m and a width of 0.53 m.
If the wallpaper has a different size, the flow rate is adjusted. The number of packages is the result of dividing the total number of trellises purchased by the amount of consumption (in rolls).
Where to start gluing
All the recommendations for choosing a place to start decorating walls with trellises state that it doesn’t matter where to start gluing wallpaper in a room - you can start from any place you like: a door, a window, a corner, or even from the middle of the wall (the main thing here is that the first canvas should be glued strictly vertically). However, this advice is not entirely correct. Paper wallpapers, especially single-layer (simplex), should be glued from the window, while in different directions - so the seams are not visible.
Determination of the pasting scheme
Depending on the type of wallpaper, experts offer two pasting schemes. How to glue paper wallpaper is shown in the diagram. Here, work starts from the window and is carried out in different directions.

For other types of tapestries, both the option shown in the diagram and work in a circle are applicable when the beginning and end meet. In this case, work can start from:
- windows (following many years of tradition);
- doors - the box serves as a guide (replaces the vertical line);
- angle - in this case, with the help of a plumb line, a vertical is drawn from which work will be carried out;
- painted on the wall vertical line in any arbitrarily chosen place.
Step-by-step instruction
You can wallpaper the walls yourself, without involving professionals. To do this, you must act strictly in accordance with the instructions.
- Using a plumb line, a vertical line is drawn on the wall with a pencil, from which work will begin.
- The height of the wall to be glued is measured and the first sheet of wallpaper is cut to size. Experts advise for non-professionals to make an allowance of 10 cm, although those who have even minimal experience with trellises cut them immediately to size.
- The remaining panels are cut, combining the pattern on the floor, and not on the wall, as some authors of works on this topic recommend. Tapestries without a pattern are simply cut to size.
- Diluted glue according to the instructions printed on the package.
- The adhesive mass is applied to the wallpaper canvas (on the wall in the case of non-woven wallpaper) with a roller or a special brush. The edges are smeared with a brush. First, the first (any) half (slightly more than half) is smeared and folded in half. The fold should not be fixed. Then the second half is spread and also folded in half ( correct method the fold is shown in fig. below).

Folded wallpaper is kept in this state until the end of the impregnation process - the approximate time is given in the table below.
- The upper half of the sheet of wallpaper is opened and glued to the wall (the lower part remains folded all this time). It is necessary to navigate not along the ceiling, but along the drawn vertical (if the upper half is glued correctly, then the second one will easily follow the drawn line).

Attention: if the wallpaper was cut with an overlap, a margin of 4-6 cm is left at the top of the wall.
The wallpaper is smoothed with a wallpaper roller (plastic spatula) from top to bottom, from the center to the edges (see photo).

- The second half of the panel is opened and also glued to the wall.
- The overlaps from above and below are cut with a knife using a metal spatula.

- The second and subsequent sheets are glued in the same way, according to the accepted scheme.
How to make seams invisible
In the process of work, it is important to ensure that the joint remains invisible. Errors occur for 3 reasons:
- the consistency of the glue is incorrectly selected (more liquid than required), as a result of which the edge of the wallpaper bubbles (lags behind) in some places;
- wallpapers by their nature, under the influence of moisture of the adhesive mass, stretch, and when dried, they shrink, forming a visible butt seam;
- a mistake was made when aligning the wallpaper - the sheets were overlapped.
The problem is solved by rolling the joint with a special narrow wallpaper roller. If an error is detected after the trellises have dried, the visible seam is painted over with a special corrective paint.
Places where pasting is overlapped with a metal ruler and a construction knife are cut in the middle 10 hours after the end of work (the wallpaper has shrunk, and the glue has not dried completely and allows you to remove both the lower and upper pieces of the cut trellises).
How to glue wallpaper in the corners
Here are some secrets that allow you to complete the work quickly and efficiently.
- It is impossible to glue a whole sheet at the corner due to a possible violation of its geometry, as a result of which the vertical line disappears at the second part of the wallpaper.
- Wallpaper in the corners is always cut off. On the second wall, it is necessary to leave 2-3 cm. The next canvas is overlapped on the left strip. Then, with a knife with removable blades, using a metal ruler, a continuous cut is made in the middle of the seam. Strips of wallpaper from the bottom and top are removed, and the seam is rolled with a narrow roller. If desired, you can even choose a picture.
- External corners are glued using a similar technology.

How to glue at windows and doors
The greatest inconvenience when pasting walls with wallpaper occurs when meeting with obstacles. You can avoid trouble if you follow the technology of gluing tapestries near doors and windows. You can glue the tapestries near the doorway according to the following algorithm:
- pasted on the wall wallpaper over the doorway;
- the pasted sheet is docked with the previous one;
- wallpaper is tightly pressed against the wall with a roller;
- scissors make a diagonal cut of the wallpaper to top corner door frame;
- wallpaper is tightly rolled to the side and top trim;
- a strongly protruding part of the wallpaper is cut with scissors;
- with a metal spatula, the left strip of wallpaper is wound under the casing.
Attention: if the platbands sit tightly on the wall and it is impossible to get wallpaper under them, trimming is done with a knife using a metal spatula.

Gluing near the window is much easier - the wallpaper is glued to the wall along conventional technology. After they are completely dry, the unnecessary part of the tapestries is cut off along the edge of the window with a knife.
Frequently asked Questions
At what temperature to glue the wallpaper
Many recommendations indicate that it is necessary to glue the wallpaper at a temperature of 23-25 ° C. However, this temperature regime can only be reached in summer. Winter, when you need to heat up, does not allow you to work in such conditions (in most Russian cities in winter, the temperature in the apartment is 18-20 ° C).
So at what temperature can wallpaper be pasted over walls? Manufacturers of tapestries and glue have taken this moment into account and recommend carrying out Finishing work at a temperature of 10-25°C. Therefore, in unheated premises(dacha, veranda) glue wallpaper in winter period Not recommended.
When can I open windows after pasting
Impatient apartment owners try to quickly get rid of the smell of glue and wallpaper. But open windows- it's drafts. And in drafts, the glue dries quickly and unevenly, as a result of which the adhesive mass does not have time to create the necessary adhesion to the wall. The result is that the seams diverge or the wallpaper sheets peel off.
When can windows be opened? You can open the windows after the glued wallpaper has completely dried - after 1-3 days(the time for complete drying is indicated, as a rule, in the instructions printed on the package with glue). For insurance, it is better to add one day to the specified time.
What to do if the wallpaper bubbles
In practice, there is often a situation, even among professional finishers, when minor violations of technology lead to the appearance of bubbles and air cavities on the surface of glued walls. This is not aesthetically pleasing, and a potential place for the appearance of mold and fungus. How to get rid of bubbles on wallpaper?
Depending on the size of the lagging area, you can advise:
First, re-glue the canvas with very large air cavities. All attempts to fix the problem without tearing the wallpaper off the wall will be noticeable.
Secondly, with medium pockets, it is also better to re-glue plain tapestries (the trace of the cut will be very clearly visible). Patterned wallpaper is cut construction knife in the middle of the resulting cavity. The edges are carefully, with the help of a spatula, pulled away from the wall and an adhesive mass is delivered to the resulting space with a brush. In this case, it is not necessary to coat the entire dry surface.
You can disperse the glue with a dry cloth with a tightly compressed cut seam. Allow 5-10 minutes to soak the base of the trellis with glue, and then roll the lagging place with a wallpaper roller to remove excess mass and air mites. In this case, it should be remembered that the paper wallpaper from the glue is stretched, and after drying, it decreases in size. Therefore, the edges of the cut must be overlapped. For vinyl and non-woven wallpaper - end-to-end.
Thirdly, small bubbles are eliminated with a syringe. The needle must be taken under the density of the glue - the thicker it is, the thicker the needle. The bubble is pierced in a circle, from the edges to the center, at an angle of about 30 degrees with respect to the wall.
Such a scheme of punctures allows you to cover the entire lagging surface of the wallpaper, as well as release excess adhesive mass through the punctures when smoothing the problem area. If large folds form, they must be smoothed out. Small wrinkles after the glue dries will disappear by themselves.
What to do if the wallpaper is translucent
The problem of translucent wallpapers after they have completely dried is solved in the only way - by reworking the work done. Therefore, at the preparatory stage, you should try to avoid this headache:
- prime the walls with a special primer (in extreme cases, whitewash with water-based paint);
- buy thick trellises;
- check averages and thin wallpaper for translucence - attach a piece of sheet to a bright spot and evaluate the degree of density.
How long does wallpaper dry
No one will give a definite answer to this question. There are a lot of factors here. And the type of wallpaper, and the applied adhesive mass, and temperature regime rooms, and air humidity, etc. The maximum run-up is from 12 to 72 hours.
The longest dry paper wallpaper duplex and non-woven on paper basis- up to 3 days. Non-woven wallpaper on a different basis (not paper) needs about a day to dry completely, vinyl - about 48 hours.
 Two-layer paper wallpaper.
 You can determine the degree of drying of the pasted wall with the palm of your hand - pressing it against the wallpaper. If you feel warm - the wall is completely dry, there is a chill - you still have to wait. In passing, we note that it is strictly forbidden to accelerate the drying process with heating devices.
How to glue meter wallpaper alone
Gluing technique meter wallpaper alone does not have any special techniques that differ from the above instructions for pasting wallpaper.
Good quality work can be achieved if you use the advice of specialists with extensive experience.
- Before starting work, the room where the work is planned is ventilated, and then tightly closed for a day.
- It is better to dismantle the plinth - it can be easily removed (gluing the trellises will become faster and easier). In order not to look for dowel holes under the wallpaper later, self-tapping screws are screwed back into them.
- It is better to cover the floor with cardboard or newsprint, but not with plastic wrap (on the film, glue easily gets under the wallpaper when smearing the edges of the sheet, as a result of which it stains them).
- Use a ladder. The table and the goats often leave marks on the pasted-over walls while moving to another place. In addition, it is more difficult for them to start the bottom of the wallpaper.
- Use specialized wallpaper glue - the universal adhesive mass holds tapestries worse on the wall.
- Do not join the tapestries in the corners - glue with an overlap (1-2 cm), and then cut with a knife, forming a seam.
- Wipe (wash) your hands regularly.
- Do not correct the uneven cut of the wallpaper on the top and bottom of the walls. At the bottom, errors can be hidden with a plinth, at the top with a frieze or baguette.
Related videos
Greetings, dear readers of our blog "Do with us with your own hands."
Continuing the theme overhaul apartments today I want to describe in detail the process of how to glue wallpaper on the walls with your own hands. What do you need to start with? What are the nuances and features to consider in the work? What questions to ask Special attention? It would seem that the question is not very complicated, but how many misunderstandings, disputes and disagreements arise when we start the process itself.
Wall preparation
First, let me congratulate you! How about what? With the fact that if you are interested in the issue of wallpapering, then the dirtiest, hardest work in the repair has already been completed. And you made it!!! Hundreds of kilometers wound up in shopping trips, in search of wallpaper, are already behind us. And here they are, the most beautiful in the world, wound in tight rolls, lying neatly against the wall!
But do not rush, you have everything ready, and someone only needs to re-paste the wallpaper without affecting everything else. Therefore, we begin the process by removing all the old wallpaper. To do this, carefully tear them off the wall, if the glue on which they stick is weak - work will go like clockwork, but if the wallpaper is glued well, you have to work hard.
Correct wallpapering - scheme
If old ordinary paper wallpapers are poorly removed, then we wet them with water, simply rolling them with a wet roller or brush. Leave for 10-15 minutes and then carefully remove. Well, the most difficult case is when the wallpaper is covered with a waterproof film on top, the so-called "washable" wallpaper. This will only help mechanical way removal - with a spatula. We remove them by prying with a spatula, trying to touch the wall as little as possible.
The wallpaper is removed, it is necessary to remove all the plaster, which does not hold well and practically falls out by itself, to cut cracked and falling out seams. All the places of depressions, depressions and irregularities that have appeared must be puttied and subsequently primed after stripping.
If you decide to level your walls, then after applying the finish layer, do not forget to prime it. It is very important! Otherwise, when wallpapering, the walls will dust and crumble, which will lead to poor adhesion of the wallpaper to the wall. BUT worse than that, when applying glue to the wall, the plaster may begin to roll. Use for this special mixtures sold in stores. And if you want to save money, you can use simple PVA glue, 2 cups of glue per bucket of water (from personal experience, excellent primer).
The whole point of preparation is to make the walls as smooth and even as possible. How to level walls with drywall sheets I wrote in a separate article "". Don't be lazy, check your walls. Remove all adhering motes and other small debris, as after wallpapering they will appear and will be ugly. You should be especially careful in this regard when sticking thin wallpapers.
Walls must be strong, clean and dry.
We dilute the glue in accordance with the instructions located on the package. I used Quelyd "Special Vinyl" glue for vinyl and textile wallpapers.

It is diluted: 1 pack per 4-4.5 liters of water and is designed for 6 rolls. For dilution, we use a suitable container, measure the required amount of liquid into it and, stirring constantly, introduce dry glue.

We give it a little disperse, for 15 minutes, then mix it well again and you can glue the wallpaper.
Beautifully stick wallpaperalong a straight wall in any room of the apartment
Step 1. Close all windows and doors to prevent drafts.
Step 2. We calculate how many vertical stripes we can fit on one wall. To do this, measure the length of the wall and divide the resulting size by the width of the wallpaper.
My wall length was 3.7 m. (3700 mm.), And the width of the wallpaper was 0.54 m. (540 mm.) Total 3700/540 = 6.85. Thus, 6 whole strips and one with an undercut went crazy on my wall.
We cut 7 strips according to the height of the room plus 50 mm. cut at the top and bottom.

Similar calculations can be made for the other three walls and cut the wallpaper for the whole room at once.
Step 3. We mark the line of verticality for the correct orientation of the first strip.

We retreat from the edge of the wall (I walked from the passage, you may have from the corner) 500 mm (the distance is slightly less than the width of the strip, so that later, if the corner of the room is a little “littered”, you can correct it by trimming the first strip) and put a mark. To mark the line of verticality of the strip sticker, we use a plumb line (you can use just a thread with a load tied to it) or a building level.

We apply a plumb line to the wall and combine it with our mark made earlier. We mark a vertical line and connect the points with a straight line. Thus, we got a line from which we will begin to glue the second strip. We do not touch the first strip (at the aisles or in the corners), we leave the extreme strips of one wall for last. I used the same markup technology with .
Step 4. We apply glue on the wall to the width of the strip and on the strip of wallpaper, evenly distributing it over the surface with a brush or roller.

Step 5. We paste 1 strip (or rather, from the edge of the wall or corner, we will have the second one, but we do not glue the first one yet). To do this, starting from the top, carefully apply the strip to the wall. We combine the edge of the strip with the drawn line of verticality and, using a wide roller, gently roll the strip against the wall, squeezing out the air trapped between the wall and the strip.

Step 6. We note the extra length of the strip.

We tear off a strip from the wall a little and carefully cut off the excess.

This operation can be done without tearing off the strip, but using a clerical knife, cut off the excess. In the end, we get this picture.

In the future, the joint between the wall and the floor will be closed with a plinth. How to install plastic plinth you can read in detail with your own hands.
Step 7. We repeat all the procedures for applying glue to the wallpaper and the wall, and glue the second strip. Only now we join the edge of the strip to the already glued first strip.

Sometimes there are situations that the ceiling is not displayed perfectly evenly, you have to cut the top of the strip a little. To do this, we release the glued strip slightly up, creating an overlap on the ceiling.

With the help of a roller, we roll the strip, and with the help of a clerical knife or scissors we cut off the excess wallpaper in such a way that upper edge the bands hit the corner exactly.

We cut off the excess at the bottom, finally roll the glued strip, rolling it with a wide roller from top to bottom and towards the edge of the strip, as if drawing a Christmas tree with a trunk in the middle of the strip. With the help of a narrow roller, we roll the seam between the strips and the upper and lower part strips adjacent to the ceiling and floor.

We get this picture.

Step 8. Similarly, we glue all the whole strips to the end of the wall.
Step by step instructions for correct work with wallpaper
Video: how to stick vinyl wallpaper yourself
Thanks to everyone who read the article to the end. I draw your attention to the fact that here I have fully described the whole process of how to paste wallpaper with my own hands in accordance with my experience and ideas. this process. Surely there are people who have devoted this large quantity time, have vast experience and professional skills. Please write about your little tricks, secrets and features on how to glue wallpaper correctly in the comments. Help people who want to gain knowledge in this matter. After all, as they say, the more you give in this life, the more you get in return.
Sincerely, Ponomarev Vladislav.
How to paste wallpaper in a room.
How to paste wallpaper when repairing an apartment or house with your own hands. Those who do this more than once do better, but there are people who still do not succeed. I want to put the apartment in order, stick wallpaper, but something goes wrong. But correctly selected and properly pasted wallpaper can become a decoration of a room or apartment. Let's figure out how to get started and.
But everything is in order. Before you start gluing new wallpapers, you need to prepare the area where to glue them (whether it be walls or ceiling). Do not try to start the robot on the old coating, there is a high probability that the old wallpaper moistened with glue will come off along with the new canvases. And all your work will go "down the drain" or as they say in Ukraine: "Behind a bad head and hands there is no peace."
First of all, we will remove the old wallpaper.  To make them easier to move away from the wall (ceiling), simply moisten them with water using a rag, sponge, wide paint brush or spray gun. If after this there are pieces of canvases left in some places, try ironing them with a hot iron (there will be no sense from the cold) through a rag soaked in water.
  After you remove all the old wallpaper, you will see the "naked" truth about your walls. These are cracks, and the remains of whitewash, and plaster that has lagged behind over time. Whitewash residue is the easiest to deal with. Take a wide brush and, after wetting it in water, just wash the wall (ceiling). Cracks and other defects will need to be puttied or
  plaster. Let the new plaster (putty) dry well, and only after the surface is dry and even, you can glue the new wallpaper.
You should remember one simple rule: in a small room, start gluing wallpaper from the window, and if the area is quite large, then from the very big object interior (for example, real or decorative fireplace etc.).
You can determine the amount of wallpaper needed for repair
 In order to hang wallpaper the right way, pick up your “brothers” for repairs (assistants), they can be either your family members, or friends, or just acquaintances, in short, anyone who wants to help you.
Depending on the type of wallpaper and the method of pasting, prepare the canvas. If you glue "butt", then you need wallpaper without edges, because it will not be possible to perfectly fit the joints. When pasting "overlap", the wallpaper should be cut off the edge that will "find" on the previous canvas.
If you decide to paste over the entire room, both the ceiling and the walls, start working from the ceiling.
How to glue wallpaper on the walls.
 The question arises: " How to start wallpapering?».
Before gluing the first canvas, mark a vertical line (this can be done using a level or plumb line) in the place where the junction of the first canvas will be. If this is not done, the wallpaper can “lay down” crookedly, and it is impossible to correct such a defect, except to start all the work from the beginning.
The question arises: " How to start wallpapering?».
Before gluing the first canvas, mark a vertical line (this can be done using a level or plumb line) in the place where the junction of the first canvas will be. If this is not done, the wallpaper can “lay down” crookedly, and it is impossible to correct such a defect, except to start all the work from the beginning.
Cut the canvas to the desired size.
It should also be borne in mind that after drying, glued wallpaper may shrink, so measure with a margin (5 cm on each side).
I want to give you one more piece of advice. If you have a wallpaper with a pattern that needs to be combined, I would advise you to cut the strips not from one roll in turn, but from several, applying a dry cloth to the already glued one and aligning the pattern, mark the place of the cut (with an overlap of 5 cm on both sides). So you will have much less waste.
We smear it with prepared glue. It is convenient to make it wide paint brush. Apply glue from the middle of the canvas to the edge. Be especially careful with the edges. After that, the wallpaper can be folded (in half or "accordion") with glue inward, without crushing the fold, for impregnation. The time depends on the thickness and density of the wallpaper. Thin wallpapers cannot be kept for a long time, and thick and dense ones are left for 5-10 minutes. Make sure that the wallpaper does not get wet, otherwise it will become "weak" and may tear. This can be done with inexpensive wallpaper. In other cases, I would advise not to fold the canvas, but to cut it off and glue it in turn, after the previous one has been glued. This way you can see the quality of the glue application better. The canvas is ready for gluing when it has become even.
While the wallpaper is soaking, coat the wall with glue. For this purpose, you can take a more liquid glue.
After the canvas has been soaked and you have plastered the wall,  carefully (together, one on top, and the second on the bottom) we put the canvas on the wall. The top worker applies the canvas to the top edge and the previously drawn side vertical line, and the bottom worker, holding the bottom of the wallpaper, and slightly pulling it away from the wall, also applies it to the intended vertical. If everything is fine, you can glue. First, we glue the upper edge, and gradually expelling the air from under the strip, we glue the entire canvas. Smoothing is best done with a roller or a special spatula. You can take a rail, stick a strip of foam rubber to it and work with it. The wallpaper is glued, but there may be air bubbles underneath. You need to drive them out from the middle, moving towards the edges and corners. If the air is not expelled, you can pierce the bubble with a needle or carefully make a small cut with a clerical knife. If the bubbles are large or there are large wrinkles, carefully peel off part of the panel, and then attach it in place. Small wrinkles will disappear after drying.
Glue that has come out of the edge of the wallpaper joint must be removed immediately with a sponge, because when it dries, this cannot be done.
Well, did you find out? It may seem difficult only at first glance, but then it will be easier.
Switch off the mains voltage before dismantling the devices!
 After the glue has dried, carefully using a utility knife, make a cross-shaped cut in the center of the place where the socket (or switch) is located and cut off the excess petals. Replace the socket cover (switch).
If it is not possible to disassemble the switch, then you need to take a dry cloth, attach it to the wall (be sure to align the drawing) and, having outlined the place where your device is located, cut a hole under it.
Let's talk about how to properly wallpaper the corners of the room.
Never seal a corner in one piece.

It is best to cut the panel into two parts and glue on the corner "overlap". This very "overlap" should be about 10 mm
When finishing pasting the walls, try to make the final joint in the most inconspicuous place.

How to glue the ceiling with wallpaper.
Let's now consider the question, how to properly wallpaper the ceiling. This process is more time consuming, so you need another helper.
The ceiling is always pasted over first. The preparation of the surface of the ceiling and wallpaper panels is similar to the preparation for working with walls, with the difference that a thicker adhesive must be applied to the ceiling.
Cut off the wallpaper panels longer and wind the edges onto the wall. After drying, cut them off with a utility knife.
Glue wallpaper on the ceiling you need in the direction of the light coming from the window. You can completely coat the ceiling with glue, and then stick the wallpaper as soon as you are ready.

As mentioned above, it is most convenient for three workers to glue the ceiling with wallpaper. The glue-soaked and accordion-folded wallpaper must be served to the workers who work upstairs. Those, in turn, carefully, gluing one edge to the ceiling and aligning the side of the canvas with a line that is drawn perpendicular to the window, unwind the “accordion” and, removing air, glue the canvas. Phew, that's rewarded. I hope you have sorted out the sequence of work. In short, one glued the edge of the strip, the second holds the “accordion”, and then they unwind and glue it together. You can also help from below. For  take a mop (or whatever looks like it)
, glue a strip of foam rubber on the crossbar (in extreme cases, wrap it with a clean rag) and hold the panel. Thus, glue all subsequent strips.
take a mop (or whatever looks like it)
, glue a strip of foam rubber on the crossbar (in extreme cases, wrap it with a clean rag) and hold the panel. Thus, glue all subsequent strips.
If you want to stick a border, then it is better to take it more densely and in one piece per roll. It can be glued by two people. The border smeared with glue is stretched to the desired length, one person holds one edge, and the second, gluing it to the wall (or ceiling), moves towards the meeting.
To facilitate the work and improve the quality of gluing, use a special primer that is added to the adhesive. Surfaces treated with this composition become smoother and slippery (at the same time more sticky), which will greatly facilitate the work. But you need to keep in mind that such glue is not stored for a long time. Primer consumption is indicated on the packaging, if not, consult with a sales consultant. When applying this adhesive mixture drying time thick wallpaper will increase by 1 day.
When drying wallpaper, try to maintain a more or less constant temperature of about 23 - 25 ° C . Do not force the drying time, as if they dry too quickly, they may fall behind. If the air in the room is too dry, put water containers. Try to protect the glued surfaces from direct sunlight.
Here, it seems, is all. I hope that after reading the article, you learned something new and it will be useful to you. Now you know, . You can get to work and God help you.
If you have friends or acquaintances who might find this information useful, please share it with them on social media.
In order to make the site more interesting and informative, please answer a couple of simple questions. Click on the button. For those readers who use Yandex and wish to receive notifications about the publication of new articles on the site, I suggest placing my blog widget on the home page using the link:
http://www.yandex.ru/?add=147158&from=promocode
You can subscribe to receive updates by E-mail in the form of "RSS entries", which is located on the main page.
Any repair begins with the acquisition of the necessary building materials, with the preparation of tools and dismantling old finish. The last position is associated with some difficulties, because tearing off, for example, old wallpaper from the walls is not as easy as it might seem at first glance. If they were well glued, then removing them can be a problem. But there are several ways to help you quickly carry out this operation.
Ways to remove wallpaper from walls
Before you start removing wallpaper from the walls, you need to take care of protecting the floor. It's best to put it on polyethylene film, which is attached to the plinth with masking tape. After that, the wallpaper is moistened warm water using a roller and allow time for them to soak.
If there is a question quick removal, it is better to use a special solution that penetrates the adhesive layer in minutes and dissolves it. The material itself begins to flake off, it remains only to collect it and throw it in the trash. It should be noted that solvents are not included in such liquids, therefore, after removing the wallpaper, there is no need to rinse the walls with water. Some areas, even under the influence of a solvent, will not immediately peel off, so it is recommended to re-apply the liquid and use spatulas.

- It is not necessary to wet the wallpaper strongly, the water will begin to flow down the wall, and only a small fraction of it will be absorbed. But a small amount of water will also not give a positive result. They will dry out quickly.
- It is necessary to moisten in small areas.
- If one area is dry, then it will have to be moistened again.
- It is necessary to tear off the wallpaper strips from the joints.
- When wetting, you need to turn off the electricity in the whole house (apartment).
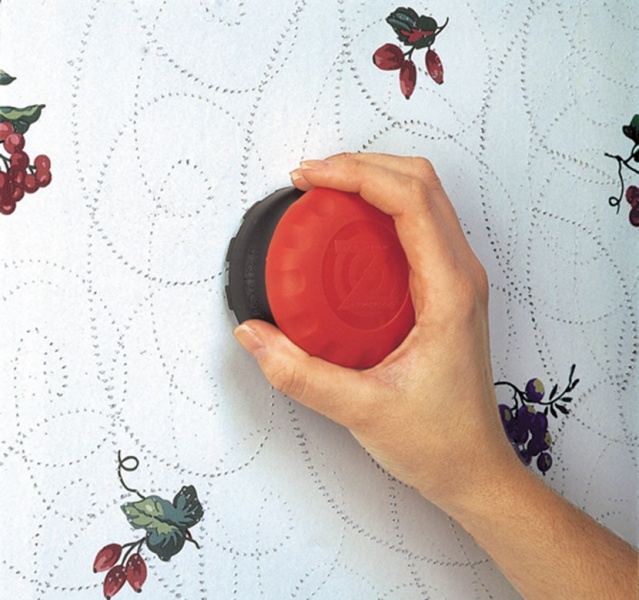
- After wetting, it is recommended to walk on the surface of the wall with a spiked roller. Small holes will help water quickly penetrate under the finish into the adhesive layer.
- You can use the so-called wallpaper tiger, with the help of which not holes, but cuts will appear on the wallpaper.
Non-woven wallpaper is removed from the walls in a different way, because they are based on synthetic fibers. It is they who create a waterproof layer on the surface. It must be destroyed, for which you can use the same wallpaper tiger, or you can get by with the usual sharp knife. You just need to make deep cuts. Next, using a foam roller, you need to moisten the wall.
Vinyl is removed from the walls in the same way as non-woven. The thing is that vinyl is a durable waterproof polymer film that is applied to a paper base. This film needs to be removed. By the way, after soaking, vinyl wallpaper should be pulled towards you, starting from the top. The tape is strong so it won't break. Paper may peel off from it, which sometimes remains on the walls in patches. They must be re-moistened and, using a spatula, removed.

The hardest part is removing the washable wallpaper. As in previous cases, it is necessary to damage the polymer outer layer with any tools. Next, the surface is wetted with water. There is no need to wait a long time, you have to try to tear them off the wall. If all else fails, then you have to use an iron. It is heated and the moistened wallpaper surface is smoothed with it. Thus, the destruction of the adhesive layer occurs.
And one more recommendation, which concerns the removal of wallpaper from a drywall surface. It should be noted that this process must be carried out very carefully, because the drywall itself is covered with a paper layer. It cannot be destroyed. Therefore, to quickly remove the wallpaper, you will need the same special liquid. But in this case, you can peel off the wallpaper, doing everything carefully.

Quick sticker method
One stick wallpaper, and even quickly, not easy. In order not to reduce the speed of the process itself, it is necessary to prepare well for it.
First, before gluing the wallpaper, the wall itself is prepared:
- It needs to be repaired: repair all defects with putty.
- Align using the same putty mortar.
- Prime the surface so that the surface has a high degree of adhesion.
- Mark out using a plumb line or level.

Secondly, you need to prepare right amount wallpaper and glue, as well as all the necessary tools:
- roller for applying glue;
- roller for smoothing wallpaper after laying on the walls;
- plastic spatula for the same needs;
- scissors or a knife for cutting material into strips;
- a sponge or rag to remove the adhesive that protrudes beyond the wall-mounted wallpaper.
Now you can proceed to the process itself, how to glue. To glue the wallpaper qualitatively, you need to cut them correctly.
Attention! The length of each wallpaper strip should be equal to the height of the wall to be finished plus 5 cm on each side. The allowance is cut off after drying. With the help of the allowance, it becomes possible to shift up or down the stacked strip, adjusting the patterns on the wallpaper.

Before gluing, on each strip with reverse side applied with a roller or brush adhesive composition. If it is necessary to glue non-woven or vinyl wallpaper, then the glue is applied to the wall. With them, the process itself is much easier. That is, take a strip, lay it on the wall, pressing the top edge along the applied markings, and press down upper part hand. After that, a rubber roller is taken into the hands, with which the material is leveled and air is squeezed out from under it. To glue wallpaper in this way is not a problem for one.
Pasting paper wallpaper
With paper wallpaper, everything is much more complicated. They must be treated with glue, then properly rolled up. It's done like this.
- The upper part of the strip folds inward by two-thirds.
- Down one third.
- The strip folded in this way must now be rolled up into a roll.

In this state, before gluing, the wallpaper should lie for about ten minutes so that the applied glue is well saturated in them. After that, the roll unfolds, but the edges remain in the same state (folded). The strip is laid on left hand, and the upper right edge is turned away and applied to the wall to the upper markup. By holding this glued edge, you can release the entire strip. Under its own weight, it will begin to straighten, and lie exactly vertically. It remains only to apply hands and a roller to straighten the material. The main thing here is that the edges of the wallpaper strip lie exactly on the markings applied in advance.
Conclusion
Many people think that fast is not always high quality. There is a lot of truth in this. But if the conversation is about peeling off and pasting the wallpaper, then this can actually be done quickly without reducing the quality of the final result. Watch the video - how to glue the wallpaper.
When it comes to, many decide in favor of wallpaper. They can be glued in almost any room, they are unpretentious, and most importantly: wallpapering is a simple and fast process. Modern design allows you to choose any color, texture, ornament or pattern. In just a few days, the room will be transformed. You don’t need special skills for this, but there is a nuance: in order to stick wallpaper with high quality, the surface of the walls must be even and durable. This article is about how to glue the wallpaper yourself.
Well-chosen wallpaper will help hide problem areas and add coziness to the room. We list the main types of wallpaper on the market.
Paper
- most a budget option. There are two types: simplex (single-layer) and duplex (paper base and decorative coating).
Simplex- This is a single-layer paper web, which is used as building material for internal works. The drawing is carried out by the method of printing (as an exclusive, the drawing is applied manually). Due to the fact that these wallpapers are made exclusively from cellulose, they are environmentally friendly and completely natural.
- Easy to glue;
- Have a low weight;
- Do not emit harmful substances;
- Their cost is the lowest among all types of wallpaper;
- Suitable for low traffic rooms.
- Afraid of moisture;
- Not durable;
- Poor abrasion resistance;
- They require a perfectly flat surface.
Paper wallpapers are specially left in a folded position after applying the glue so that the glue soaks them. Glue is applied both to the roll and to the wall.
Duplex- This is a canvas that consists of two layers of paper, where the front layer has a relief structure. The manufacturing technology consists in gluing two layers, after which the canvas is placed under a press and the pattern is pushed back.
Multi-layer wallpapers have good strength, do not deform when glued, do not react to high humidity(but it is not advisable to wash them often with a wet cloth) and “can breathe” (fungus does not form on the walls). Due to the structural layer, they can be glued to a surface with minor flaws, saving on additional wall putty.
Among the shortcomings, it can be noted that when applying glue to the material, the wallpaper must be glued immediately so that the glue does not have time to saturate the front layer. If you use inexpensive glue, then it is better to apply it to the wall.
Do not glue paper wallpaper on the walls in the kitchen and play area children's room. It will not be possible to wash off the grease, dirt and art of the child, and it is impossible to replace a separate piece of the damaged coating.
non-woven
Consist of cellulose fibers bonded with a polymer. Interlining is similar in composition to paper, but stronger and more resistant to abrasion.
There are two types of non-woven wallpaper:
- wallpaper with a decorative layer of vinyl, paper or textiles;
- fully non-woven - from one or more layers.
The second option is often used for painting. The deeper the texture, the more often it will be possible to repaint the wallpaper. For painting wallpaper suitable dispersion and acrylic paint on the water based. Smooth wallpaper can be painted with a roller a day after gluing. Embossed can be painted with a short pile roller to emphasize the pattern.
For non-woven wallpaper, a special glue is used, which is applied only to the walls, and they are glued without overlap.
Of the benefits: hide small irregularities; glued and removed from the walls easier than paper; pass air well; almost do not fade; dense types do not bubble when glued.
Of the minuses: a soft decorative layer is easy to damage; dust can accumulate on a deep texture; more expensive than paper some of them can shine through, so you should choose denser options or prepare the base color of the walls in advance (by the way, you can achieve soft tones this way).

To distinguish interlining from paper, bend the roll sheet: there should be no creases on the interlining.
Vinyl
The base is made of non-woven or paper, the decorative layer is made of several types of PVC:

Of the benefits: they last longer than paper ones; most species can be washed; well hide the unevenness of the walls.
Among the shortcomings: vinyl does not pass air well; not the best for the price cheap option.
Before sticking vinyl wallpaper regardless of their variety, treat the surface with an antibacterial impregnation to avoid mold in the future.
Glass fiber
Made by weaving from interwoven glass fibers. It is durable, breathable material, does not tear or burn. Many confuse them with glass wool and are afraid to use them when decorating walls, but this opinion is completely wrong! The composition and method of manufacture is fundamentally different, from touching them, there will be no unpleasant sensations.
The surface of the cullet can be painted with acrylic, latex or water-based paint, but before that it is necessary to smear the canvas with glue diluted with water, otherwise the paint consumption will be enormous, since the cullet strongly absorb liquid.
Glue for such wallpaper you need to buy a special one, since this material is quite heavy. It is necessary to apply glue only on the wall, with a strip slightly wider than the canvas. The strips need to be cut 10 cm longer than necessary, this will help align the structure of the pattern when joining the next piece of wallpaper.
Of the benefits: a durable and resistant to mechanical stress surface (even when washing using detergents); does not burn and does not emit toxins when heated; fastens putty walls in new buildings to avoid cracks during shrinkage of the building; service life of about 30 years; it passes air well and does not contain substances to provoke the development of mold; suitable for commercial and residential areas with any level of humidity.
Among the shortcomings: it is very difficult to remove after pasting; when painting, a lot of material is used; very high price.
The walls under the glass wallpaper must be perfectly even, as with sharp changes in the surface area, the wallpaper can crack. Use gloves and goggles when cutting the blade to avoid skin irritation.

Textile
The base can be made of paper or non-woven, and the surface is covered with fabric: linen, silk, felt or jute. These wallpapers look original, eco-friendly. Depending on the type of top layer, the following types textile wallpaper:

Naturally, glue for such wallpaper needs a special one, it is applied to the wall and strips of material are very carefully glued. Firstly, paper-based wallpapers are easily torn, and secondly, glue must not be allowed to get on the front part.
Fabric wallpapers have significant shortcomings: their surface strongly absorbs odors, which automatically excludes pasting them over the kitchen; they are sensitive to mechanical stress; strongly attract dust, it is necessary to use a washing vacuum cleaner for cleaning; their price tag is quite high.

When buying wallpaper, it is worth checking that the batch matches on the rolls: the shade in different batches may differ.
Bamboo
Such wallpapers are made from stems of certain varieties of bamboo. Cut from the trunk upper layer which is heat treated and dried. Further, the stems are split into even slats and glued to the fabric base.
There are two types of bamboo wallpaper:
- Made from the outside of the cut. As a result, the natural structure does not change, remaining uneven, with small scratches and chips. To change the shade, the surface is subjected to varying degrees of firing, which gives the product an olive, lemon, chocolate, tortoiseshell and vanilla color. Due to the natural layer of varnish, the wallpaper does not fade, is not afraid of moisture and is easy to clean.
- Made from the inside of the stems. Cheaper option as bamboo cavities are sanded and lost protective layer. But in this version, the wallpaper turns out to be even and smooth, although the tendency to fade and the need for varnishing such material puts it in second place.
glue bamboo wallpaper can be used on almost any surface, but the glue should not be water-based, liquid nails are well suited.
Of the benefits: durable; applicable for both internal and external walls (subject to varnishing); environmentally friendly; have an antibacterial effect; hide the unevenness of the walls; friction resistant; repel moisture and dust.
Of the shortcomings: the joints are clearly visible; when exposed to direct sunlight, they lose their brightness.
You need to cut bamboo with a hacksaw or grinder. as the structure is quite strong. If you need to cut along the canvas, then you can get by with a clerical knife.

Liquid
This type of coating is not exactly wallpaper, but it is customary for us to call them, while in Europe this finishing material dignify decorative plaster. Liquid wallpaper consists of small pieces of paper with the addition of dye and binders. Sold in dry form, diluted with water before application to the surface. It is applied in the same way as putty with a spatula.
- The material is applied to any surface shape (arches, bends, ledges, etc.);
- Environmentally friendly;
- They have a good level of thermal insulation and reduce the penetration of noise into the room;
- Hide almost any flaws on the walls;
- durable;
- You can draw real pictures using different colors;
- They let air through.
- Burn out;
- Not resistant to moisture and friction.
- Glue suitable for the type of wallpaper;
- rubber roller or pressure spatula;
- knife-cutter;
- roulette;
- roller and brushes;
- bath for glue;
- ladder;
- pencil;
- bubble level or plumb line.

Preparing walls for gluing

To remove an old layer of wallpaper, soak it, then it will easily move away from the walls. Use a spray bottle or perforated bottle to spray water. In particular difficult cases you can iron the wall with an iron through a wet rag. Be careful not to get wet wiring, sockets and switches! To simplify the process, stores now sell wallpaper remover.
Rinse the whitewash with water, and water-based paint remove with a spatula. Clean up any cracks and plaster that is already badly holding. At this stage, it is important to evaluate the base: is it enough to repair the bumps, or do you need to completely level the walls?
For good adhesion and bacteria removal, saturate the surface with a deep penetration primer. In this case, it is important to prime each new layer: - putty - before gluing. If there is a risk of fungus and mold in the room, treat the surface with an antiseptic. Irregularities after plaster are sanded with a grater.
Required Tools
Wallpapering
At the time of gluing, the electricity in the room must be turned off. Unscrew the housings of sockets and switches in advance to glue wallpaper under them.
Measure the height from floor to ceiling and add 5 cm. If you have a pattern that needs to be joined, leave a larger allowance. Cut the desired number of sheets. The surface of the walls above the door and window is small, the remains are suitable for pasting it.
 Start at the window and move towards the door. After you reach the door, go back to the window and glue the remaining sections.
Before wallpapering, close all doors, windows and vents: there should be no draft in the room until the walls are completely dry (that is, at least a day).


Video tutorial on gluing wallpaper on the wall: