Beautiful things for DIY decoration. Crafts for the home: DIY interior decor ideas from scrap materials
Perhaps in every home there are interesting and not so interesting things that seem to be unnecessary, but it’s a shame to throw them away. In this article, we will share with you ideas on how to create comfort in your home with your own hands, essentially from nothing. We have a few decorating secrets that will make your home shine even in the dark. And all this requires only a little of your time and a drop of creativity. Are you ready to implement the most interesting handmade ideas for your home with your own hands?
DIY thread balls for home decor
To implement the first idea you will only need balloons, threads, glue and your limitless imagination. The simplest in execution, but already loved by many, is an element of home decor! How are these charming balls of thread made with your own hands?
- First, inflate the balloon until required size, trying to make it as round as possible.
- Next, thoroughly soak the prepared threads with glue (even regular PVA-M will do) to make the product stronger and more reliable.
- Then we fasten the thread and begin to wrap the ball. We wind it carefully, leaving small gaps, not very thickly. When you see that your ball is as close as possible to desired result, cut the thread and secure its tip with glue.
- We hang the ball to dry for several hours.
- After it has completely dried, burst the ball and carefully remove it from the inside through one of the large openings.

Voila: now you can decorate your home with these adorable balloons. By the way, there are many different options using such decor - they can be hung from the ceiling, placed on a table, made into a garland or even a lamp. You can find some similar DIY home ideas in the photo below.


Make a ball of thread truly magical by decorating it with a led garland, and then your room will shine with new colors.

Interesting DIY lamp ideas for your home
You probably already guessed that original lamp You can make it with your own hands not only from a ball with threads. Dekorin picked up a few more interesting ideas creating beautiful lamps for the home especially for extraordinary housewives. Search among the following photos my:
- For lovers of autumn and yellow foliage:


- If you have discs collecting dust somewhere on your shelves, it's time to find a better use for them:

- For those who like to travel, we also have a great option. What could be more magical than falling asleep under the radiance of the entire universe?

- Even from paper you can create incredible beauty. Try it, fantasize yourself or let them like this beautiful butterflies soar under the roof of your house:


- Such homemade lamp in the kitchen will definitely captivate your guests with its originality:


- And another small but very elegant candlestick, which is very simple to make and will give your home not only light and warmth, but also an amazing smell.

Creative ideas for your home with DIY luminescent paint
With the help of such luminous paint you can create real miracles. With it you can turn the room into an absolutely new world by simply turning off the light. Just thinking about it, the most extraordinary ideas come to our minds. After all, paint can be used on any surface, be it walls, ceilings, furniture or any other interior elements. The most creative ideas for the home, which can be implemented with glowing paint with your own hands, look at the photo below.


 Also read: How to make an original sink cabinet with your own hands


Useful handmade ideas for the home - decor from jars
It would seem, how can you decorate a house using ordinary glass and tin cans? And Dekorin knows dozens different ways and is happy to share them with you!
From glass jars or even bottles you can make original flower vases. Such decorative elements add elegance to the overall atmosphere of the room. The jars can be hung or displayed, decorated or simply filled with flowers - either way it will look great. Get the most interesting handmade ideas for your home in our article
Tin cans from coffee and other products are perfect as candlesticks or lamps for outdoor and indoor use. Everything ingenious is simple - and it really is, look:


Creative ideas for your home with your own hands: handmade decor in 30 photos updated: May 3, 2017 by: Natasha Podolyaka
Manufacturing DIY things for the home- this is a great opportunity to combine an interesting, exciting creative process with the undoubted benefit of filling the interior with useful and beautiful objects. , which we will look at today, can be repeated very simply; in fact, it is the simplicity of their implementation, coupled with the effective appearance and undoubted usefulness and became the main reason for including them in this small selection.
DIY things for the home: photos
Elegant DIY things for the home, photo which you will see are performed in various techniques and relate to different areas of home decor and content. Here is our first idea - a soft floor pouf, analogues of which are quite expensive in a home decor store. But, if you think about it, all you need for this is multi-colored scraps of fabric and filling, as well as a small piece of rope.
Preparation for work will consist of forming rectangles from various pieces of fabric, the larger side of which will be equal in length to the radius of the desired pouf. You yourself can vary exactly what size you want it to be. If it is important for you that the craft is more practical, it can be used not only in the apartment, but also in the country, in the open air, then select fabric with the appropriate qualities. Next, cut the rectangle diagonally into two triangular halves, sew the next rectangle into one, and then cut off half of it. You can initially sew ready-made triangles, but this will make it a little more difficult for you. The wider the rectangular blanks are, the fewer sectors the finished pouf will have. When the circle is closed, the first half of the pouf is ready, while the second, lower half does not have to be assembled from pieces, you can use a whole circle. The rope must be laid inside a rectangle, the length equal to our circumference, and together with it, both parts must be sewn to each other. Leave about 15 centimeters unsewn, through which you can turn the workpiece inside out and fill it with filler. When the desired volume is achieved, close this technical hole with a hidden seam.

Rope or twine will also be suitable for our next craft, because it turns out that in order to make DIY useful things for the home, we need the most simple materials. In this case, we need paste, cling film and a skein of twine or rope. The shape will be a bowl of the size we need, we wrap it tightly with film so that no glue gets under the film, but also so that later this protective layer can be easily removed from the surface of the bowl. Pour the paste into the container (dilute 100 grams of starch with a glass cold water, and then pour the mixture into 750 grams of boiling water, stirring until it thickens) and put the twine there so that it is thoroughly saturated with it. After this, we put the twine on a bowl covered with film, so that we get beautiful, openwork patterns, do not do it too tightly, otherwise all the charm of the craft will be lost. When the glue is completely dry, carefully remove the workpiece from the bowl and separate it from the film. You can put fruits, sweets, seasonal and so on in the finished vase.

Open shelves are becoming more and more fashionable, but you want not only fashionable things in the house, but also unusual ones. Invented just for such lovers creative DIY items for home, bright representatives which is an invisible shelf made from a thick book. In this case, you will still have to visit a hardware store to purchase the missing parts - these are dowel screws and L-shaped fasteners. One end of this bracket is applied to the book and markings are made at the location of the future hole; you need to drill the cover and a dozen pages. After this, the bracket is placed inside and tightened through the cover with a bolt and washer with a plug for beauty, and the other end is hung on the wall. On top of the shelf you can put a few more books, put a lamp, put a phone, in general, use them as you please.

DIY from unnecessary things for the home
But the greatest satisfaction from the work done comes from home handyman if you can do something do it yourself from unnecessary things for the home. This is at the same time also the process of recycling these most unnecessary things. If your home has recently undergone renovations and small pieces of expensive items remain, quality wallpaper, then somehow I can’t bring myself to throw them away. And rightly so, because you can use them in decorating furniture, creating interior details, and so on.

You can see examples of the use of wallpaper that was unsuitable for repair in our photos. You don’t even have to cover thick vinyl or non-woven wallpaper with any protective layers, they themselves are quite strong and will serve you for a long time.

You can even accumulate these unnecessary things on purpose in order to eventually get something useful for the household. For example, when we create a wonderful floor mat from wine corks. The corks need to be carefully cut in half with a breadboard knife and glued onto a rubberized base. You can do this either in even rows or create different patterns by changing the location of the plugs.
My home is my fortress. Yes, that's what they often say. But you and I are not living in the Middle Ages, our fortress should not be an ordinary house, but a cozy nest, where everything is beautiful and comfortable. In this article we will look together at different ideas decorating rooms that you can do yourself without much expense.
Hallway
Even the simplest entrance area can be made functional and stylish. Finishing wood panels will bring a fresh note to the interior. Not only is it simply beautiful, it is also convenient. On the panel you can screw hooks for bags and jackets. You can also make a small shelf on top for useful little things.
For small apartments there is also interesting solution. Shoe rack, hooks and cabinets can be combined into one organizer.

Regular front door You can also make it a stylish element using wooden diapers.

To keep your shoes out of the way and not dirty anything, you can make an unusual stand from a wooden box and stones. So even after a walk in the rain, your hallway will remain clean.

By the way, instead of pebbles, you can use an artificial mat made of plastic grass.
An old ladder can be used as a shoe rack. Now all the shoes will be at hand.

For a couple of years now it has been fashionable to make all sorts of homemade things from wooden pallets. In the hallway you can use them as shoe stands. You can make a shelf on top for small items or just put flowers, and attach hooks for umbrellas on the sides.

There is a small life hack for pet owners. To keep dog or cat bowls out of the way, mount them on a separate shelf in a closet or under a countertop.

Surprise your guests with a non-standard approach to such an ordinary thing as coat hooks. Wooden slats, branches, screws, a little imagination and voila! The unusual hanger is ready.

Bathroom and toilet room
These premises should, first of all, be comfortable. However, one should not forget about beauty. After all, everyone is pleased when the necessary things are at hand, when there is no need to untangle the wires from the hair dryer or rush around looking for ear sticks. We offer several simple ways organization of space.
An old closet drawer or shutters from a flea market can be turned into a toiletry holder.

And old floorboards can be used in wall decor. It looks unusual, but is very simple to do: the slats are either glued to the wall or screwed with self-tapping screws. They can be painted, varnished or otherwise decorated on top.

Nowadays it is very possible to use jars to serve drinks and dishes. Why not use them in decoration? You don't have to look for those same Mason jars that the whole Internet is crazy about. Any others will do.

We are all accustomed to towels hanging on hooks and taking up quite a lot of space. Use shelves to store bath accessories. And it’s convenient, because you can put something else on the shelves, and it’s beautiful.


Now it has become very possible to use stone to decorate a bathroom. They cover the walls and decorate the bathtub. You can even make a rug out of pebbles! Just don’t forget the rubber base in this case so as not to scratch the floor.

To avoid the hassle of separating your laundry before washing, make a rack with several storage baskets at once. Baskets can be painted in the color of the laundry for which they are intended.

By the way, about washing. Tired of plain white washing machine? Paint it. All you need is permanent enamel and a stencil. The latter can be made from masking tape.

Living room
Getting a stylish shelving unit quickly and inexpensively is no problem. Use wooden boxes. They can be arranged as you need, making shelves of various sizes. There is another plus - you can put together such a cabinet with your whole family and have a lot of fun.


Using the same principle, you can make a desktop. You will need modular shelving from Ikea, a table top, slats, screws and some paint. The number of shelves and the shape of the entire table depends on your needs.
In general, the use of wood in the interior is one of this year’s highlights. Wooden pallets are used, parts from old furniture, stairs, branches, etc.


Help to make your living room more interesting hanging shelves. You can use both ropes of different diameters and belts.


A cornice is always a very expensive pleasure. And if you have a non-standard window and suitable size You just need to order, then it turns into a complete torment. The simple solution is to use tap water plastic pipes small diameter. You just need to paint them in a color that suits your interior.

Another life hack on the topic of curtains. How to decorate a window without using a cornice at all? You will need a wooden lath and a lot of hooks for clothes. Don't forget to sew the loops to the curtain.

You can zone the space in different ways: walls, screens, curtains. There is another way - jute cords. You can use any other materials like ribbons or colored fishing line.

Bedroom
Garlands and photographs will help you decorate your bedroom walls in an unusual way. But you don’t need heavy frames with glass or any special things for this. Photos can be posted on fishing line, string, or directly on the wall using double-sided tape. And single-color garlands will create an atmosphere of comfort and romance.


Shelves unusual shape will add freshness to the interior.


Great idea for girls to organize their decorations. You will need branches, cords and decorative nails. The latter need to be stuffed onto branches at the required distance and hung on the wall with laces.

The new is the well-forgotten old. The same goes for decor. No need to buy new chest of drawers or a closet when you have an old one. You can simply paint it. And then your favorite thing will serve you for many more years.


To save space, there is one very simple “trick” - a shelving wall. This will help get rid of most of the closets in the room.

Add some magic to your bedroom with cotton clouds and garlands.

An old ladder can serve not only as a clothes hanger, but also as a library shelf. This solution seems strange, but just try it – it’s really convenient.

Most important element bedrooms - bed. A large double bed is a dream. However, such a thing is often expensive. Don't despair, because making your own bed frame is not at all difficult. By using wooden slats different thicknesses, self-tapping screws, saws and stains, you can make the bed frame exactly the way you want.

Kitchen
The kitchen is the most visited place in the house. Making it functional and comfortable is quite easy, and now we will look at several examples of rational organization of space that will not only help to restore order, but also make the room more comfortable.
To keep spatulas, spoons, forks and knives out of the way on the countertop, use jars. If you paint them, it will be great.

On small kitchens you need to make the most efficient use of space. Hidden shelves and built-in wardrobes are your best friends in this case.
Even in the cabinets themselves, you can organize the space so that you can fit more. Internal shelves can be mounted not only on the walls, but also on the doors. It seems like this simple idea, but how useful.

Life hack: to prevent lids from pots and pans from taking up much space, use regular plastic towel hooks.


There is always one problem with deep boxes - it is difficult to get to what is in the depths. The solution is simple - round rotating shelves. All products are visible and easy to get.

We are all accustomed to the fact that kitchen drawer spoons, forks, etc. are stored vertically. What if the box is too small for, for example, a rolling pin? Diagonal placement of sectors will allow you to fit everything.

So that all the spices are visible and not lost kitchen countertop make the stand with a ladder. On the top tier you can place small pots with herbs, like parsley, dill, cilantro or basil. Now everything is at hand.

Corner sofas and kitchen islands You can also assemble it yourself. Moreover, you can think about storage space in them kitchen utensils. Not only will no one have such furniture, but it will fully meet all your needs.


One of the very convenient moves in the kitchen is the use of magnetic tape. You can store knives on it, as well as spices in jars with metal lids. Great idea to save space on your kitchen counter.

And your favorite mugs can be hung on regular hooks. Both stylish and comfortable.

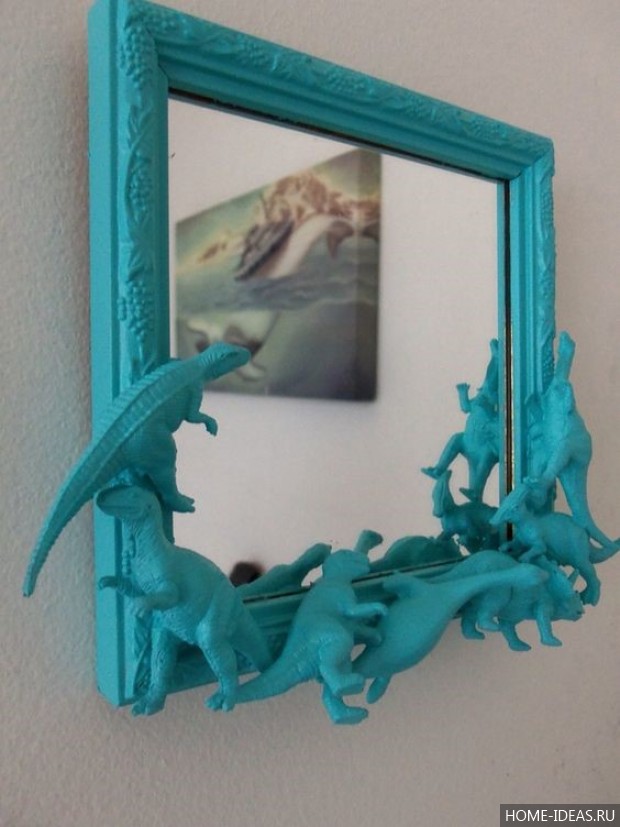
Who said that when we grow up, we part with our toys? There's no need to do that. You can use small figurines to decorate your interior. They can find new life as magnets, coasters, handles, or anything else you come up with.


It would seem that you can do with such an ordinary thing as a refrigerator. We all like to put notes on it with reminders. What if you write on the refrigerator itself, and with crayons? You just need to paint it all with special paint for chalk boards and enjoy. By the way, this technique works on any surface.

Yard and garden
When decorating your home, you shouldn’t forget about what’s outside. Let's start with the entrance area. Using concrete blocks and a couple of wooden slats you can make a cute and comfortable table, where flowers, a watering can, a flashlight or anything else will live.

By the way, you can make various benches from concrete blocks, decorate flower beds, build a barbecue, and even make flower pots. It all depends on your imagination.


You can also make stylish ottomans and armchairs with your own hands. You need old tires, liquid nails and thick rope. The finished structure can be painted in any color. These ottomans are suitable for both indoors and outdoors, because they don’t mind rain.

Boxes or pallets made of wood can serve as the basis for a garden cabinet. Here you can store various flower accessories, pots, watering cans and other tools. What if you leave the top flat? work surface, then you can make something or replant flowers.

What could be unusual in a flower pot? It would seem - nothing. However, here you can surprise everyone. Plant succulents in a birdcage. When they grow, it will be very beautiful. And instead of the usual hanging pot you can use an old chandelier.

An ordinary children's inflatable pool can be used as a sofa. Just put a blanket or blanket inside and cover the sides with pillows.

It’s so beautiful to use candles in the garden, but they are constantly blown out by the wind. To prevent this from happening, you can make candlesticks from empty tin cans or ordinary glass ones. You can decorate everything with stones or ribbons if desired.


These, of course, are not all ideas for home and garden, only a small part of what you can do with your own hands. You just need to not be afraid to experiment and fill your home with cute and beautiful things.
Create a beautiful and cozy interior in your home you can use handmade crafts. Making such original things is not so difficult - you don’t need professional skills for this. The things we make with our own hands are unique, they give the interior of the home individuality and add variety to the environment.
From crafts self made the special warmth of the hearth emanates. Thanks to unusual creative gizmos, you will have the opportunity to change the interior at will or in accordance with the seasons (for example, create New Year's decor). DIY home decor is varied and purposeful. Homemade beautiful things and useful crafts for the home can be used as original furnishings, decorative elements or as devices intended for storing various household items.
In order to make things with your own hands, you don’t have to buy expensive materials, you can also use improvised means.
Creation unusual decor possible without large material costs. Most of you have various unnecessary little things in your house, for example, fabrics, colorful paper, buttons - all this can be used as material for crafts.
There is similar “junk” in almost every house, if you dismantle the pantry or rummage around in the attic, you will find something. They are also useful for making beautiful new items and homemade little things. natural materials, glue and threads. But handmade decor ideas at home are also needed - of course.
Many people believe that only people with experience can make crafts and create presentable interior items on their own - this is a misconception. Show your imagination, combine different textured materials, don’t be afraid to experiment, and you will create not only a beautiful, but also original decor for home.

Even if you have to tinker with the first thing, each subsequent decorative craft It will come out better and better, and you will spend less time.
DIY craft ideas for the home
So, what can you do yourself for your home? Let's look at a few ideas for inspiration. Among the proposed options, you will definitely find something interesting for yourself and try to make the thing you like with your own hands.
Housekeeper
One of the useful things for the home that also serves a decorative function, which you can make with your own hands, is a key holder.

The peculiarity of this key holder is that its design imitates brickwork. The basis for the key holder is thick cardboard (you can use part of a box). You will also need a tight toilet paper or thick napkins. Dense material is needed so that it does not spread when lubricated with glue. Stock up acrylic paints, varnish and glue (ordinary PVA will do).
Make the back wall of the key holder from rectangular cardboard or a sheet of plywood. Hooks will be attached to the base. Cut out small bricks from cardboard rectangular shape, the size should be the same and glue them to the base, leaving a small distance between the parts. Not the entire surface of the cardboard is covered with bricks.
In the central part you need to stick a sign decorated with an inscription, and in the upper part you need to place a beautiful picture.
After this, coat the bricks well with glue, and put a napkin (previously crumpled) on top and a little more glue for impregnation. Using a stick, press tissue paper or paper into the gaps between the miniature bricks to create corners. Give the craft time to dry.

Paint the dry panel with paint (to imitate natural brick, you need to choose a red-brown shade). Use bronze paint to paint the seams.
After the paint has dried, paint the bricks with the same tone using a dry brush (dip the brush into bronze-colored paint, then wipe it on paper until it is almost dry, and only then brush the brickwork).
Note! When painting bricks, you need to move the brush without changing direction.
To give the key holder a smooth finish, coat it with a clear matte varnish.
The work is completed by attaching the loops, after which it can be hung on the wall or given as a gift to someone. The photo below shows the finished key holder:

Jewelry hanger
All representatives of the fair sex love jewelry; Almost every woman has jewelry that needs to be stored somewhere. An original storage for jewelry will be a hanger made like a painting.
In order to make a hanger for storing jewelry, you will need:
- baguette frame;
- plywood;
- stain (paint can be used as a replacement);
- hooks and drawer handles;
- nails;
- screwdriver and drills;
- cutting tool.
Cut the plywood according to the dimensions of the frame and coat it with stain, then dry it and apply it to the frame. Mark the places where the hooks will be attached and screw them. All that remains is to hang the decorations on the hanger.
Now you have a place to store women's treasures - jewelry.

Plastic canvas box for storing small items
A simple but presentable box designed for storing various small items can be made from plastic canvas.
Canvas is a material for embroidery. You will need a canvas made of plastic; you can buy it in stores that sell everything for needlework.
Note! Plastic canvas is usually made in the form of sheets, A4 size. The perforations in the plastic canvas differ in size. Canvases are produced with different numbers of perforations; the more there are, the smaller they are.
In addition to the canvas, you need to stock up on the following materials:
- dense threads;
- large needle;
- fabric or beads;
- scissors.
Embroidery on plastic canvas is almost no different from regular embroidery. Embroidery techniques can be different, the most popular are cross stitch and satin stitch.
The plastic canvas is flexible, but at the same time it is very durable.
Decide what the dimensions of your box will be. Divide the material into parts intended for the sides and the bottom. There should be five parts in total. Make elements for the lid. Make a workpiece whose size is 0.5 cm larger in width and length from the bottom. The sides of the lid should be slightly narrower. You will need five more parts. Then sew the parts with thick threads (you can use braid and even ribbons).

You can embroider any pattern on the blanks. Drape the parts that are not embroidered with fabric or embroider with beads.
Having completed all 10 blanks, begin assembly. The first step is to sew the side parts to the bottom. Then sew with outside all the side elements of the box and trim the top around the edges. The last step is to assemble the cover in the same way.
We assemble the lid of the box in the same way.
A beautiful box made of plastic canvas is ready.
Woven rugs using tapestry technique
One of the options to add coziness to the interior is tapestry rugs. To weave such things, you do not need special tools. A rug using the tapestry technique can be made from scrap materials: thick threads that are used for knitting (they can be replaced with ropes made from old clothes) and cords.
A tapestry is a lint-free carpet made manually. The base of tapestry rugs is decorated with ornaments created by interweaving threads. We will create a plot composition in the form of a circle with drawn lines; a thread will run along them, serving as the basis.
All work is done using weft threads. The complex name hides ordinary ropes and braid, from which weaving and decorative patterns are created.
- choose a strong thread to create the base;
- pulling the weft thread should be done by hand;
- To make the tapestry more dense, you can press the threads to the center; for this, use a simple fork.

Stage one. We draw cardboard measuring 500 x 500 mm. We stitch the cardboard with the thread chosen for the base. To do this, cut the markings drawn on the cardboard and thread a rope through the lines so that it runs through the central part.
Stage two. Let's start weaving the tapestry. You need to carefully fix the starting thread. Weaving using the tapestry technique involves pulling the underlying cord by alternating one thread at the top and the second at the bottom.
Stage three. Having weaved the last turn of the thread around the cardboard circle, you need to turn the resulting rug over onto reverse side and cut off the base cords. When pruning, leave about 5cm at the ends. Pull the ends of the laces out of the notches made on the cardboard (there is no need to remove the picture while pulling it out) and tie them into pairs. Attach pompoms to the resulting knots.
Complete the composition by sewing a thick rope from the wrong side in a circle - this will hide the knots and ends of the threads.
Advice. By using different textures and shades of threads, you can make different rugs and then combine them into one. You will get a large rug that can be hung on the wall or laid on the floor.
A tapestry rug placed on the floor will make it warmer and also looks beautiful. Weaving a tapestry rug with your own hands is not difficult: try it and see for yourself.
Ribbon curtain
You can make an unusual curtain from ribbons. Tape curtains are suitable for both windows and doors. It will take a little time to make a curtain from ribbons, even sewing machine not needed. A fluttering ribbon curtain repels insects well; Previously, such curtains were made from newspapers cut into strips.
To make a curtain from ribbons, you need the following materials:
- ribbons or fabric strips (with edges that do not fray);
- cornice;
- clips or buttons.
The ribbons need to be thrown over the cornice and secured with clamps. Large beads can be strung onto fabric strips for decoration.
The ribbon curtain performs not only a practical, but also a decorative function. The advantage of curtains made from ribbons is their lightness. This is an excellent option for a summer house; a ribbon curtain can also be hung in an apartment.

Flower pots made from paper bags
Many people have houses paper bags, instead of throwing them away, make a flower pot out of them.
Materials for making flower pots:
- paper bags;
- wooden skewer;
- scissors;
- rope;
- glue;
- plastic container.
Take paper bags and mark them: eight strips measuring 70x300 mm, then cut the paper along the dotted lines.
Place a wooden skewer in the corner of one of the strips and wrap it around it paper base diagonally. You must make a paper tube from each strip. Tape the corners of the paper tubes to prevent them from unraveling. The easiest way to do this is with a glue gun.

Take a plastic container, apply glue to it and wrap it with paper (from the same bags) so that the plastic is not visible. Glue paper tubes to the bottom of the container. Cut paper strips measuring 70x450 mm (you will need large bags) and make tubes.
Wrap the tubes so that they are pressed tightly against the walls of the container. Attach a long tube of paper with glue to the bottom of the container and wrap it around it, you need to braid the main tubes. Wrap all the main tubes, and then change the direction of weaving to braid the missing tubes - this way you need to wrap the entire container.

Make two holes in the sides of the pot (top).
Stretch a string through the holes made; tie a knot at each end of the twine to secure it well. Another woven tube will help hide the ends of the twine. Wrap the tubes protruding above the pot inside the container and secure with glue.
The unusual flower pot is ready.

Handmade items for the home can be used as decorative elements in your home or given to friends.
Most things made by hand are not only beautiful and original, but also useful and necessary in the household. Feel free to start working on homemade things and decorate your home with them.
Video For five more ideas for handmade crafts with your own hands to decorate the interior of rooms, see the video below:
Perhaps, at least once, every woman thought that it was time to update the hallway, hang a beautiful mirror in the bedroom or new shelves in the kitchen. We all sometimes want to “refresh” a boring interior, bring something new, interesting and stylish into it. However, here the issue of price comes to the fore. Not everyone is ready to shell out substantial sums for exclusive items. How to update the interior with minimal costs? It's actually very simple - you just need to apply a little manual labor, imagination and enthusiasm. And we will help you with this! In this article you are guaranteed to find something that will interest you and give you inspiration. And with a little imagination and adapting the ideas described below to suit your apartment, you will get truly designer things!
15 interesting and simple interior ideas that you can do yourself.
1. Wood hanger
Do you have long and strong cut branches at your summer cottage? Don't rush to throw them away! By treating them against insects and beautifully painting them, you can turn them into a very fashionable environmental element of the decor of a hallway or room.
2. Stylish geometric patterns on the walls
Using masking tape and interior paint or any other finishing material you can turn boring walls into a riot of shapes and colors!
3. Picture blocks
Nothing adds zest to an interior like paintings. They always attract the eye. Why not make them yourself? And it is not at all necessary to be able to draw for this. You can use templates or make an applique. And for a family with children, a very cute option is to hang handprints in a frame.
4. Bright vases made from glass bottles
Many people take out vases exclusively for fresh flowers. Meanwhile, they can serve as stunning room decor. Moreover, you can put fragrant dried flowers in them or fill them with cute trinkets, sparkles or colored sand.
5. New life old guitar
Surely your husbands were fond of playing the acoustic guitar in their youth. And if this hobby has sunk into oblivion, and the guitar is still lying somewhere in the garage. It's time to get it! After all, you can make a very atmospheric shelf out of it, cut it out or create a picture using a burning device. Everything is up to your imagination!
6. Glass jar organizers
Half-liter jars, which every woman has in abundance at home, with a slight movement of the hand turn into very convenient organizers. They can be painted inside or decorated in an interesting way - and they will undoubtedly delight you with their appearance and functionality.
7. Bench of two chairs
The ideal solution for summer cottage plot, and to the apartment. Two old chairs plus a couple of boards and upholstery - and here it is, new item furniture! And this is also a great reason to work together with your husband.
8. Old suitcase- in new decor
An old suitcase is another thing that everyone has. So, instead of letting it gather dust and take up space under your bed, take it out and turn it into a beautiful vintage shelf, a low chair for a loggia, for example, or a tall one if you attach legs to it.
9. Carved lamps
Paint the tall ones tin cans, make a pattern of holes - and they will turn into a romantic night light in which you can put a scented candle.
Here you will most likely need male hand. Because it will be necessary to measure, saw, cut, and drill. But at the same time, the work still remains very simple and is unlikely to take more than a couple of days, taking into account long rest breaks.
(c) abeautifulmess
11. Mirror-sun
You can make a real sun from an ordinary round mirror!
For this you will need:
- 48 wooden spiers;
- 24 round mini-mirrors with a diameter of 15 mm and 24 with a diameter of 10 mm;
- 1 round mirror with a diameter of 20 cm;
- double-sided tape for the mirror;
- white paint;
- sheet thick cardboard from under a box or thin plywood;
- glue gun and 2 glue sticks;
- jigsaw;
- cutter;
- protractor;
- scissors, ruler, pencil, brush.
The photo below shows a detailed sequence of actions.
(c) beatrice4273
12. Lots of small shelves
You can often find wooden hollow cubes in craft stores. different sizes. You can make an excellent regiment family out of them for all sorts of different little things. Sometimes similar cubes can be found in hardware stores. They are perfectly connected to each other using wood glue. And how much space there is for interesting coloring!
