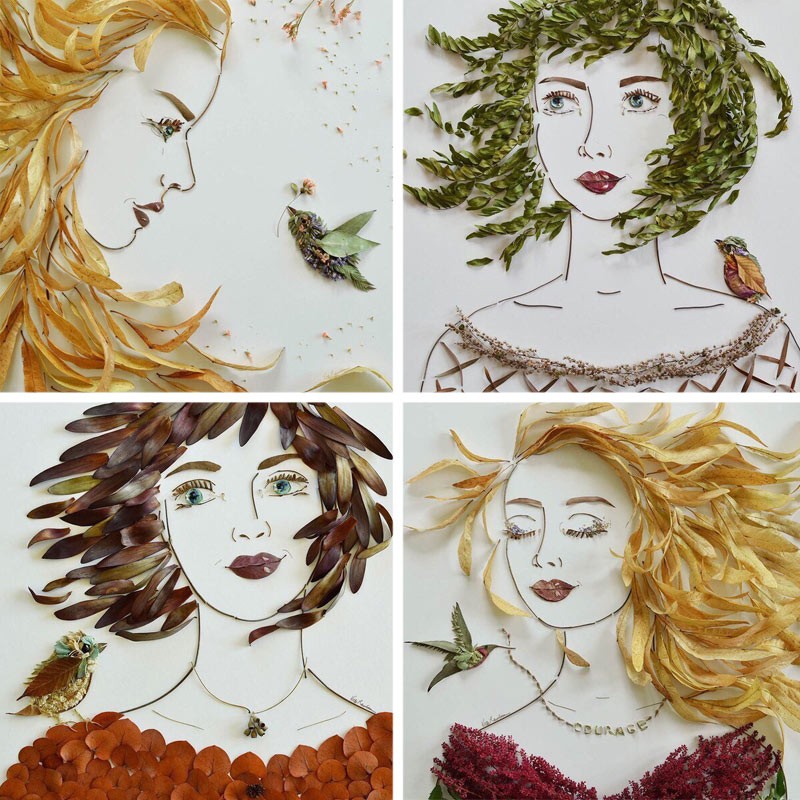
We collect natural materials for crafts. Natural material and its types
Any creative process always has to start somewhere. Working with natural material begins with the fact that your leisure plans include activities such as hiking in the forest, in the park and on the river. You simply owe the whole family to go on country walks. Otherwise, your baby's knowledge will be meager, even if you fill the shelves of his room with illustrated books. Walking in the wilderness, be sure to look at everything that surrounds you. And wherever you are, try not to return home empty-handed. It is possible and necessary to collect natural material all year round.
Crafts from natural material
Crafts made from natural material are striking in their diversity. To make them, you will need all sorts of “flying” tree seeds, dried leaves, acorns and chestnuts, rowan berries, intricate sticks and pebbles. Be sure to stock up on moss, pieces of bark, cones and river sand. Ate a watermelon or melon - dry the seeds. What is not the material for creativity! And so that these riches are not stale, we immediately get to work. We will show you several directions in the manufacture of crafts from natural materials.
Bottle with colorful sand
For its production at home, you will need a dry bottle with a wide neck and sand, as well as a funnel made of a thick sheet of paper. To color the sand, use ground crayons or food coloring. The sand needs to be divided into as many parts as you have dyes. In each container, thoroughly mix the sand with the dye. Pour it into the bottle through the funnel. Try to bring the layers of sand to a thickness of at least one centimeter. To get not only horizontal layers, but also beautiful vertical transitions, the bottle must be held at an angle. To do this, you can put something stable enough under its bottom. The sand bottle must not be shaken. The container filled to the top can be "sealed" different ways. For example, cover the neck with fresh maple leaf, and tie a satin ribbon on top. To get started, practice just making multi-colored layers. Next time you can add something interesting to the sand layers. Place beautiful pebbles, leaves, flowers or other decorations close to the walls of the bottle. If only they passed through her neck.
original fir cone
You can make a craft from natural material in the form of a single cone or make a whole garland to decorate a room for the New Year holidays. To do this, you will need aluminum food foil and multi-colored foil from candy wrappers. Teach your child how to roll pieces of foil into small balls. When there are a lot of such balls, they should decorate the cones. To do this, you need to carefully insert each ball between the scales of the cone. To hang the cone, take a small rubber band, thread a ribbon through it for a bow. Attach the elastic band itself to the top of the cone by its scales, and then tie a bow.
Crafts for children from natural material
Children's crafts made from natural materials enrich, inspire and simply cheer up. They can decorate the children's room. You can also give them to family and friends.
All kinds of insects
They do not have to repeat the living originals. To connect all parts of the "insect" you need multi-colored plasticine. First, lay out the "bug" from constituent parts without connecting them. This will help you and your child achieve proportionality and symmetry. The "body" can serve as a chestnut, an acorn, half a walnut shell. Take this base in a plasticine ring. A “head” is attached to it - an acorn cap, a rowan berry or a small piece of plasticine of various shapes. Thin sticks or pine needles become “paws”. The ends of the "legs" should end with small plasticine balls. "Wings" are obtained from all sorts of combinations of seeds of ash, maple, elm, pine. They can be pre-painted with paints and varnished. Small dried leaves of willow, poplar or maple are also suitable for this role.
green muzzle
You will need a plastic bottle, cat grass seeds, a small amount of soil, acrylic paints, chestnuts, acorns and plasticine. cut off lower part bottles. fill it up land mixture two thirds of the volume. Pour the grass seeds in a fairly dense layer. Sprinkle them with a small layer of soil on top. Water well. Now it remains only to draw a cheerful muzzle with paints, and attach acorns or chestnuts with plasticine over the rest of the surface of the bottle. Let your little one remember to water his craft regularly. When green sprouts begin to appear, this will delight the child. And he will probably want to make another such funny face.
So that children's crafts made from natural materials are not forgotten, you can make an archive of works, a photo book and even a photo exhibition. The scale of these events depends only on you. Children get a special delight from the opportunity to see the result of their work - a finished craft or toy. Give a special place to the composition of crafts made from natural materials for everyone to see. Craving for creativity early age needs encouragement!
Good afternoon. Today I can finally sum up a large collection of ideas for crafts made from natural materials. We already have a large-format article with crafts from autumn leaves for children and adults. There is a detailed article in the autumn theme. In this article I will publish the most interesting and non-standard tricks and techniques. I decided to do wide overview page, which will prove and show that natural material for creativity is not only acorns and chestnuts. You will see with your own eyes and fall in love with the new fresh ideas work with natural materials. Crafts made with your own hands, from branches, from leaves, from dried flowers, from everything under your feet. Nature is rich in material, and man is rich in beautiful ideas. So, let's see what crafts can be made from natural material this season.
Idea Pack #1
SCALES from cones.
The cones are made up of scales. If you collect open pine cones, then it is convenient to pull out of them with pincers, pliers, or bite SCALES with wire cutters. And then use this bumpy natural material as a mosaic coating on a variety of autumn crafts.
Note. In order for the cones to open well, spread out with scales, they can be warmed up in the oven.
Here we see mushrooms. Their legs are carved from a thick wooden chock. The hats are molded of plasticine and the top of the hats is covered with scales. It turns out cute mushrooms-crafts with their own hands. Suitable Job for school work.

But the spruce cones have scales flatter and smoother. They look like the smoothed feathers of birds. Therefore, the idea of \u200b\u200bcrafts comes to mind on a bird theme. We sculpt the bird's body from plasticine, we coat with PVA glue, put a layer of torn paper napkins on the glue, again with glue, again with napkins - it turns out papier mache shell. We dry this shell until it is completely lignified. And on this hard dry surface with hot glue (layer by layer, row by row) we lay the spruce “tile” of feather-scales.

And also the scales of a spruce cone are similar to the scaly armor of ancient lizards. So here's another idea for you. After all, this is a great challenge to your artistic potential. It's not just a bird here - there's a whole beast that looks like it's alive. Great crafts for boys made of natural material.
Here we act exactly the same as with the bird- we sculpt the base from plasticine, pack it in several layers of papier mache (alternating pva glue and paper napkins). And then, after this mass has dried into a hard crust, you can glue the dinosaur figure with spruce scales.


After plucking the cone, a cone BOTTOM remains. It looks like a flower with petals. From such cone flowers, you can make a new autumn craft with your own hands - for example, a WREATH. We glue the base for the foam wreath with a chopped cone - just with hot glue from a gun.

You can cover such cones-flowers with bright gouache. In order for the gouache color to become juicier and shine, it is necessary to sprinkle this product on top after drying with gouache, I recommend spraying it with simple hairspray. The color will stick and won't stain your hands.

You can do it yourself beautiful flowers, picking up the most accurate and even scales of different sizes, and stacking them radially from the center. The middle of the flower can be decorated with beads or rhinestones. From such natural material, you can even make brooches in the autumn style with your own hands - and wear them with a coat, or pin them to a shawl.

Flowers from cones can not only be collected into wreath crafts, but simply laid out on a panel. Put on glue on a piece of plywood. You will get an excellent craft made from natural material for a competition in a school or kindergarten.

From whole buds You can also make great crafts. We add not only natural material to the cones, but also other materials (colored felt, cardboard, ropes, plastic, etc.).


Idea Pack #2
Crafts from natural material
WALNUTS.
From nut shells in childhood, we all made boats, or hats on plasticine mushrooms. But you can go further in your work from walnuts. Children will be happy to create mice or birds, and adult skillful hands and a warm spiritual heart can create a whole world out of a nutshell ... Now you will see it.


In this article I want to introduce you to a very good person. Her name is Marina. Master with an attentive soul.
This is how the account page of this master on the Fair of Masters website looks like.

I really like the work of master Marina from the site Fair of Masters. With her own hands she created amazing, in its sincerity and warmth, the world of good old women. The walnuts in the place where the wings are connected are surprisingly similar to a wrinkled smiling old woman. It remains to add eyes, a nose-bone and mentally wrap everything with a cotton handkerchief. And now the cunning old woman looks at you cheerfully.

We make a body from a bump, weave hands from rough paper packaging twine. From felt we dump warm felt boots. Each old woman can be made with her own character. Cheered up with a big smile. Or silent thoughtful, on my mind.

Old women can be both summer and winter.

You can create whole worlds from natural material in which kind old women live and work. They themselves will keep their world clean.

And after work, they will gather for a cup of herbal tea to tell stories, make fun of each other and sing songs of their youth.

Master Marina sells her crafts. You can order her work on the master's personal page - https://www.livemaster.ru/woods. Marina can make you a custom-made craft for your family and friends.
After all, how nice it is to receive as a gift the World of good old women, which will always smell like a village CHILDHOOD for you - grandmother's pancakes, a stack of firewood by the barn, chickens running around the yard, a heated tree of an old bench near the fence.
Master Marina, I want to give an idea. In one I talked about another Czech Master who created the world of ACORN PEOPLE - Dubanchikov and wrote a book with stories about them, which he illustrated with emotional scenes made from natural material. The book is published in the Czech Republic, and only in Czech. I think that many children will like our Russian book with good stories about Russian village grandmothers, illustrated by the works of Marina.
After all, this is a real miracle, to make a new world out of natural material with your own hands - kind, fabulous, REAL. More and more new houses, cozy benches, swings, carts, wagons will appear in it.


Idea Pack #3
Crafts from natural material
FAIRY HOUSES.
If you like fairy tales with fairies and magicians, then you will like the world of fairies made of natural material. You can create your own cozy houses for the fairies, break whole for them housing complexes, with ponds, parks, gardens, swings.

You can bring a man-made miracle to the school competition of crafts made from natural materials. The house where the gnome lives. Parts can be attached to plasticine, staples (from a stapler), to glue from a hot gun.


Pieces of moss, acorn caps, scales torn from a cone with pliers, lichens and dry hard hanging mushrooms taken from trees in the forest. And even pieces of plants torn from indoor flower pots- any natural material will be used to build such a complex but interesting craft. The house will grow and be ennobled by natural design before your eyes.


You can base thick wooden stick found in the forest. Saw off a comfortable piece from it. Buy at a hardware store tinted stain for wood- and cover the tree in a noble dark color. Cut out of thick cardboard windows, cover them with the same stain. From ice cream sticks put together a real door, arrange a porch. Sculpt a conical roof from plasticine. Break a large pine cone with tongs or pliers on scales and lay out tiles from them on the roof of a natural house.
Some elements can be molded salt dough(a glass of fine salt, a glass of flour + water (add water a spoon at a time, and grind with salted flour with your hands until a single lump is formed, similar to plasticine). Roll out the dough - cut into bricks with a knife. Dry - and get a lot of building material for the porch , paths, fences, etc. The dough can also be painted with gouache or stain.


But the house is VERY SIMPLE. Now I’ll tell you how to make it with your own hands from the things that surround us.
- Take strong cardboard package from milk or juice. Cut windows in it - this will be the future facade of the house.
- Buy a small bag gypsum plaster(or putty) diluted with water and coat the facade of the house with this mixture.
- Dry and cover with whitewash or white gouache (toothpaste on the edge).
Make a roof out of cardboard, also apply glue to it and lay tiles from pieces of bark or cones. or chips.

Idea Pack #4
Applications
And of course, the most common crafts made from natural material are applications using dry herbarium - herbs, leaves, flowers. We made everything from leaves of chicks or fish in an aquarium. In a special article, I give many options.
And in this article I want to show a beautiful mosaic technique laying out dry natural material in the form of a SILHOUETTE PICTURE.

You can find a lot of ready-made silhouette templates on the Internet. If in the search bar you type the phrase "silhouette of a hare picture" or another animal.

The most important thing in such a craft is to achieve recognition - the clarity of the silhouette. Therefore, you need to choose a silhouette without small details - protrusions. And if you chose with detailed protrusions, try to make the small relief detail be made with ONE SOLID petal (like the ears of a bunny or its protrusions of the paws in the photo above).
If, when laying out the mosaic, the edge of the plant protrudes beyond the border of the silhouette, it must be carefully cut with scissors (as is done in the photo above with a cat - it has triangles of ears cut out).
Nature Idea Pack #5
Crafts from branches.
From branches different forms and bends, you can lay out beautiful crafts with your own hands. Branches can just decompose on a white paper background, repeating the outlines of a bird or animal. It is possible in advance on paper draw a silhouette of a bird weak pencil lines. And then pick up branches that would lie on this drawn silhouette of a bird, repeating the curves of the picture.
Crafts from natural material can be fix with glue with a hot glue gun. Or make a photo-craft. That is, lay out the branches and take a picture of the craft, thereby perpetuating your product from natural material in the form of a photograph.

You can fix the craft at the key nodes of the plexus of branches and then in these nodes attach it to the base ( vertical wall or a horizontal shelf-stand), as is done in the photo below.

In addition to branches, you can use wood chips, pieces of bark, chips and saw cuts from logs, chocks, thick branches in your crafts. This is how crafts-owls from the photo below are implemented. Simply and interestingly made with your own hands - you can safely carry it to the exhibition autumn crafts to school or kindergarten.

One and the same idea can be embodied in different angles and different materials. Here, for example, in the photo of horse crafts made from natural material, both branches and bark, and snags are used.

You can lay out entire mosaics completely filling the silhouette image with natural material. The direction of the branches should repeat the direction of the pattern details. Spread the branches in the same directions as the fur pile of the animal, or repeat the muscular relief of the animal with branches.

Maybe this species handicrafts made from natural material will captivate you so much that turn into a solid hobby with the prospects of monetization in profitable business. Why not make beautiful wooden sculptures for a summer residence or estate for sale.

And if you want to use branches to create crafts from natural material in class at school, then here are simple ideas for you on how this can be implemented in the lessons of labor for boys. Everyone is taught cut with jigsaws plywood figurines. In addition to animal figurines, you can put together frames from slats and make beautiful landscape paintings of an autumn forest with mossy branches overgrown with lichen.

Similar ideas can be implemented at labor lessons for girls - without plywood and a jigsaw - by making a frame of cardboard twisted into a square tube (fold 4 pieces into a frame-frame, insert branches into holes), and cut animal silhouettes from dense packaging corrugated cardboard from old boxes and paint in gouache, if desired.

Package of nature crafts No. 6
Maple and ash seeds.
Dry lobed tree seeds are very interesting to beat in the most various crafts with your own hands.
You can make a mosaic craft out of this natural material in the form of a bird (because maple seeds look like feathers). You can lay out a pattern in the form of a butterfly on the glass, and thanks to the transparency of the background, it will seem that it is hovering in the air, as is done in the photo below. Maple seeds paint well with watercolor, so your butterfly craft can be in all colors of the rainbow.

At school or kindergarten, from the same natural material, you can make very simple children's crafts with a base on thick cardboard. Maple seeds can be a hairstyle on a painted human head, they can become a fluffy squirrel tail, feathers on the wings of an owl, or needles on a cardboard hedgehog (as in the photo below).

And maple seeds look like dragonfly wings. Therefore, you can make simple children's crafts in the form beetle insects. For example, string beads on a wire (this will be the body) and glue seeds to the body on glue or plasticine. Wings can be painted with nail polish and sprinkled with glitter glitter. The bulging eyes of a dragonfly can be cast from frozen drops of the same nail polish. Get a beautiful fast and simple craft from natural material for children.

And the same maple natural material can become the basis for fun GRAPHIC CRAFTS-DRAWING with an ordinary black marker. We paint on the missing details for the snub noses and turn the seeds laid out on a sheet of paper into interesting graphics. These are already crafts for training your imagination - great idea for a circle on the topic "Learning to think creatively."

More about it GRAPHIC reception I told about the use of natural material in the article
Idea Pack #7
Crafts from natural material
STONES.
A simple rubble stone left over from summer cottage construction, or smooth river, sea stones can become the material for your natural DIY crafts. The stone itself can tell by its shape who it looks like. And you just have to take felt-tip pens or gouache to bring this image to life.
If you feel like an artist in yourself - you can make complex multi-line drawings - as is the case with the stone owl craft. Or smooth thick pebbles can look like clumsy chubby panda bears - and such crafts made from natural material will be feasible for children. First, we cover all the stones with white, dry them, and then with a black marker we draw on it the black details of the teddy bear.


Ordinary felt-tip pens draw very well on stones. After completing the general painting work, the details of the picture need to give contours(clear boundaries) black marker.

You can draw the silhouette of a snail or a sheep on the stone yourself. And to give the children the task to simply color the finished silhouettes, supplement them with a pattern of stripes and dots or curls.

From dry grass and wire or other natural material, you can make a nest. And in this craft, put the chicks made of stones with your own hands. Older children can decorate a complex picture with a chick and an open beak. For younger children, the task is easier in the form of chickens in shells.

On a piece of plywood or a round saw cut from a log, you can lay out a whole picture of stones and other natural materials decorated with paints. This craft is suitable for work on the autumn competition in school or kindergarten.

Older girls will like exquisite pictures from the life of a fashionable girl - a felt-tip pen, paints, stones and rhinestones.

You can use the mosaic technique to lay out a variety of characters from stones. Attach the stones to the glue with a hot glue gun. The stones in the mosaic can be painted with gouache, or have their own natural color.

These can be landscape paintings made of natural material (sea pebbles, glass turned by water, shells, etc.).

Idea Pack #8
Crafts from natural material
PORTRAITS.
Highly interesting topic for crafts made from natural materials these are portraits. The face in the picture always attracts the eye. You want to look at such a craft for a long time, it has a soul, human eyes, into which you want to look, read their thoughts. A portrait is a craft that looks at you.

You can plant all the details of a portrait from natural material on glue. Or just fold the portrait like a mosaic on a sheet of cardboard, take a picture and brush off all the details of the masterpiece with your hand from the table. And on the wall in your room there will be a photograph of a disappeared, but ever-living portrait.
As an ornamental natural material, you can use stones, dry leaves, cones, seeds, bark. For drawing thin lines of a branch different trees, straws, blades of grass.


If you are working with children, then you can give them an easier task. Print the finished face on the printer. And from natural material in this craft make additions
Good luck with your work.
Olga Klishevskaya, specially for the site
Nature every year gives us a lot of free natural materials suitable for creativity. The process of creating with your own hands develops the artistic taste, thinking, memory of the child, cultivates perseverance. But most importantly, you can have fun and usefully spend time with friends, delighting yourself and others with crafts.
Preparation of natural materials for their further use
Nature is the best artist, it creates such natural materials that in skillful hands turn into works of art!

plant materials
chestnuts
Chestnut fruits have a bright brown color and a shiny surface, so they make excellent DIY crafts from natural material. The shell of a fresh chestnut is thin, easily pierced with an awl. Chestnuts are a fertile material for working with young children themselves. You can make many different dolls,.


It is better to store in a cool place in boxes.
acorns
Oak fruits ripen in autumn, in September-October. collect various shapes and magnitude.


At the same time, their cups (pluses) on which they are held are also collected. Plushs are very often used separately from the acorn, as an independent natural material for various crafts.

Acorn cups and balls knitted from wool
How to knit even balls of wool, see the video Olga Skibina:

Acorn buns and Christmas bells


You can store them for a very long time, after washing and drying thoroughly. But why just keep stones when you can play with them with the whole family?)


For another way to apply an image to river or sea stones, see the video from You Can Do It Craft. You will be surprised how easy it is!
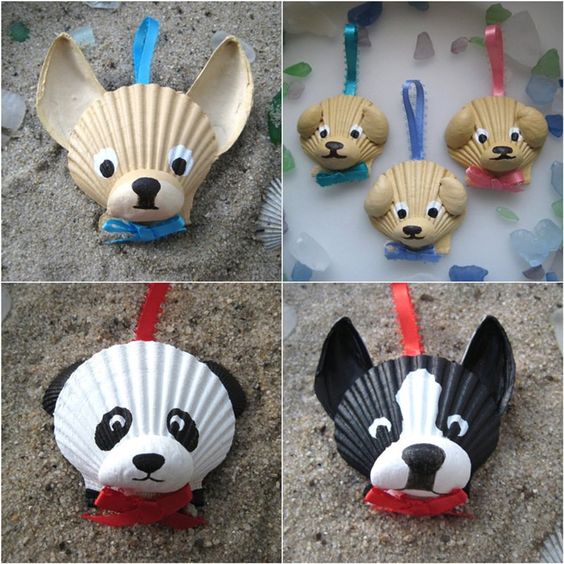
shells
You can collect shells on the banks of rivers, seas, lakes while relaxing with your children. Many of them are original in appearance, in shape - oval, comb-shaped, elongated, etc.
Boil them for a few minutes to free them from living organisms. Shells are washed with a small brush (you can use a toothbrush), after which they are dried, sorted by type and size. Stored at any temperature.
You can also clean the shells in a solution of whiteness and water at a rate of 1: 1. The top layer will disappear after a while, leaving the shell with a nice shiny top.
Animal figurines are made from large shells.


Small shells make wonderful applications, garlands:


Shells can be used not only as the main material, but also as additional decor(wings of birds, ears of a dog, flower petals, etc.)


Sand
Highly available material, which can be collected in any sandbox. It differs in structure. Rinse and dry thoroughly before use. And then you can use it as a decor in your work:


Rules for the storage of natural materials
Do-it-yourself crafts made from natural material will be flawless if, after collecting, drying, pre-treatment you properly store these natural gifts. To do this, you must adhere to certain rules.
- A dark, cool and well-ventilated area is the best place for storage of natural materials.
- Can buy plastic containers for storage of each type of materials; use carton boxes from under shoes, tea, sweets; take the usual glass jars with screw cap. For seeds, as well as for beads, it is better to have a container with many compartments.
- Dried flowers are fragile and break easily, so they are placed in a tight box or container. Petals are stored separately from flowers. Flowers with a stem can be stored in a vase.
- Prepared leaves are also brittle. You can store them in large books. Also, for safety, put them in signed candy boxes, grab a little tape so that they do not accidentally open.
- Seashells are placed in glass jars or plastic containers with a wide neck so that they do not crumble.
Additional tools for crafts made from natural materials
To create a beautiful craft from natural materials, you will need additional tools and materials.

It can be:
- colored paper;
- cardboard;
- skin scraps;
- scraps of fabric;
- bird feathers;
- Styrofoam;
- plasticine;
- wire;
- PVA glue, "Moment";
- gouache;
- stain;
- varnish etc.
Paper very often used as an addition to natural materials. Children, bending, gluing it, make the work much more interesting.
Plasticine fasten separate parts of simple toys at the initial stage of work. It is not very durable, but as a supplement it is often used in kindergarten and elementary school.

From wire most often they make the frame of a toy, the connection of its parts. Copper wire diameter 0.29-0.35 mm - soft, flexible and durable - the most comfortable. And for the frame, a wire of a larger diameter is used - 1-1.5 mm.
Threads it is better to take thick, multi-colored ones (No. 10).
Glue it is better to take white PVA, BF, etc. However, in kindergarten it is better to use PVA glue.
They also use foil, pebbles, pits from cherries, and bristles.
Additional material is best stored in a small box with cells for each type of material.
Usage additional material depends on the idea, the skill of the children, the degree of development of the imagination! Offer your options, but rely more on children's intuition and desire.

It is also additionally necessary to have certain tools for making crafts from natural material:
- artistic scissors;
- awl;
- jigsaw;
- tweezers;
- pliers and wire cutters;
- sewing needles;
- brushes for glue and paints;
- cotton cloth for wiping off adhesive residue.
Scissors for children should be with blunt ends, small, with rings convenient for a child's hand.
Awl must be taken from durable material with a handle length of about 6 cm, a diameter of about 2 cm, a stabbing part - 3.5 cm
Needle need a large sewing machine. It must be kept in a needle case with a thread threaded into it.
Attention! Only adults use pliers, pliers, drills!
To draw the contour of the part to be cut out, a simple pencil. For example, dresses, hats for a doll, etc. It is better to take a soft pencil (2M).
Tassels(soft for drawing, harder for glue). It is better to buy squirrel brushes (No. 4 and 6). For glue take brushes with hard bristles.
Stack- a tool necessary for surface treatment of clay or plasticine. The length of the stack for children is about 12 cm.
Crafts from natural material for kindergarten
Toddlers are very fond of turning chestnuts and plasticine into toys in their hands that they can play with. Crafts made from natural material for kindergarten are not very complicated, so any child can do it with the help of an adult. Sometimes they are made from fruits and vegetables, but most often they are applications from leaves and animals from cones and acorns.
Crafts from leaves and maple "helicopters"
The lightest and available work even for kids - this is an application of leaves. If this is the first time you are making a composition with your child, offer him a picture that will serve as a template. Do not rush to do everything yourself. Invite the child to choose the leaves as desired, so that the work turns out to be similar to the sample. This is how they will develop Creative skills your child.
Application material:
- colorful leaves;
- thick sheet A-4;
- brushes for glue;
- PVA glue;
- scissors;
- sample.
To make a simple composition, you need even, dry leaves. Put them under a press or in a book. In two days the material is ready. Cut out suitable parts with scissors and lay them out on a piece of paper.
Now you can glue. First the background and bottom layers, and then the finer details. For example, if you want to make an elephant, then first make the body and head out of the leaves, and then glue the trunk, tail, legs. If there are not enough eyes, then they can be drawn with a marker or made from tree seeds.

It is not necessary to do everything according to a template. You can come up with a picture yourself and create an original composition of leaves.


Use colored paper, felt-tip pens, paints as an addition, so your applications will be even more interesting.
Along with the leaves, “helicopters” from maple are also ideal as a basis for crafts made from natural material for a kindergarten. Just look at this miracle!

Fairy wings from maple seeds

Dragonflies from maple helicopters
Now you are convinced how beautiful and original leaf applications can be. Use these ideas for leisure activities with children.
Simple master classes on creating children's crafts from acorns and cones
At the end of summer, acorns begin to ripen, and they make wonderful crafts made from natural material for a kindergarten or school. They keep well and last a long time. autumn evenings together with children, you can do a pleasant and useful thing that develops fine motor skills hands of the baby, fantasy and perseverance.
The most common acorn crafts are animals and various little men. From toothpicks, matches, thin twigs, you can easily make legs, handles, horns and other small items. An adult needs to help the children poke holes in the acorns.
To attach small parts, you can use a glue gun, Super Moment glue, but only adults should do this. And it is safest for the guys to fasten the parts with the help of plasticine.

Fly agarics from acorns are even easier to make! To paint acorns, you need to remove the hats from them, and after the paint has dried, glue them in place.


Acorns are very beautiful on their own, and if they are also painted with acrylic paints or nail polish, then such crafts will decorate any home.

And from silver-painted hats you can make original decoration to the Christmas tree. The process of creating such an eco-toy is quite simple: we closely glue acorn caps onto a foam ball (you can take an old Christmas ball). And sparkled new.

We found another video for you, where Niki Junior tells what a wonderful craft will turn out from leaves, cones, twigs and a plastic bottle. Look, you will learn a lot.
Categories
Previous articles in the series "Acquaintance of the child with nature"
Overview of ideas and crafts
1. Fossils
I took this idea from our Asian travels. In Thailand and Bali, plant prints poured in concrete are very often used in the design of any buildings. Perfect beauty! It feels like fossils with traces of ancient ferns. I've always wanted to bring something similar to my home. So far, only children have tried to make crafts using this technology.
In any vessel, it is necessary to collect wet sand, crushing it tightly. Then, with leaves, flowers, or better even with something more textured, for example, cones and branches of Christmas trees, make prints in the sand.

Dilute gypsum in a separate vessel and pour sand with imprints with the resulting solution. Leave for several hours, and preferably a day, for the gypsum to harden. On the reverse side, we also signed where whose work, because. Children are very jealous of property =)

You can use the resulting plaster molds in your home design, especially if you do it more carefully. With sand, of course, the variant turns out to be “rough”, just for children's games, but for the house it is better to make a “clean” one. To do this, instead of sand, you can use soft plasticine or salt dough, for example. Spread it on the bottom of the dish, make prints of plants on it, and then pour it with plaster. The result will be more accurate and clear. I always use gypsum, by the way, this one, I’m already buying the tenth bucket and I’m not overjoyed :)
And with our fossils, we decided to do otherwise than just decorate the house with them, which is discussed in the next paragraph;)
2. Archaeological excavations
I buried these fossils in the ground, maybe in a sandbox, for example, and gave the child a set of a young archaeologist - a shovel and a brush :) Mishutka dug with pleasure and gently cleaned the found “antiquities” with a brush =)

You can complicate the task by drawing, for example, a map of excavations and learning to navigate the terrain with your child. But this, I think, is for children from 5-6 years old, Mishutka and I managed with a simple option of digging in the ground :)
3. Ancient glaciers
Another interesting option- Freeze your natural finds. To do this, take any plastic form, put plants or flowers in it and fill it with water at room temperature. The last condition is required! Ice will turn out clean and transparent only if the water is at room temperature. Place the molds carefully in the freezer. After a few hours, and preferably a day, you can get ready-made ice.

You can play with them in a variety of ways. For example, we arranged a “penguin world”, where ice cubes served us as particles of the habitat.

You can play, for example, in the ice age with dinosaurs. Or make ice garlands from flowers frozen in ice. In winter, they will look very impressive! In general, it all depends on the imagination of mother and child;)
4. Punching
A simple, but very entertaining version of the game is to make stamps with collected leaves. You can simply stamp, making prints in different colors, you can collect it into a single thoughtful compositional pattern, or you can make wrapping paper for the holidays on the back of the wallpaper, stamping with leaves in a certain color rhythm.
The child just paints the leaves in different colors and then attaches them to the paper. Get a variety of prints.

Despite the simplicity of the idea, the children were very interested in making prints of a variety of leaves.
5. Stencils
This method was shown to us by my favorite primary school teacher. My result then came out so amazing that it sunk not only into my memory, but also into my soul, forever =) You lay out different leaves on a plain white sheet of paper, press them with something heavy so that they do not move accidentally. Then you take a brush, or even better an old toothbrush, dip it in the paint and start splattering it. You simply shake the brush over the paper, and in the case of a toothbrush, you need to draw some stick back and forth along its hairs. Colored splashes rush in all directions.

Take different colors one by one, in any order and concentration. Spray them all the voids on the sheet so that there are no white spots left at all. The better you cover the sheet with paint splashes, the more distinct and beautiful the result will be.

The leaves can be placed randomly on paper, like Mishutka in the photo above, or you can put some kind of pattern out of them, like Sashulya. This is how she got a butterfly.

It would be possible to finish the elements of the butterfly, but we left everything as it is, now such beauty hangs on our honor board :)
6. Applications
Already after our applications, I accidentally stumbled upon information on the Internet that this type of creativity is very popular in Japan, and is called Oshibana. Wow! And we just decided with the children to make some figures out of leaves and twigs, sticking them on paper =)

Mishutka simply liked the process of smearing with glue, i. his work was spontaneous rather than deliberate. But Sasha did in my opinion very beautiful bird, it seems to me some kind of crane with a long neck =)

While I was preparing this article, I read about oshibana and found such interesting examples.

Just in my opinion children's version- to make a kind of zoo. The animals turned out very cute =)
7. Herbarium
The good old herbarium to this day does not lose its relevance. A child can literally turn into a young naturalist, collecting and drying various leaves and plants, pasting them into an album and signing names, as well as other details.

Surely many people remember how to do it, but I'll write it anyway :) Just collect various leaves, flowers, twigs, in general, a wide variety of plants. Put them between the pages of a thick book and leave until better times. Usually for several weeks. Plants dry out in a flat state, so it is easy to paste them into a notebook or notepad later, which makes it a kind of book on botany.

Or you can arrange a herbarium in a frame like this, decorate your home with these stylish “pictures”.

8. Prints
In this game, the result, as you can see, is scary, but in the original, very beautiful pictures come out. But apparently my lack of enthusiasm affected the children as well. To tell the truth, I am against such "entertainment", but nevertheless I offered Sasha and Misha such an option for "crafts".

This imprint method is based on the secretion of plant sap. It is the juice that colors the white sheet of paper. Well, in order to squeeze the juice out of a flower so much, you need to hammer it with a hammer. I'm not a Greenpeace fanatic, but somehow it's wrong to first teach children to respect nature, read books about it, and then brutally hammer it with a hammer. Therefore, we took the grass that had already been cut earlier, and not fresh juicy flowers, and the result turned out to be so-so.
But I objectively understand that this is just my worldview, and we are all different. Therefore, if you still decide to try, then you need to take watercolor paper, carefully lay out a small bouquet of flowers on it, then cover it with a sheet of plain paper on top, and knock on this sheet with a hammer. When you remove it, you will get a beautiful print. The only plus of this exercise for me is that this way you can explain to the child that the juice different plants can be used as paint. Recall the history of how natural dyes were made before. Here it can be seen very clearly.
9. 3D coloring pages
Any natural materials can be painted! You will say that this is banal and some kind of nonsense in general, but I don’t think so at all. All the more important is what you do. Not just let the child color the found dry stick, but invite him to make little men out of these sticks and let everyone be in their own clothes. Or, in winter, we painted cones in different colors, so that later we could tie strings to them and hang them as toys on the New Year tree.

"Three-dimensional coloring" is suitable for both older children and the smallest. For example, these shells were painted by Mishutka at the age of 1.5, when we lived in Krabi. In the morning we collected shells on the sea, and after a quiet hour we sat creating =)

Or, too, from shells and paints, this is a variant of fish in the sea. We did not paint the shells themselves, but we glued them on a cardboard box, having previously smacked gouache on it. The shells themselves were glued with eyes (these are sold in creative stores). Below I made a selection of goods that we used for all these crafts, among which there are eyes, maybe it will come in handy for you;) And Misha also made this picture a year and a half, maybe even a little earlier.

And just the other day, a variety of stones became the object of our coloring, in general, you can think of a lot of things with them in order to use them later in games. Here we have stone houses for our board games, which we invent one after another and draw with chalk on a graphite table.

I will definitely tell you about this table and what you can do with it, you can be the first to know when the post comes out.
I note that for the smallest, this coloring option is ideal. The fact is that it is difficult for kids to color standard pictures without going beyond the borders. Therefore, they are better off decorating some real objects, such as clay pots, wooden cubes or toys (sold in art stores), or any suitable natural materials. Agree, it is easier for a child, aged 1-2 years, to feel the border on some object than on paper. Therefore, it is not necessary to ask children early to color ordinary coloring books, let them color voluminous objects. Do not forget that acrylic paints are best suited for this, and not watercolors or gouache.
10. Plasticine vases
Another simple but fun way to use natural materials such as shells, small pebbles or some kind of seeds (watermelon, pumpkin, etc.).
Take any bottle or vase or, as we are here, a clay pot and ask the child to coat it with plasticine. This develops motor skills very much, because it’s hard work =) And then, together with the child, glue your selected natural materials to this plasticine, pressing them down with your finger. Babies should be helped. Mishutka also made such a craft at the age of 1.5. I did not push him to cover the entire surface of the pot with shells, because. for small child it is difficult. He made only a border out of shells, but in my opinion it turned out pretty well =)

Then we planted a flower in this pot, the child also “worked” himself, and then presented this flower right in the handmade pot to Mina, a Thai girl, whose birthday we were invited to. I wrote about this in my article How the Tiger went to the birthday of a Thai girlfriend :)
Of course, there are a lot of variations of games with natural materials. I have covered only a small fraction of them, but even this dozen of games will bring variety, children's interest and the desire to know nature and the world around you to your summer activities.
Goods for creativity
In addition to natural materials that you can not only collect, but search through find-and-find games, for these crafts, you can also use the art supplies that I used in these games.
Nature is an inexhaustible source of creativity and inspiration. From time immemorial, people have drawn plots for works of art from it. For the people, their environment was not something frozen, motionless. Fields and trees, sun and clouds, grass and mountains were inspired images in fairy tales, epics, proverbs and sayings.
In wild flowers, people saw the charm of youth, birds were a symbol of freedom and independence, the wind was the personification of strength and power. Love in nature comes with mother's lullaby and grandmother's slow, calm fairy tale.
Man is the master of his land, namely the master, and not the squanderer. Respect for nature must be nurtured from childhood, as well as respect for elders, a culture of behavior in society.
Craftsmen used natural material to make various handicrafts, many of which outgrew their narrow utilitarian meaning and turned into genuine works of art.
The list of both groups is quite significant, therefore, based on specific local conditions, you can always find material for any homemade product. Each plant has its own uniqueness. appearance: leaf shape, flower shape, surface, etc. as in working with natural materials all this must be taken into account.
Let's start with the most common material known since ancient times, this is clay.
Clay, found in nature, is so diverse in composition that in the bowels of the earth you can actually find a ready-made clay mixture suitable for making any type of ceramics - from sparkling white earthenware to red oven bricks. Of course, large deposits of valuable types of clay are rare, so factories and factories for the production of ceramics appear near such natural treasures. For example, oily ironclay is best suited for black polished ceramics. It is characterized by high plasticity, it is perfectly molded on the potter's wheel, and after drying it can be ironed to a mirror shine. The ware from such clay does not pass moisture and differs in high durability.
You can find suitable clay for modeling and pottery almost everywhere, there would be a desire. In addition, a small amount of clay can always be “fixed” by elutriation and other methods. Clay can occur immediately under the soil layer at a shallow depth. On soda plots, it can be found during various land works. Layers of clay quite often come to the surface along the banks of rivers and lakes, in the slopes and slopes of ravines.
Clay suitable for modeling can be successfully prepared even in a big city. After all, builders are always digging pits for a new house somewhere nearby, or a water or gas pipeline is being repaired. In this case, clay layers lying at great depths are on the surface.
Each type of clay at a certain stage of modeling, drying and firing changes its color. Dried clay differs from raw clay only more light tone, but when fired, most clays change their color dramatically. The only exception is white clay, which, when moistened, acquires only a slight gray tint, and after firing it remains the same white. According to the color that the clay acquires after firing, they distinguish between white-burning clay (white), light-burning (light gray, light yellow, light pink), dark-burning (red, brown, red-brown, brown-purple) .
Ceramics-- products from inorganic, non-metallic materials (eg, clay) and their mixtures with mineral additives, manufactured under high temperature, followed by cooling.
In a narrow sense, the word ceramics refers to clay that has been fired. However modern usage of this term extends its meaning to include all inorganic non-metallic materials. Ceramic materials may have a transparent or partially transparent structure, may originate from glass. The earliest pottery was used as pottery made of clay or its mixtures with other materials. At present, ceramics is used as an industrial material (machine building, instrument making, aviation industry, etc.), as a building material, as an art material, as a material widely used in medicine and science. In the 20th century, new ceramic materials were created for use in the semiconductor industry and other areas.
Depending on the structure, fine ceramics (glassy or fine-grained shard) and coarse (coarse-grained shard) are distinguished. The main types of fine ceramics are porcelain, semi-porcelain, faience, majolica. The main type of rough ceramics is pottery.
Wood since ancient times, it has been used in architecture, sculpture, arts and crafts, especially folk (utensils, furniture, often tinted or decorated with carvings, intarsia, painting, gilding, etc.; carvings on facades and in the interiors of buildings; wall cladding with lath, braid, etc.), as well as in the manufacture of printing plates for woodcuts, prints and patterned gingerbread. A person in everyday life constantly comes into contact with a tree - in the bosom of nature, and in everyday life with certain products made from wood. Wood is the material that protects, warms, helps and pleases a person, giving him aesthetic pleasure. There is no alternative to wood as an ornamental material: its physical and plastic capabilities have long attracted people.
The centuries-old practice of wood processing has allowed us to accumulate a lot of experience, to study all its properties and expressive possibilities. Thus, certain traditions of working with wood gradually developed, depending on the natural and climatic conditions, lifestyle and human activities.
The richness of the color shades of wood, the variety of textures and textures (waviness, concentricity, picturesque entanglement of fibers, etc.) determine an infinite number of decorative effects products, and the relative ease of processing contributes to the direct embodiment of the creative energy of the artist.
From deciduous trees, linden is often used for carving. Linden wood is easily and cleanly cut, little prone to cracking and warping. Due to its low hardness, linden is not used to make furniture, so its use is limited to small household items.
Alder wood is also easy to cut, warps little, accepts finishes well and imitates other species, such as mahogany. All this makes it suitable for all kinds of work.
An excellent material for carving is birch wood. It is harder than linden and alder and is more difficult to cut, but the quality of the carving is better. Birch wood is well stained and finished. Its disadvantages are the ability to easily absorb and release moisture, as well as the tendency to warp and crack, which does not allow it to be used in large products. From birch, you can make overhead carved decorations and details of furniture and other products.
For carving on small items - dishes, souvenirs - poplar and aspen wood is used.
Oak has long been used for large decorative carvings and the manufacture of carved furniture. Oak carving is complex and laborious due to the high hardness of the wood and the tendency to chip, but it is very expressive and decorative.
For small items decorated with carvings, rarer types of wood are also used: apple, cherry, etc.
From conifers for carving, pine, spruce, cedar, yew wood is used. From ancient times, decorations for architraves, icons, cornices, and gates were carved from pine. This carving is large, so the unevenness in the density of the layers of early and late softwood does not complicate the work.
For many millennia, wood remained an accessible, beloved and understandable material for humans. Wood - structural material. As such, it is irreplaceable. building material. Its mechanical and physical qualities are amazing: a tree lends itself well to processing, it can be cut, chopped, sawn, planed, sharpened, bent. Elasticity and viscosity make it possible to hold screws and nails well. Coatings with varnishes and varnishes make the tree waterproof.
The tree has exceptional practical qualities. All items made of wood carry the features of sculptural quality. Wood is a decorative material. As a living natural organism, it has its own unique structural features, expressed in texture and color. In the totality of mechanical, plastic and decorative qualities, wood is exceptionally suitable material to do artwork.
Everything created by man from wood has always had a practical purpose and at the same time expressed a spiritual meaning, since the most characteristic feature of applied art is that things created for practical application, become carriers of the mood of the master, his feelings and thoughts. A person improved a thing in form and perception, and in the process of labor his hand improved, a sense of form, color, material, proportion, symmetry, and rhythm was brought up.
Wood carving is a type of arts and crafts (carving is also one of the types of artistic wood processing along with sawing, turning). modern carving does not have a strict classification, since different types of thread can be combined in the same product.
Carving is a type of decorative art; a method of artistic processing of wood, stone, bone, terracotta, lacquer and other materials by carving.
Carving is used to decorate household items, decorate buildings, create miniature plastic works. There are three-dimensional, high-relief, flat-relief, notched, contour, through and overhead threads.