Home care for orchids. Orchid Care
Phalaenopsis - this is what the orchid is called in botany. For its delicate aroma, as well as beautiful flowers, people love it. An orchid is a demanding flower, so without proper care, you will not expect proper growth and flowering. There are a lot of orchid varieties (about 30,000), so it is listed in the Guinness Book of Records as the most common plant. You can talk about the merits of phalaenopsis endlessly singing its beauty, but we have a different task!
All flower lovers would like to see a blooming orchid on their windowsill, but not everyone decides to purchase it. Just by transplanting an orchid incorrectly, you can ruin it, because not everyone knows how to care for an orchid in a pot. Even the variety of these colors does not negate the general rules for caring for them, which we will now consider.
An orchid is a rather capricious flower, but it is not difficult to take care of it at home, and especially if you know what actions are needed, and most importantly at what time. To do everything right, you need to know about the flower's lifestyle. It is recommended to buy phalaenopsis in spring or summer. Do not rush to repot the orchid and do not worry about it, because this species can grow for another two years in the substrate in which it was sold. Until the plant adapts, it must be fed. How to care for an orchid if it grew in sphagnum moss? It is recommended to immediately transplant the plant into another pot, and then everything is the same as with other plants. Before you start caring for a plant, you need to get the most complete information about its variety, growth characteristics and species. Even in the store, you should carefully examine the roots of the phalaenopsis, they should be visible through a pot with transparent walls. Take the flower and gently shake it near the substrate itself. If the orchid holds tight, then it has strong roots, which means that the purchase can be made safely. Any kind of flower does not like excessive watering, while they like high humidity. Phalaenopsis roots quickly absorb the resulting moisture, keeping it in the system for a long time. How to care for an orchid in different periods, we will now tell. At home, orchids reproduce without problems. In order to subsequently have another full-fledged phalaenopsis, you need to know some basics. Most often, the root system at some point itself begins to divide, but if there is a need to do this, you can do it yourself. For this type of reproduction, we take out the phalaenopsis from the pot and carefully shake off the substrate from the root system. Next, carefully cut the roots in the middle between the false bulbs. Now they will need to be disinfected, which can be done with charcoal by simply sprinkling them on the incision sites. The plants obtained after separation are planted in different pots, and read about further actions in the article, which will tell you how to care for home orchids. This type of division is available only to some varieties of orchids. Whether you can propagate the plant in this way, you need to ask in advance when buying. In phalaenopsis of this type, shoot nodes grow at some distance from each other. Having previously disinfected the knife, we cut off the young shoot at the height of half the cutting. The cut off part is disinfected with powdered charcoal, after which we plant the plant in a pot. In this way, it is best to propagate fast-growing orchids, since their usual varieties will require special care and will develop for a long time (several years) before they turn into ordinary flowering house plants. How to care for home orchids during the period of growth, development, flowering and after it? To ensure a comfortable stay for the phalaenopsis, you will have to sweat a little at first, but this is a justified waste of energy. This method of reproduction is also acceptable for orchids, however, like the previous version, it is not acceptable for all species. After the appearance of a young sprout, which is planned to be separated, it is necessary to spray it intensively with water at room temperature, which stimulates the appearance of roots and accelerates its growth. After the formation of a young plant, it should be cut off, disinfecting the cut site accordingly and transplanted into a pot Reproduction of phalaenopsis in this way is quite difficult and takes a lot of time. Orchid seeds are very small and lack nutritional tissue. For their germination, sterile conditions and a nutrient medium are necessary.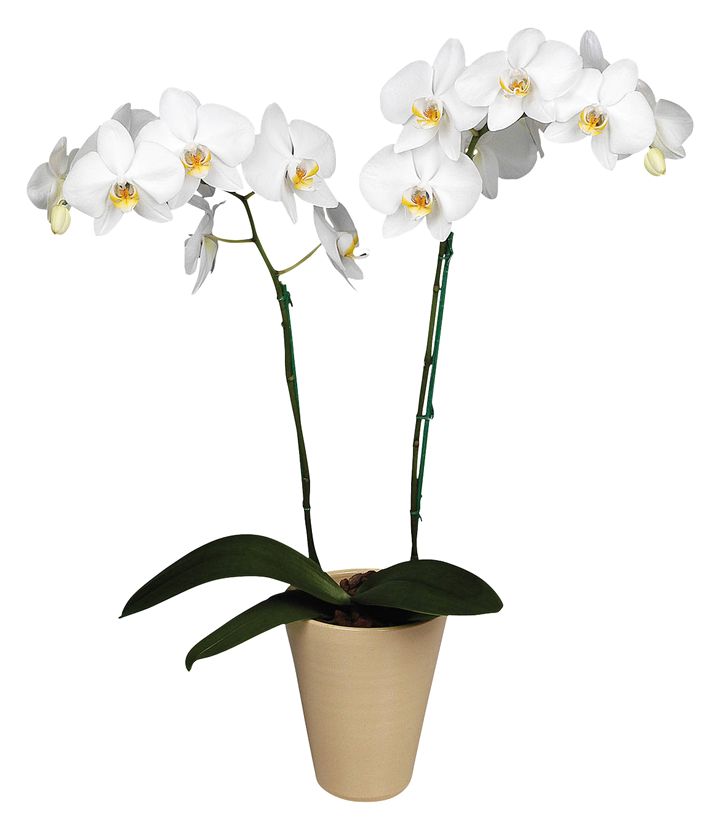
Orchid propagation
Reproduction by division
Apical cuttings
side shoots
seeds
Many lovers of growing beautiful flowers at home, having brought an orchid home, are wondering how to properly care for it? What is required for this?
First of all, you need to arrange a kind of quarantine for the plant. It needs to be put in a secluded place for two weeks, away from other home flowers. Moreover, the sun's rays should not fall on the plant, it should be in complete rest. At this time, the plant does not need additional top dressing fertilizers.
How to transplant an orchid at home
If you just brought indoor flower home, you do not need to replant it. The plant will feel great in its own substrate for a couple of years. It is necessary to transplant a plant only if it is in sphagnum moss.
flower need carefully remove from the pot. During this operation, you need to try not to damage the root system. Sometimes you even have to cut the pot.
The roots are freed from the substrate, dried and rotten are removed. Then everything is washed clean running water. Orchid put in a new pot with the substrate, add soil, until the empty cavities between the roots are filled.
It is forbidden to cover the top of the flower, it must always be on the surface. The soil is moistened, the orchid pot is placed in a dark place and kept for several days.
Gardeners believe that the plant is under stress after transplantation, so it needs to be treated with special flower "antistress" » . Orchids do not need this, she herself is successful deal with stress and easily adapts to new conditions, which can be clearly seen in the photo.
It is not required to treat the orchid leaf with drugs that kill insects. Do not poison a plant that has just moved.
What kind of lighting is required for an orchid
Looking at a photo of a colorful orchid, you always wonder how to create the right lighting for this plant at home. After all, the future of its flowering and growth largely depends on this.
Under normal lighting, the flower will delight the eye beautiful flowers, and if it is not enough, the leaves will begin to acquire a light green color, begin to stretch, begin to turn yellow.
To make the flower look like in the photo, need to create lighting, according to certain rules:
- Indoor orchid develops well in diffused light. Exposure to direct sunlight has negative impact to an orchid. This nuance must be taken into account when caring for an orchid at home.
- AT summer period, it is desirable to put the plant in a darker place. This is especially true of the location where the hot rays of the sun hit the leaves.
- In the autumn period, indoor orchid does not require dimming. The amount of sunlight decreases, shoots begin to ripen in the orchid. She starts laying new flower shoots.
- For this plant great importance has a length of daylight. It must last at least 12 hours. With a decrease in daylight hours to 10 hours, the creation of artificial lighting is required. For this purpose, you can use the fluorescent bulbs shown in the photo.
Varieties and differences of orchids


Known three kinds heat-loving orchids, which require a certain temperature regime. These include the following titles:
- Dendrobiums.
- Phalaenopsis.
- Catley.
Since these plants are native to tropical forests, they must be kept at a temperature of no more than 32 degrees. At night, the temperature should not fall below 18 degrees. The temperature difference per day should not exceed five degrees.
medium temperature orchids
The plant is divided into several types, the name of which:
- Milton.
- Odontoglossums.
Houses must be created for such an orchid cooler mode. In summer, the daytime temperature should not exceed 22 degrees, in winter nights the temperature can fluctuate in the range of 12-15 degrees.
Cold-loving view
Such orchids are found in a subtropical climate, grow in the highlands and have the following names:
- Dendrobiums.
- Lelia.
- Paphiopedilums.
The plant grows well in summer at a temperature of 22 degrees, and in winter no more than 15 degrees. Almost any type of orchid, grows well at home when the daytime temperature does not exceed 27 degrees, and the nighttime temperature is 24 degrees.
How to water orchids at home
 In order for the plant to develop well and delight the eye with beautiful flowers, as in the photo, it is very important to water it correctly. Under natural conditions, orchids do not grow in water; they cannot tolerate stagnant moisture for a long time.
Therefore, watering an orchid at home should be the same as in the real conditions of its residence. For example, the Phalaenopsis flower likes a slightly damp substrate, while for Oncidium it must be completely dry. In other words, for each type of orchid some watering required.
In addition, the intensity of irrigation depends on other factors:
- temperature;
- humidity;
- lighting;
- pot dimensions;
- composition of the substrate;
- seasonal vegetation.
Since orchids are epiphytic plants, they are able to withstand a slight overdrying of the soil.
However, if you stop watering the orchids, they will start to fade quickly leaves become shriveled and unsightly. If there is excess moisture, the roots will begin to rot, the perimeter of the sheet will be covered yellow. This is very clearly visible in the photo.
Orchid needs sprinkle with soft water. It is considered the most suitable, well settled in the summer, rainwater. In winter, you can organize watering with melt water.
If you water a flower with water from a tap, then it must be pre-boil. The water temperature should be three degrees above room temperature.
In the summer, watering is carried out several times a week, but no more than three. And only when it starts to dry out upper layer substrate.
In winter, it is enough to water the plant a couple of times a week, when the pseudobulb begins to wrinkle.
If the flower grows in a pot, it is watered from above, if in baskets, then they are simply lowered into the water for five minutes. Excess water must drain completely, it must not stagnate.
Necessary fertilizers
You need to feed the plant only when it is growing. Fertilizer should be applied once a month. The most suitable are:
- greenworld.
- pocon.
- Bona Forte.
It is very important to add fertilizer according to the proportions indicated on the package. The plant does not tolerate large accumulations of mineral salts in the soil. The orchid may simply wither.
That is why the substrate, before adding fertilizer, you need Rinse clean water . Washing and top dressing should alternate every week.
Fertilizers intended for other types of flowers are not suitable for orchids. No need to feed the plant winter time and when it is at rest.
How does an orchid reproduce?
 Reproduction "Children". By "babies" they mean small new plants from which new types of orchids can appear. These side shoots most often appear in plants with a high concentration of nitrogen.
When "babies" appear, it is advisable to spray the orchid more often. After the "kids" have grown up and given roots, they can be separated, treated with charcoal and planted in a separate pot.
Type of reproduction by layering. For propagation, layering is used, which is found only in sympodial flowers. To work, you will need to create a small greenhouse located directly above the bent part of the stem. Then you need to moisten the moss and wait until the awakening of the sleeping kidney begins.
If the shoot does not have foliage, is located horizontally in the greenhouse, it must be constantly heated and regularly moistened. After about 30 days, dormant buds will wake up. Young plants appear green leaf and roots.
When small plants are well rooted, they are carefully separated from the main shoot, processed and planted in a small pot. You do not need to immediately remove the plant from the greenhouse. Let it sit there for a few days.
Vegetative propagation method
 It is suitable for any type of orchid. The roots of the flower are simply divided into several parts, each of which has two pseudobulbs. This method can only propagate large orchids.
The flower is taken out of the pot. The roots are carefully separated from the ground. Rhizome cut into several pieces, on which there are several bulbs.
The cut is sprinkled with charcoal. Landing of each fragment is done separately. New flowers should be lightly watered and sprayed daily until the plant sprouts new shoots and leaves appear. This will be more proof that the orchid has begun to grow.
Orchid care at home after flowering
 When the indoor flower is at rest, you do not need to water it. It is enough to monitor its condition, the color of the leaves and other parts. It would be nice to take a photo of the flower at this time, so that later you can compare its new state with the old one.
Such a kind of quarantine is necessary to detect flower pests, and further fight them. Two weeks will pass and the orchid can be put on the window, it should get used to the sun. You can start lightly watering the plant.
The end of flowering field, when the peduncle has completely dried up and turned black, its cut under the base and removed. When flowering is complete, plant nutrition is done much less. In winter, orchids are watered once every 30 days, the plant is sprayed several times a month.
I must say that if you need to transplant a flower, then in the future it will begin to bloom, and its leaves will turn green, you need to put the pot in another place.
In the case when, after flowering, the leaves of the orchid began to wrinkle and turn yellow, the peduncle completely stopped, the pot also need to rearrange. It will start blooming again.
Let's summarize all of the above. If you properly care for orchids at home, you can always enjoy the view of these beautiful flowers at home.
A blooming orchid rarely leaves anyone indifferent. Unusual, delicate flower sung by poets since ancient times. The mystery inherent in orchids is associated with the peculiarities of the structure of flowers, as well as the endowment of the plant with "healing power". In Asian countries, since time immemorial, they have been used for medicinal purposes. At present, the potted orchid is often bred as the main decorative element of the house plant collection, due to its aesthetic characteristics, fragrant aroma, excellent color and shape of flowers.
Characteristics of indoor orchids
 By and large, the structure of a room orchid differs little from other flowers. The plant has a trunk, leaves and flowers, although there are specific features. For certain types of orchids, the presence of “false” bulbs (pseudobulbs) is characteristic, where nutrients accumulate. These bulbs were originally formed from a wild plant to protect against adverse conditions in their habitats. At home functional value the pseudobulb is reduced, although it is impossible to completely talk about its uselessness: the bulbs distribute useful elements for stem growth and lush flowering.
Roots - main part any plant. The special properties of the room orchid are associated with the presence of main and adventitious roots. Adnexal elements are formed on any parts, with the exception of the main root: on stems, shoots. This structure is associated with the "ancient" ancestor of a domestic plant, when the roots of a wild orchid had to support the growth of a flower, absorbing as much nutrition and moisture as possible from environment. Many orchids have lush vegetation from adventitious roots.
 Orchid leaves show how the plant can adapt to external conditions. When describing a room orchid, it is worth noting the feature that light-loving varieties have thickened rich leaves; species that prefer shade (for example, miltonia) have soft light foliage. Usually the leaves of orchids are green, but there are also variegated varieties (ludisia, makodes).
The seeds of most varieties of orchids usually do not germinate in ordinary soil. There are several reasons for this. Firstly, the seeds of a room orchid are hardly visible to the eye due to their small size, and secondly, they do not have a supply of endosperm inside, which prevents them from obtaining nutrients from the soil. When compiling a substrate for seed germination, gardeners use agar-agar - a substrate in pure form or special hydrogels based on it.
Typology of indoor plants
If we talk about what kind of indoor orchids are, it is worth highlighting two main types according to the type of growth: monopodial and sympodial.
 The differences between them are determined visually. Monopodial varieties always grow upwards, with each new leaf being slightly larger than the previous one. Over time, all sheets acquire the same size. These species include phalaenopsis, agrekkum, aerangis, vanda. The root system of monopodial types forms adnexal parts on the plant stem.
The sympodial type is characterized horizontal arrangement rhizomes, called rhizome. Such types indoor orchids are a bushy plant with several shoots. These include varieties: cattleya, cumbria, cymbidium, oncidium, miltonia. The shoots at the top of the bush stretch upward and have a thickened lower part. This is the so-called "false" bulb or pseudobulb. The flower arrow in sympodial varieties appears both from the shoot and from the bulb itself.
Due to the incredible beauty of flowers, orchids are very popular among professionals and just lovers of home plants. A wide variety of colors and shapes can impress the most demanding gardener. Particularly surprising are the varieties of indoor orchids with flowers only a few millimeters in size, while the largest specimens reach a quarter of a meter in diameter. According to the type of flowering, home orchids stand out in two types: multi-flowered and with single flowers.
Phalaenopsis is by far the most popular type of home orchid. Beautiful, delicate indoor phalaenopsis orchids, with proper care, can bloom year-round. The representative of the tropical forests of southeast Asia became known in the 17th century. The plant got its name by chance. In 1825, Karl Blum, leader botanical garden watching beautiful white moths. He later discovered that they were orchids. And this is not surprising, because the shape of the flowers really resembles fluttering butterflies. The name "Phalaenopsis" means "like a moth".
White phalaenopsis orchids are often grown at home and in offices, used to decorate private areas around the house, and added to wedding bouquets. Usually, the white room orchid is divided into two types: miniature and standard. The standard can grow up to one meter, the diameter of the flowers varies from 2 to 13 cm. miniature species have a length of up to 30 cm. White orchids are odorless, react poorly to direct sun, diffused light is preferable for them.
Proper care of indoor orchids
Temperature, lighting, location
 The level of lighting is one of the determining factors in the question of how to care for a room orchid, which will affect further flowering. Competent home plant care is associated with providing at least 14 hours of light daily, so in winter you will need sources of additional artificial lighting (fluorescent lamps, phytolamps, fluorescent white light). Fresh air and sufficient light will promote good growth and development of orchids at home.
For orchids, windows located in the eastern and western parts of an apartment or house are best suited, that is, places where there is diffused light. In the southern part of the house, the flowers will most likely need additional dimming from too much bright sun, northern windows are not suitable for all varieties of flower. With a lack of light, the cultivation of indoor orchids may be accompanied by a lack of nutrients, with excessive lighting, the flower will begin to dry. The first signal that there is not enough light for the orchid will be the color of the leaves: they will turn dark green. A healthy color of the leaves is considered to be light, rich green, reddish shades. With an excess of light, the leaves will turn yellow, brown dry inclusions may appear.
The optimum room temperature for orchids in winter is 16-18 degrees, in summer - 20-25 C.
 The experience of professional flower growers notes that in order to stimulate the flowering process, it is important for an orchid to create a difference between day and night temperatures within 3-5 degrees. Also, observation of the plant in winter showed that the orchid practically does not bloom at temperatures above 24-25 degrees.
Its useful to note salient feature orchids, in particular, phalaenopsis: good adaptability and response to the creation of favorable conditions. This suggests that after-purchase care of a room orchid, taking into account as many of the plant's natural preferences as possible, provides good development and frequent flowering. High humidity is important for orchids, so spraying should be done regularly, especially in winter when room heating which dries the air. During flowering, spraying should be done with extreme caution, avoiding water on the flowers. This is fraught with the appearance of ugly spots and the rapid fall of color.
Fertilizers, crop watering
 The speed and frequency of watering will depend on the environmental conditions of plant development: temperature, light, soil composition. There is important point that watering a room orchid must comply with the rule: it is better to underfill a flower in a pot than to overdo it. The orchid will easily endure a slight drought, as it belongs to epiphytic plants. For a flower, soft water with a minimum inclusion of salts is well suited, the best option is rainwater. You can take boiled water room temperature or 2-3 degrees warmer.
The plant in pots is watered from above, the flowers in the blocks are lowered into the water for several minutes, after the excess moisture has drained, they are put in place. In summer, the frequency of watering is 2-3 times in 7 days after the top layer has dried, in winter, orchids are provided with a slightly dry period. For some varieties, a slight wrinkling of false bulbs will serve as an indicator of the need for watering. It is important to remember that the care of a room orchid, in particular, watering, must be adapted to specific conditions. The main feature of orchids: they absolutely cannot stand stagnant water.
One of the reasons why an indoor orchid does not bloom is an excess of moisture. This is especially true during the formation of the buds of future flower ovaries. If the plant is watered too abundantly, then you can see the formation of dried buds and dry flower stalks that have not had time to open. Almost all varieties of orchids begin to bloom after the growing season. Until this time, the flower needs enhanced watering. During the flowering period, a lot of moisture is also needed. The frequency and intensity of watering should be reduced during the dormant period, namely after flowering and in winter, when there is a lack of light and no heat in the room.
 Top dressing of the flower should be carried out during the growth period with a frequency of 1 time in 15-20 days. Almost all plant species do not respond well to high salt concentrations. It is a good support succinic acid for indoor orchids, which strengthens and stimulates the further development of the plant. After treatment with acid, the flowers activate the growth of green mass, roots and shoots. For orchids, succinic acid is a means of constantly stimulating the formation of roots - one of the vulnerable parts of the plant. The acid also neutralizes harmful toxins in the soil.
The popular broad-spectrum liquid fertilizer Agricola has been successfully applied to orchids. Top dressing contains important humic elements and mineral salts. Agricola is used for indoor orchids at the rate of 5 ml of the substance per 1 liter of liquid. The resulting solution is used as ordinary water for watering the plant. Feeding is best done every two weeks. The acidity of the fertilizer solution, equal to pH=6, will be optimal for better absorption of micro and macro elements.
Diseases and pests of orchids
 The appearance of a room orchid disease is often due to improper care: lack of lighting, direct sunlight on the leaves. However, there are diseases that can harm the plant: rot, viruses, fusarium, anthracnose, bacterial diseases. Orchids affected by the disease have pronounced spotting on leaves and buds. This is a signal to isolate the plant from healthy flowers. Spots in the form of lines, circles, as a rule, signal a fungal or bacterial infection.
The popular cultivar Phalaenopsis has a tendency to bacterial infections. Leaves usually begin to turn yellow, then darken and become elastic. Further, wet formations appear on the foliage, from which a liquid substrate flows. In such a situation, diseases of indoor orchids and their treatment should be accompanied by isolation of the plant. The affected leaves are cut off, and the places of the cuts are treated with iodine. If after two weeks the disease has not reappeared, the plant can be placed next to other flowers.
 Spider mites on indoor plants and orchids are detected as follows: a thin cobweb appears on the buds and flowers. You can see it during regular spraying, so do not neglect them. In a more advanced stage, orchid leaves begin to dry out and curl, showing pale yellow lesions. Ticks can lead the plant to death, drink all the juices, and in addition, contribute to further fungal infection of the flower. In the earliest stages of infestation, mites are not easy to spot, often they love soft leaves, so you should be more attentive to young plants of domestic orchids.
Reproduction, transplanting a room orchid
 Breeding orchids at home can be safely carried out, knowing some of the features of this process. Standard propagation of indoor orchids is done by dividing an adult plant, cuttings, side shoots, seeds, false bulbs, layering, tops. most used and affordable way- dividing the bush during the transplantation period. The plant is separated along with the roots, while it is desirable to leave three false bulbs for each part (for sympodial varieties). An important requirement for breeding by division: the orchid must be large enough.
Knowing how to propagate an indoor orchid is not enough. You need to strictly follow the basic rules. It is better to disinfect the tools used, treat the cut points with charcoal. Roots require careful handling as they tend to break easily. Before planting, the soil can be moistened with soft water, after which the pot with the plant should be placed in a warm, but not sunny place, do not feed, temporarily do not water, but only spray.
 Indoor orchids are bred by cuttings when pseudobulbs of some varieties are formed by thickening of the internodes of the main stem. This type of propagation allows you to effectively use the entire supply of false bulbs and get a large number of plants. Separated bulbs are cut so that each fragment has a developed kidney. The cuttings are kept in a warm insulator (temperature not lower than 20 ° C) until development begins, with high humidity air regularly to avoid rotting.
The orchid is great for growing indoors. After all, this is one of the most beautiful and popular tropical flowers that growers love. On shelves flower shops there are many orchids of various colors and shapes of petals, but how to choose a healthy plant so that it will please with its amazing flowers for a long time? And how to ensure optimal conditions in the house for a tropical guest?
What rules to follow when buying?
Pay attention to the shelf in the store, it should be clean and dry, there should be no water in the trays under the orchid pots, and the pots themselves should be transparent and with ventilation holes on the side walls. Through the transparent pots, the orchid roots are clearly visible, which should be gray-green.
The green and long tips of most roots indicate active growth, which means that the orchid is developing normally and everything suits it in care.
 If at the end of the roots there is just a green dot (pupated root) and the leaves are not sluggish, then the orchid is in a dormant period or has recently woken up.
Roots without a green dot at the end should alert, this is called deaf pupation, and its main reasons are a lack of moisture, or vice versa, its excess.
If all aerial roots are tightly pupated, and the roots in the substrate are black or gray, you do not need to buy such a plant.
A viable root is hard and resilient, it does not squeeze through when pressed, but even a small necrotic area on it can become a source of infection for the entire plant, so the roots must be examined very carefully.
You need to pay attention to the leaves, they should be green, with a smooth glossy surface, which is especially noticeable on the upper young leaves, and firm to the touch. If the leaves are sluggish and have spots of any color, then it is better not to risk it and choose another flower. Old lower ones gradually lose their luster, but do not lose their density.
A new leaf growing from the middle of the outlet indicates the active growth phase of the plant, and this is a sign of good conditions. For normal growth and development of an orchid, at least 3-4 leaves are required.
Too bright and large leaves indicate an excess of fertilizer, which will affect the flowering of the orchid. An overfed plant will not bloom for another 2-3 years, moreover, it is vulnerable to diseases and pests.
 Dull, wrinkled, wet-spotted leaves are not necessarily a sign of illiterate care. It is possible that the plant is affected by a bacterial or viral infection.
What is the best time of year to shop?
An orchid is a delicate plant, so it will not survive transportation in the cold season, it will get cold or freeze. If, nevertheless, an orchid was needed in winter, it is advisable to take care of transportation in advance and take heaters with you to the store, for example, bottles of warm water and thermal packs, then there is a chance to deliver the flower home unharmed.
Before the eighth of March, orchids are often sold on the street, and you definitely shouldn’t buy there. At home, such a flower is likely to wither, unable to withstand a sharp temperature drop.
It is better to buy a flower not watered, with a dry substrate, so it is easier to transport and adapt faster to new conditions.
 Together with orchids, it is better to immediately buy a substrate for transplantation, as plant breeders often put foam rubber or pieces of moss in pots, which hold moisture for a long time during transportation to the store and subsequently cause roots and trunk to rot.
Proper care of orchids at home
It is quite difficult for a tropical plant to create conditions similar to natural ones. But if you follow the basic rules of lighting, watering and temperature, then the capricious orchid will grow and bloom beautifully in room conditions.
illumination
The rule of thumb for choosing light for almost all orchids is simple: you need a lot of ambient light, but not direct sunlight. If there is enough light, then the orchid blooms regularly. With a lack of light, pseudobulbs and leaves stretch, the color of the leaves becomes lighter, the purple color on the back of the leaves disappears in some species of orchids. If the orchids are variegated, then a decrease in illumination, on the contrary, enhances the leaf pattern.
In spring and early summer, when the intensity of natural light is at its strongest, all orchids need shading from direct sunlight. Orchids need spring shading to adapt: during the winter, orchids have lost the habit of such bright light, and their delicate leaves can get sunburned.
 Summer shading not only saves from sunburn, but will help to lower the temperature somewhat. To shade orchids, you can use ordinary gauze in one or two layers, a tulle curtain, or other high light-loving plants able to obscure orchids with their leaves from direct sunlight. If you have a balcony or a tree outside the window, then additional shading is no longer required.
Most orchids require moderate light, and ground orchids are generally shade tolerant. These species are most suitable for indoor cultivation. In spring and summer, they require a significant reduction in light intensity.
Phalaenopsis, hemaria, slippers, anectochilus in vivo grow under the canopy of the rainforest, receiving only about 1% of sunlight. Growing such orchids is possible even with artificial lighting.
In addition to the intensity of light for orchids, the duration of daylight hours is also important. Normal daylight hours are considered to be 12 hours long. With daylight hours of 10 hours or less, orchids already need additional illumination. If the orchids are young, then it is advisable to increase the daylight hours to 16-18 hours a day.
 The increase in daylight hours is quite feasible with the help of additional lighting in the morning and in the evening. Small fluorescent lamps are suitable for this. The light of these lamps is most suitable for plants, little heat is emitted from these lamps. The more lamps, the further away the orchids should be. By the way, when turning off the additional lighting lamps at night, you can get the optimal temperature drop necessary for phalaenopsis to lay flower buds.
How to water
Orchid roots are very sensitive to water quality. They can not be watered with too cold or too hot water, as well as hard. The deposition of salts is easy to notice by the appearance of the pot with the plant. If on the edge of the container or pieces of bark protrudes white coating, means hard water is used for irrigation.
Ways to soften hard water:
- Boil water. In this case, the soluble calcium and magnesium salts become insoluble and precipitate out. You can use 2/3 of the top layer of water.
- Prepare melt water. To do this, fill plastic bottle tap water and allowed to partially freeze in freezer. The main part of the salts passes into the water that has not had time to freeze. It is drained, and the ice remaining in the bottle is thawed and used for irrigation.
- Throw in water at the tip of a teaspoon of citric or oxalic acid and let stand for about 2 days. The bottom layer of water is not used.

Chemical water softeners and ion-exchange filters are not used to soften water used for irrigation, since calcium salts are replaced by sodium salts that are harmful to plants.
Water temperature for irrigation should be room temperature or slightly higher. Water heated above 38°C will burn sensitive roots, and too cold will cause them to become cold.
How often to water an orchid
There are many factors that affect the frequency of watering. It is necessary to take into account:
- the temperature in the apartment, the higher it is, the more often the plants are watered;
- the volume of the pot and the material from which it is made, the presence or absence of a drainage hole;
- the size of the root system - the more roots the orchid has and the larger the plant itself, the more water he needs;
- current time of year: if there is not enough light in the apartment, watering is made more rare.
In autumn and winter, it will be enough to water the plant once a week or even two. Water more frequently during hot summers. The frequency of watering can be adjusted up to 2-3 times a week, if necessary. The color of the orchid roots serves as a signal for when to water the plants.

Note!
In a dry substrate, the roots become silvery white. If they are green, you do not need to water the orchid yet. The weight of the pot will also say a lot: when the substrate is completely dry, the flowerpot with the orchid becomes light.
For some orchids (Cambria, Miltonia), it is recommended to add high-moor peat to the substrate. This increases the moisture capacity of the soil, so the plants are watered less often compared to those planted in the bark.
Ways to water orchids at home
The method of watering orchids depends on the method by which it is grown. If it is grown in closed system without a drainage hole, so much water is poured into the vase so that it covers the expanded clay layer. In the future, the water will gradually evaporate, nourishing the roots of the orchid.
Instances that are grown in the bark can be watered in three ways: by pouring, dipping and soaking.
In order to water the orchid by the strait method, it is taken to the bath and the pot is poured with about two liters of settled, slightly warm water. This method allows you to thoroughly moisten the substrate and at the same time remove accumulated harmful impurities and fertilizer residues from the pot. After the excess water drains, the orchids are returned to the windowsill.
 Watering by immersion is carried out by placing a flower pot in a basin filled with water for 1-2 minutes. This method is suitable during cool conditions, in which case the bark does not have time to get too wet.
For soaking, the orchid pot is placed in a container with settled warm water for 15-20 minutes. During this time, the bark manages to absorb a sufficient amount of moisture. After that, the excess water should be drained and put the flower in its place.
The Vanda orchid is often kept without soil at all in hanging baskets or high glass vases. They are watered with a short soak and the roots of the plants are sprayed daily. Once every 2 weeks, the roots are bathed in warm water for half an hour, and then the orchid is returned to its place.
All kinds of orchids love warm shower, which allows you to wash off the dust from the leaves and nourish the plants with moisture. After a shower, be sure to drain the remaining water from the pot, it should not stagnate in the pan. This procedure can be carried out only in the warm season.
After watering, be sure to remove water from the axils of the leaves and the middle of the outlet. The accumulation of moisture in these places can lead to decay. It is especially dangerous if the middle of the leaf rosette rots, where the growth point is located. In this case, the orchid will not be able to continue its growth, but will simply die. Water droplets are removed with a cotton pad or paper towel.
Irrigation Features
Any change in the maintenance of orchids requires a change in watering. The plant's water needs change, which must be taken into account.
blooming orchid
Usually, when watering orchids, they wait until the substrate in the pot dries out completely. With blooming orchids everything is a little different. Even if there is still condensation in the pot, you can already water the plant. Such orchids have much more moisture consumption, therefore it is not recommended to allow the substrate to dry completely - otherwise the petals may become lethargic, and for this reason the flowers of the orchid completely fall off.
When watering, you need to be careful: make sure that water does not fall on the peduncles and the flowers themselves. When transporting the plant to the bathroom, care must be taken not to break the long peduncle with inflorescences. No wonder it is attached to special supports, and their weight, together with the flowers, is quite noticeable.
 Some experienced growers during this period they prefer to water the orchid from a watering can, like ordinary flowers - in this case, the risk of accidentally damaging the flower is minimized. Just do not forget to drain the excess water from the pan after 5-10 minutes.
Watering in winter
Watering orchids in winter must be coordinated with the length of daylight hours and air temperature. The lower the temperature and the less light, the less often the flower is watered. The fact is that an orchid can fully assimilate moisture using the example of phalaenopsis only at values not lower than 18-20 ° C and daylight hours equal in duration to 12 hours. Therefore, in the winter months, the orchid's need for water is reduced.
Only under the influence of light do the stomata on the underside of the leaves open in Phalaenopsis, which causes active gas exchange. In order for the plant to fully develop and grow in winter, it needs to be backlit, but in this case, be careful about watering. Since these are epiphytic plants, it is better to underfill than overfill.
In winter, orchids should not be kept on a cold windowsill, otherwise the roots cool and cannot properly absorb water. If you water the plant regularly, and the lower leaves lose turgor, place the orchid pot on a foam stand or a special heat-insulating mat. You can help the plant recover by spraying the underside of the leaves in the morning.
After transplant
When transplanting, orchids are usually planted in a new purchased or self-prepared substrate. Such bark is usually well dried to avoid the appearance of fungus, so the plant pot will need to be soaked for half an hour in warm soft water.
If the first watering is poor, then the bark will not absorb moisture and the roots will remain dry. You can dissolve in water for the first watering a little fertilizer. The next watering should be done no earlier than in 2 weeks, the moisture reserves after a long soaking will be enough for this period.
After the purchase
Watering an orchid after purchase largely depends on the condition of the plant. You can buy a flower in a very dry form or, conversely, overly moistened, with rotten roots.
It happens that the manufacturer puts a peat cup under the root collar so that the moisture is retained by the plant during transportation. If you leave everything as it is, then when watering, the water will be distributed unevenly.
The roots located near the wall of the pot will dry out faster, and a peat cup, saturated with moisture and located near the root neck, can contribute to its decay. Therefore, during transplantation, it is necessary to remove the peat cup, and at the same time all rotten or dried roots.
Many people ask the question, why do orchids fall flowers? The fact is that, as a rule, plants are sold flowering, and after the flower is delivered home, the owners water it incorrectly. Place the pot in a bright, warm place and water at the moment when the roots become light, but there will still be condensation on the walls of the pot.
Helpful advice!
Water for watering orchids can also be acidified with high-moor peat. To do this, it is placed in a bag and lowered into water for several hours.
Otherwise, watering plants after purchase is no different from standard home care. Consider the amount of light, the temperature of the content, the size of the plant, and you will quickly be able to find the right algorithm for watering your orchid.
Watering errors
Many people think that tropical flowers need a lot of moisture because they grow in hot climates. This is only partly true. Being epiphytic plants, orchids do not come into direct contact with water, they are surrounded by very humid air, from which they receive everything they need.
 If we recall the atmosphere of the tropical forest, then we can note for ourselves daily temperature drops, periods of drought, alternating tropical showers. Orchids really like it when there is a cycle in their care. It must be remembered that they need the simultaneous presence a large number moisture, air and light.
However, mistakes are still made and quite often. They consist of the following:
Excessive watering. Wait until the substrate in the pot is completely dry. If you are in doubt about whether it is time to water your orchid, wait another day and only then water it. The consequences of an overflow can be fatal. If the roots start to rot from waterlogging, and you don’t notice it in time, the plant will die or it will have to be reanimated.
Watering at night. Any of the orchids is best watered in the morning. During the day under the sun, the plant will have time to dry well, which will avoid mold and rotting of leaves or bulbs.
Ignoring the needs of the plant. At different periods of its life, the orchid feels differently. If it does not give new leaves, roots, peduncles, does not grow bulbs, then the plant has come to rest time and abundant watering will not benefit it. If the orchid has bloomed or is actively growing green mass, the need for moisture increases.
The main problems in growing orchids
The most common problems that arise if the grower did not adhere to the rules for caring for the plant are described below.
Orchid leaves turn yellow
Most often, flower growers note that the leaves of such a flower begin to turn yellow. It should be remembered that for each of the plants, at a certain time, the leaves change their color to yellow and begin to dry out, which is an absolutely natural process.
Examine the bush. In the case when the old leaf plates, which are usually located at the very bottom, become yellow, then you should not worry. Thus, the orchid is updated. Only after the leaf is completely dry, it will need to be carefully removed.
 However, in the case when yellowing has touched the young leaves, you need to sound the alarm. As a rule, an orchid gets sick due to improper watering:
If the soil is waterlogged, then rot can appear on the root system quite quickly, which will lead to yellowing of the leaf plate.
In the event that the earthen lump is too dry, then the leaves of the orchid will begin to fade. In this case, the same result will be if the air humidity in the room is excessively low, and the florist does not spray the foliage regularly from the sprayer.
In winter, the bush may begin to turn yellow leaves due to the fact that it is affected by a draft. Also at this time it is not recommended to keep the orchid near the window or in a room where it is relatively cold. yellow leaves become due to strong cooling or freezing.
If direct sunlight falls on the foliage in the summer, they can burn them. As a result, yellow or brownish spots remain on the surface of the leaf plates.
Problems with orchid roots
If the orchids are not cared for as expected, then problems with its root system may well begin. Check out the roots. If they become slimy and have a lighter color or darken (become dark brown), then you have watered it incorrectly.
No need to think that the plant should receive as much moisture as in wild environment during rainstorms. The point is that in wild nature, after the downpour passes, all the water is absorbed into the soil or drains from the bark of trees, without lingering for a long time. Therefore, orchid roots absorb as much water as they need. That is, the roots are not constantly in the water.
 If, under room conditions, such an epiphyte is watered “from the heart”, then the excess water will stagnate in the substrate, and then the roots will begin to rot. And if you find this, then urgently transplant the orchid into a new substrate, but first remove all rotten and diseased roots.
Also, do not forget that this tropical plant needs moisture. In this regard, try to spray its foliage with a spray bottle every morning. Use warm filtered or settled water.
orchid not blooming
It is not uncommon for flower growers to note that for some reason their "beauty" does not want to bloom. In most cases, there is such a situation when flowering has already been observed several times, but when the next dormant period is over, the orchid for some reason does not release the peduncle.
Most often, this problem occurs when the flower does not have enough light. As a rule, it is in winter that the illumination is quite scarce. At this time of the year, most species of orchids have a dormant period, which explains the lack of flowering. Phalaenopsis are recommended to provide additional lighting using artificial lighting. In this case, they will continue to bloom further.
Carefully cut off the peduncle after flowering is over, it will be possible only after it has completely dried. However, in the event that it does not dry out and at the same time has a green or pale brown color, then most likely, young flower buds form on it after some time.
What to do in the case when this epiphyte does not want to bloom anymore? Such a plant needs stress. In order for budding to occur at room conditions, orchids need a temperature of no higher than 10–12 degrees, and at this time it must be watered quite sparingly. However, it is impossible to sharply lower the air temperature and reduce watering. This must be done gradually.
At the same time, it must be remembered that given plant during such a period, a difference between night and day temperatures is necessary. So, in the daytime you need warmth, while at night it should be cooler by 10-12 degrees. The result of this content of the plant should be the laying of a flower bud.
 If you take care of the orchid in this way for 4-6 weeks, then in most cases your efforts will be crowned with success. As a rule, during this time, the laying of the kidneys should already occur. In the event that the buds still did not appear, it is necessary to carefully remove the flower from a dormant state. This will require a gradual increase in temperature. Orchids need to be watered more and more.
In the event that this epiphyte did not bloom after 6–12 months, then you should not worry too much about this, because a young peduncle can form in about 24 months.
And why do orchids not bloom, but the leaves grow large? It's all about fertilizer, most likely they used nitrogen-containing fertilizers for indoor plants. Oversaturation of the soil with nitrogen causes an increased growth of green mass, and you may not wait for the laying of flower buds or flower stalks. Therefore, fertilize with phosphorus-potassium fertilizers, they stimulate flowering.
Pests and diseases of orchids
Such flowers are quite resistant to diseases and pests, but problems still happen.
Most often, rot appears on the plant. It is formed due to waterlogging of the soil and the plant itself. So, if you violate the irrigation regime and make it more abundant or frequent, as well as significantly increase the number of sprays, this can lead to rotting of the root system, as well as leaf plates (especially their bases) and bulbs. In this case, the plant is not easy to cure.
The affected area must be carefully cut out with a very sharp, disinfected knife, along with a piece of healthy tissue. Then it is necessary to treat the cut with a special solution that has bactericidal properties, which can be bought quite easily. The substrate and container should be replaced, while the pot can be boiled well if desired.
 Of the harmful insects, mealybugs are most often planted on the orchid and spider mites. If there are few of them, then you can try to get rid of them with a solution of soap, which you need to wipe the leaf plates 2 times with a break of 7 days. If orchids are bred in the ground small midges, then you will need treatment with Aktar or Fitoverm.
The main problems and advantages of orchids are told, now it remains to purchase this beautiful flower. By following the recommendations for growing, you can achieve a result that will delight you for many years. The main thing is to adhere to certain rules of care and pay more attention to this plant.
Article read: 782
© Copying is prohibited!
All materials of the site site are protected by copyright law - article 146 of the Criminal Code of the Russian Federation and are monitored for plagiarism. In the event that texts are found on third-party resources, we will be forced to go to court with financial claims against the defendant.
Orchids are beautiful tropical flowers that add an exotic touch to any space. Given the orchid's natural habitat, you may need to put in some extra effort to not only keep the plant alive, but also start blooming. Your indoor orchids should receive plenty of indirect sunlight and the indoor air should be reasonably warm and humid.
Steps
Beginning of work
- The most suitable type of orchid for growing at home is the moth orchid (phalaenopsis). These orchids bloom for several months and grow best in medium-sized bark mixtures in warm temperatures and low to medium sunlight. They are good for beginners and can outlive any of your mistakes.
- If you tend to water the flowers too much, it is better to choose a slipper orchid (for example, Paphiopedilum or Fragmipedium). On the other hand, if you tend to forget to keep an eye on your plants, Cattleyas, Oncidiums, or Dendrobiums will work best for you.
- If your house does not get a lot of sunlight, then the best choice there will be a diamond orchid (paphiopedilum). For small window sills, mini cattleyas (pleurothallis) are suitable or miniature orchid butterfly.
-
Choose the right pot. Most often, an orchid is grown in terracotta pots (made of clay or plastic). There are many different kinds. Here are some tips: if you water the plant often - use a clay pot with coarse filler; if your orchids often dry out, use a plastic pot and a smaller mixture.
- Transparent plastic pots are good because the light hits the roots of the plant, and you can watch them grow. They are well suited if you do not have much time for plant care.
- Pots with an inner mesh insert or two-tiered basket provide good drainage and air circulation, especially if the orchid is overwatered.
- Wooden baskets are usually made from rot-resistant wood such as teak. If you decide to use a basket, you will first need to put a layer of moss on the bottom, and then - planting mix.
-
Use the right potting mix. Orchid roots need access to air that the soil cannot provide. Therefore, mixtures for planting orchids, as a rule, do not contain earth. The mixture often uses ingredients such as spruce bark, coconut shell, sphagnum moss, wood fibers and perlite. Most often it is a mixture of two or three of these components.
- A fine mixture is best for small orchid species and varieties that have shallow roots and need to stay moist. These species include the slipper orchid, as well as most varieties of the oncidium and miltonia species. Prepare a mixture of 4 parts fine spruce bark, coconut flakes, or redwood bark, 1 part charcoal, one part garden perlite or medium Aliflor.
- A medium to coarse mixture is a good option if you are unsure which species to use for your orchid. This mix works well for Cattleya, Phalaenopsis, and most mature orchids. Make a mixture of four parts medium grade fir bark or medium grade coconut husk, one part medium charcoal, and one part garden perlite or medium Aliflor.
- If you don't feel like making your own mix, you can find a good ready-made alternative at most garden supply stores. There are many universal mixtures that are equally suitable for many types of orchids.
-
Find the right light source. Orchids need a lot of light. Depending on the species, they need diffused or direct sunlight. Choose a north-facing window with direct sunlight that partially diffuses (for example, through a curtain).
- Watch your orchid to determine if it needs more or less sunlight. So you can decide whether to close the window with additional curtains.
- Use fluorescent lights in addition to natural light. Gardeners claim that a conventional daylight effect lamp can have a positive effect. The light from the window may not be enough, especially on cloudy days, or the orchid may stand near the window, from which it receives little light. Buy a pair fluorescent lamps 20 watt or similar lamps to simulate more intense lighting.
Orchid Care
-
Maintain the right temperature. Find out if your orchid is growing cold or warm. Each type requires air temperature in different ranges. AT warm conditions grow vanda orchids, phalaenopsis and oncidium. In a cool climate, fragmipedium, miltonia, and cymbidium orchids are grown.
- At night, the temperature should drop to -9 °C. In nature, orchids grow in those places with a contrasting drop in night air temperature. Therefore, by artificially lowering the temperature in your home, or in the room where the orchid grows, you will stimulate the growth and flowering of this plant.
- Grow warm-loving orchids at 24 to 29°C. At night, the temperature should drop to the level of 19-24 °C.
- During the day, keep orchids that like cool climates at temperatures between 19 and 27 °C. At night, the temperature should drop to 10-19 °C.
-
Maintain good air circulation. This is especially important in warm weather. Open windows in hot, muggy weather, or place a small fan near plants. Stale, stagnant air is not conducive to orchid growth.
-
Water your orchid properly. The amount of water depends on the variety. In general, it is recommended to water this flower every 5-12 days, depending on the time of year and temperature. In hot weather, more frequent watering may be necessary.
- Roots should remain evenly moist throughout the year. However, the plant does not need much water during the colder months, when natural growth is slowed down, unlike during the warm and sunny months.
- Here are some types of orchids that need to be constantly hydrated: Paphiopedilum, Miltonia, Cymbidium, and Odontoglossum.
- Orchids that need to be kept moist during active growth, but almost dry between waterings - Cattleya, Oncidium, Brassia, Dendrobium.
- Some orchids need to dry out well between waterings. For example, Phalaenopsis, Wanda, Fskocenda.
-
Fertilize approximately once a month. It's just general recommendations because it really depends on the type of orchid. During the active growth phase, it is advisable to fertilize it once a week or even once every two weeks. However, you should water the orchid with plain water without top dressing at least once a month to wash out excess fertilizer and salt.
- Don't feed too often. Otherwise, you will destroy the plant and negatively affect its growth, especially during periods of "hibernation".
- Some orchids do not need to be fertilized at all. In fact, many orchids bloom beautifully year after year without any fertilizer.
-
Repot your orchid. The best way determine whether the plant needs to be transplanted - observe its growth. If the orchid does not bloom even when proper lighting, temperature and humidity, you may need to repot the plant. Do not repot an orchid during flowering.
- Choose the size of the pot depending on the size of the root tuber, the pot does not have to be large. Orchids like slightly cramped pots and don't produce much foliage or flowers in an oversized pot. Choose a new pot, a new filler and transplant the orchid.
- Orchids requiring an annual transplant: Dendrobium, Miltonia, Paphiopedilum and Phalaenopsis and their varieties.
- Orchids requiring transplantation in a year: Cattleya, Dendrobium, Oncidium, Odontoglossum and their varieties.
- Orchids requiring repotting every third year: Vanda and its varieties, Cymbidium.
Troubleshooting
-
Care for orchids that do not bloom. There are several possible causes Why don't orchids bloom? Most common cause is the lack of sufficient lighting, so check this factor first. Look at the color of the leaves. They should be medium green. If the leaves are dark, deep green, then the plant may not be getting enough light. There are several more reasons.
- The orchid may simply be too young. Plants must be mature enough to flower and this only occurs during their natural cycle.
- Your orchid may be too loose in the pot. For best results it is advisable to check that the flower sits tightly in the pot. Pots that are too spacious for a small root can create barriers to the growth or flowering of an orchid.
- Another problem could be that you are using the wrong fertilizer. Orchids usually do not absorb too many substances. One of the problems can be an excess of nitrogen, which inhibits flowering. Try to keep the fertilizer nitrogen ratio at 3:1:3 or 4:1:4.
-
Caring for orchids with sluggish leaves. If you are dealing with sluggish leaves, you should transplant the orchid and check the root system. There are several likely causes of soft and lethargic roots.
- This may be the result of over watering. You can safely water your orchid about once a week, depending on the type, but only if the plant is healthy and properly planted. Check to see if the potting mix has dried well before watering the plant.
- The pot is too big. This can also create problems with the roots, because they will expend too much energy on forming a dense root system, rather than developing new leaves and flowers.
- The filler in the pot has deteriorated. The filler in the pot retains its useful properties for a certain time. After which it needs to be replaced. Check if it's time to replace it.
-
Destruction of pests. While pests rarely infest indoor orchids, they can still show up in planting mixes out of nowhere. Learn to deal with such troubles, and then you can grow your orchid healthy and unharmed.
- Aphids most often attack buds and buds. Small holes in these areas may be a sign of aphids. Fortunately, most insecticides help get rid of these little annoyances.
- AT soil mixtures snails and worms can be found, so check the mixture before transplanting the plant. They can damage roots, leaves or stems. Again, this problem can be solved with insecticides or changing the planting mix.
- If young leaves lose color and white masses appear on the orchid, then the plant is most likely infected with a flour worm. Use insecticides or products containing certain oils that suffocate pests. After the elimination of the threat, it is desirable to transplant the plant.
- To prepare a homemade insecticide, mix 9/10 liters of warm water, 1/10 liters of alcohol, 1 tsp. light oil (Neem Oil is a great option), a few drops of mild dishwashing detergent. Mix everything in a spray bottle and shake well (with the cap on). Spray the orchid.
- Look for additional lighting fixtures in garden stores. Often there are light amplifiers on sale that will benefit the home orchid.
Warnings
- Watch out for pests. Insects and other pests are not a big threat to indoor orchids, but sometimes spider mites, ants and aphids attack orchids. If you notice these pests on the plant, wash them off or treat the flower with insecticidal soap.
Choose the right type of orchid. There are many different types of orchids and your choice depends entirely on the conditions you can provide for that plant. The choice is influenced by factors such as: the temperature in your home, how much light the plant receives, how much attention you can give flower care and which orchids you like best.