Homemade asynchronous generator. How to assemble a powerful homemade electricity generator
Unfortunately, often power supply organizations cannot cope with the provision of private households with electricity. Due to power outages, dacha owners and country cottages forced to turn to alternative sources of electricity. The most common of these is the generator.
Features of the electric generator and its scope
An electric generator is a mobile device used to convert and store electricity. Operating principle this device simple, which allows you to make it yourself. scheme simple generator can be easily found on the Internet.

A hand-made unit will not be a worthy competitor to a factory-assembled product, but this optimal solution if you want to save a significant amount of money.

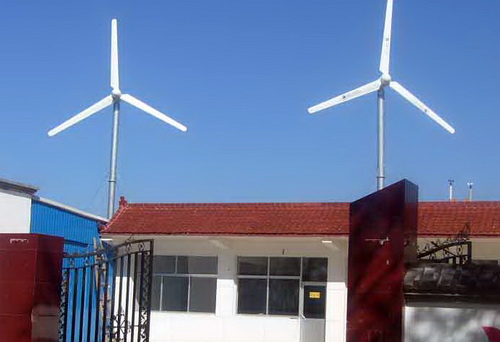
Electric generators have a fairly wide range of applications. As you can see in the photo of homemade generators, they can be used in wind farms, in welding work, and also as offline device to support electricity in private homes.

The generator is switched on by the input voltage. To do this, the device is connected to a power source, but this is not rational for a mini-power plant, because it must generate electricity, rather than consuming it to run.


As a result, models equipped with the ability to sequentially switch capacitors or with a self-excitation function are especially popular.
The nuances that you need to know to create an electric generator
Buying a generator is quite expensive. Therefore, more and more zealous owners resort to making the unit with their own hands. The simplicity of the principle of operation and design solution allows you to assemble an electric generating device in just a couple of hours.

How to make a generator with your own hands?
The first stage is to set up all the equipment so that the rotation speed exceeds the speed of the electric motor. After measuring the amount of rotation of the motor, add another 10%. You will get the speed at which the generator should operate.

Step two - altering the generator for yourself with the help of capacitors. It is very important to correctly determine the required capacity.

The third step is the installation of capacitors. Here it is necessary to strictly follow the calculation. In addition, you need to make sure the quality of the insulation. That's all - the assembly of the generator is completed.


Master class on making an asynchronous type generator
One of the most common types of homemade generators is asynchronous electric generator. This is due to its simple principle of operation and good technical characteristics.

What do you need to make such a generator with your own hands? First of all, you will need an asynchronous motor. His hallmark are short-circuited turns instead of a magnet on the rotor. You will also need capacitors.

Manufacturing instructions
Connect a voltmeter to any of the motor windings, and spin the shaft. The voltmeter will show the presence of voltage, which is taken due to the residual magnetization of the rotor.

It's not a generator yet. Let's try to create a magnetic field using rotor coils. When the electric motor is turned on, the short-circuited turns of the rotor are magnetized. A similar result can be obtained when the device is operating in the "generator" mode.


We put a shunt on one of the stator windings using not electrical capacitor. Let's spin the shaft. The value of the appeared voltage will eventually become equal to the rated voltage of the motor. Next, we shunt the remaining windings of the power device with a capacitor and connect them.

The generator is considered a potentially dangerous device, so handling it requires special care. It must be protected from atmospheric precipitation and mechanical shocks. It is best to make a special casing.

If the device is autonomous, then it must be equipped with sensors and devices to record the necessary data. It is also desirable to equip the device with an on / off button.


At the slightest doubt in your abilities, it is better to refuse self-manufacturing generator.

DIY photo generators


It is worth clarifying the definition generator". Most have associations with gasoline or diesel generators built on the basis of the engine internal combustion. Of course, a do-it-yourself electric generator, an indispensable component of a car, and domestic power plants based on internal combustion engines are the most common of industrial designs. By definition, an electrical generator is a device that converts different kinds energy into electricity.
It will not be possible to use the energy of the atom at home (not the scale). The energy of the sun, wind, moving water and thermal energy(ICE) use according to your strength.
Energy of sun
Solar battery — alternative source energy, no difference big power, but as an auxiliary (backup) system is already quite widespread.
It directly generates electricity, which is used to charge the battery. Of course, the power plant operates during the day and the power depends on the length of daylight hours. If you look at the insolation map of Russia, you can see that the duration of "sunshine" in half of the territory is from 1700 to 2000 hours per year, and in the southern regions (surprisingly, in Yakutsk) more than 2000 hours.
The efficiency of such batteries ranges from 9% - 25% of the declared power (depending on the type of cell), the most common models with an efficiency of 14-19%. If you don't go into distinctive features batteries, then in most cases, to get 1 kW of electricity, you need a panel with an area of 7 to 10 square meters. m. And now you can multiply by the amount sundial and get a good annual savings figure ...
What else is good solar panels- ease of installation. If you do not mount the system according to the “sunflower” principle, with rotation relative to the position of the sun, then the solar generator circuit is very simple.
Do-it-yourself electric generator: location of a stationary battery
for year-round operation it should be + 15 ° to latitude, for the summer months it is necessary to subtract 15 ° from latitude. Although for small systems you can increase the power up to 50% by tracking the azimuth of the sun, since the deviation of the battery from the perpendicular of the sun's beam by no more than 15 ° gives 99% of helioradiation. The height of the sun need not be tracked, as it mostly falls within a 30° spread. The main thing is to take all this into account when installing the battery, for example, on a pitched roof.

except stationary systems you can buy or make a portable solar power station with your own hands, the power of which will be enough to recharge your phone or tablet somewhere in nature.

Do-it-yourself electric generator: wind energy
Wind is another environmentally friendly form of energy. But if solar energy is converted into electricity using photocells simply (from the point of view of the end user), then a wind power generator is a complex engineering structure that requires a whole range of work. In fact, at home, it is necessary to repeat the industrial installation.

The main components: engine - multiplier (reducer) - DC generator - battery charge controller - battery - voltage converter.
A wind turbine, or wind wheel, can be with a horizontally oriented axis and a vertical one. In the first case, this is the familiar (and most common) propeller design.

The vertical axis is wind turbines based on the Darrieus or Savonius rotor. Of the two, it is easier to make an electric generator with your own hands according to the second option.

Do-it-yourself power generator: each scheme has its own advantages.
Vertical-axis rotors have an efficiency of no more than 15%, but they also have a much lower noise level, and the Savonius rotor is quite simple from the point of view of a wind turbine. In addition, this type is less dependent on wind strength and does not require orientation relative to direction. air flow.
Horizontally axial modifications have more high efficiency, but require orientation relative to the direction of the air flow (with a weather vane, or a shovel) and protection from strong winds. In addition, they are quite noisy, not only because of aerodynamic noise, but also mechanical ones are added (after all, the thrust bearing is “noisy”). Plus, to generate decent power, you need a rather large propeller size. But nevertheless, it is this type that is used in almost all industrial designs.
Now about the propeller, its dimensions and the number of blades. There is already a strictly verified, including empirically, table of the dependence of the power of the installation on wind speed, blade size and their number.
In order not to get confused with fractions, it is worth giving a simple layout with a wind speed of 4 m (the efficiency of the horizontal “windmill” is 0.35, the efficiency of the generator is 0.9, the gearbox is 0.8):
- diameter 2 m: 2 blades - 10 watts, 3 blades - 15 watts, 4 blades - 20 watts, 6 blades - 30 watts, 8 blades - 40 watts;
- diameter 4 m: 2 blades - 40 watts, 3 blades - 60 watts, 4 blades - 80 watts, 6 blades - about 120 watts.
In principle, as the diameter increases, the dependence is not quite linear, but general idea gives. To get 500 watts at a wind speed of 4 m per second, the diameter of the wind wheel for 2 blades is 14 m, 3 blades is 11.48 m, 4 blades is 9.94.
Why is 4 meters per second chosen for the calculation?
As a rule, for middle lane In Russia, this indicator is the ceiling for average monthly values. For example, for Moscow and the region, the average monthly wind speed during 2012 generally fluctuates around 2.5 m/s. So when choosing a wind power generator, you should first take an interest in the statistics in the region, and then calculate whether it is worth straining, but if there is available materials and nodes, then why not make such a device.
Now about the blades - the most crucial moment. Sailing blades (like old windmills) have low efficiency, so you need aerodynamic blades, like an airplane wing.

You can even carve them out of wood, although many craftsmen cut plastic pipe. But here there are nuances.
With a small number of blades, they are more difficult to balance and, moreover, vibrations are possible. A wind wheel with 2-3 blades belongs to high-speed ones, the linear speed at strong wind at the end of the blade it can reach up to 200 m / s (the Makarov pistol bullet is 400 m / s, and the speed of the Saint-Etienne duel pistol of the 1835 model is 168 m / s).
Plastic is a brittle material and can break at high speed in the presence of vibration. Therefore, it is best to use more “low-speed” wind wheels with 6 blades and a diameter of 2-3 meters to make a wind generator with your own hands.

And for their manufacture to take pvc pipe for pressure water pipeline with a wall thickness of 4 mm. We cut out the blades, grind its edges and grind to obtain the required aerodynamic characteristics.

Then a "star" is made from sheet steel to assemble the propeller.
After mounting the blades, the wind wheel must be balanced. To do this, it is installed indoors on a vertical support with the axis level strictly horizontal and ensure that the wheel does not arbitrarily turn at any position of the blades, otherwise vibrations will occur.
Simultaneously with balancing, the position of the blades in space relative to the vertical is checked. For this, a fixed reference is used at the lower (or upper) point, determining the distance from this point to each blade when it is opposite it.
Unfortunately, without the use of a factory-made electric generator with your own hands or a DC motor, it will not work to make a wind generator.

Theoretically, it can be made, but why ... You can always find and buy a low-speed DC electric motor with permanent magnets and a voltage of up to 100 V. You can also install an automobile one, but it requires high speeds, and therefore a gearbox. You can choose a bike motor, which at 200 rpm maximum power 250 watts, at 24 V (enough with a margin).

After the propeller and the choice of the generator, it is necessary to make a frame with robust design(after all, the "plane" on a leash).
Then make a swivel assembly attached to the frame and carrying the wind wheel and generator, with a brush current collector (if it is possible to pick up a factory one, it is better to use it).

And to protect against hurricane winds, install a movable side shovel with a spring tie on the hinge. In strong winds, there will not be enough spring force to align the shovel perpendicular to the blades. And the force of the wind will simply turn the blades along the direction of the wind. At normal speed flow, the spring will turn the blades perpendicular to the shovel.

It remains to assemble the structure: the propeller to the generator, the generator to the frame, the frame to the frame, a shovel is attached to it on a stretch, the frame to turning mechanism, the generator to the current collector, and already from it there are wires to the electrical part.

The whole structure is mounted on a mast.

Electrical part wind generator the simplest: the diode bridge through the fuses and the voltage controller is connected to the battery, and the voltage is distributed further from it. Constant - for powering devices with the appropriate type of power supply. And to get alternating current using a voltage converter.
Video
To assemble a powerful home-made electricity generator, we need an old one without eights on the rear wheel. The higher the maximum gear ratio, the better. Because of the fit, women's bikes are preferred, but harder to find. A 28" wheel and a 52 tooth front sprocket would be fine, but my first homemade electric pedal generator was with a 26" wheel and a 46 tooth sprocket and it worked without a problem. Only the highest gear will be engaged, so you can get rid of the derailleur. Remove all other unnecessary parts from it - brakes, front wheel, etc. can be saved so that there is something to hold on to and there is where to fix the switch, and a voltmeter. Since we got rid of the front wheel, to install the bike you will need to make a stand out of metal, wood or something else so that the rear wheel does not touch the ground.


If you are using a K1 alternator (used on cars such as the Ford Fiesta, Escort, Granada, Vauxhall, Opel), it often comes with a two-dimensional pulley. Lucas generators should be avoided as they are not as efficient as Bosch and Motorola generators. Look out for vehicles with large engines where the alternators are designed to run at low speeds. Ford/Bosch N1 alternators can be found on Sierra and Volvo vehicles. They are of good quality, but a bit bigger and heavier than the K1. Make sure you buy a stand-alone generator that does not require outdoor unit control, as some Japanese generators are shipped without it. It is better to buy a generator with two large terminals and one small one. The two large terminals are connected together and serve as a plus, the small one is connected to the indicator light, and the 5 mm ground terminal is connected to the body and serves as a minus. After the purchase, it will be a good idea to conduct a basic test of the generator. In order to check if the generator is working, you can use a small light bulb, which we will continue to act as a charge indicator. If an alternator passes the test, it does not mean that it is capable of generating electricity. But in this way, the most common shortcomings can be identified: problems with the fuse, diode block, worn brushes. These faults can be fixed by borrowing parts from other broken alternators with intact diode and driver blocks, etc. Don't throw away rusty or dirty alternators. If they pass the tests, then they are likely to work.

Clean the generator by first removing the cooling fan (it is noisy and not needed). Attach the alternator to the bracket at the back of the seat so that its spindle is 10 - 12 cm outward from the rim as shown in the picture below.
Using a tape or cable, measure the required belt circumference. It is approximately 82 inches. Buy an A82 "V" belt from a car shop. They are produced in increments of one inch, cost about 500 rubles, and are also used in agricultural machinery. A78 belts can be used on 26" wheels and A80 belts on 27" wheels. Better yet, buy a timing belt like the Goodyear Extraflex.

Such belts bend more easily around small pulleys, which significantly reduces mechanical losses compared to a solid belt. Adjusting the tension of the alternator installed on the car is carried out using a special plate with a slot. Instead, we will use a spring tensioner designed to smooth out wheel irregularities. Since very low torque is required, the belt does not need to be tightened too much. A heavily tightened belt increases friction losses. If you have a pulley from K1, then after stabilizing its movement, count the number of revolutions of the generator for one turn of the wheel - more than 45 is good, and 60 is generally ideal. If you bought a K1 split pulley, take it apart and put a spacer between the two plates so that the belt goes further inside. This will increase your speed.
After completing the mechanical work, provided that the generator is used in public places, it is necessary to provide protection for all moving parts. Small children are attracted to shiny moving objects - a wheel and a rim, and the person sitting behind the generator does not see what is happening behind! Even though no gears are required, don't rush to get rid of the derailleur. He pulls the chain and if a finger gets between the chain and the sprocket, you can only get off with a slight bruise, while without a switch, it can go as far as amputation.

The “upright bicycle on a shelf” version of the powerful pedal generator described above is the easiest and most obvious way to make a homemade generator, but it’s also easy to make a chair-based version. In addition, you only need a cheap plastic chair, some kind of footrest, part of the old frame from the tent, two large diameter pipes (inserted into each other) or a height adjuster from a swivel chair. If you cut office chair, then take only old mechanical chairs without air springs, which can be dangerous when cutting and drilling! Generators are easier to transport if they are made collapsible in the middle. You can also get rid of the belt-tensioning spring by attaching the alternator so that the belt tensions under its own weight.
Compared with the exercise bike generator, the road bike generator has the disadvantage of weak flywheel effect. This problem is solved with the help of additional weight, which is attached to the rim with bolts with a diameter of 4 mm. Give cargo U-shape(bulge outwards). Make sure that the load does not have any opportunity to come off. Don't overdo it with the load! I once saw a rim loaded with lead fall apart!
In the continuation of the article, we will consider.
For the needs of the construction of a private residential house or cottage home master may need offline source electrical energy, which you can buy in a store or assemble with your own hands from available parts.
Homemade generator Can be powered by petrol, gas or diesel fuel. To do this, it must be connected to the engine through a shock-absorbing clutch that ensures smooth rotation of the rotor.
If the locals allow natural conditions, for example, frequent winds blow or a source is close running water, then you can create a wind or hydraulic turbine and connect it to an asynchronous three-phase motor to generate electricity.
Due to such a device, you will have a constantly working alternative source of electricity. It will reduce energy consumption from public networks and allow savings on its payment.
In some cases, it is permissible to use a single-phase voltage to rotate an electric motor and transmit torque to a home-made generator to create its own three-phase symmetrical network.
How to choose an asynchronous motor for a generator by design and characteristics
Technological features
The basis of a homemade generator is a three-phase asynchronous electric motor with:
- phase;
- or squirrel-cage rotor.
Stator device
The magnetic circuits of the stator and rotor are made of insulated plates of electrical steel, in which grooves are created to accommodate the winding wires.

The three individual stator windings can be wired in the factory as follows:
- stars;
- or a triangle.
Their conclusions are connected inside the terminal box and connected by jumpers. The power cable is also installed here.

In some cases, wires and cables can be connected in other ways.

For every phase induction motor symmetrical voltages are applied, shifted in angle by a third of the circle. They form currents in the windings.

These quantities are conveniently expressed in vector form.

Design features of the rotors
Wound rotor motors
They are provided with a winding made according to the stator model, and the leads from each are connected to slip rings, which provide electrical contact with the start-up and adjustment circuit through pressure brushes.
This design is quite difficult to manufacture, expensive in cost. It requires periodic monitoring of work and qualified maintenance. For these reasons, it makes no sense to use it in this design for a home-made generator.
However, if there is a similar motor and it has no other application, then the conclusions of each winding (those ends that are connected to the rings) can be shorted to each other. In this way, the phase rotor will turn into a short-circuited one. It can be connected according to any scheme considered below.
Squirrel cage motors
Aluminum is poured inside the grooves of the rotor magnetic circuit. The winding is made in the form of a rotating squirrel cage (for which it received such an additional name) with jumper rings short-circuited at the ends.
This is the most simple circuit motor, which is devoid of moving contacts. Due to this, it works for a long time without the intervention of electricians, it is characterized by increased reliability. It is recommended to use it to create a homemade generator.
Designations on the motor housing

In order for a homemade generator to work reliably, you need to pay attention to:
- , which characterizes the quality of protection of the body from the effects of the external environment;
- power consumption;
- speed;
- winding connection diagram;
- permissible load currents;
- Efficiency and cosine φ.

The principle of operation of an induction motor as a generator
Its implementation is based on the reversibility method electrical machine. If the motor is disconnected from the mains voltage, the rotor is forced to rotate at the calculated speed, then EMF will be induced in the stator winding due to the presence of residual energy magnetic field.
It remains only to connect a capacitor bank of the appropriate rating to the windings and a capacitive leading current will flow through them, which has the character of a magnetizing one.
In order for the generator to self-excite, and a symmetrical system of three-phase voltages to form on the windings, it is necessary to select the capacitance of the capacitors, which is greater than a certain, critical value. In addition to its value, the design of the engine naturally affects the output power.
For the normal generation of three-phase energy with a frequency of 50 Hz, it is necessary to maintain the rotor speed exceeding the asynchronous component by the amount of slip S, which lies within S=2÷10%. It needs to be kept at the synchronous frequency level.
The deviation of the sinusoid from the standard value in frequency will adversely affect the operation of equipment with electric motors: saws, planes, various machine tools and transformers. This has practically no effect on resistive loads with heating elements and incandescent lamps.
Wiring diagrams
In practice, all common methods of connecting the stator windings of an induction motor are used. Choosing one of them creates various conditions for the operation of the equipment and generate a voltage of certain values.
Star schemes
A popular option for connecting capacitors
The connection diagram of an asynchronous motor with star-connected windings for operation as a three-phase network generator has a standard form.

Scheme of an asynchronous generator with connection of capacitors to two windings
This option is quite popular. It allows you to power three groups of consumers from two windings:
- two voltage 220 volts;
- one - 380.

The working and starting capacitors are connected to the circuit by separate switches.
Based on the same circuit, you can create a home-made generator with capacitors connected to one winding of an induction motor.
triangle diagram
When assembling the stator windings according to the star circuit, the generator will produce a three-phase voltage of 380 volts. If you switch them to a triangle, then - 220.

The three schemes shown above in the pictures are basic, but not the only ones. Based on them, other connection methods can be created.
How to calculate the characteristics of the generator by engine power and capacitor capacitance
To create normal operating conditions for an electric machine, it is necessary to observe the equality of its rated voltage and power in the generator and electric motor modes.
For this purpose, the capacitance of the capacitors is selected taking into account the reactive power Q generated by them at various loads. Its value is calculated by the expression:
Q=2π∙f∙C∙U 2
From this formula, knowing the power of the engine, to ensure full load, you can calculate the capacity of the capacitor bank:
C \u003d Q / 2π ∙ f ∙ U 2
However, the mode of operation of the generator should be taken into account. At idle, the capacitors will unnecessarily load the windings and heat them up. This leads to big losses energy, overheating of the structure.
To eliminate this phenomenon, capacitors are connected in steps, determining their number depending on the applied load. To simplify the selection of capacitors for starting an asynchronous motor in generator mode, a special table has been created.
| Generator power (kVA) | Full load mode | Idle mode | ||||
| cos φ=0.8 | cos φ=1 | Q (kvar) | C (uF) | |||
| Q (kvar) | C (uF) | Q (kvar) | C (uF) | |||
| 15 | 15,5 | 342 | 7,8 | 172 | 5,44 | 120 |
| 10 | 11,1 | 245 | 5,9 | 130 | 4,18 | 92 |
| 7 | 8,25 | 182 | 4,44 | 98 | 3,36 | 74 |
| 5 | 6,25 | 138 | 3,4 | 75 | 2,72 | 60 |
| 3,5 | 4,53 | 100 | 2,54 | 56 | 2,04 | 45 |
| 2 | 2,72 | 60 | 1,63 | 36 | 1,27 | 28 |
Starting capacitors of the K78-17 series and the like with an operating voltage of 400 volts or more are well suited for use as part of a capacitive battery. It is quite acceptable to replace them with metal-paper counterparts with the corresponding denominations. They will have to be connected in parallel.

It is not worth using models of electrolytic capacitors to work in the circuits of an asynchronous home-made generator. They are designed for DC circuits, and when passing a sinusoid that changes in direction, they quickly fail.
There is a special scheme for connecting them for such purposes, when each half-wave is directed by diodes to its assembly. But it's pretty complicated.
Design
The autonomous device of the power plant must fully provide the operating equipment and be carried out by a single module, including a hinged electrical panel with devices:
- measurements - with a voltmeter up to 500 volts and a frequency meter;
- switching loads - three switches (one general supplies voltage from the generator to the consumer circuit, and the other two connect capacitors);
- protection - eliminating the consequences of the occurrence short circuits or overloads and ), which saves workers from insulation breakdown and phase potential entering the case.
Main power redundancy
When creating a home-made generator, it is necessary to provide for its compatibility with the grounding circuit of the working equipment, and for autonomous operation, it must be securely connected to.
If a power plant is built for backup power devices operating from the state network, then it should be used when the voltage is turned off from the line, and when restored, it should be stopped. For this purpose, it is enough to install a switch that controls all phases simultaneously or connect complex system automatic backup power supply.
Voltage selection
The 380 volt circuit has an increased risk of human injury. It is used in extreme cases, when it is not possible to get by with a phase value of 220.
Generator overload
Such modes create excessive heating of the windings with subsequent destruction of the insulation. They occur when the currents passing through the windings are exceeded due to:
- improper selection of capacitor capacitance;
- connection of high power consumers.
In the first case, it is necessary to carefully monitor the thermal regime during idling. With excessive heating, it is necessary to adjust the capacitance of the capacitors.
Features of connecting consumers
The total power of a three-phase generator consists of three parts generated in each phase, which is 1/3 of the total. The current passing through one winding must not exceed the rated value. This must be taken into account when connecting consumers, distribute them evenly over the phases.
When a homemade generator is designed to operate on two phases, then it cannot safely generate electricity more than 2/3 of the total value, and if only one phase is involved, then only 1/3.
Frequency control
The frequency meter allows you to monitor this indicator. When it was not installed in the design of a home-made generator, then you can use the indirect method: at idle, the output voltage exceeds the nominal 380/220 by 4 ÷ 6% at a frequency of 50 Hz.
One of the options for making a home-made generator from an asynchronous motor and its capabilities are shown in their video by the owners of the Maria channel with Alexander Kostenko.
Goods
(13 votes, average: 4.5 out of 5)The energy of the electric current, entering inside the asynchronous motor, easily turns into the energy of motion at the exit from it. But what if a reverse transformation is required? In this case, you can build a homemade generator from an asynchronous motor. Only it will function in a different mode: by making mechanical work electricity will start to be generated. Ideal Solution- transformation into a wind generator - a source of free energy.
It has been experimentally proved that the magnetic field is created by an alternating electric field. This is the basis of the principle of operation of an asynchronous motor, the design of which includes:
- The body is what we see from the outside;
- The stator is the fixed part of the electric motor;
- The rotor is the element that is set in motion.
At the stator main element- a winding to which an alternating voltage is applied (the principle of operation is not permanent magnets, but on a magnetic field damaged by an alternating electric one). The role of the rotor is a cylinder with grooves in which the winding is laid. But the current supplied to it has opposite direction. The result is two variables electric fields. Each of them creates a magnetic field, which begin to interact with each other. But the structure of the stator is such that it cannot move. Therefore, the result of the interaction of two magnetic fields is the rotation of the rotor.
The design and principle of operation of the electric generator
Experiments also confirm that the magnetic field creates a variable electric field. Below is a diagram that clearly illustrates the principle of the generator.

If a metal frame is placed and rotated in a magnetic field, then the magnetic flux penetrating it will begin to change. This will lead to the formation of an induction current inside the loop. If you connect the ends to a current consumer, for example, with electric lamp, you can observe its glow. This suggests that the mechanical energy expended on rotating the frame inside the magnetic field turned into electrical energy, which helped the lamp light up.
Structurally, the electric generator consists of the same parts as the electric motor: housing, stator and rotor. The difference lies only in the principle of action. The non-rotor is driven by the magnetic field generated by the electric in the stator winding. And an electric current appears in the stator winding due to a change in the magnetic flux penetrating it, due to the forced rotation of the rotor.
From electric motor to electric generator
Human life today is unthinkable without electricity. Therefore, power plants are being built everywhere that convert the energy of water, wind and atomic nuclei into electrical energy. It has become universal because it can be transformed into the energy of movement, heat and light. This was the reason for the mass distribution of electric motors. Electric generators are less popular because the state supplies electricity centrally. But still, sometimes it happens that there is no electricity, and there is nowhere to get it from. In this case, a generator from an asynchronous motor will help you.
We have already said above that structurally the generator and the engine are similar to each other. This raises the question: is it possible to use this miracle of technology as a source of both mechanical and electrical energy? It turns out you can. And we will tell you how to convert the motor into a power source with your own hands.
The meaning of rework
If you need an electric generator, why make it out of an engine if you can buy new equipment? However, high-quality electrical engineering is not a cheap pleasure. And if you have an unused this moment motor, why not do him a good service? Through simple manipulations and minimal cost you will get an excellent current source that can power devices with a resistive load. These include computer, electronic and radio engineering, ordinary lamps, heaters and welding converters.
But savings are not the only benefit. Advantages electric generator current constructed from an asynchronous electric motor:
- The design is simpler than that of the synchronous counterpart;
- Maximum protection of the insides from moisture and dust;
- High resistance to overloads and short circuit;
- Almost complete absence of non-linear distortion;
- Clear factor (a value expressing the uneven rotation of the rotor) no more than 2%;
- The windings are static during operation, therefore they do not wear out for a long time, increasing the service life;
- The generated electricity immediately has a voltage of 220V or 380V, depending on which engine you decide to remake: single-phase or three-phase. This means that current consumers can be directly connected to the generator, without inverters.
Even if the generator cannot fully meet your needs, it can be used in conjunction with a centralized power supply. In this case, we are again talking about savings: you will have to pay less. The benefit will be expressed as the difference obtained by subtracting the generated electricity from the amount of electricity consumed.
What is needed for remodeling?
To make a generator from an asynchronous motor with your own hands, you must first understand what prevents the conversion of electrical energy from mechanical energy. Recall that for the formation of an induction current, the presence of a magnetic field that changes with time is necessary. When the equipment is operating in motor mode, it is created both in the stator and in the rotor due to mains power. If you transfer the equipment to the generator mode, it turns out that there is no magnetic field at all. Where can he come from?
After the operation of the equipment in the engine mode, the rotor retains residual magnetization. It is she who, from forced rotation, causes an induction current in the stator. And in order for the magnetic field to be preserved, it will be necessary to install capacitors that have a capacitive current. It is he who will maintain the magnetization due to self-excitation.
With the question of where the original magnetic field came from, we figured it out. But how to set the rotor in motion? Of course, if you spin it with your own hands, it will be possible to power a small light bulb. But the result is unlikely to satisfy you. The ideal solution is to turn the motor into a wind generator, or a windmill.
This is the name of the device that converts kinetic energy wind to mechanical and then to electrical. Wind generators are equipped with blades that are set in motion when they meet with the wind. They can rotate both vertically and horizontally.
From theory to practice
We will build a wind generator from a motor with our own hands. For easy understanding, diagrams and videos are attached to the instructions. You will need:
- Device for transmitting wind energy to the rotor;
- Capacitors for each stator winding.
It is difficult to formulate a rule according to which you could pick up a device for catching wind the first time. Here you need to be guided by the fact that when the equipment is operating in the generator mode, the rotor speed should be 10% higher than when operating as an engine. It is necessary to take into account the frequency not of the nominal, but of idling. Example: the nominal frequency is 1000 rpm, and in idle mode it is 1400. Then, to generate current, you need a frequency equal to approximately 1540 rpm.
The selection of capacitors by capacitance is made according to the formula:
![]()
C is the desired capacity. Q is the rotor speed in revolutions per minute. P - the number "pi", equal to 3.14. f - phase frequency (constant value for Russia, equal to 50 Hertz). U - voltage in the network (220 if one phase, and 380 if three).
Calculation example : three-phase rotor rotates at 2500 rpm. ThenC \u003d 2500 / (2 * 3.14 * 50 * 380 * 380) \u003d 56 uF.
Attention! Don't choose more capacity calculated value. Otherwise, the active resistance will be high, which will lead to overheating of the generator. This can also happen when the device starts without load. In this case, it will be useful to reduce the capacitance of the capacitor. To make it easy to do it yourself, put the container not in one piece, but in a team. For example, 60 uF can be made up of 6 pieces of 10 uF connected in parallel to each other.
How to connect?
Consider how to make a generator from an asynchronous motor, using the example of a three-phase motor:
- Connect the shaft to a device that drives the rotor due to wind energy;
- Connect the capacitors according to the triangle scheme, the vertices of which are connected to the ends of the star or the vertices of the stator triangle (depending on the type of connection of the windings);
- If the output requires a voltage of 220 Volts, connect the stator windings into a triangle (the end of the first winding - with the beginning of the second, the end of the second - with the beginning of the third, the end of the third - with the beginning of the first);
- If you need to power devices from 380 volts, then a star circuit is suitable for connecting the stator windings. To do this, connect the beginning of all windings together, and connect the ends to the appropriate containers.


Step-by-step instructions on how to make a single-phase low-power wind generator with your own hands:
- Take it out of the old washing machine electric motor;
- Determine the working winding and connect a capacitor in parallel with it;
- Provide rotation of the rotor due to wind energy.

It will turn out a windmill, as in the video, and it will give out 220 volts.
For electrical appliances powered by direct current, an additional rectifier will be required. And if you are interested in monitoring the parameters of the power supply, install an ammeter and a voltmeter at the output.
Advice! Wind generators due to the lack of a constant wind can sometimes stop working or work not at full strength. Therefore, it is convenient to organize your own power plant. To do this, the windmill is connected during windy weather to the battery. The accumulated electricity can be used during the calm.