How to make a house out of cardboard boxes. Cozy cardboard house: crafting with children
You can build a cardboard house with your own hands, without applying special efforts. The designs can be different - this is a dollhouse, and a garage or parking lot for toy cars. Children will be delighted to participate in joint creativity. After all, the process of making crafts in the form of a hut is fascinating.
At the same time, you can create a cozy cardboard nest that will fit a small fidget.

How to make a craft with your own hands
Taking a little time joint work with children and letting your imagination run wild, you can build a lot of original designs. And how to do this, we will tell further.


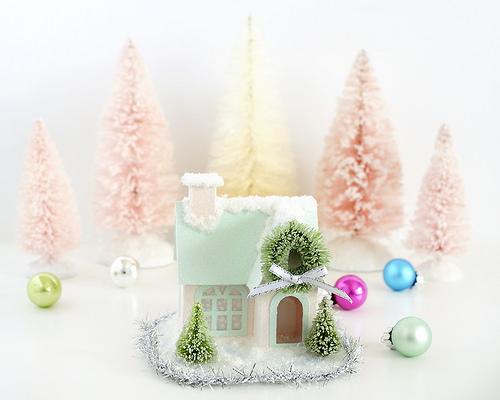
New Year's hut
When making crafts, you need to focus on the schemes and patterns of cardboard houses. After you choose the most suitable option, you should transfer the markup to the workpiece. Well, then there is nothing complicated:
Cut out the pattern pieces from white sheet paper and stick them in the prescribed sequence on the cardboard. You can use glue or double-sided tape.

All cardboard parts are carefully cut out. For the arrangement of windows and doors, you should use a clerical knife.


Adhering to the traced folds, bend the workpiece and glue the structure. For strength, a primer can be applied to the house.

The hut should be painted and decorated, for example, the roof is often sprinkled with sparkles. Having attached a rope to the structure, the hut is used as a Christmas tree decoration.

Cardboard and foam house
This option is more labor intensive. But our instructions on how to make a house out of cardboard will help you quickly cope with the design.


Take a regular cardboard box. The size is selected individually. A house is being built from it - you need to cut the necessary parts and glue them together. After window and door openings are drawn on the structure, they should be cut out with a clerical knife.

The hut can be decorated or pasted over with colored paper. But the decoration will look more original mounting foam. It is applied in strips, leaving 3-4 mm gaps between them for swelling. The foam will dry in 30-40 minutes.

In the meantime, you can build a stand:
- cut a piece of cardboard in the form of a rectangle with an area slightly larger than the base of the house;
- glue the stand to the frame of the building;
- imitate snow with foam or cotton wool glued with PVA to the stand.

Excess foam from the craft is cut off with a knife, and then the structural elements are painted in the selected color scheme.

Home for gnomes
The task can be simplified if you use existing blanks, for example, cylinders from rolls toilet paper. In order for the composition to be original and attractive, as in the photo of a cardboard house, you need to be patient. You can take 2-3 cylinders and cut into two parts so that you get parts of different lengths.

Then cut out paper strips. Their length will be about 150 mm, and the width is 15-30 mm more than the height of the cylinder used as a house. Windows and doors are cut out of colored paper and glued to a white strip.

The cardboard cylinder should be wrapped with paper with windows, having previously applied an adhesive mass to the surface. The edges of the paper that go beyond the cardboard are wrapped inside. From colored paper, you need to make cones that will serve as a roof. They are glued to the cylinders. The village for the gnomes is ready.


House in the hands of a child
Many are interested in how to make a house out of cardboard with their own hands. Even your kid will cope with the proposed technology. Apply to white cardboard markup at home or print a template from the Internet. The kid himself will be able to cut the entire structure along clear lines.

For the manufacture of the roof, you should take a rectangle of cardboard suitable for slopes of length and width. This sheet is folded in half and attached to the assembled frame of the house.


Dollhouse made of cardboard
If your child asked to make a home for dolls, then you should not immediately run to the garage and start sawing boards.

Everything can be done much easier - just use our instructions on step by step manufacturing houses for beginners:
Take a cardboard box right size. For example, it can be packaging for parcels or from household appliances. Open it up and down.

The two small side pieces on top are cut off so that triangles are obtained on both sides, pointing upwards. The triangles on top are aligned vertically, and the longitudinal long elements of the cover are attached to them with glue or tape, forming lower part roof slope.

It is not always possible to completely form the roof - its top (horse) will remain open. You can solve this problem by cutting off the lids from the bottom of the box. The longitudinal elements are attached to each other in the form of a hut and are fixed to the already constructed part of the roof. As a result, the roof ridge will be built. The main thing here is to make all measurements and fasten, observing the joints.


Windows and a door appear on the walls of the house, which are then cut through with a knife. The roof can be painted in the form of tiles, and the walls can be painted in the preferred color.


Cozy house for children
It is possible to make a structure in which a child can fit from an ordinary cardboard box from under large-sized household appliances.

It is desirable that the height of the walls be at least 1-1.5 m for a comfortable stay of the child. If this option is difficult for you to choose, then a cardboard house for children can be made from two boxes interconnected with tape.

The top cover must be tightly closed and the joints secured with adhesive tape. A sheet of thick boxboard is placed on top to strengthen the structure. The roof can be made in several ways:
By fastening two rectangles of cardboard - this is how the roof slopes are obtained. If you make them with a slight launch beyond the walls of the house, you get a stronger mount.

Rafters are mounted on top. They are made from two intersecting plastic pipes small diameter. They are attached to the house at the corners of the structure. A piece of a wide pipe should be placed in the middle so that the rafters do not bend. Laid over the rafters light bedspread or a blanket.


Building a house for dolls, decorating a Christmas tree or having fun for a child is quite simple. This requires the use of available material. The participation of the child in the design will help you show your imagination to the maximum together and keep the baby busy with exciting work.

Photo of cardboard houses


All children dream of toy houses, which they clumsily try to build from what they have at hand. And sometimes parents do not even realize that there is material in the house from which you can make a wonderful house for children's games - this is ordinary cardboard. Without much effort from waste material can be beautiful and comfortable home - favorite place for children's games.


Decorating the house, children will develop their imagination. A toy house can be for them spaceship or the castle of the princess, involving them in an amazing adventure. Tidying up their toy home, children learn how to clean up the house. Having retired to the house, they can organize a secret society or tell horror stories to each other.
Making a house out of cardboard with your own hands is not difficult. Children must be involved in the construction process. It's very interesting and exciting! Helping in construction, children will receive the first architectural knowledge and skills.
Materials and tools
Do-it-yourself cardboard house does not require large material investments. Materials and tools for construction can be found in the household of any family:
- Carton boxes different sizes, glue gun.
- Scissors, sharp knife, pencils, felt-tip pens, markers, adhesive tape.
- Acrylic or watercolor paints, gouache, glitter and various embellishments.
Operating procedure
The sequence of building a cardboard house with your own hands can be different, depending on what kind of architectural structure you want to create. But the general algorithm can be described as follows:
- Find a sketch or diagram on the Internet, print it out on a printer and start acting. If you experienced master, you can draw a sketch of the house yourself.
- According to the scheme, cut out the parts and glue them in the desired sequence with adhesive tape.
- Together, you can decorate your building with fun.
Helpful Hints
- It will be great if your boxes include corrugated cardboard.
- Cardboard cutting work should only be carried out by adults.
- For the stability of the house, it is desirable to find cardboard pipes. You can ask for them at a store that sells goods in rolls. If you can't find it, make pipes out of cardboard. To do this, simply roll it up.
- Try to make the door of the house open outward so that the children have more room to play.
- Don't throw away small cardboard boxes. From them you can make a beautiful doll castle for a princess or a garage for cars.
Options cardboard houses handmade, there are many. You yourself can come up with something interesting. We offer several workshops and original ideas for the manufacture of houses that you can easily build with your children.
DIY folding cardboard house - master class

We will need: a large cardboard box, scissors, a sharp knife, tape.
Step one: cut off upper part large box, as shown in the diagram. Set aside the cut pieces. We glue the side seams of the box with tape.
Step two: turn the box over and connect its parts in the places indicated by the yellow arrow in the diagram. We make a roof from the cut off parts, connecting the parts with adhesive tape in the places indicated by the arrows. We attach the roof to the side parts.
Step three: cut the cardboard in the place indicated by the yellow dotted lines in the diagram. We connect the parts indicated by the yellow arrows.


A comfortable and functional house is ready. It can be taken apart at any time, played with and put back together again.
Cardboard house with a door - master class

We will need: a large cardboard box, a sharp knife, adhesive tape, acrylic paints or gouache.
Operating procedure:
- We cut out the roof and side parts of the house according to the scheme from cardboard.
- We assemble the house and glue the junction of the side seams with tape.
- We glue the roof and cut out the door on three sides, as shown in the figure.
- The window can be cut or drawn.
DIY cardboard mill - master class

We will need: a large cardboard box, a knife, adhesive tape, wooden stick, screw, rope, acrylic paints.


Operating procedure:
- Fold the box as shown in the diagram. From the sides we cut out triangular gables, and on the roof we make holes for the window and pipe.
- According to the pattern, we make a cardboard tube.
- We screw a screw into the tip of a wooden stick and attach it to the roof with a rope.
- According to the scheme, we make a screw and fasten it to a stick along with a screw so that it spins.
- We cut out two triangular windows at the end and fasten the pipe.
- We paint the mill with bright colors.
Do-it-yourself house for Barbie - master class

We will need: two small cardboard boxes, a knife, adhesive tape, glue, acrylic paints, colored paper.

Operating procedure:
- We take two boxes, cut out two windows on the side and glue them together, as shown in the first picture.
- Glue the shelves back wall and a roof made from two pieces of cardboard.
- Cut out beautiful windows, then paint the resulting house with paints or glue it with colored paper.
Cardboard cat house - master class
You can make a wonderful cat house for your pet out of cardboard with your own hands.

We will need: two not very large boxes, a knife, adhesive tape, glue.
Operating procedure:
- We make two small houses according to the size of the cat according to the scheme given in the second lesson. Only one of the houses should be without a roof, there is no need to make doors.
- We cut out the windows, as shown in the diagram and glue one house to another. We hope your kitty enjoys her new home.
Interesting DIY Cardboard House Ideas


- Cottage with starry sky can be made from cardboard boxes skillful hands.
- Surprisingly beautiful doll houses are obtained from cardboard if they are pasted over with a bright cloth.
- Unusual architectural cardboard structures are simply amazing.
- A transforming dollhouse can be made from cardboard according to the attached scheme.

We hope that our lessons, ideas and tips will help you create wonderful toy houses. You will certainly get a joyful mood and indescribable emotions as a result of your creativity.
I always want tea drinking to bring not only taste pleasure, but also aesthetic. A box of tea bags does not look very nice, especially on holiday table. To somehow decorate the serving of tea, tea houses were invented. You can buy them ready-made, or you can make your own. For the basis of the house, you can take plywood or more available material- cardboard. Consider making a tea house out of thick cardboard.
To make a house you will need materials:
1. Cardboard.
2. Pencil and ruler.
3. Scissors.
4. PVA glue.
5. Acrylic paints.
6. File.
7. Napkins for decoupage.
8. Eggshell.
9. Sponge, brushes.
10. Twine.
11. Varnish.
The process of making a tea house.
1. To make a house, you need to make a sketch and think over the dimensions. We will make the base of the house according to scheme No. 1.
2. According to the calculations performed, we draw the base of the house. Then we cut out the details.

3. To assemble the body of the house, you need to prepare 3 short strips. We glue the strips on the bases of 3 sides of the house.

4. Then cut out 4 long stripes. With the help of these strips we will fasten the side walls of the house. First, we fasten together 2 sides of the house.

5. We fix one more side of the house. For strong fastening, we use sustainable elements, with which we support the walls during gluing.

6. Carefully lay the front wall with a cutout on top of the prepared fasteners and press lightly.

7. To ensure the strength and stability of the structure, it is necessary to cut out additional details.

8. We fix the walls of the house from above and below with the help of prepared parts.

9. The walls are fixed to each other, we glue the base of the house.

10. We glue the outer joints with masking tape so that in the future the structure does not have cracks and folds.

11. We proceed to the manufacture of the roof. To do this, we use the scheme number 2.

12. We draw the cardboard, according to scheme No. 2. Cut out the elements of the scheme.

13. In order for the roof slopes to be fixed together, it is necessary to glue the strip in the form of a three-dimensional triangle.

14. Close the voids with small triangles.

15. We fix the roof slopes.

16. On both sides we glue the gables.

17. The body of the house is assembled. Let's start priming. For this white acrylic paint paint over inner part house foundations and roofs.


18. Then we prime the outer part of the walls of the house.

19. At the roof, we prime only the gables.

20. Next, you need to start decorating. Let's start with the foundation of the house. To do this, we will use napkins for decoupage. Cut out a pattern from a napkin right size and lay it with the colored side on the file.

21. Then carefully pour water onto a napkin.

22. We attach a file with a picture to the front wall of the house.

23. Press the drawing against the wall.

24. Remove the file from the drawing.

25. We cover the drawing with glue.

26. Glue another pattern to the side walls.

27. We decorate the free space around the picture with an eggshell.


28. We prime the shell.


29. Color the shell pink.


30. Using a sponge, make prints with dark paint on the shell.
A dollhouse is a special dwelling in which children's pets live. You can buy it in a toy store, but you can save money and make a cardboard house with your own hands with your child. It will be a fun entertainment that will bring the joy of communication to both of you.
What will be needed?
Do fairytale house quite easy for a child. You just need to stock up on imagination and patience. You will also need:
- sharp knife;
- glue;
- Scotch;
- scissors;
- watercolor;
- tassel;
- colored paper and other finishing materials.
Drawings and photos will help you make a beautiful dollhouse.
For doll
A fabulous house can be made on several floors: for this you need 2-3 boxes, but you can do with one. If there are no solid boxes in the house, use adhesive tape to connect several cardboard sheets: the dollhouse will turn out just as well.
- Take a cardboard box. If it is not glued, fasten the edges well. It is better to do this with adhesive tape, otherwise the fabulous house will be fragile and may fall apart during the game. Cut out windows.
- Fasten two separate sheets of cardboard at a 45 degree angle. This will be the roof. Place it on top of the box.
- From separate sheets of cardboard, cut out partitions for the rooms that the fairy house will contain.
- Place them inside the box.
- Now it's time for finishing. It can be arbitrary: from fabric, colored paper, beads, patches or scraps. You can cover a dollhouse for children with white paper, and then ask the child to color it. He will definitely be happy to take part in this venture!
- Concerning interior decoration, here, too, do not skimp on fantasy. After the next repair in the apartment, there will always be pieces of wallpaper, fabric, oilcloth. They can also be placed inside and pasted over the dollhouse.
This is what a children's fairy-tale house in the photo may look like.
And this is what the dollhouse looks like from the inside:
Video instruction
Schemes
For babies
Sometimes children want not to play with dolls, but to climb into a small Orphanage hic and equip your space in it. Let's give them that opportunity! Do children's house DIY is also very easy. The difference will only be in size, so you'll have to look big box from under household appliances, such as a refrigerator or washing machine.
- Glue the sides of the box or tape them together.
- With a clerical knife, make holes for the entrance and windows.
- In order to have more space in the house, you can remove the top of the box and attach an L-shaped roof in its place. Thanks to this technique, the kids will feel more spacious in the house.
- Now it remains to do the finishing. Children's house can be decorated natural materials: twigs, bars, cones, etc. You can simply paste over with paper and paint.
An ideal mount for all elements would be tape or a stapler. Glue is an unreliable material: the children's house may break during the game.
This is what the children's house looks like in the photo. Agree, the craft scheme is very simple and is unlikely to complicate loving parents.
Wooden
For the New Year
New Year's house for children will differ only in exterior decoration. The craft scheme will be the same. To give the product a fabulous, New Year's look, cover it with sparkles, cotton wool, attach paper snowflakes.
Inside you can put a small artificial Christmas tree and decorate it, and Santa Claus with the Snow Maiden or a snowman can live in this house.
This is how the New Year's house for children will look in the photo.
Any child dreams of their own house, where they can create an individual atmosphere and enjoy the game. Basically, such houses are divided into two types: intended for the child himself and for dolls. It is quite simple to make any cardboard house, as this material is soft and practical. To make a beautiful, correct and neat design, you must follow the instructions for assembling them.
Any child dreams of their own house, where they can create an individual atmosphere and enjoy the game.
The easiest dollhouse to make is the one made of cardboard.. best material to create such structures, cardboard boxes from household appliances or thick art cardboard will serve. This material will allow you to create high-quality, strong structures and will not overshadow the children's gameplay.
While working on the creation of the house you will need:
- cardboard;
- stationery knife with a new blade;
- scissors;
- glue;
- Scotch;
- decorative materials: remnants of wallpaper, linoleum, self-adhesive paper, fabric;
- paints - gouache or acrylic;
- brushes.
A small house is made according to the following instructions:
- For the manufacture of two-story house with 2 rooms on the ground floor, you need to take two boxes that have the same thickness, which are connected in series with each other with glue. A smaller box is placed on a more elongated box so that their two sides form a single wall of the house.
- The elongated box that forms the first floor is divided into two parts using a cardboard rectangle that acts as a partition.
- To form the roof, you need to take a rectangle. With the help of a ruler and a knife, a blind incision is made in its middle. Then the rectangle "breaks" and bends at an angle. Using glue, the corner roof is attached to top floor house.
- The glued construction is placed on a large sheet of cardboard, circled in pencil.
- The resulting figure is cut out and glued to the back of the structure, forming the back wall of the house.
- Window openings are cut on the walls.
Gallery: do-it-yourself cardboard house (25 photos)


The easiest dollhouse to make is the one made of cardboard.
Then you need to move on to decorative interior and exterior decoration of the structure.
Interior and exterior decoration
To make the house beautiful and interesting, it needs to be properly designed. The first step is to strengthen the structure by doing exterior finish building. To do this, you can use self-adhesive paper or glue the case with plain white paper using double-sided tape. Such processing of the walls will strengthen the joints of the structure and extend its durability.

To make the house beautiful and interesting, it needs to be properly decorated.
After that, you should go to the interior decoration:
- each room is covered with wallpaper;
- on both sides of the window, pieces of fabric are attached to imitate curtains, an openwork strip is cut out of thick paper, which plays the role of a cornice and is glued parallel to the upper side of the window;
- you can put the remains of linoleum on the floor;
- the roof is decorated with carved stripes, imitating a chapel, a brush in the shape of a triangle is made in the corner part;
- inside the rooms you can put furniture for dolls made of cardboard and decorated with the same materials at hand.
Making a dollhouse with your own hands with your child will not only immerse him in an interesting creative process, activate his imagination, but also develop accuracy and gain skills in working with cardboard, paper and glue.
Staircase with steps in the dollhouse: step by step instructions
To the floors in dollhouse were interconnected, it is necessary to make a ladder. It is very simple to do this, you only need to measure the height of the room, determine the length of the desired staircase.
In the process of making stairs you will need:
- cardboard;
- glue;
- scissors;
- ruler.
Step-by-step instruction:
- A long rectangle is cut out of cardboard, 2-4 centimeters thick. From the upper long side of the rectangle you need to cut a zigzag. All elements of the zigzag must form an angle of 90 degrees.
- Then the second same element is made.
- The width of the stairs is determined.
- Rectangles are cut out, the length of which corresponds to the width of the stairs, and the width to the length of the side of the zigzag. The number of such rectangles is determined by the number of sides of the zigzag.
- Then each rectangle is glued to the side of the zigzag, fixing both main elements together.
- After all the rectangles are glued to the vertical and horizontal sides of the zigzag, you will get steps with an angle of 90 degrees.
If desired, railings can be glued to the stairs, however, they will complicate the use of this adjacent element during the game.
DIY dollhouse (video)
How to make a cardboard house for children with your own hands?
Many children dream of their own little house where they can retire and enjoy the game. Such an item brings a sense of coziness and comfort to the game, which is why it is popular among children. In order not to purchase expensive structures, a toy orphanage can be glued together from ordinary cardboard.
For this you will need:
- a ready-made template or a drawn diagram;
- stationery knife;
- ruler;
- PVA glue;
- thermal gun;
- colored paper.
The layout of the game house is assembled according to the following instructions:
- Cardboard material depicts a diagram of a house or its details.
- Then the drawn elements are cut out. If there are fold lines, they should be drawn with a ruler so that grooves form. Then the sheet is bent along the grooves.
- All seams are taped. If there are partitions inside the house, they must be immediately glued with a heat gun.
- After assembling the entire structure, it should be strengthened. To do this, a paper strip is glued to each glued seam. Such elements should be glued not only from the outside of the building, but also from the inside.
After complete assembly at home, you can proceed to decorate it. Home decoration can be done using various materials. Most often, colored paper, paints, fabric, wallpaper are used for this. It is best to put such a house in the corner of the room, since in this place its dimensions will not interfere with free movement around the room.
Scheme
The first step is to draw a diagram of the house. If you skip this step, the design may turn out to be sloppy or uneven. As a basis, it is necessary to take a cross scan, in the center of which there will be a base - the floor, and the cross itself will form the walls of the structure. If the child is large and it is necessary to make a house in his full height, each detail is best depicted separately.

The first step is to draw a diagram of the house
For the construction of a large orphanage can be used ready-made schemes. The simplest of them is the development of a house with a corner roof. It should be enlarged to the desired size and transferred to cardboard sheets. If desired, each element of the house can be drawn separately, maintaining all the proportions presented.
Do-it-yourself doll house (video)
Making a paper house
From colored paper, only a miniature house can be made. You can use this design, for example, as a tea house by placing tea bags in it.
During the cooking process you will need:
- colored paper;
- scissors;
- glue.
Does paper house step by step:
- The first step is to redraw the diagram of the house on paper. To do this, you can use a ready-made scan, or you can come up with your own.
- Next, the drawn element is cut out, a fold is made along all the dotted lines.
- A doorway is cut through - with the help of this hole it will be possible to get a tea bag.
- Windows can not be cut through, but simply decorated by making an application of colored paper.
- Then the walls, the roof of the house are decorated with elements cut out of colored paper.
- The decorated scan is glued together with allowances.
It remains to fill the house with tea and treat guests. In order not to look for ready-made schemes, you can use the following sweep:

Only a miniature house can be made from colored paper
Children must be involved in the process of making cardboard and paper houses. Joint activities will not only teach the child to work with paper products, but also develop the skills of accuracy, perseverance, and imagination in him. In addition to the options presented, cardboard boxes can also be used to create houses for decorating gifts, organizers, caskets.