Crafts for the home: DIY interior decor ideas using scrap materials. We create home decorations with our own hands Unusual home decor
In the interior of a home, sometimes it is enough to change one minor element to make the whole house come to life and sparkle with new colors. Decorating an apartment with your own hands allows you to change the atmosphere and style of the entire room without resorting to global transformations. Ideas for handicrafts are almost inexhaustible and depend only on your imagination. At the same time, local decoration does not require high costs: a lot of things can be made from leftover building materials after renovation, or from old things.
This idea is very original and requires a non-standard approach to ordinary things. This kind of home decor is not difficult to make, and in the end you can get an interesting floor or wall decoration.

The easiest way to implement this idea is if you replaced windows during the renovation and you still have an unnecessary window frame with a fairly strong frame. You can also take an old door if it was not made of solid fabric, but had panels or glass inserts. In addition to the frame you will need:
- dye
- cardboard
- textile
- scotch
- photographs or pictures
- different decorative elements.
First, glass or other inserts are removed, and then the frame is carefully sanded so that there are no uneven spots or sagging old paint left.

The cleaned frame is covered with fresh paint. You don’t have to take only white – you can match it to.

The base for the collage is cut out of cardboard along the inside. Then the appropriate fabric is selected and a piece is cut off with seam allowances. The fabric is ironed, pulled tightly onto the base and secured with paper tape on the back side.

The elements of the future collage are attached to the front side of the fabric using thin double-sided tape.

The finished collage is inserted into the updated frame.

The back surface is also covered with fabric, the edges of which are neatly tucked inward.

This DIY home decor will be an interesting decoration for any room.
Panel of cereals and pasta
This original panel looks very stylish. If everything is done correctly, then under a layer of paint it is almost impossible to see the original material.
To create a panel you need to prepare:
- plastic tray
- cereals, legumes, curly pasta, dry berries
- spray enamel of a suitable color.
The tray is rubbing sandpaper so that all small elements stick more firmly to the rough surface. The area is covered with glue and available materials are poured on top bulk products– peas, pearl barley, etc.

When the glue dries, curly pasta, dried berries, and beans are glued on top. You can create any picture to your taste.

After drying, the panel is coated with aerosol enamel. Such DIY home decorations look great in compositions, so it is recommended to make several panels in a similar style and place them in a group.
Notepad on the refrigerator
The original notepad for notes is made according to the same principle as the panel, but to attach it to it you need to equip the craft with small magnets.

You will need:
- the same cereals as for the panel
- small notebook with loose leaflets
- felt-tip pen
- thick cardboard
- dye
- matches
- furniture varnish
- pieces of magnet or magnetic sheet.
A base is cut out of thick cardboard, the size of which is 7-8 cm larger than the notepad on all sides. The cardboard is coated with paint. The heads of the matches are cut off and after the paint has dried, they are glued to the base in the intended order.

A thick layer of glue is applied to the base and each area is sprinkled a separate species cereals

The entire surface is lightly pressed with your fingers, then the excess cereal is poured onto the table. A felt-tip pen cap is glued to one side and the entire structure is left for the glue to dry. After this, the cereal and matches are generously coated with varnish, which will serve as an additional binding material. When the varnish dries, a notepad is glued to the front side, and magnets to the back. This is what the finished notebook will look like.
Unusual dandelion balls
These original DIY decor items surprisingly well and harmoniously emphasize the individuality of the room.

To make them you will need:
- cotton swabs
- foam ball base
- food coloring
- a tube or twig for the “stem”.
Cotton swabs are cut in half. By the way, you might be interested in an article about crafts made from matches, which you can read.

The foam ball can be taken in any size. If it is small, you will end up with just “dandelions” for a vase. From larger balls you can make fantastic figures that will look very unusual. Sticks with cotton wool are inserted into the ball, and they must be placed very tightly so that the “dandelions” turn out fluffy.

The finished balls can be painted in any color - multi-colored food dyes are suitable for coloring.

After this, the foam ball is placed on the leg - an unusual do-it-yourself apartment decor is ready!

Textile frame
Such original frames, decorated with dried flowers or beautiful spices, will be an excellent decoration for the kitchen.

You will need:
- a piece of cardboard (depending on the required frame size)
- fabric scraps, decorative braid
- PVA glue
- scissors
- dried flowers or spices for decoration.
A frame is cut out of cardboard, coated on both sides with PVA glue and carefully wrapped with decorative tape.

A cardboard rectangle is cut to the outer size of the frame. Lubricated with glue and covered with cloth. The frame is glued to the “back” and the entire structure is placed under a small press (you can take several books).

After the frame has dried, the selected decor is glued to it.

If you make several of these frames with different finishes, then such homemade interior items can be included in a wide variety of compositions.
Rug made of leather belts
Making your own carpet from belts is not difficult at all. There are several options for such crafts, but the main two differ from each other in the method of fastening the belts - end-to-end with a rope (staples) or by gluing them to a base.

In the first case you will need:
- about 10 belts made of genuine or artificial leather
- awl or leather punch
- rope or twine.
The belts are cut to the same length, holes are made along their edges at the same distance (every 2-3 cm). The straps are then sewn together using thin rope or twine. You can stretch the rope between the holes in any order - along, across or crosswise. Metal staples look very stylish if you use them instead of rope.

- The second method involves gluing the belts onto a dense base. You can lay out different patterns - herringbone, checkerboard, zigzag, etc. The procedure is similar to the previous method. It is very important that the straps are not wrinkled, otherwise the rug will be ugly.
- The belts are being prepared and the buckles are being cut. If you want to lay out patterns, then the belts are cut into several parts. To do this, a layout diagram of individual leather elements is first drawn up and their sizes are calculated. Then cutting lines are marked on the belts and “patterns” are made along them.
- A piece of thick fabric is used as a base, from which a figure of the desired size and shape is cut out. The belts are laid out on the canvas in the appropriate order. The reverse side is pre-degreased. Then glue suitable for joining leather and fabric is applied, the strap is pressed to the base and any excess glue that appears from its surface is quickly removed.

In this way you can cover the entire floor in the room - it looks very stylish!

To successfully bring this incredible DIY home decor idea to life, the belts need to be glued onto sheets of plywood and then laid on the floor. This coating goes well with parquet or laminate.
Dish rack
Some wooden hangers easily turn into simple, but very original stand for dishes.

To work you will need 8 wooden hangers. The metal hooks are removed from them and the bottom bars of 6 hangers are removed. Three pairs of hangers are connected by a “jack” using self-tapping screws. Single hangers are installed between the pairs and the entire structure is held together by the very remaining lower crossbars. The recesses in the hangers (if there are any) are perfect for this. Two crossbars are attached under the joints of the hangers in pairs, which will ensure rigidity and stability of the structure.

This stand is not suitable for drying dishes, since wooden hangers do not have a special coating and will quickly deteriorate from constant moisture. But if you coat wooden hangers with a water-repellent emulsion or use plastic hangers, then such homemade decorations can be safely used as a dryer.
Original shelves made from furniture boxes
Drawers that remained from old furniture, can be turned into beautiful and practical interior elements. You can use them for racks and place various little things on them, creating cute decorative compositions. This solution is suitable for lovers of vintage jewelry.
To create such apartment decor with your own hands, you can take any old drawers from the closet, desk, chest of drawers or kitchen set. Worthy use can be found for any quantity drawers different sizes.
To do this you need:
- remove the drawers, check the integrity of their surfaces and connections;
- the handles can not be removed - they give an original look to the decor;
- change the appearance of the boxes at your discretion;
- you can add transverse shelves;
- screw the drawers to the wall with screws or make them removable by attaching reverse side suspension mounts;
- arrange decor or arrange things.
Small drawers are suitable for interior decoration, while large ones are used as additional shelves for storing things. For example, you can place beautiful dishes, small plastic items, figurines or photographs on them - all this will look very unusual in drawers with handles mounted on the walls.

Very convenient option– shelves for small things: books, CDs, bath accessories, jewelry, handicrafts.

You can change the appearance of the boxes based on their purpose, and as your imagination dictates. Very interesting solution It turns out if you focus on the design of the back wall. Remnants of wallpaper and fabric are suitable for this (they will hide well uneven surface), paint, notes, old geographical maps etc.

Butterflies on the walls
Free-floating moths are a great DIY home decor that creates a romantic atmosphere. Nowadays they sell vinyl stickers that just need to be attached to the wall, but it is much more pleasant to make them yourself from vinyl tape.
To get it on scale, volumetric panel, you need to use many butterflies of different sizes. Images of butterflies can be found on the Internet. Stencils are prepared from them, applied to vinyl film, outlined and cut out.
Then markings are made on the wall, butterflies are applied to it and glued with the central part so that the panel becomes voluminous. The wings should remain with a film that will prevent them from sticking to the wall. This will create the impression that the butterflies are “hovering” against the wall. The figures can be arranged in a spiral or in any way you like.

Rope air lamp
To make such a lamp you will need a minimum of available materials and financial costs.

You need to take:
- beach ball
- hemp rope
- latex paint.
On the surface of the beach ball (you need to take an unnecessary one, since it will later need to burst) a circle is drawn into which the light bulb will be inserted. This hole is located at the bottom of the future product.

Glue is poured into the jar, the rope is dipped into it and the excess is carefully removed with your fingers. For ease of wetting, the rope is wound into loose loops. The beach ball is then completely wrapped with this rope, without disturbing the drawn circle. The finished ball is thoroughly dried.

When the rope is dry, the beach ball is pierced, the air is released from it, and then it is carefully removed through the hole.

The bottom of the lamp is painted with latex paint. After the air lamp has dried, a low-power light bulb is inserted into it.

Using your maximum imagination, you can create amazing home decor with your own hands from scrap materials. Just think about what you like. And create!
If you suddenly caught yourself thinking that it’s time to update the interior, but finances don’t allow it, if, while walking through the rooms, you hear the ringing of bells, which creativity tirelessly rings at the sight of the deserted landscapes of your home - stock up on rubbish that is unnecessary at first glance , old things, used clothes. It's about to appear on the horizon main character imminent production, a phenomenon so fashionable, practical and charming that there is no strength to resist it - DIY home decor, handmade style.
You can create any decoration for the room with your own hands.
 Homemade fabric appliqués can decorate a child's room.
So, cast aside all doubts, for prejudices in this area are unacceptable. Homemade decorations have won their place in any, even the most minimalist interior. Their uniqueness and a certain charm attract the attention of guests and delight the owner’s eye.
First of all, try to highlight your own character traits and hobbies in order to later project them onto the interior decoration. This approach will not only allow you to express yourself, but will also help give an atmosphere of exclusivity.
Creative skills will be very useful for decorating your home with your own hands. If you know how to draw, embroider, calligraphy or any other skills, use them! This not only shifts the focus towards your personality, but also guarantees impressive results.
Wall decor
This section includes the most extensive experience of self-expression. The range of possibilities and techniques for decorating walls is almost endless, and is limited only by the limits of your imagination.
Painting
 If you are afraid to draw something by hand, use a stencil.
 The most obvious way to diversify the interior is probably to use paint. First of all, it's inexpensive. Secondly, it's very entertaining. Thirdly, it sometimes looks breathtakingly beautiful.
The first step is to decide on the general composition. Draw several sketches on paper, think about how well the final work will look in your case.
If you are, let’s say, far from an outstanding artist, get ready-made stencils. If you have a printer, you can make your own templates.
 For those who are not afraid of bad omens.
 Sometimes it happens that there is a sharp need for slight madness. Express this through chaotically painted walls. To do this, you can use any available materials: rags, items of clothing, yourself.
Paper applications
 Paper applications in frames look original on the walls.
 Some heights in decor can be achieved using the most ordinary colored paper. We are all in elementary school produced small works of art in the form of pictures. Now this doesn’t seem surprising, but we shouldn’t rush to conclusions.
 Graceful butterflies look good anywhere in the room.
 A great way to decorate empty walls is with paper butterflies. Approach their production with enthusiasm: create a whole story, imitate wind flows by changing their location, experiment with lighting to create a shadow composition. This simple method can make a room feel light and relaxed.
 Create a whimsical butterfly pattern right on your wall!
 If you are proficient with technology artistic carving on paper, then even more doors open before you. In addition, do not forget about the ceiling, which, for example, can be decorated with silhouettes of soaring birds, kites and flower petals.
Panel
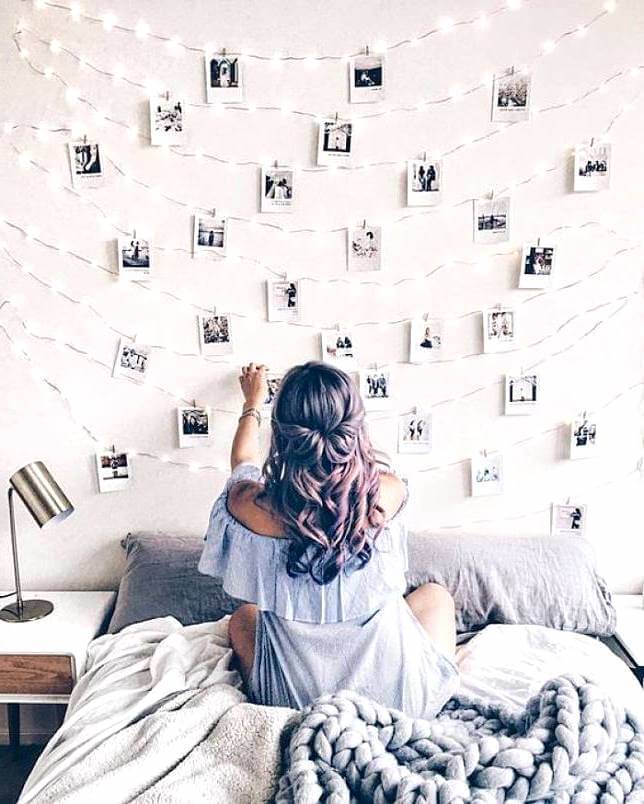
 A composition of many pictures and photographs will attract the eye and refresh memories.
 A universal solution to the problem of bare walls will be a panel. Decorative elements that fall under this definition allow a wide range of creative freedom while maintaining a pleasing appearance.
 Panels can be glued together from anything, even shells.
 The walls can also be decorated with empty baguettes, various characters and figures, and improvised shelves and hooks. The living room will be an excellent haven for a collage of your favorite photographs, and the bedroom will be suitable for homemade dream catchers. Feel free to combine various methods. Thus, for example, painted flowers can always be supplemented with paper butterflies, and you can add interactivity to the shelves by making them part of the drawn character.
 A wide variety of dream catchers will guard your night's peace.
 DIY decorative elements
So, the walls are left behind, and we make our way deeper into the room, where many vases, lamps and pieces of furniture await us. It just so happens that all this can now be quite expensive, which makes it impossible to buy an alternative at the first desire. In such cases, an indispensable companion is the rubbish that fills the pantries. What you planned to throw away yesterday can save your family from aesthetic disappointment today.
 Moss does not require any care; choose an unusual pot for it.
 Decorating vases
 It's easy to decorate ordinary bottles with satin ribbons, turning this combination into a beautiful vase.
 You can use old unwanted jars or glass bottles as a base. Apply any available products to them, select the most suitable ones. You can, for example, cover a wine bottle with newspaper or magazine clippings. This will look very colorful. Banks can be tied with twigs, threads or lace.
Decoration of lamps
 Using an inflatable balloon and glue, you can create an original lampshade with your own hands.
 Natural elements once again come to our aid. The above paper butterflies will be a great addition to any lamp. In addition, you can use branches and flowers that will fit perfectly into the overall image, even if the interior does not imply eco-style. A lamp wrapped with twine will give a feeling of warmth and homely, almost rustic comfort.
Lighting
 Garlands in jars and bottles look very unusual.
 Any room, any piece of furniture can be decorated with a good garland: wrap it around the curtain, bookshelves, tape the closet. If desired, it can be used as a separate method of decoration. Make a small hole in the colored container. Pass the LEDs through it. As a result, you will get an unusual lamp.
Plants
 Plants in the room can be either real or artificial.
 Of course, you can place a lot of flower pots throughout the apartment, but they will look much more interesting in different glass containers. It is worth mentioning that in such conditions only the most resistant ones will last, so you can forget about exotic flowers. Place some soil, moss, weed plants and a couple of branches into the jar. It’s not that difficult to do it yourself, but all your guests will be deeply impressed by your idea.
 Even the most unpretentious plants will give you comfort.
  Designer pots sometimes combine the incongruous!
 Letters
 Using letters for interior decor, you can create any word or sentence.
 This is a great way to personalize your space. They can decorate the doors of bedrooms, living rooms, children's rooms and kitchens. Take a template made of cardboard or wood as a basis. Then gradually cover the free space with flowers, pom-poms, fragments of magazine clippings, and wine corks.
Bathroom decor
 Plants in the bathroom give the impression that you are bathing in a tropical pond.
 The bathroom requires special attention. Application specifics, limited space narrow the scope for searching for creative solutions.
Considering the decor of the restroom and the abundance of water, it would be logical to use marine motifs. Shells can be used to decorate shelves, mirrors, and lamps. This will create a resort atmosphere and remind you of vacation.
Paintings - essential element decor. In addition, while soaking in the bath, it will be pleasant to look at a masterpiece of world painting.
Original shelves will fit perfectly into any interior. Wicker baskets and wooden boxes will replace boring chests of drawers and cabinets.
Scented candles provide unique warmth.
Experimenting with lighting will add intimacy to the room. Place scented candles around the bathroom. The mirror can be covered with LED garland.
Natural elements will allow you to fully relax. Various plants will help you calm down and dissolve in the lamp environment.
Video: How to decorate a room with your own hands
Decorating the walls is usually the final stage of construction work. In such a situation, even at the design stage, a color and stylistic solution is determined, materials are selected, and the necessary preparations are made. If we are talking about the need to change an old interior that has become boring over several years, or to transform the appearance of one or more walls without carrying out large-scale renovation measures, you can use creative ideas and independently add original notes to the decorative design of the room. Read on in our article to learn how to decorate walls with your own hands, based on fashion trends.
Wall decor using improvised materials
If you have the skills to work with scissors and paints, quickly make your own wall decor possible from ordinary items.
Decor made from toilet paper rolls
- After collecting the cardboard tubes remaining after using toilet paper, they are slightly flattened and cut in equal parts, each of which will subsequently become a flower petal.
- Now, from the cut pieces, you need to create a single composition. To do this, all the elements are glued together with their side planes, then they are given the required shape and painted in desired color. Elegant paper wall decor ready.


Important to know! Unusual design decorating a wall in a house with a classic design is always popular. Even with minimal financial investments, you can recreate a noble atmosphere in the interior or hallway by making bricks from cardboard and painting them in the desired color.

Texture painting of walls
Texture painting of walls is used to give them relief and create a bright accent in the interior. When carrying out work it is possible to use various technologies, with which you can transform any room according to your taste.
When using texture painting technology, the surface does not need to be leveled, thus replacing a certain section of the wall is possible at any stage.
Below are practical advice, which will help you quickly and efficiently decorate walls, while obtaining excellent results.
Preparatory work
To receive best result, before starting work, the walls are plastered in one layer, good are being cleared, then covered with paint on an emulsion basis. Texture paint is applied to the surface in three ways.
- The wet method is to use fabric.
- Dry method - using a brush.
- And the last method is the rolling technology of “rolling” textured fabric along the wall or ceiling in the same direction.

Texture painting technology:
- To begin with, the walls are cleaned of old paint, all cracks are sealed, the putty area is sanded, after which the surface is coated with a special primer.
- Next, to create a tint, a base coat of paint is applied. Usually acrylic paint is used for this light colors(light grey, beige or white). Paint is being applied with a regular roller, which can be purchased at any hardware store.
- After application, you need to wait for the paint to set and only then begin to create painterly textures.
- The glaze is applied to the wall using a brush, pressing the ends of the bristles into the fresh coating, so that a clear structural mark remains on the surface. To ensure that the deep pattern is not blurred, it is recommended to clean the bristles of the brush as often as possible.
- Depending on preferences, the brush can be replaced with fabric, the fibrous structure of which will change the texture of the wall, giving it an interesting and unpredictable pattern. Special attention should be given to the corners, they should be perfectly smooth. For joint finishing it is best to use small brushes.
- After the glaze has completely dried, it is necessary to apply several layers of varnish or cover the surface with a transparent glaze without texturing it. It is recommended that two people work together to process a strip from floor to ceiling in one step.


Even amateurs can do this type of work, but achieving an excellent result will require perseverance and patience.
Wall photo gallery
Decorating one of the walls with photographs brings a feeling of family unity into the interior, creates a special mood, awakening the kindest and brightest feelings.
These can be large portraits, genre scenes or ordinary shots captured from everyday life. A collage looks great, allowing you to fit many images into it. If desired, it can be made themed, dedicating it to a significant event, anniversary, or one of the family members.


Volumetric photographs are an elegant addition to a modern interior

Photos in frames different sizes and shapes give the interior a modern dynamism. For example, what makes a space more conservative and static is decorating the wall with rectangular frames, which are arranged strictly horizontally in one or several lines. What unites this composition into a single whole is the color shade of the frames.
You can move away from the usual way of placing photographs by decorating the wall with a stylized image of a trunk, successfully placing portraits of household members on its branches, creating a whole family tree.


Photographs that are not framed, but pasted onto thick cardboard in rich colors that echo the color motifs of other items will help add sophistication and uniqueness to the interior. They are fixed on stretched cords, fishing line, chains.
Will appear emphasized and romantic wise quotes, important wishes, monograms, written on high-quality thick paper in an elegant font and framed with a gilded frame. They are placed next to photographs or on an adjacent wall, thus creating a space permeated with rhythm.


Important! If the wall area is small, it is not at all necessary to create a large composition. You can place one photo on a narrow glass shelf, highlighting it with beautiful lighting.
Volumetric elements
Architectural decor completely changes the surrounding space, becoming the center of the entire room. Having a free wall in a spacious room, with the help of volumetric elements you can turn it into cozy corner relaxation, combining it with an exhibition of your favorite collectibles.
Having built a shallow false wall, they construct built-in decorative, small niches with glass and soft lighting. Objects placed in such niches attract attention in such lighting. A portal with antique half-columns and imitation stucco will help decorate the fireplace.
In order not to disturb the harmony, the color scheme of the façade planes is selected to suit general style interior The color stylized as noble marble looks advantageous.


Frames as a decorative element
Frames from which glass is removed, cardboard is painted in bright colors or removed altogether can create an amazing world of aesthetics. The material and color scheme of the frame are selected to match the specific style of the room.
- Strictly shaped rectangular products made from noble breeds wood
- In Provence style it looks harmonious with smooth lines and rounded corners.
- For eclecticism, you can choose frames of the same shade, but of various shapes and configurations.
Another option for wall decor would be a single frame shape, but with a different color and texture of the material.


Empty frames are arranged in various combinations and shapes. They can create strict horizontals, verticals, and move diagonally. Created from small frames geometric shapes or dynamic curved lines.
An interesting stylish image arises if several frames are fixed on one image, breaking it into several fragments.


Use of paintings
It is possible to create a certain mood with the help of paintings, which have long been a win-win option. wall decoration.
Wall decoration in style will be supported by images with clear, ordered lines on an achromatic background. They should have a simple frame without unnecessary decorative elements.
Important! If several small posters are selected, they are aligned along one line.


Noble, vintage style Provence suggests the presence of paintings depicting idyllic village landscapes or genre scenes, and stylized solid wood Frames with impeccable varnish and carving will add more attractiveness to the interior.
A touch of modernity is brought into the interior by modular paintings, which allow you to create compositions in accordance with your own preferences. Red furniture and black and white paintings combine stylishly. For those who prefer calm, elegant solutions, floral motifs in beige tones will suit them.


Mirror fantasies
Mirrors are held in special esteem by designers, especially when decorating the interior, since with their participation the space visually expands. When fixed under the ceiling along the entire perimeter of the wall, a mirrored border creates the impression of a significant increase in the height of the room.
You can bring a feeling of celebration and freshness into the room if you place small mirrors on a free section of the wall, framed by frames stylized as aristocratic marble or mysterious malachite. They are placed randomly or in a clear order. The free layout brings speed and makes the interior more dynamic.


- A beautiful carved frame with gilding turns the mirror into a bright accent of a classic interior.
- For rooms designed in high-tech style, mirrors are framed with a narrow chrome strip.
- The eco-style is supported by deliberately rough bamboo or wooden frames.


Soft decor
Soft panels allow you to create an expressive image of a room and bring coziness and comfort into it. Their surface is made of textiles, leather or faux fur. Eco-friendly padding adds volume.
Such decorative elements are most often used to decorate the wall at the head of the bed.


Create thin and exquisite interior in the living room it works if you cover it with sheets of plywood required sizes noble fabric. Brocade or velvet with bright colorful patterns will add an unusual oriental accent.
Such panels placed on the wall visually highlight the guest area where chairs and a table are located. A decorative fireplace will fit perfectly there.


Having mastered sewing skills, you will be able to accomplish decorative wall element using timeless patchwork technique ( patchwork). Exclusive knitted products are made by crochet or knitting. Openwork or multi-colored patterns, well-chosen to the main interior style, give the room a complete, original look.
They are pulled onto a round or rectangular base and create a planned compositional drawing. If necessary, use frames to enhance the overall perception.


Decorative paper elements
The walls can be skillfully decorated with butterflies, flowers, made from paper - corrugated, writing, papyrus. Lightweight parts are fixed with double-sided tape and can be easily restored or replaced with other decor. On a wall painted in a neutral color, the finest paper details form lines - horizontal, diagonal, broken, curved, concentric, vertical and others.
You can make them in collaboration with children. Having fixed circles on the fishing line that change color saturation from yellow to orange or from blue to violet shade, manages to create a special dynamic atmosphere.


Using Cymbals
Special charm and sophistication for interior wall decoration have wall plates. Painted collectibles are quite expensive. However, it is possible to make the kitchen look festive by gluing fragments of the ornament onto ordinary porcelain or plastic plates. This could be the splendor of sophisticated Gzhel or the majestic Zhostovo painting. You can decorate your kitchen surroundings with bright Gorodets motifs.
After spending a little time, you will be able to decorate the plates with elegant pastel or contrasting patterns using the decoupage technique. Transferring the ornament present on the curtains to the plates will add mood and emphasize the special style of the room. For these purposes, you can cut out individual fragments from the remnants of the fabric and use transparent varnish to fix them on a plywood circle.
Important! Plastic products from varnish can be deformed, so PVA glue is used to work with them.


Vinyl stickers
It will be possible to quickly update the interior if decorate walls with ready-made vinyl stickers. Among the extensive assortment, you can choose images with different color combinations, shapes and sizes.
For example, a window design expands the room. The same purpose is served by the appearance on the wall of a road going into the distance, fields and meadows, or a boundless outer space. A nautical theme would be great in a bathroom. Gloomy subjects are not suitable for home interiors.
Important to know! Vinyl stickers easy to replace if there is a need to refresh the interior or add new notes to it.


Wall painting
Since ancient times, painting has been the most popular method of wall decoration. In order for the final result to be polished and elegant, it is necessary to have not only artistic abilities, but also a rich imagination.
Drawing is done using tempera, acrylic, water emulsion, oil paints. Having mastered certain skills, you can use an airbrush, cans of pearlescent, fluorescent paints (Fig. 1).
Creative wall decor ideas
- Gives amazing expressiveness and depth to the wall 3D drawings, for which, at the first stage, relief semi-volumetric images are made from gypsum mass. Then they are beautifully painted. (Fig.2)
- The simplest way to give plain walls an unusual color tone is striping. The edges are sealed with masking tape, which allows you to get perfectly smooth edges of the image. You can vary the width, color, direction of the stripes. (Fig.3)
- For connoisseurs wall painting even without knowledge of artistic techniques, you will be able to bring a special mood into the interior if you use stencils. You don’t need to make them yourself, since specialized stores and showrooms offer a wide range that allows you to choose the planned pattern. (Fig.4)
- It’s even easier to decorate wall planes using stamps. Previously sketch is being developed And markings are being made. This will avoid mistakes. The material for stamps is rubber. There are foam rubber and wooden products, and also in the form of a roller. For home use, simple stamps are cut out of ordinary potatoes. (Fig.5)
Beautiful DIY wall decor is the end result of a lot of work, patience and perseverance.

(Fig. 1) Beautiful hand-made wall painting

(Fig. 2) Three-dimensional 3D image of a musical violin, which remains to be beautifully decorated with a drawing

(Fig. 3) Bright stripes on the wall

(Fig. 4) Using a stencil you can get an original drawing on your wall

Flowers in the interior
Lovers home floriculture Plants are often placed on the walls using flowerpots. If for these purposes ampelous varieties are selected, forming entire waterfalls of descending shoots covered with foliage and flowers, then it will be possible to create a magnificent vertical that enhances the perception of homeliness and comfort.
The graceful shape of the pots serves as decorative additional element, allowing you to install flower arrangements on narrow, almost invisible glass shelves. In such situations, priority is given to compact flowers, selecting them according to the shades of the petals.

flower beds You can enhance the effect with the help of mirror elements placed on the wall behind the pots. This technique expands the space, makes it unusual and mysterious.


Video: how to decorate the walls in the house
There are many ways to decorate walls. Some of them are easy to do on your own, allowing you to quickly update them with available materials, and some will require certain skills. Good luck with your remodeling.
Someone will certainly look at this collection of ideas and say that it would be easier to buy new furniture or decor. But this article is not for them, but only for true connoisseurs of unique style and products self made. Here you will find 10 of the most beautiful interior items that you can make for your home with your own hands without spending extra money.
The best DIY home crafts from scrap materials for 2018!
1. Decoupage and other DIY furniture repair ideas
Restoring old chests of drawers and sideboards is perhaps one of the main trends of our time. Many pieces of furniture fail over time: the cabinets of tables and chairs become loose, upholstered furniture is pressed through and requires a new “filling”. But chests of drawers and sideboards can stand for themselves for many years and bother you with their outdated appearance.
Home crafters and decoupage masters not only found a way to update the design of old furniture, but also created a fashion for using vintage “grandmother’s” chests of drawers in the interior. You will find detailed instructions on painting and decoupage in our article. .
Below are some photos of amazing home projects to inspire you.

Restoration of an old chest of drawers with replacement of handles and hand painting: 
 Painting and finishing old cabinet with metal buttons:
  As a result, the furniture acquired an original decorative effect in Moroccan style. Simple, like everything ingenious:
By the way, in this way you can create more sophisticated things for the home:

Decoupage and painting amazingly transform old furniture facades, but not every person has enough time and patience for this painstaking task. Therefore, the best DIY home ideas will also include remodeling furniture using duct tape to look like marble, gold, and other fancy finishes. A minimum of effort - and the most ordinary piece of furniture will turn into the main decoration of your interior.


2. Beautiful things for the home with your own hands: carpets
Perhaps the most pleasant thing about creating things for the home with your own hands is when one of the guests asks: where did you buy such beauty? A stylish rug with a zebra print (or other motif of your choice) is sure to earn such a compliment. And more than once.

The fabric can be any. The main thing is that it is not too demanding to care for: it is not afraid of moisture and is easy to clean. In this case, the master chose vinyl fabric. It is heavy and durable enough to look like a true carpet. What's more, the quality of vinyl these days is very impressive and is available in a wide range of colors and interesting textures.
All necessary materials and tools:
- Thick paper;
- Vinyl upholstery fabric;
- Scissors;
- 2 Krylon pens or regular fabric paint.
Procedure:
- Create a stencil from paper. Draw and cut out the outline of the zebra skin, then the drawing itself on it. Don't worry about your artistic talent - a zebra's skin shouldn't look uniform or symmetrical. As a last resort, the pattern can be copied from a picture on the Internet or even printed to cut out.
- Attach the stencil to the vinyl fabric and trace the outlines of the stripes with Krylon pens (apply paint with a spray or brush). After this, the stencil can be removed and you can continue painting the areas inside the contours.
- Let the paint dry and you're done! To make sure the pattern will stick, you can “seal” the rug by spraying it with a clear coat of acrylic spray paint.

Krylon pens create a stunning gold leaf effect on the surface of the fabric. In addition, the paint in them dries quickly and adheres very reliably. If you cannot buy them in your city, then use regular paint for fabrics or walls. As the next hero of our article.

He took a cheap white rug as a base and decided to give it an interesting DIY look with a chevron pattern. All he needed was thin duct tape, scissors, a thick brush and latex paint two different shades.

Finally, another inspiring example in which a makeshift stamp is used instead of a stencil. The craftsman had a rubber bath mat, leftover wall paint (it was slightly diluted with water to achieve a vintage effect), a roller and an old IKEA wool rug. Let's look at the photo what he managed to cook from these ingredients.


3. Unusual “marble” DIY crafts (photo)

7. Turn photos into wall decor
It's much cooler than just hanging framed photos! Your personal photos or any images you like from the internet can be turned into beautiful wall art for any room. To make this decor with your own hands, you can use any of the following methods.
- Find or buy a backing. It can be a thick sheet of polystyrene foam or polystyrene foam (as in this case), a board and other available materials.
- Print the photo, having previously edited its dimensions so that they are approximately 5 cm more sizes substrates. These “extra” centimeters will be used for folds.
- Cut the photo and backing into pieces if you want a modular set rather than a whole painting. Otherwise, skip this point.
- Place the photo on the backing and fold the ends. The author of this product used a double-sided duct tape for attaching photos. You can attach it with regular glue or other available means. The surface of the photographs itself can also be treated with glue or paste for shine.

- Print the image and prepare a canvas onto which it will be transferred.
- Stretch the canvas over the frame and apply a thick layer of gel medium on it. These gels are widespread and today they can be bought at any finishing materials store.
- Place the photo on the greased canvas and press down. Leave it like this for several hours, but periodically spray it with water from a spray bottle.
- Carefully, using your fingertips alone, begin to erase the back surface of the image from the canvas. Remove all paper in this way.

The result is a beautiful one with wear and tear that will only give it a touch of vintage style. All that remains is to apply the final layer of gel medium on it as a protective coating.

For inspiration, we’ll give you a couple more ways to decorate your interior using photos.
 We use an old window frame as a photo frame. What do you think of the idea?
8. Creative homemade lampshades for lamps
Homemade lampshades made from fabric, paper, thread and other improvised means will not only decorate your home, but also bring an unusual atmosphere to it every dark time of the day.

Look for the best ideas to suit your taste in our article . On next photo- a popular creative lampshade made of threads.

9. Succulents - living home decor with your own hands
A succulent living wall is perhaps the most amazing of all the DIY home crafts you can make. Agree: if you saw it in someone’s living room or other room design, you wouldn’t be able to remain indifferent!

Dekorin will tell you how to get such impressive and environmentally friendly decor:
- You will need a shallow wooden container for planting and a metal mesh.
- To secure the mesh to the container, use an improvised wooden frame, which can be made from small boards or wood chips. Attach to staples or nails.
- Prepare any for composition. They easily take root in the most difficult conditions and look most advantageous when you combine different shades and leaf shapes. Common examples of succulents: aloe, various cacti, young or stone rose(Sempervivum), sedum (Sedum), rockweed (Orostachys), etc.
- Fill the container with soil and plant your chosen plants in it. Use any cactus mixture for drainage.

Here are examples of crafts for the home that you can make with your own hands using the above method.


10. DIY home crafts from glass containers
Glass bottles and jars often accumulate on balconies and in storage rooms. What they are not turned into today: lamps, candlesticks, vases, table decor... It’s simply amazing how easily they become part of stylish interior, you just need to use a little ingenuity, as well as paints, fabrics, threads, paper and other improvised means. Last batch of photos for today. Also read:
10 best ideas on what you can do for your home with your own hands updated: March 21, 2018 by: Margarita Glushko
You gradually get bored with the same interior and want to somehow update the decor, but grandiose renovations involving rearranging furniture or moving partitions cost a lot. All this forces owners to look for more affordable solutions and new ideas for home decor, which are easy to implement without the help of specialists and DIY construction teams. In this article, we will explore this issue a little and give some tips on how to improve your life using the simplest design techniques that do not require large investments.
With a change of interior, your life may change. New mood, new views, new opportunities.
So, one day you looked around and felt an urgent need to change something in your home.
Do not rearrange the furniture, do not change the curtains, do not re-stick the wallpaper. No, that's not it! I would like to introduce some kind of creative novelty into the atmosphere of my home, change the mood of the house, and turn everyday life into a holiday. And of course, the idea arose to do this with the help of crafts for decoration. But sometimes you have a picture in your head, but you can’t explain it, or you don’t have the money for a designer, or you just want to make home decor with your own hands. With the help of such crafts you can really change the interior, bring individuality and creativity. There are a lot of ideas to update the interior, it all depends on the breadth of scope, availability of funds, and free time. For example, an ordinary picture appeared on the wall, and the room already looked in a new way. Or you can start transforming the same room from this picture; imagination will play a role here.
"My home is my fortress." In your home you want to feel not only protection, but also coziness, comfort, and tranquility. To do this, do not forget that you yourself can make an interesting decorative crafts. Thus, contribute a piece of yourself. This is where yours will come to help. interesting ideas for home decor with your own hands.
Of course, you can invite a designer, try to draw and explain what exactly you want to change and how. But not everyone is satisfied with the result, maybe they didn’t explain it correctly, maybe the specialist didn’t understand, a different material was used, or the designer saw the result in his own way. Or maybe there is simply no money for such services.
Another thing is that you started changing the design yourself. The idea is always before your eyes, and maybe the result. You know what you want and how it should turn out. In the process, you understand what to change, material, color, and sometimes even the idea itself. Control your costs and time.
Visiting exhibitions, museums, theaters, or simply enjoying a walk in the park, there is a possibility that an uncontrollable feeling to create will arise in you. And it’s quite possible to start implementing your ideas in your own home. And going to a store to buy materials will give you a lot more ideas for decor. There, before your eyes, new elements and materials for making crafts with your own hands will open.
Try rearranging the furniture first. This way you will understand what doesn’t suit you and what you want to change. For example, more space opened up near a window, or space appeared on the wall and you wanted to add a new element there. An empty area on the wall can be decorated with an original painting or an antique mirror. As a result, you will want to change the furniture to complete the interior. It is not necessary to change furniture; it is better to think about how to transform what you already have. You can age a cabinet or sideboard using special materials using a certain technique.
The zoning technique is impressive. You find yourself in an office whose design coincides with the style of the middle of the last century, from the living room where the modern execution of design ideas is carried out.
A kind of journey from the present to the past, and vice versa.
Major renovation is the best time to change the interior. There is nothing in the house except bare walls, windows and doors. There is an opportunity to look at everything with a fresh look, nothing is tied to old things. All you have to do is close your eyes and imagine how everything will look after the successful implementation of your idea.
If inspiration does not come, then with the first steps of your endeavors, it will definitely appear. The fact is that bare walls will immediately reveal all the shortcomings of the building, and the true size. That’s when interior ideas and first sketches of decorative elements will begin to emerge.
In a “naked” form, the housing will reveal everything that was previously hidden by carpets, chandeliers and other furniture. A clear picture of all problem areas will emerge. For example, strongly narrow room, or low ceilings, poor lighting, location doorways. And then you must take into account all the pros and cons in order to choose the right style, and hence repair materials, and appropriate furniture.
In cases where there is no time or money to undertake a major renovation, or there is a fear of not being able to complete the renovation, options for local decoration are considered.
Here are some DIY home decor ideas.
We remove the curtains, or bedspreads, or maybe both, and trim them with rags, fringe, or beads. Tablecloths and rugs can also go through a refurbishment process. Embroidery always looks great on such things.
We get the hidden ones interesting photos or themed cards. Can also be combined. We design it on the wall in in the usual form, or put it in frames. Chaotically, diagonally, the circle comes to mind. As an option, you can consider pasting photographs of furniture. Consider setting up a stand. Window frames or old interior doors will help with this.
There was a need to renovate the room, but it was not possible. In this case, we can use local decoration. Old and faded wallpaper can be revived with the help of a card, covering the most damaged areas.
You can change the card over time. Let's say the geographical fun was outweighed by the political one. Thanks to such changes, you can not only hide the imperfections of the wallpaper, but also improve your knowledge of geography.
Magazines and newspapers will be invaluable in resolving the issue of painting the ceiling. We cut out pictures of different sizes and shapes and paste them randomly on the ceiling. Get the effect of an information stand. You will look at it while lying down and maybe add something if you wish.
In some cases, an old cast-iron battery can decorate the room. To do this, it needs to be cleaned, sanded, painted with glossy black paint and varnished. This element of creativity will not be to everyone’s taste, but for some it will prompt the creation and implementation of new ideas.
Updating your furniture might be a good idea. Replace the upholstery on the chairs, change the covers on the armchairs, and the bedspread on the sofa - and the room will immediately be transformed. The weaving technique is used to decorate kitchen stools, a very advantageous option. It seems like they are new.
In the old classic style decor wooden house will win the heart of any connoisseur. A house outside the city or in the country, decorated in this style, will not leave you indifferent. You can take leather or another material of your choice and use it to replace worn upholstery on a sofa or couch. Using decorative varnish with an aging effect, cover all wooden surfaces. Add a gramophone and a samovar to this and the interior will be simply exceptional.
Well, for connoisseurs of rocking chairs, there is good idea. Take an old chair or armchair, install wooden arches on it, and the chair is ready. For more creativity, hang it from a bracket mounted on the ceiling. It will be very unusual.
On the eve of the holidays, I really want to make adjustments to the usual environment of my home.
Thematic decor is indispensable in such cases. We will use our ingenuity depending on the theme of the holiday.
IN New Year with my own hands paint the windows with images of the Snow Maiden, snowmen, Santa Claus, and Christmas trees. Or you can draw magical stories, cut out snowflakes from napkins and sprinkle them with glitter. Try making a paper garland with your whole family. This activity can also be turned into a competition for children, whoever glues the longest will win. All ideas can be brought to life using available materials, and at no additional cost.
The Easter holiday will be decorated with Easter eggs and other themed decorations. On Valentine's Day, balloons, cards with hearts and flowers will come in handy. Help add romance to this day scented candles. And of course Halloween. Here you can generally accelerate, if only time and materials allow. The very first thing is a Jack-O-Lantern “pumpkin head”, prepared goodies in the form of mummies and skulls, painted windows with an evil theme, and don’t forget about scary costumes.
All DIY decorations and decorative elements for your home can be easily made from scrap materials. They bent a fork or a spoon and got unusual hooks. Some people will like the idea of making a lampshade from a bicycle wheel rim. Just decorate it intricately and the chandelier is ready.
Chest of drawers made of plastic drawers, simple and creative. Wicker flowers and leaves will be a wonderful decoration for photo frames and paintings. This decor will appeal to people who prefer to work with natural materials. You can make the most ordinary vase original. To begin with, we increase the volume using fabric or burlap, then tighten it with twine, rope or belt. Now we add decorative elements - beads, buttons, shells, seed beads. It will be interesting to paste it with cereal or coffee beans. You can glue it with glue.
There are also ideas for those who like simple and tasteful things. For example, turn a burnt out light bulb into a vase for beautiful flower. Very carefully remove the core from the light bulb, attach it to a decorative stand, also made from scrap materials, and the vase is ready. Decorative elements can be made from the most incredible materials, combine textures, create creative designs. The main thing is that there are no limits, you don’t need to be afraid to experiment. DIY home decor crafts are the most suitable for solving many issues.
(No ratings yet)