How to glue foam ceiling plinth? What to glue on and with what glue? What to glue first, wallpaper or ceiling plinth How can you glue ceiling plinths to wallpaper?
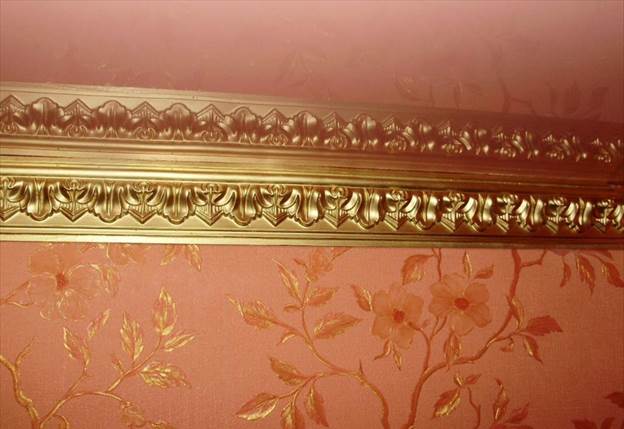
Ceiling plinths for wallpaper can be soft or hard, depending on the material from which they are made. The material can be wood, plaster, plastic and even stone, it all depends on the flight of designer’s imagination and financial capabilities.
Only light elements can be glued on top of the wallpaper, since they will not create unnecessary load. When using heavy ones, you should first attach them to the wall, and then glue the wallpaper.
Due to the different curvature of the wall and baseboard, a gap may arise between them. If ceiling plinth soft, it can be pressed to the wallpaper. When using hard, putty is carried out first. It is impossible to perform this operation well on top of the wallpaper, since the putty will ruin appearance, will not adhere securely to the wall and will create additional stress on the wallpaper.
Types of ceiling plinths
Usually finishing ends with wallpapering and installation of ceiling plinths. After this, the premises are considered fully suitable for habitation.
Ceiling plinths are divided according to the materials used for their manufacture, and are:

Before installation, you need to carefully mark the corner elements and make cuts. It is better to cut corner elements using a miter box, which will ensure perfect joining. In this case, it is worth leaving a small margin of length of 2-3 cm, which will allow you to make the most accurate adjustment of the joints during installation. After installation in place, you can carefully trim off the excess. Depending on the material, you can cut the parts with a stationery knife, a hacksaw with fine teeth, or a hacksaw for metal. In this way, the heavy elements are attached first, and then the wallpaper will be glued.

The method of fastening the plinth also depends on the material.
- fastening wooden plinth carried out with glue and nails, in some cases they are glued without the use of nails;
- gypsum is glued to a gypsum solution containing from 1 to 3% PVC glue. For the most durable fastening, dowels and nails are additionally used. The holes for them are pre-drilled in the parts, and upon completion of the work, the mounting holes are hidden using gypsum putty.
- plastic and foam skirting boards are installed with glue. This method of fastening is sufficient for reliable fixation, since the weight of the elements is relatively small.
In some cases, ceiling plinths are sold with corner elements, which greatly simplify the fastening and fitting of elements and hide the edges.

You can glue the wallpaper first or after installing the baguette. Each method has its own advantages and disadvantages. With any method, installation should begin from the most clearly visible corner.
Installation before wallpapering
When installing a ceiling plinth on a wall before wallpapering, you must first level the surface. If it was not possible to perfectly level the wall, but the plinth is already being installed, you just need to carefully fill all the gaps between the wall and the plinth.
This method is most often used when installing heavy fillets with low ductility, made of gypsum, stone or wood.
Gluing wallpaper after installing the plinth is more difficult, since it requires careful marking of the sheets, but at the same time, the plinth fits tightly to the wall, which eliminates gaps that spoil the appearance.

It is advisable to prepare sheets of wallpaper in advance and leave a length margin of 2-3 cm in order to better fit the pattern. Excess length that ends up on the baguette can be carefully trimmed using a spatula and a utility knife. To do this, you need to press the sheet with a spatula close to the ceiling plinth and cut along it. This method allows you to trim the edges of the wallpaper very evenly close to the baseboard.

Another advantage of this method is that if it is necessary to replace the wallpaper, the baguette can be left in its place.
Installation over wallpaper
The use of light and flexible ceiling plinths, after gluing, allows you to hide uneven cuts of wallpaper sheets. The main disadvantage of this method is the need to remove the baguette when replacing wallpaper, which most often leads to their damage and replacement. In addition, you should be extremely careful to apply glue to two planes at once, adhesive to the ceiling and wall. When installing, you need to hold each element pressed until the glue sets.
If glue is squeezed onto the wall or ceiling, it must be removed immediately with a dry cloth.
When painting, first apply mounting tape next to the ceiling plinth, and only after that painting is done. Masking tape allows you to avoid loss of the decorative qualities of the wallpaper.
Installation with suspended ceilings
If there are suspended ceilings in the room, the technology for gluing wallpaper and baseboards changes slightly. The latter should only be used specially designed for such ceilings. They have a wider shelf so that they can be securely glued to the wall. Under no circumstances should they be glued to the ceiling, as this may cause damage to the canvas.

Below is a video that will tell you how to install the ceiling plinth - first or after wallpapering:
11833 0 0
What to glue first: wallpaper or ceiling plinth - expert opinion and tips on arrangement
Questions like: is it possible to glue ceiling plinth to wallpaper, or what is glued first and what then, are asked regularly on forums and other similar resources. So, there is no definite answer here. It all depends on the type of wallpaper, the material from which the baseboard is made and the condition of the walls. And then we will look at the most common situations, plus I will tell you how to install it all yourself.
Types of ceiling plinths
In fact, floor plinth It differs from the ceiling only in the material from which it is made. Strong, mechanically damage-resistant planks are installed in the floor area, and any kind can be installed under the ceiling, because there they are practically inaccessible.
| Photo | Recommendations |
 |
Paper skirting boards.
This edging is also called a frieze or border. At a stretch, decorative paper strips can be classified as skirting boards, but formally they are considered such. In terms of order, the paper border is always glued on top of the wallpaper. |
 |
PVC skirting.
Plastic baguettes are mounted on the ceiling only if the ceiling is sheathed with the same plastic. As you can see in the photo, they even have a groove for such panels. These baguettes are attached either to the sheathing or to the ceiling. As for wallpaper on the walls, before filling the wallpaper, the plastic is simply folded back and the wallpaper is glued. Formally, here the plinth is mounted on the wallpaper, although the fillet is attached to the ceiling. |
 |
Polyurethane moldings. Flexible polyurethane baguettes are now considered the most popular. The material is light, durable and at the same time elastic. Such baguettes cannot be distinguished from the same plaster, and they can be mounted both on and under wallpaper. We'll talk about the intricacies of installation a little later. |
 |
Plaster stucco.
Before the advent of polyurethane and foam, gypsum was extremely popular. The baguettes are beautiful, but quite fragile and heavy, which makes them more difficult to install.
|
 |
Foam edging.
If installed correctly, foam moldings cannot be distinguished from plaster or polyurethane, but their price is more than affordable, plus anyone can glue them to the ceiling.
|
 |
Wooden fillet.
Wooden edging is now considered elite. Such skirting boards are often attached to the base with dowel nails, the problem is that they need ideal smooth walls and ceilings. |
 |
Stone border.
Marble, granite and other stone products cost incredible amounts of money, plus they are very problematic to install. |
Subtleties of arranging different options
- Flexible and lightweight - this includes polyurethane, foam and polyvinyl chloride. This direction can be mounted both on top of the wallpaper and end-to-end with the canvas;
- Hard and heavy - here we have plaster, wood and stone. All of them are mounted end-to-end only. The fact is that not a single wallpaper, even the densest one, can withstand such weight, plus it is often necessary to level the walls under hard baguettes.
When and how the fillet is attached to the wallpaper
Experienced craftsmen are strongly against this approach, because this is, in fact, a one-time option. If you start changing the wallpaper, you will have to remove the frieze, which means double work. But people are afraid that without experience they will not be able to beautifully arrange the joint between the baguette and the canvas and glue the baguette on top.

But let's return to practice: let's start with the fact that the baguette can only be glued to non-woven wallpaper or to vinyl wallpapers, the paper can only withstand a thin foam frieze, nothing more. I'm glad that the instructions are the same in all cases:
- The frieze is glued on top of the wallpaper after the walls are completely dry, which is about 2-3 days from the end of gluing;
- Apply 1-2 strips of thick mixture to the back side of the baguette. universal glue, type “Moment-installation”, after which the baguette is applied to the junction of the ceiling and the walls and held for about 30 seconds;
- If glue oozes out from under the baguette, it is immediately wiped off with a soft rag.

Another common question is how to remove the ceiling plinth without damaging the wallpaper? I will say right away - this is unrealistic. If the baguette is glued, then when you try to remove it, it will tear upper layer canvases. And if the strip is screwed on with self-tapping screws, which is also possible, then the screws have already gone through the canvas and it is damaged.
Installation of fillets end-to-end with the canvas
First, we need to secure the fillet itself, and only then join the fabric to it. Foam plastic, polyurethane and gypsum fillets are glued. Polystyrene foam and polyurethane are glued with universal glue, gypsum is attached with gypsum mortar with the addition of PVA.
- Before installation, the wall is treated with a strengthening primer, otherwise the glue will not adhere well;
- When the soil has dried, apply glue to the fillet and fix it on the wall;
- If the wall is curved and there are noticeable gaps under the plank, you need to cover them with putty, after which you can start painting the baseboard.

A separate topic is going around corners. “Sofa” craftsmen advise cutting the slats using a miter box, I categorically do not recommend doing this, the corners are almost always crooked and there will be a gap between the slats.
A proven technology for trimming skirting boards in corners looks something like this:
- First, apply the strip to one side of the corner and trace the edge on the wall and ceiling;
- Then do the same on the other side of the corner;
- The intersection of these lines will be the cutting line. This technique works for both interior and exterior corners.

Using a ceiling plinth (fillet, baguette, molding, ceiling cornice) you can hide small surface irregularities and visually differentiate the wall and ceiling. Those who want to carry out the installation themselves have questions - how to glue the ceiling plinth, what kind of glue to choose, can it be glued to all surfaces? Here we will look in detail at all the features of fillets and the intricacies of working with them.
To start gluing the baseboard correctly, you need to prepare the tools and choose the installation method. It depends on two components:
- the material from which the plinth is made;
- surface, but which will be installed.
When buying a fillet, check with the seller what material it is made of. On this moment The following types of ceiling plinths are produced:
- plastic;
- from expanded polystyrene;
- from foam plastic;
- wooden;
- gypsum;
- polyurethane.
If pasting will take place over wallpaper, give preference to lightweight materials. If the room has a complex architectural shape, with curved walls, it is better to purchase polyurethane moldings - they are flexible and will easily follow the geometry of the walls.

Choosing the installation method and glue
Fixation can be done with self-tapping screws or using various adhesive compositions. Nowadays the following are used for baguette installation:
- acrylic putty;
- acrylic liquid nails;
- neopropylene liquid nails;
- silicone sealant;
- liquid plastic;
- glue for polyurethane;
- PVA based adhesive mixture.
The most common ones now are moldings made of polystyrene foam and polystyrene foam. They are light, compact and inexpensive. Due to their low weight, they are attached using glue, without additional mechanical fixation. How to glue foam ceiling plinths? It is best to do this with acrylic putty, glue mixture with PVA or silicone sealant (for wallpaper). Liquid nails can cause deformation of the foam, so their use is not recommended.
Plastic moldings can be “planted” on any liquid nails if they are glued on top of wallpaper, or on putty if decorative finishing walls - plaster. PVC skirting boards can be fixed using liquid plastic.
Heavy polyurethane moldings are attached using a special glue for polyurethane or universal glue. Small skirting boards can also be attached to liquid nails.
Plaster moldings are attached adhesive solution based on alabaster with the addition of PVA glue. Massive and heavy elements must be additionally fixed with self-tapping screws.
Wooden ceiling cornices Most often used if the wall decor also contains wood or its imitation. Installation of wooden moldings is carried out to wooden blocks(triangular in diameter). Small skirting boards made of light or very light wood (pine, alder, fir, cedar) are sometimes glued to liquid nails. But in this case, when the humidity in the room changes wooden elements can "lead". Attaching it to wooden blocks located every half meter prevents this from happening.

Preparing the tools
Having figured out the installation method, we move on to preparing the tools.
Before you start gluing the ceiling plinth, prepare the following tools.
- For cutting: construction knife for foam plastic or polyurethane, a hacksaw for metal or a fine-toothed hacksaw for plaster, a hacksaw for wood for a wooden ceiling cornice.
- For marking: level, pencil, ruler, tape measure.
- For cutting skirting boards at an angle: miter box.
- For installation: glue brush, putty spatula, screwdriver, drill, dowels and self-tapping screws for heavy moldings.

How to glue a cornice onto putty: step-by-step instructions
- Mark the border of the plinth on the ceiling using a level and a pencil.
- Take measurements along the perimeter of the room (each side is recorded separately).
- Calculate how many whole strips go on one wall and how long the piece needs to be added.
- Make markings on the baseboard and cut pieces to the required length.
- Place the prepared elements on the floor around the perimeter of the room, and if everything fits, proceed with installation.
- Mix the putty according to the instructions.
- Apply putty thin layer to the places where the cornice will be attached.
- Apply putty (thickly) to the back of the fillet.
- Moisten the putty areas on the ceiling and wall with primer.
- Press the prepared plinth against the wall, and remove the putty that protrudes beyond its borders with a spatula. You need to start from the corner, and apply the next piece to the one already glued.
- If gaps have formed, fill them with putty.
- After the putty solution has dried, it is necessary to cover the joints and crevices with the same solution.
- The skirting board can be painted after it has completely dried.
After wetting with the primer, subsequent actions must be carried out quickly so that the surface does not dry out.

How to glue ceiling plinths in corners?
The easiest way is to buy it together with the molding strip inner corners. They are sold 4 per pack, so it's convenient for a standard room. If the room has not only internal, but also external corners, then you need to purchase external corners as well. The corners are glued in the same way as a straight strip of cornice.
Sometimes it is impossible to select the corners of the desired pattern; is it possible to glue the molding in this case? If you have a miter box, then cutting the cornice at the desired angle is not difficult. To do this, a strip of cornice is placed in a miter box and a cut is made at an angle of 45º. It must be taken into account that for internal corners the cut goes from the back to the front part, that is, after the cut, the back part should be longer. And for external corners, on the contrary, from the front to the back.

Features of wallpapering
It is preferable to glue any cornice not to wallpaper. On wallpaper (on top) only installation using self-tapping screws or gluing of lightweight foam or polystyrene baseboards is allowed. If the wall is already decorated wallpaper, and polyurethane or gypsum ceiling moldings If you still need to “plant” it with glue or putty, you need to cut off a strip of wallpaper at the top, slightly narrower than the width of the baseboard (the shelf adjacent to the wall). Then pasting is carried out in the usual way.
A lightweight foam plinth can be glued on top of wallpaper, but in this case the answer to the question of what glue to use to glue the ceiling plinth will be different. Here it is better to use white silicone sealant, PVA-based glue or polyurethane glue.
The gluing technology is simple.
- Apply glue to the wrong side in a continuous strip.
- Press the baseboard into the corner between the wall and the ceiling and hold it in this position for 1 minute.
- If there are cracks or gaps, cover them with silicone.
- Apply sealant to side part(the junction of the strips) and glue the next part of the plinth.
To protect the wallpaper from getting glue or sealant, cover the strip near the baseboard with masking tape before work.

How to glue ceiling plinth to a stretch ceiling?
In fact, the plinth does not stick to the suspended ceiling. Its fixation is carried out only to the wall, but at the same time the molding successfully closes the gap formed between the ceiling and the wall after installing the film. In principle, the entire process of gluing skirting boards in this case is almost no different from fixing it under normal conditions.
The differences are as follows.
- Since the plinth is attached only to the wall, and not to the wall + ceiling, the contact area is much smaller. This means that the glue must be chosen carefully, and if possible, secure the fillet with self-tapping screws.
- If it is not possible to secure the elements mechanically, you need to increase adhesion to the wall; for this it is better to choose a plinth with a wide vertical side.
- In order not to accidentally damage suspended ceiling, before work it must be covered with cling film. It adheres well to the ceiling film, and after work it can be easily pulled out from under the cornice.

Fastening wooden ceiling plinths
A special feature of the installation of such baguettes is the preliminary fastening of the mounting angles (bars). These are “rough” parts with a triangular cross-section.
The step-by-step installation of wooden ceiling plinths is as follows.
- Calculate required amount rough corners. When calculating, keep in mind that they should be located every half meter.
- Fix them in the corner between the ceiling and the wall.
- Mark the bottom border of the baguette along the entire perimeter of the room.
- Calculate the number of whole strips and sections.
- Mark and cut pieces of baseboard.
- Make corner cuts using a miter box and process (fit) the edges with a file.
- Screw the molding with screws to the bars or nail it, carefully adjusting the adjacent elements.
It is better to use screws for installation. In this case, if necessary, it will be possible to make adjustments without losing the appearance.

Wide skirting boards with a complex pattern are suitable for high rooms; if the ceiling is low, it is better to give preference to laconic options - narrow and not overloaded with details.
If the ceiling is high, you can glue the baguette to the wall 20 centimeters below the ceiling. In this case, you can mount lighting above it.
When buying a plinth, immediately ask about the possibility of purchasing additional elements– external and internal corners. Their purchase will greatly facilitate the installation of moldings.
In most cases, the ceiling plinth is perceived as a simple decorative element, designed only to decorate the room, while the purely functional side is often neglected. But as practice shows, fillets protect against cracking of the joints of walls and ceilings and the upper part of the wallpaper coming off. That is why, when renovating a house or apartment, it is so important to know how to glue a ceiling plinth to wallpaper or a painted wall.
The most popular fillets are made of polystyrene foam and polystyrene foam (read also: ""). The former are more attractive because they have a more pronounced texture.
After you have chosen the ceiling plinth, you need to decide on how to glue it. It is also important to understand the question of how to glue the ceiling plinth - to wallpaper or to bare walls (more details: " ").
Let's consider existing approaches to fastening skirting boards.
Gluing the baseboard directly to the wallpaper
Experts often advise against gluing ceiling plinths to wallpaper, but this does not mean that this cannot be done. It all depends on the interior, the evenness of the walls and other factors (read: ""). This method Installation of fillets consists in attaching the baseboard directly to the wallpaper using glue. At the same time, installation is very simple and quick. It is for this reason that many non-professionals prefer this method of gluing the baseboard.

Installing the baseboard before gluing the wallpaper
In this case, the fillet is installed before the walls are finished with wallpaper. This method is used by professionals, as it allows you to seal all the cracks and joints during the process of applying putty (more details: " "). The wallpaper is aligned with the already installed baseboard. But in terms of its complexity, this method is not much different from the previous one. Just a little practice and even an amateur will do it no worse than a professional.
Ceiling skirting boards allow you to smooth out the transition from walls to ceiling, and they also hide unevenness. But to do this, you need to install these elements correctly. By taking into account the information about how to install the baseboard - before and after wallpapering, you can decide which option is more suitable for you.
Tools and materials
In order to install the ceiling plinth, you can use the following materials:
- polymer-based glue;
- putty mixed with PVA;
- liquid Nails.

For installation you will need:
- mounting knife;
- putty knife;
- miter box;
- pencil;
- ruler;
- brush;
- sandpaper;
- dye;
- glue;
- transparent sealant;
- putty.
So, now you know how to glue the ceiling plinth onto the wallpaper and what tools to install it with. Before starting installation, it is necessary to correctly calculate the number of pieces of ceiling plinth. To do this, you need to measure the perimeter of the room, after which the resulting value is divided by 2 (the standard length of one element of the ceiling plinth in meters). When receiving a fractional value, it is rounded up. It is also necessary to purchase 1-3 more skirting boards than the calculated quantity, since during the installation process something may go wrong and the element will have to be replaced. In addition, during the installation process you can show your imagination and install the baseboard in a figurative manner, so its quantity can be even greater.
Preparatory work - we decide on the installation diagram
First you need to make a simple drawing. To do this, take a sheet of paper and a pencil. The scale can be taken as 1 m = 1 cm. Thus, one strip of the ceiling plinth in the drawing will occupy 2 cm. Draw the perimeter of the room on a sheet of paper. After this, place the plinths on the diagram so that there is a minimum amount of waste, that is, so that the elements have to be trimmed to a minimum.

Since the profile is asymmetrical, it is necessary to decide which side to glue it on. It is often recommended to fasten the wide side of the fillet so as to cover surface imperfections as much as possible. That is, if you are gluing skirting boards on top of wallpaper, then it is better to glue the wide side to the wall. If ceiling surface uneven and has some imperfections in the corners, then the wide side is mounted to the ceiling.
Instructions for gluing skirting boards
Let's start installation. The ceiling plinth for wallpaper must be cut at the ends according to the right angles(more details: " "). A miter box is used for these purposes. A plinth is inserted into it and, using a mounting knife or metal saw, a cut is made at an angle of 45 degrees. Moreover, for internal corner the cut should be directed from right to left (for the plinth in the left corner), that is, its lower edge will be larger; for the outer corner, the plinth of the left corner is cut from left to right.
WITH back side The baseboard glue is applied in a thin, even layer. In this case, you need to make sure that it does not go beyond the edges. If excess glue comes out and gets on the surface of the wall or wallpaper, it must be wiped off immediately with a dry cloth. Now press the plinth against the wall and hold it in this position for as long as indicated in the instructions. But don't overdo it. If you squeeze the baseboard, it may crack or you will leave noticeable fingerprints on it (more details: " "). In addition, there is no need to try to repeat the uneven contour of the wall or ceiling. The baseboard should not bend.

How to glue ceiling plinths, see details in the video:
conclusions
For beginners in this business, we advise you to choose the second option, since it is much easier to implement. But if you want to get a better and more professional result, then the first option is optimal solution for you. We wish you success in your renovation.
Tsugunov Anton Valerievich
Reading time: 4 minutes
The final stage of finishing a room requires special care and accuracy from the master, since any error will be clearly visible. The junction between the wall and the ceiling is a difficult area to work with, especially if there are uneven surfaces. The use of fillets makes the task easier and makes the transition from plane to plane more aesthetically pleasing. They also go well with wallpaper, complementing each other favorably. But what should you glue first: wallpaper or ceiling plinth?
When can a fillet be attached to wallpaper?
The ceiling plinth performs decorative and masking functions: with its help, some unevenness of the ceiling is hidden. This opportunity is of high value for the home craftsman, because he can create a perfect flat surface It doesn't always work out. A crooked ceiling can ruin general form rooms even with perfectly aligned walls.
To understand whether fillets can be glued to wallpaper, you need to study the types of products produced and some physical characteristics– weight, material of manufacture, width. To create such decorative elements the following are used:
- expanded polystyrene;
- Styrofoam;
- polyurethane;
- plastic;
- natural and artificial stone;
- tree;
- ceramics;
- gypsum.
You can glue skirting boards to wallpaper when the canvas can support their weight long time. Therefore, it is better to immediately exclude massive products and consider only light options from all varieties. The easiest way is to use baguettes made of polystyrene foam and polyurethane.
Important! Most often, putty is used to install skirting boards on the ceiling, but they need to be attached to wallpaper with a universal transparent glue, which sets quickly and does not soak the canvas. “Liquid Nails”, “Dragon”, “Moment” are suitable.
The advantage of installing fillets on top of the wallpaper is the additional fastening of the joints of the strips where they most often come off - under the ceiling.
One of the disadvantages is a technical point: if decorative elements require painting, puttying or varnishing, then you need to think about protecting the pasted wallpaper from dirt.
Important! If you decide to use large-relief wallpaper, then you should immediately abandon gluing a frieze on top of it: the fastening will be unreliable, the plinth may move in waves, and gaps will be visible at the place of contact.
When is the frieze glued first?
Fastening severe types baguette requires high load-bearing qualities from the surface. Therefore, they must be glued directly to the wall and ceiling. For massive varieties (stone, ceramics, wood, gypsum), special metal fasteners are used that are mechanically installed in the ceilings.
It should also be understood that heavy products are not able to bend under surface changes. Acrylic putty is used to compensate for gaps and eliminate cracks. Working with this material is a rather dirty process, and if by this time there is already wallpaper on the wall, it is quite difficult to save it from stains and scuffs. In addition, very often paint is applied to the frieze after installation, which also risks damaging the coating.
Conclusion: if the choice fell on a massive ceiling plinth, then wallpapering should be done after its installation and finishing.
However, you need to be prepared for the fact that making a smooth wallpaper edge without noticeable gaps will be much more difficult than using a light frieze that masks errors. Therefore, you should first glue a couple of training cuts on an inconspicuous area.
How to apply wallpaper evenly under a ceiling molding?
To carefully and beautifully trim the wallpaper under the baguette, you need to do the following:
- Glue the strips with a slight overlap onto the frieze.
- While the glue is still wet, take a wide spatula (30 cm) and smoothly press the canvas to the junction with the wall. You can also use an iron ruler for these purposes.
- Then use a knife, without loosening the pressure of the tool, to carefully remove the excess. The cut should be exactly along the edge of the spatula blade.
Important! For work it is used only very sharp knife, which will not tear the material. Using painting tool With break-off blades, it is recommended to use one section per cut.
- Glue stains on the baseboard are removed with a dry, clean rag.
Advice! To feel more confident, you should practice cutting wallpaper in an inconspicuous area. You can also glue a couple of unnecessary pieces from the roll, and after stuffing your hand on them, simply remove them.
Baguette and suspended ceiling
The most logical option seems to be in which the suspended ceiling is first installed, and then the baguette and wallpaper. There is no risk that the material on the walls will come off or become dirty or damaged during installation ceiling structure and baseboards. The same procedure is followed for all types suspended ceilings: plasterboard, slatted, Armstrong, PVC panels.
However, in this case there are risks for the already stretched fabric, so care should be taken:
- The material may be stained with glue stains during the wallpapering process.
- The adhesive for a plastic baguette can corrode the film and it will have to be replaced.
- Mechanical damage to the ceiling during the installation of fastening fittings for a heavy baguette cannot be ruled out.
If wallpaper in a room is often re-pasted, then it is most profitable to install a wide molding: the finishing will be done at a considerable distance from the ceiling, which will prevent its accidental damage.
Installation of ceiling plinth under tension fabric
When installing a frieze under already stretched ceiling It is recommended not to use it on wallpaper. This will reduce the risk of damage to the film or canvas and will significantly simplify the process when subsequently changing the wallpaper.