Painting Easter eggs. Master class with step-by-step photos
In preparation for Easter, we devote Special attention coloring of eggs. But this symbol of the holiday can be immortalized by replacing egg on wood.
I propose to paint a solid wood blank in the shape of an egg as an Easter souvenir. Let's take a sky-colored background and golden patterns in the form of twisting lines as a basis, adding flowers and strawberries.
This one will not break like its natural counterpart and will remain with its owner for a long time. long years. It will remind you not only of the bright holiday, but also of the person who gave it. It is pleasant to pick up and look at, and it will also elevate the interior as an imitation of a Faberge egg.
We need:

- volumetric blank in the form of an egg made of solid wood,
- sanding sponge,
- primer for acrylic paints,
- acrylic paints, including gold metallic,
- brushes,
- thinner for acrylic paints,
- glossy acrylic varnish,
- pencil, eraser,
- Construction gloves may also come in handy.
- Manufacturing algorithm.

Usually, when making a workpiece of this type, in the workshop it is fixed in the machine from the end sides. Therefore, notches in the form of burrs often form at the attachment points. First of all, they need to be treated with abrasive big size, and then sand it small. Secondly, the entire workpiece is completely sanded using a low-abrasive sanding sponge.
2. Take a workpiece, a large-diameter bristle brush and acrylic primer.

Let's cover the workpiece with soil.
3. Then we process the workpiece with a sanding sponge of the lowest abrasiveness or sandpaper number zero.

Let's repeat the procedure with applying primer and sanding.
4. For the next step we will need a smooth, primed blank, a pencil and an eraser.

Let's draw a picture. In our case, thin lines in the form of a pattern are taken as a basis, which are complemented by flowers and berries.


5. Take a blank, a nylon brush, thinner for acrylic paints and blue paint.

Mix thinner and paint to obtain the most delicate blue color and apply it to the workpiece, trying not to get on the flowers and berries. Since the resulting mixture is transparent, it can be used to cover patterns, and they will be visible later, which is useful for further coloring.

This stage will give us a more voluminous drawing and high-quality coloring in the future.
6. Take a blank, a brush, gold and yellow paints.

Mix the paints and draw the basic golden design.

7. Take white and red paints.

And we complement the picture with white flower petals and red berries.

8. Take blue paint and a brush.

Carefully draw the main background, trying to pay more attention to drawing the places next to the golden lines. This will make the background more voluminous.
9. Let's take out the gold paint and brush number one. It doesn’t matter whether the brush is natural or synthetic, the main thing is that it is very thin at the end.

We put paint on the dots on the berries and the stamens on the flowers.


10. Take the blank, brushes with diameters 3, 2 and 1, blue paint.
We varnish the surface several times. Each time, following the instructions, we wait for the allotted time for the varnish to dry.
The souvenir is ready.


The egg symbolizes life, it does not look alive on the outside, but it carries life inside. The souvenir we created symbolizes the beginning of a new life and will bring good luck and changes for the better for its recipient.
Very beautiful Easter eggs can be obtained by painting with hot wax. Under the definition hot wax This refers to ordinary wax crayons, which can be purchased at a stationery store. For painting Easter eggs, wax crayons (can be replaced with beeswax or paraffin candles tinted with food coloring) are melted and placed in a small metal container, which is heated to a temperature of 65°C. Wax painting is used mainly for pre-painted eggs, which looks more impressive.

Before you start painting the Easter egg, you need to paint it in any traditional way known to you, of which there are quite a lot. Eggs are colored in onion skins, food coloring, beets, and so on. In order for the egg to color well and evenly, it must first be washed well and degreased. Vinegar is usually used for degreasing; eggs are wiped with a piece of gauze or a cloth soaked in vinegar - using the food coloring method. When coloring with a decoction of onion peels, you can add vinegar while boiling the eggs - 1-2 tablespoons of vinegar and a pinch of salt per liter of water.
Copper wire is used to paint Easter eggs with wax (in the absence of copper wire, you can use a long needle, crochet hook, or awl). You can take a round wooden stick and insert a copper wire into it, leaving a copper tip about 2 cm long. The thinner the tip, the finer lines you can draw on the egg. For painting with hot wax, it is copper that is used, since due to its properties it retains temperature for a long time, the wax on copper wire It does not harden quickly and you can draw quite long lines.

Work process
Wax or wax crayons (you can also use ordinary colorless paraffin candles) are melted in a small metal container (you can take a tablespoon) over a flame (over a burning candle, burner or in a water bath on the stove), heated to a temperature of 65 ° C (do not bring until the wax boils), we maintain the temperature of a certain color of wax throughout the painting.
We do not hook with a copper tip a large number of wax and paint the egg by putting dots or drawing lines. The combination of lines and dots makes it possible to create a variety of patterns.


The egg, chicken or goose, must be at least room temperature during painting, not cold!, since our wax is hot and can harden immediately after it hits the egg. As for the wax, it should not be too hot or cold during painting. To achieve a satisfactory result, use one egg for testing to understand what wax temperature is best for painting with a particular pattern. If you want to paint an egg different colors wax, then do not paint it with all the colors of the rainbow at once. First paint the entire egg with one color, then wipe the egg with a dry cloth, which will remove any excess wax, if any. Then you can move on to using a different color of wax.


Upon completion of painting with hot wax, for a better effect, Easter eggs are greased or sunflower oil, which gives them shine.
To paint an Easter egg, you can use the templates below, or you can come up with something of your own. Experiment and you will succeed! See also.


If everything described above is not entirely clear, I suggest watching this video clip in which a Czech craftswoman paints an Easter egg with hot wax. Video clip without comments, which are not needed at all. The main thing is to see it once and everything will immediately become clear)

And now I suggest you look beautiful ideas Easter egg paintings that can inspire creativity,


Easter eggs master class
Easter egg painting - eight simple ways- I present to your attention ideas for painting Easter eggs from craftswoman Alice Burke
Alice Burke is a freelance mixed media artist | She explores various new materials to use in her works, happily breaks the rules and breaks the patterns accepted in art | She draws inspiration from street art, graffiti, art history and fashion | You can often see her rummaging through a trash can in the hope of finding something unique that can later be used to create a work of art | On the eve of Easter, she took several photos of lessons on decorating Easter eggs
This is what she writes in the preface to her master class: “Who told you that in order to decorate eggs, you need to mess around with dirty hot dyes? It's not like that at all! Watch how I painted a dozen eggs using materials found in my immediate environment.”

Idea No. 1. Take eggs and color them bright acrylic paint or food coloring. Then take a stroke corrector pen and draw simple patterns across the entire surface of the shell.

Idea No. 2,3. Use cotton swabs and use them to apply different patterns.

For example, create a pattern like this by dipping a cotton swab into paint and applying thick or translucent strokes.

Or make polka dot eggs using cotton swabs as pokers to apply the design.

Idea No. 4. Bubble wrap is another great material for creating interesting surfaces.

Just take a small piece of this film and spread some paint on it, then roll the egg over it.

Voila, you have an interesting egg with speckles or polka dots.

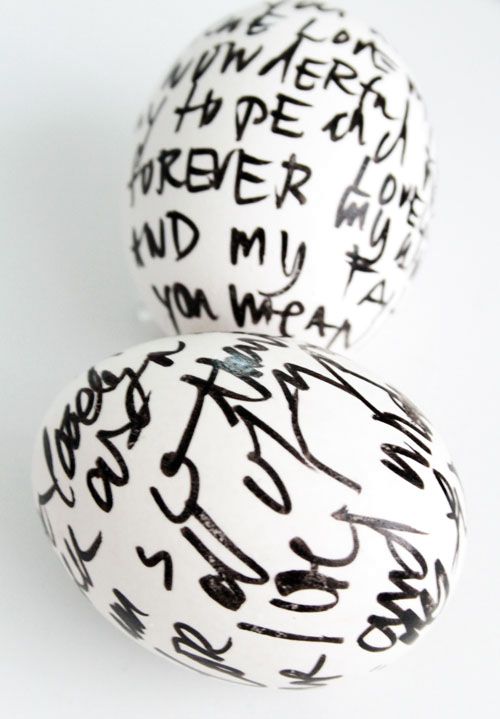
Idea No. 5. Creating inscriptions with a black or colored marker directly on the shell is perhaps the most easily implemented idea for decorating any surface.

You can write anything from wise sayings and prayers to funny wishes and meaningless doodles.

Idea #6 Colored handwriting and scribbles applied with multi-colored markers or felt-tip pens can also create a very bright and unique pattern on the surface of an Easter souvenir.

Idea No. 7 Well, and finally, a simple gel pen, Alice claims that with the help of this simple tool you can uniquely paint Easter eggs.

Look at the very simple feathers drawn, and what a cute pattern it turned out to be.

DIY Easter eggs
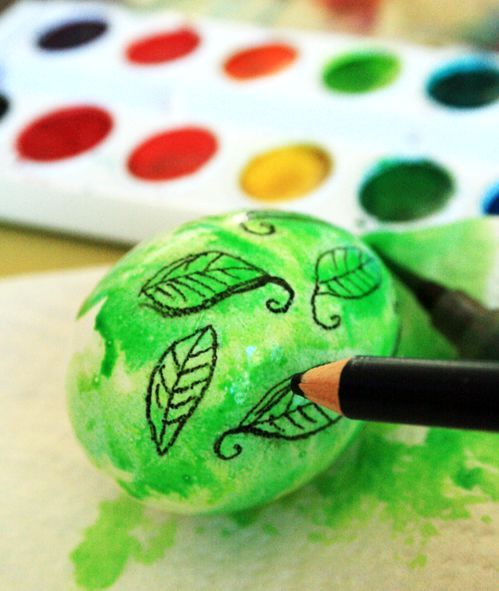
Here another great idea from the same craftswoman. This master class shows an easy way to create unique and colorful Easter cards. eggs-using watercolors. Keep in mind that the pattern applied with such paint is not waterproof and products painted using this technique easily lose the applied pattern at the slightest contact with water. But painting eggs with watercolors is such a fun activity for children that you shouldn’t pay attention to this drawback.

To paint eggs using this technique you will need:
- watercolor paints,
- brushes,
- boiled eggs,
- watercolor pencils.

Step 1. Wet the brush with water, dip it in watercolor paint and apply paint to the entire surface of the souvenir, do not try to achieve uniform coloring, just paint the entire shell.

Step 2. Without waiting for the shell to dry completely, apply bright color spots of the same shade as the background directly onto the damp surface.

Step 3. Take watercolor pencils. The craftswoman writes: If you have never used watercolor pencils (or water-soluble pencils), they are simply wonderful. They are similar to ordinary colored pencils, but after you finish your drawing, you can draw with a wet brush and the image will become blurry and have a special charm, you will achieve the same effect if you draw on a damp surface.

Step 4. Alice used her watercolor pencils and worked on a wet surface, this is how she talks about her feelings: “When you draw on a wet shell, you feel like the pencil literally melts and bright and at the same time soft lines of the details of the drawing are born under it. »

Step 5. Add colored doodles all over the surface and dampen them.

Step 6. Let the painted items dry.

Just admire how beautiful it turned out, if you want to consolidate the result, after completely drying, spray the shell with hairspray, and then cover thin layer acrylic varnish.


Decorate your gifts with inspiration, give with pleasure!
Translation by Oksana Korshunova especially for the site: Good IDEA
====================================================
In addition to the traditional Easter cake, the symbols of the Easter table are, of course, eggs painted for the holiday. You can decorate Easter eggs in an original way using simple painting techniques that are accessible not only to adults, but also to children. We are happy to share the secrets of our craft with our readers.

In order to paint Easter eggs, it is not at all necessary to be a master of a brush. In addition to traditional painting with an artistic brush, there are simpler techniques, some of which do not require this tool at all. Let's look at the most popular of them.

Bonded painting
To paint Easter eggs using this technique you will need:
- cotton swabs (pokes);
- acrylic paints;
- brushes;
- sponge;
- cotton pads;
- sunflower oil or furniture varnish.

Progress:
1. Boil an egg hard-boiled, dry and cool it. If you want to make a real Easter souvenir, carefully remove the contents raw egg through small holes in the bottom and top and paint the dried shell.
2. Using a foam sponge, cover the entire surface of the egg with white acrylic paint. Dry for a few minutes. If the coating is not thick enough, apply another layer.
3. Start painting the Easter egg. We suggest you decorate the shell with bunches of rowan berries. Dip a poke (cotton swab) into red paint and, applying it with perpendicular movements to the shell, draw 10-15 large berries, forming a bunch.
4. The second element of our Easter egg painting will be rowan leaves. First, using a cotton swab, draw lines with green paint - the bases of the leaves. To enliven the painting, apply a more saturated color stroke with a thin brush to each green line.
5. Yellow strokes made on the leaves with a thin brush will further enliven the painting and make it more voluminous.
6. Draw highlights on the berries and leaves by applying a few white strokes using a brush or cotton swab.
7. To create contrast, add a few black dots to the base of the berries.
8. After the painting on the Easter egg has dried, coat it with furniture varnish. A boiled egg can be processed for shine vegetable oil using a cotton pad.

Easter egg painting with wax
Easter eggs painted with wax are called pysanky. This technique is traditionally popular in Ukraine and allows you to create both simple souvenirs and genuine artistic masterpieces.
To paint eggs using wax technique you will need:
- a raw egg;
- pisachok - a device for applying hot wax to the shell. You can make a pissie yourself by twisting a small piece of foil into a funnel and securing it to wooden stick. Wax is placed in foil and heated over a flame until liquid state and is applied to the shell through a hole in the funnel;
- candle;
- vinegar;
- cotton pads.
Progress:
1. From a raw egg at room temperature (not cold!) Remove the contents through small holes at the bottom and top. Wipe the shell with a cotton pad soaked in vinegar.
2. Prepare egg dye - it can be natural or artificial dye.
4. Immerse the scribbler in the melted wax and heat the contents of the funnel over the flame again.
5. Apply the wax design by rotating the egg, but without moving the scribbler.
6. After the wax has hardened, dip the egg into the dye and let the paint dry.
7. While heating the wax painting over a candle flame, gradually remove the wax trace from the surface of the shell with a woolen cloth. The areas where the wax was applied will remain unpainted, and you will have a light design on a colored background.

Working with a pissy

The traditional color of Easter eggs is red


The Easter egg is a model of the world, so eggs are often painted with belts
(sky, earth and underworld) and draw animals and plants on them

The painting includes birds, flowers and patterns with waves.

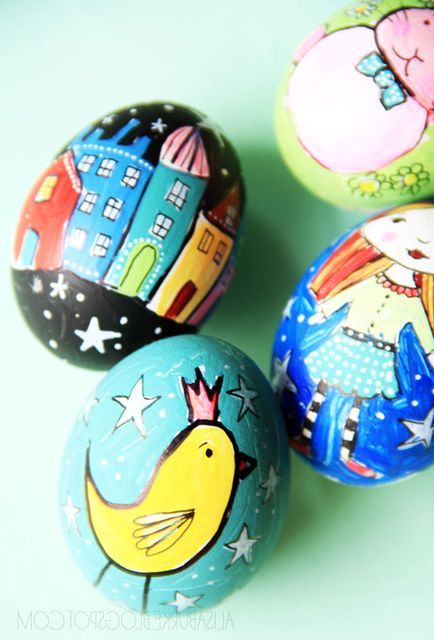
Variety of colors and styles

This is what the Lusatian wax painting of Easter eggs looks like
Easter egg painting with engraving
Easter eggs painted using this original technique are called “shkryabanks”. To create a painting-engraving you will need:
- chicken, duck or ostrich egg, cleared of contents;
- spicy and thin instrument for engraving, for example, a stationery knife;
- paint for Easter eggs.
Progress:
1. Dye the eggs in your chosen color using natural or artificial dye.
2. Dry the shell for 24 hours so that the dye hardens well.
3. Using a sharp tool, “scrape” out the eggshells selected ornament (you can use a stencil).


Modern scrap banks

Even a simple scraper can be performed masterfully
Ornaments for painting eggs
Browse our selection of Easter egg designs to see if one of them will inspire you to experiment.

A simple pattern for stanchion painting and painting with a traditional solstice

Traditional painting

Ornament "Intercessor"


By the way, you can decorate not only ordinary chicken eggs, but also wooden models- they definitely won’t crack, especially beautiful drawing can be stored for years.
If your family has a tradition of exchanging Easter gifts, make beaded Easter eggs.


In a week we will congratulate each other with the bright words “Christ is Risen!” At the same time, it is customary to exchange an Easter gift - a pysanka. On it, with the help of special patterns, you can wish a person love, health, prosperity, and it is believed that it will become not only an Easter table decoration, but also a real amulet.
COLOR RULES. Your paints will be the most beautiful and strong if you use a few little secrets when painting them:
To prevent the eggs from cracking during cooking, let them sit for about an hour. room temperature;
You need to add a tablespoon of salt to the water to make the shell stronger;
In order for the paint to lay evenly on the eggs, they must first be degreased: wipe soap solution or alcohol.
NATURAL "DYES"
1. Onion skins
If you want the color of the eggs to be more saturated (not light orange, but bright red), take more onion peels and boil them for about half an hour before lowering the eggs into them. Cool and only then lower the eggs (if you put them straight into hot water, they may burst), and simmer for about 10 minutes.
2. Birch leaves
To make the eggs golden yellow, color them using dry birch leaves. The technology is exactly the same as with onion peels.
3. Speckled eggs
Before you dip the eggs in the dye, wet them and roll them in rice, then place them in a gauze bag and tie them tightly.
4. Floral motifs
Collect the first leaves and flowers and, slightly wet them, glue them to the eggs, then put them in a stocking, tie it tightly and paint in the usual way.
SECRETS OF PAINTING
PREPARATION
Choose an egg that is smooth, without spots or cracks. It should be white: this way the colors will appear brighter. Wash it, dry it and blow out the contents. You can do this with a syringe by making two holes on both sides. Stir the contents with a needle to make it easier to blow out.
Then rub the shells with vinegar to remove any greasy fingerprints. In those places where they remain, the paint may not adhere well.
WAX ON WHITE

Using a “brush” (a watering can on a wooden handle into which pieces of wax are placed, you can buy it on Andreevsky Uzviz) apply from bottom to top those parts of the ornament that should remain white. Hold the “brush” motionless while swirling the egg. Periodically heat it on a candle flame to draw the desired patterns with melted wax. To avoid mistakes, first draw the ornament with a pencil.
FIRST COLOR

When you finish applying the ornament with wax, dip the egg in yellow paint (an aniline dye solution is suitable for Easter eggs: 0.5 tsp per 300 ml warm water) and let dry a little. Take the egg not with your hands, but with the help of a special napkin, so as not to smear the paint and get your hands dirty.
MULTICOLOR

After removing the egg from the paint, lightly blot it with a napkin, but do not rub it. Apply the desired pattern again with wax and immediately dip it in green paint, repeat this operation with red and black paints.
WAX TEARS

After all the layers of wax and paint have been applied, bring a burning candle to the egg (this should be done from the side, but not from the bottom, otherwise the pysanka may burst or become smoky). The wax will melt and the patterns will appear. Then dry the egg with a soft cotton cloth.
FINAL STAGE

Rub the finished pysanka with vegetable oil: it will shine. Then it will remain to be consecrated in the church and given to relatives or friends so that it will delight them for a whole year.
We thank Evgenia Molyar for her help in preparing the master class. O. Head of the Department of the Museum of Ukrainian Folk Decorative Arts.
HOW TO “PRESERVE” PYSANKA
TWO HALVES

We break the finished pysanka with a dull knife blade (do not cut it under any circumstances!). Then we select the white and yolk and be sure to peel off the film on the shell.
THE BASIS

When everything inside the egg is cleaned, grease it with regular PVA glue and glue the inside with pieces of paper. Newspaper is ideal, but not smooth, but fibrous ( toilet paper too thin). When you reach the edge of the shell, make sure that the sides peek out from each half.
REUNION

We cover the top of the paper with more PVA glue, and then carefully connect the two halves according to the pattern of our pysanka.
FINISHING TOUCH

In order for the two halves to connect well, all the air needs to come out of the egg so that there is a vacuum inside it. To do this, we simply suck the air out of the pysanka.

The finished pysanka should dry for approximately 7-10 days at room temperature. “Having been preserved”, it will not break, which means it will be a talisman for your great-grandchildren.
We thank the staff of the Pysanka Museum in Kolomyia for preparing the material.
Eggs painted in one color are called painted eggs, and eggs painted with ornaments or plot patterns are called pysanky. Classic pysanka – the hard way Easter egg painting using wax, steel feathers or hooks, as well as special paints. But along with traditional ways coloring, there are a large number of simpler and original methods paint the egg. Even kids can paint Easter eggs with watercolors, gouache or markers. You can also use watercolor pencils, corrector, felt-tip pens, gel pens and other standard writing instruments. Painting and painting eggs for the main Christian holiday, Easter, is a long-standing tradition. One of the legend versions says that when Saint Mary Magdalene came to Emperor Tiberius and told about the Resurrection of Jesus Christ, the emperor did not believe it and said that it was as impossible as the fact that a chicken egg would turn red. At the same moment, the chicken egg he was holding in his hands turned red, confirming the news of Mary Magdalene. Other versions date the origin of the tradition back to pre-Christian times.
Painting Easter eggs with watercolors
An easy way to make unique and colorful Easter eggs with your own hands is to paint Easter eggs with watercolors, combined with watercolor pencils. Keep in mind that this is not a permanent dye, but it is an easy, affordable and fun decorating method, and you can create a real watercolor painting effect right on the shell.

The saturation of the pattern depends on the degree of dilution of the paint with water. You can first cover the entire surface of the egg with a light layer of watercolor, and then, while the paint is still wet, add more concentrated and saturated spots.

The core of watercolor pencils consists of pressed watercolors, which allows them to be dissolved with water. In other words, we draw as if with colored pencils, and then we go over the image with a damp brush or cotton wool and get a watercolor drawing. In this case, you can use a watercolor pencil to draw on the still wet surface of the egg. The effect is as if the pencil is melting. As a result, soft and slightly blurred lines perfectly depict details.


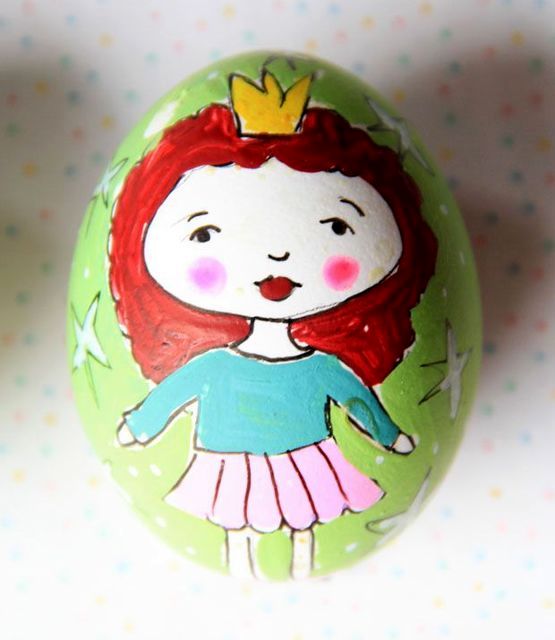
Painting Easter eggs with gouache
But this wonderful painting of Easter eggs can be done with gouache, acrylic paint and permanent markers!

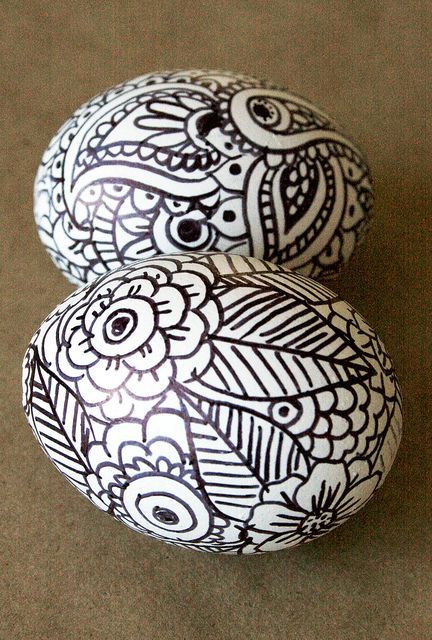
Painting Easter eggs with a marker
Stylish black and white Easter eggs - forget about paints and different materials! Only black permanent marker and your imagination!

Painting Easter eggs with a gel pen
Fine drawing with gel pen:

Painting Easter eggs with fingers and sticks
Doodles, dots, spots, stains made by the fingers of children's hands!


Easter eggs from Kinder Surprise
You can use markers and felt-tip pens to paint plastic eggs from Kinder Surprise. Interestingly, the child can then combine the halves of the egg himself, creating a new Easter egg each time.