How to update an old sideboard. My Crazy Hands: Restoring an Old Sideboard
So, we need:
Acrylic glue;
White acrylic paint;
Kohler of different colors;
Acrylic primer;
wallpaper border;
Synthetic brush (with a blue handle);
Roller (for leveling wallpaper);
Screwdriver;
Styrofoam decor;
Gold acrylic paint;
Ruler;
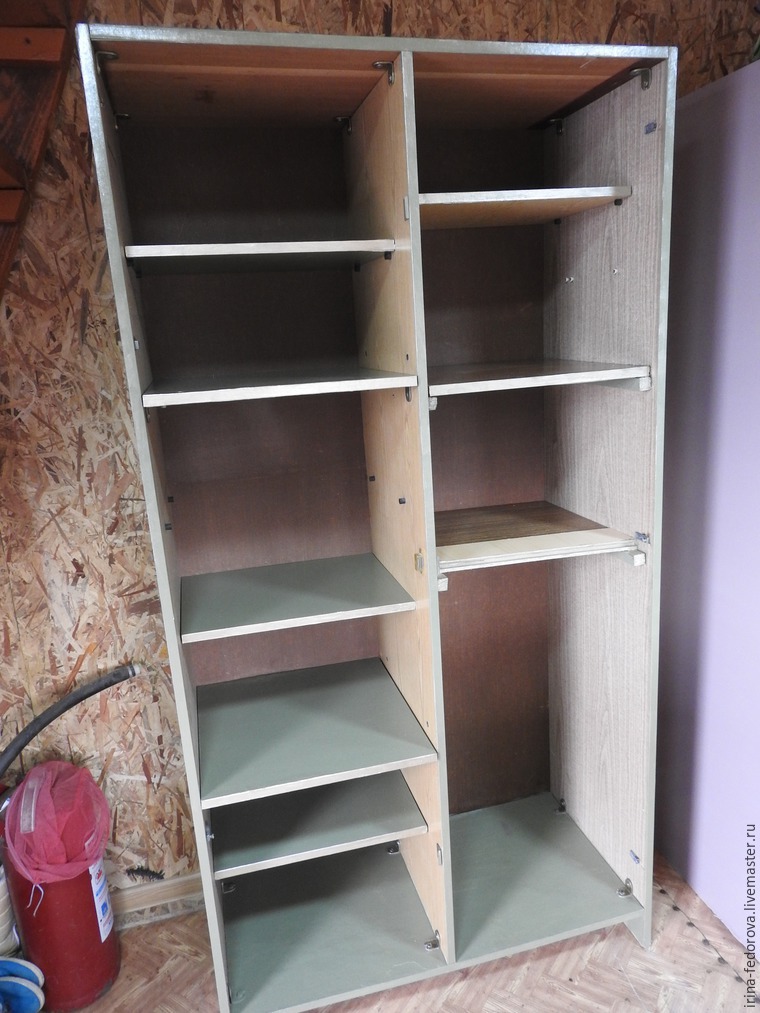
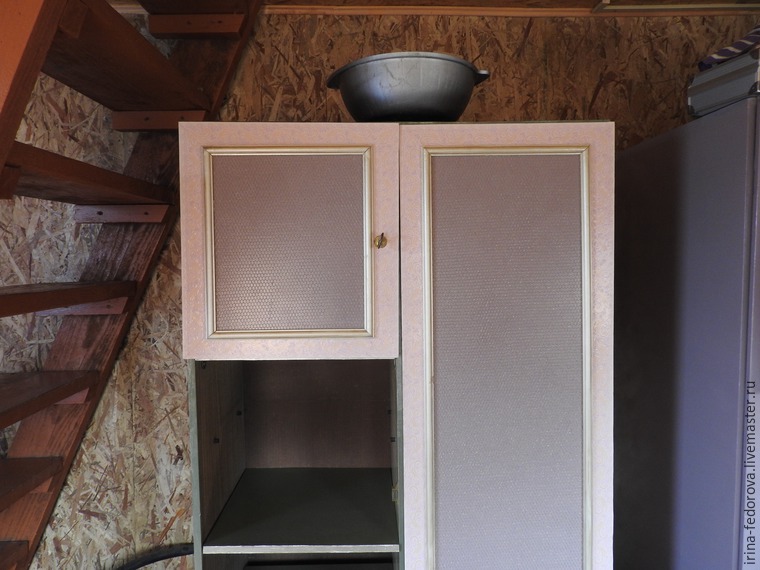
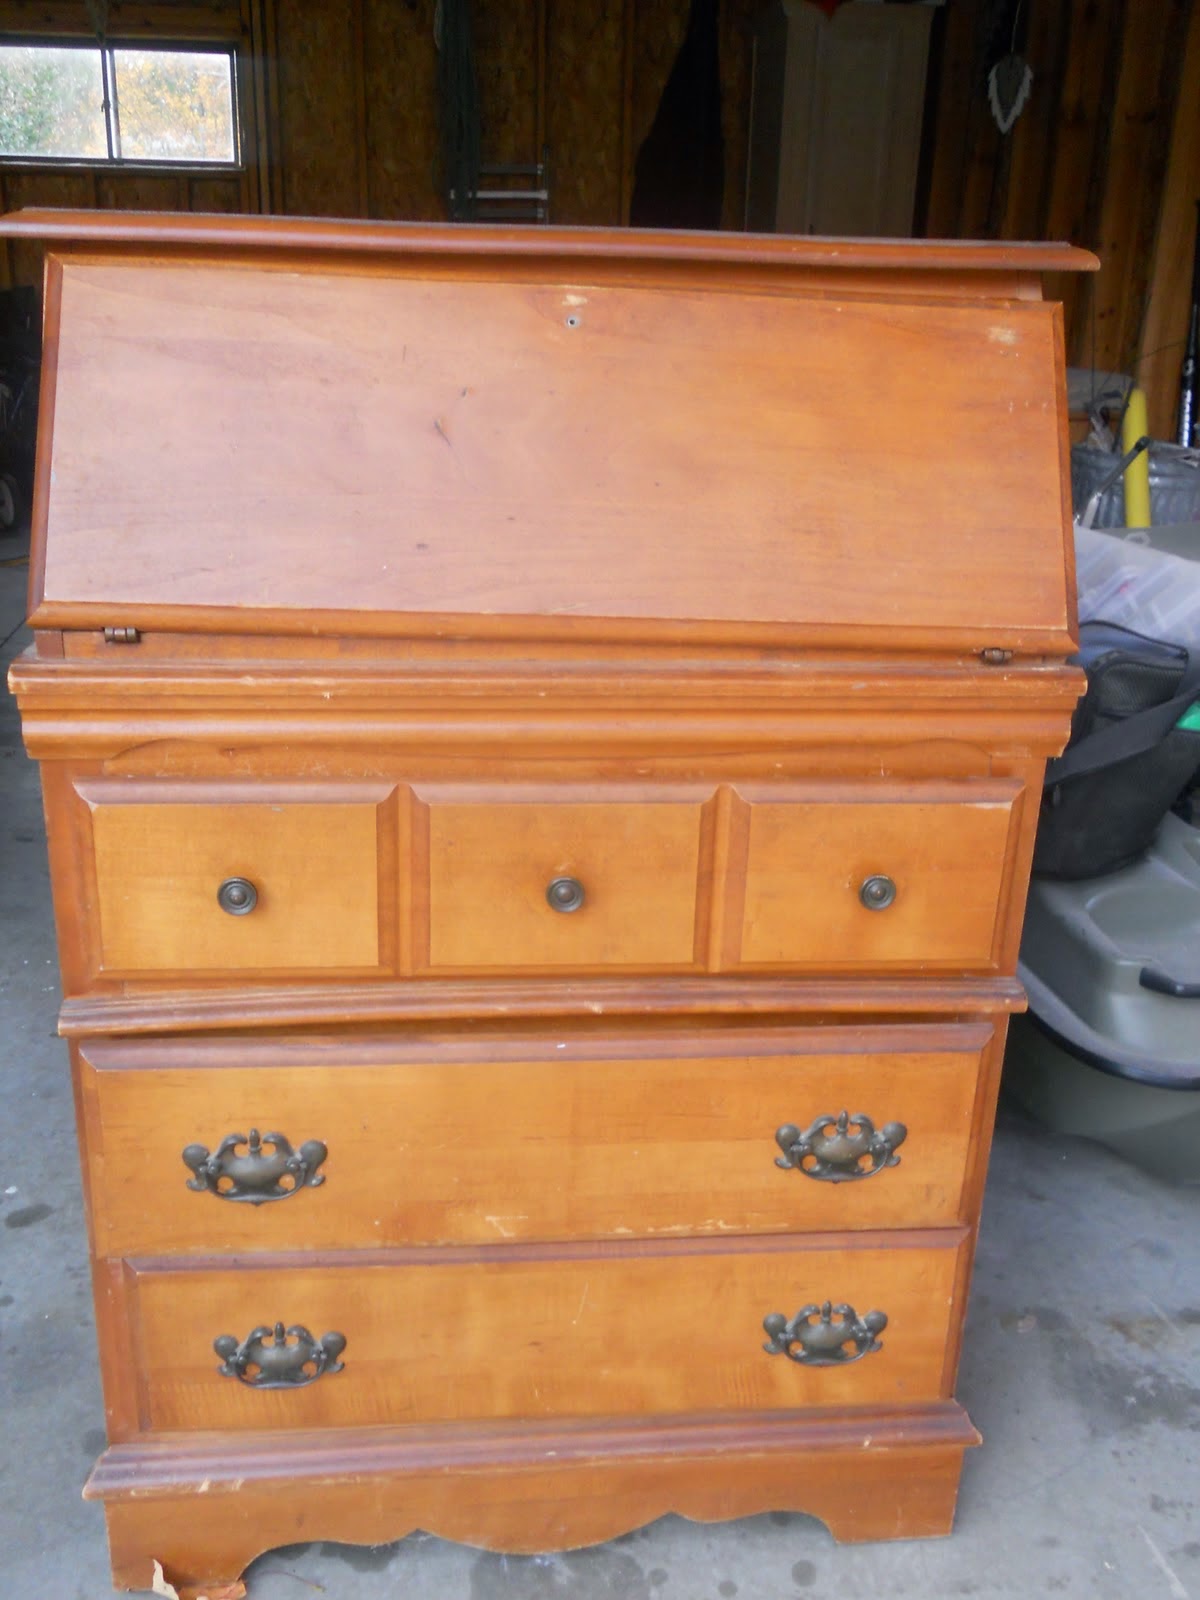
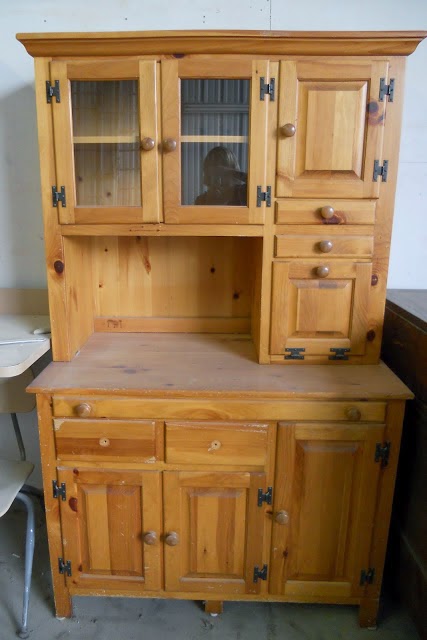
Here's what the sideboard looked like:
1. Unscrew the doors and wash everything thoroughly with detergents. We dry.
2. We take sandpaper (large) and begin to shovel those places that you decided to remake or repaint. I decided to only varnish the inner walls 2 times, so I did not sand them. Sweep everything with a brush, wipe with a damp cloth, dry. Then we cover with a primer for 2 times and wait for everything to dry.


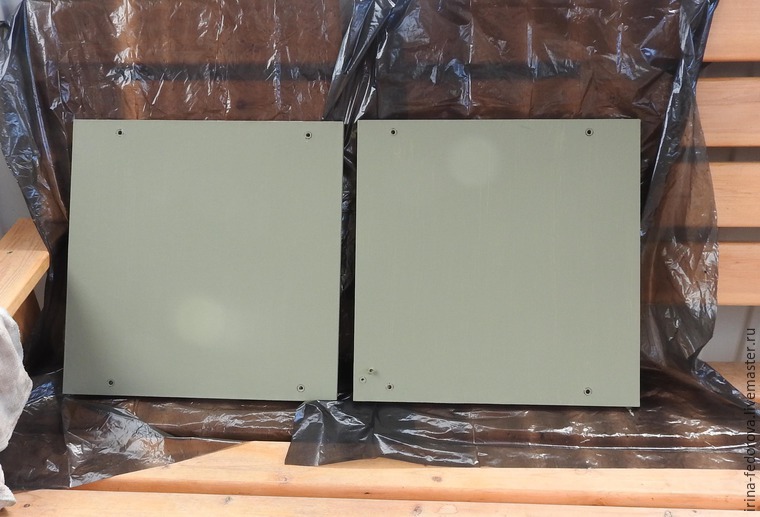
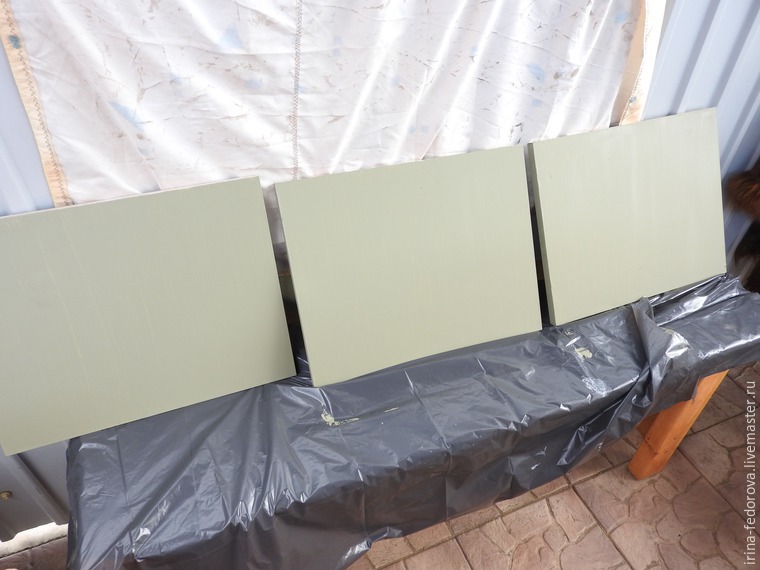
3. After the primer dries, take sandpaper and start cleaning and leveling. We clean without fanaticism, we need to achieve a smooth surface. We check with the palm of our hand: if it is smooth and nothing clings, we finish and move on to another action. We breed white acrylic paint color and get the color you want. I painted the outer side walls with purple paint, and for interior decoration and shelves, I prepared khaki or olive paint. I painted 2 coats. The ends of the shelves and the outline of the cabinet itself, I painted with gold + silver acrylic paint. I covered everything with 3 layers of acrylic varnish, and the doors with one layer. I was going to decorate them, so one layer will be enough.
Here's what happened:
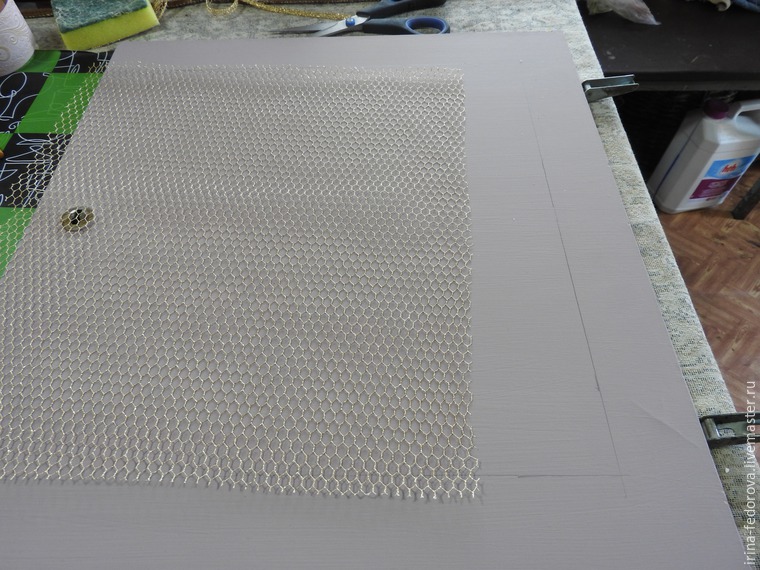
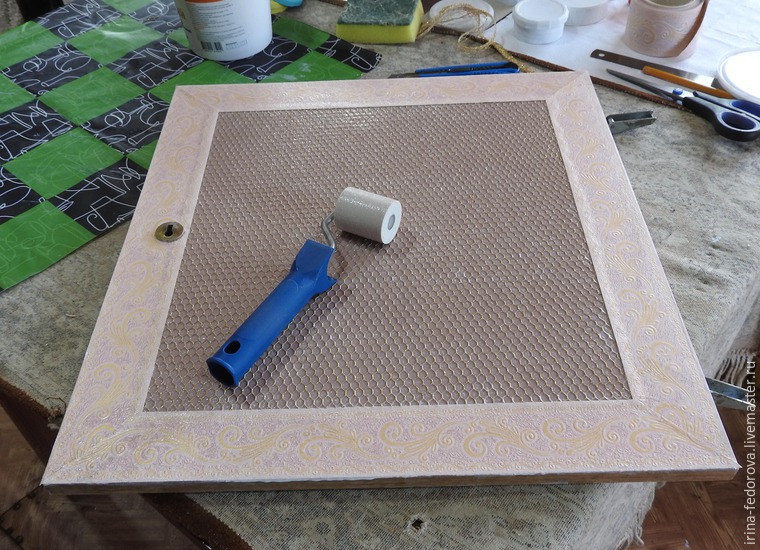
4. On the doors, I decided to stick a border and a grid.
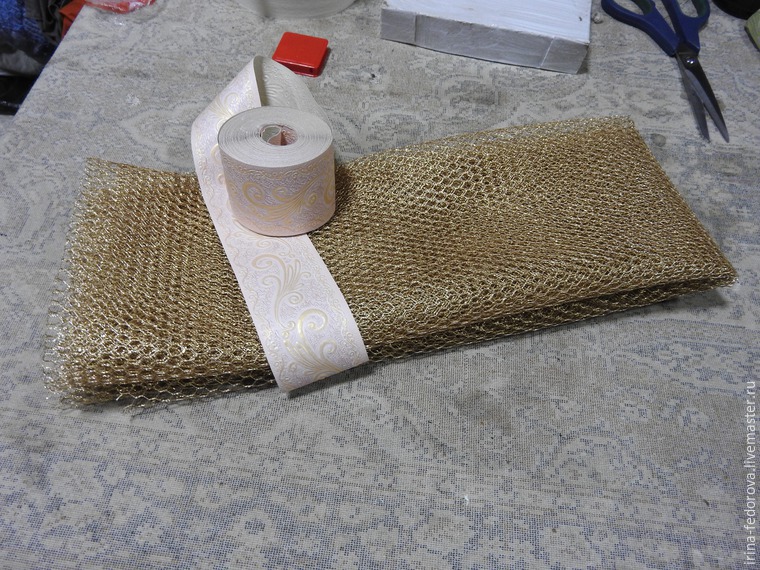
I measured the width and height on all the doors and cut the border, which I planned to stick around the perimeter of the doors. The ends were cut at 45 degrees, the mesh was cut out 1 cm less on all sides.
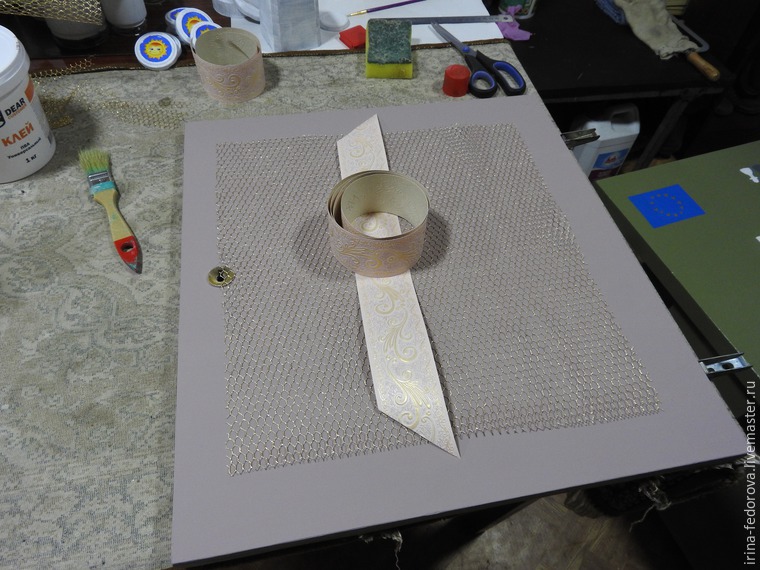
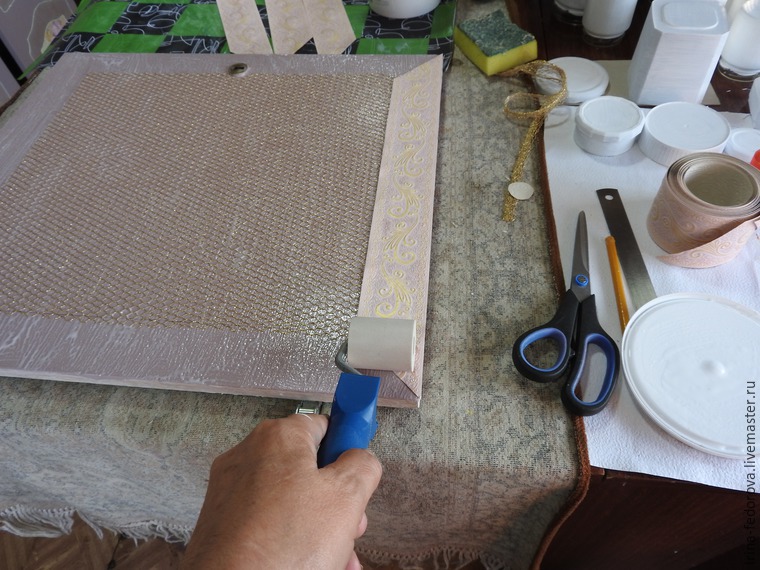
5. We apply PVA glue with a brush on the door, apply it abundantly and apply a grid, level it with our hands, blot excess glue with a cloth. Then we apply glue to the border and glue it. The border should go about 1 cm on the grid. We level it with a roller or a rag to whom it is more convenient, expelling all the air from under it. Let dry for 15 hours.
Here's what happened:
6. When everything is dry, we need to cut off the ledges of the curb, if any. We take a clerical knife and carefully cut. I want to apologize for my manicure. I can't work with gloves.


7. Holes under the key, I painted over with gold acrylic paint.
8. We cover the doors with another 2 layers of acrylic varnish with interlayer drying.
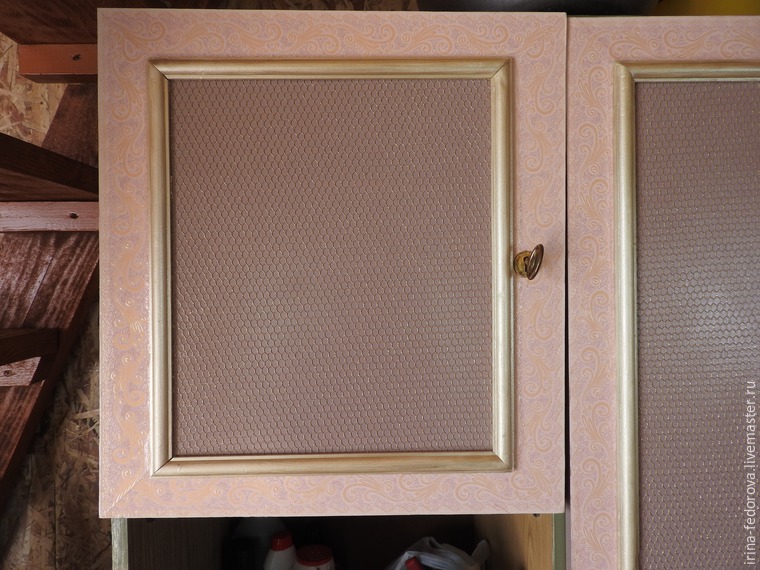
9. On the border of the grid - a border, I decided to stick an inexpensive, I would say cheap decor. I painted it under gold with acrylic paint and glued it on the super glue "Master Clean". Withstood 4-5 hours and applied the final layer (already the fifth) of acrylic varnish.
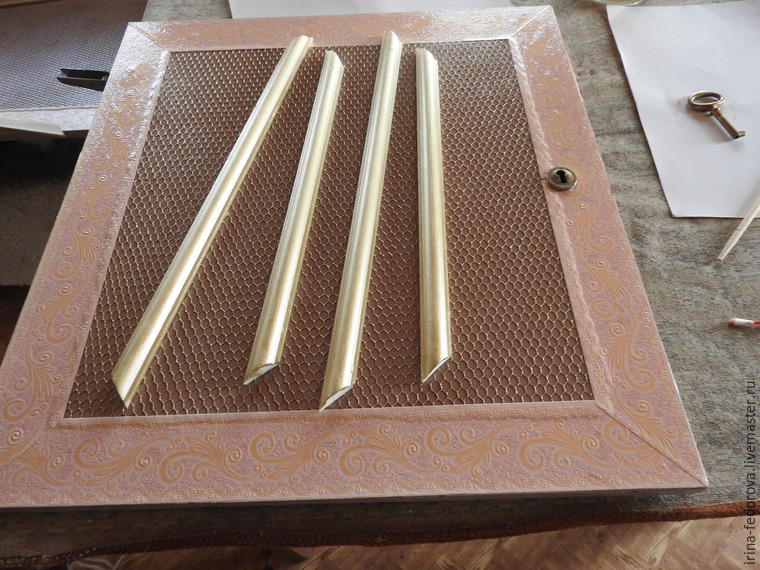
Here's what happened:

10. When everything was completely dry, I screwed the doors.
Here's what I got:
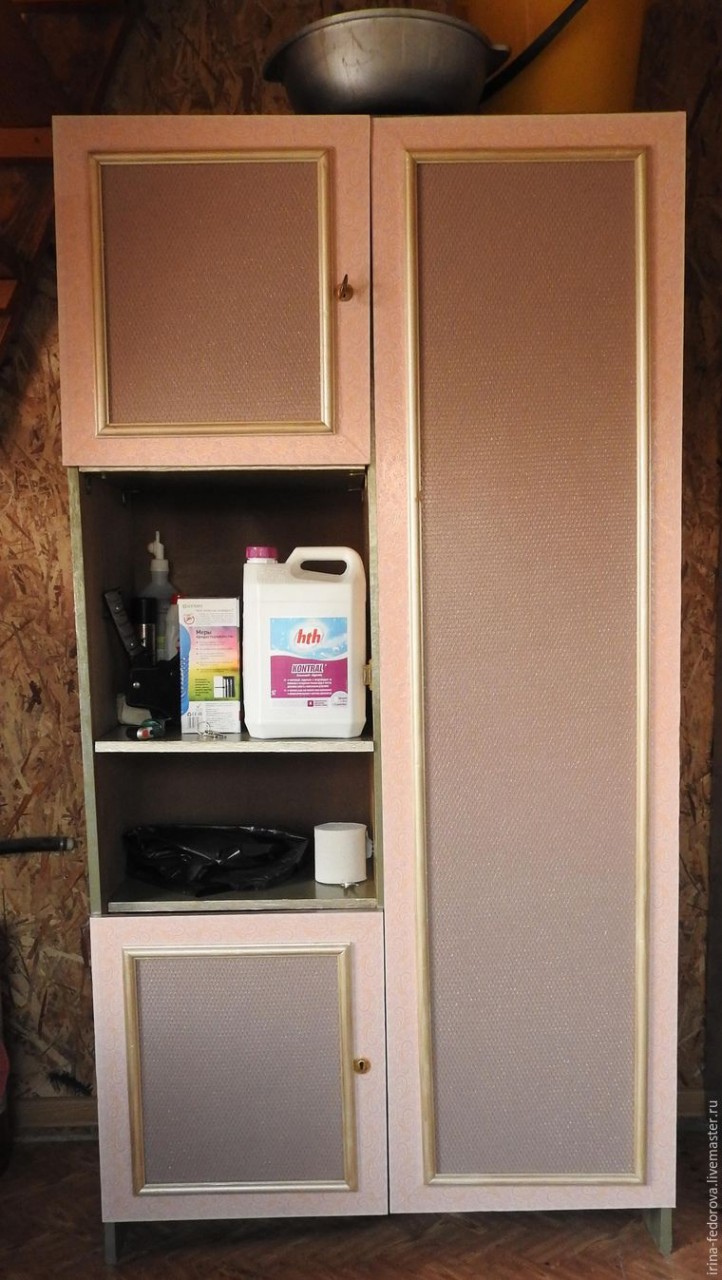
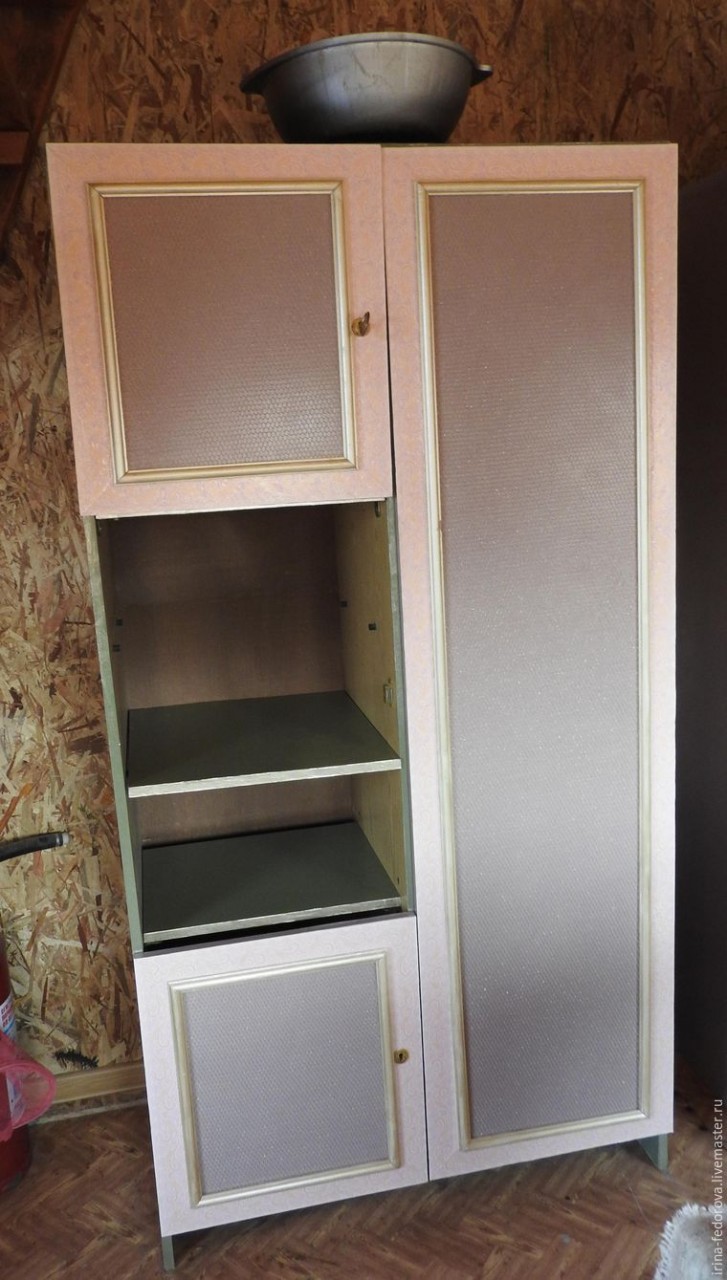

I apologize for the poor quality pictures. The veranda on which the wardrobe stands is very narrow, so it was not very convenient to take pictures.
I would be very happy if I inspired someone to remake. It's great to look at the result of your labors, and if this creation is also liked by someone, then you get a full charge of vital energy.
My sister really liked my alteration, maybe, of course, she was cunning? :)
Thank you for your attention, creative inspiration and joyful days!
I went to the Leroy store in advance, bought everything for alterations, something that was already ready, what I didn’t have, bought it.
So, we need:
Acrylic glue;
White acrylic paint;
Kohler of different colors;
Acrylic primer;
Metallic mesh fabric, gold;
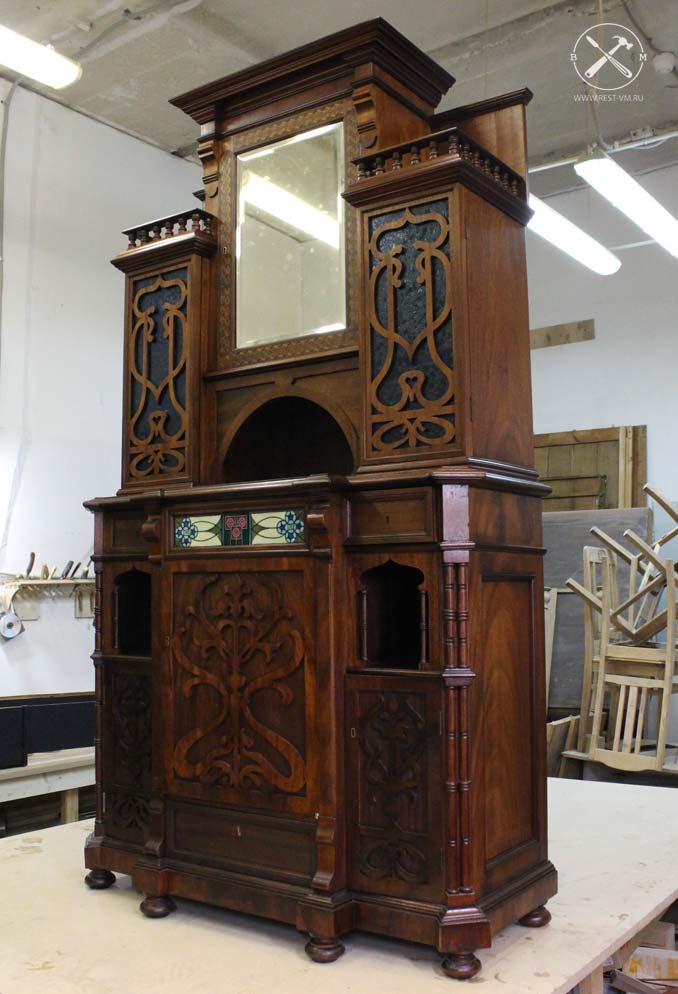
Our workshop has completed restoration of an antique sideboard early 20th century. Thanks to the active participation of the owner Andrey Sokolov and his relatives, we learned the amazing history of this work of art: where and when it was made in St. Petersburg, who were its first owners, learned the vast geography of the buffet's travels around Russia, and when it came to Moscow. (buffet history and condition before restoration)
And we hope that after our restoration work, he will long years will delight its owners, as it is truly one of the amazing family heirlooms that is passed down from generation to generation.
This picture was sent to us by Andrey with the words:
"This photo was taken around 1950 in Moscow in communal apartment on Tokmakov Lane, where my grandfather, great-grandfather and great-grandmother lived after the war."
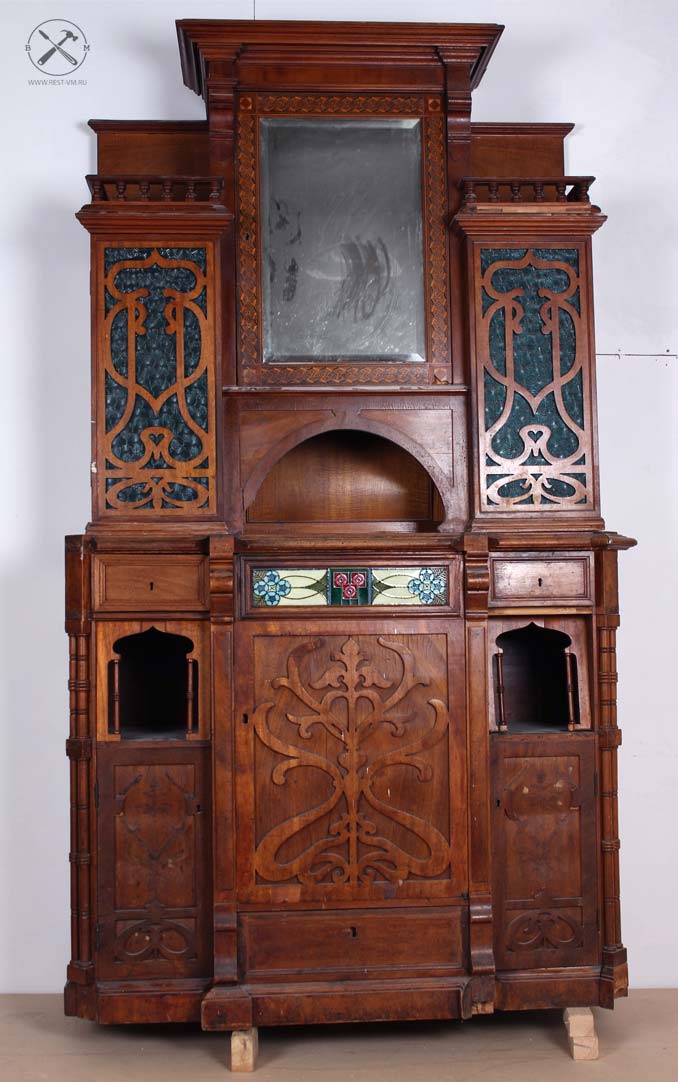
But before we show you the result of the restoration of the sideboard, let's quickly remember in what condition it arrived at our workshop.
The general condition was deplorable:
- the front legs were missing;
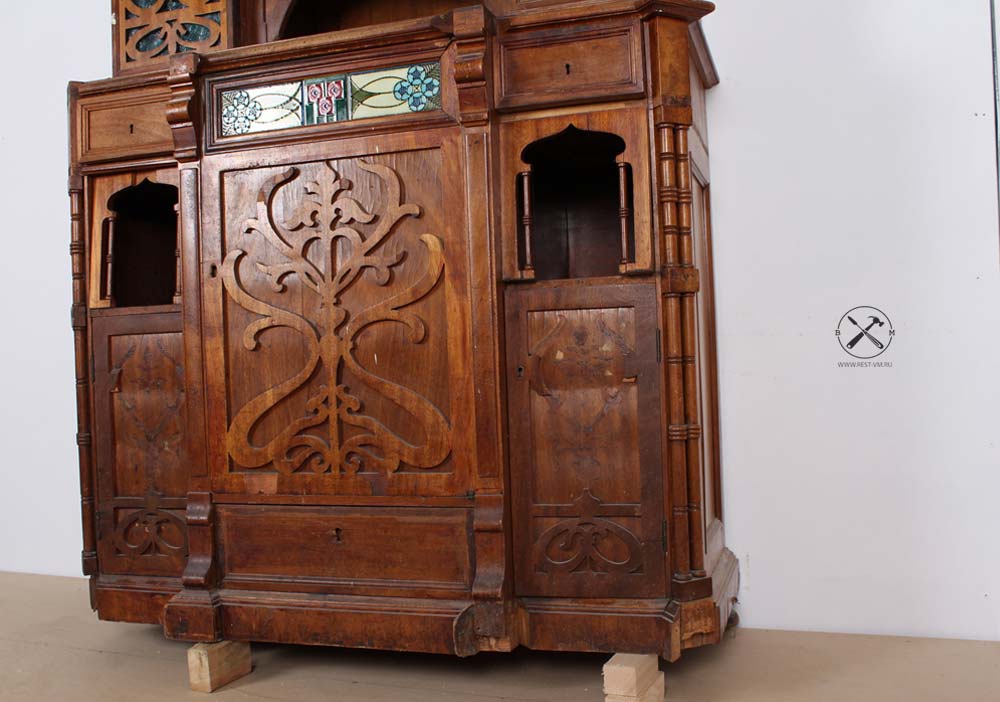
- there were not enough thread elements;
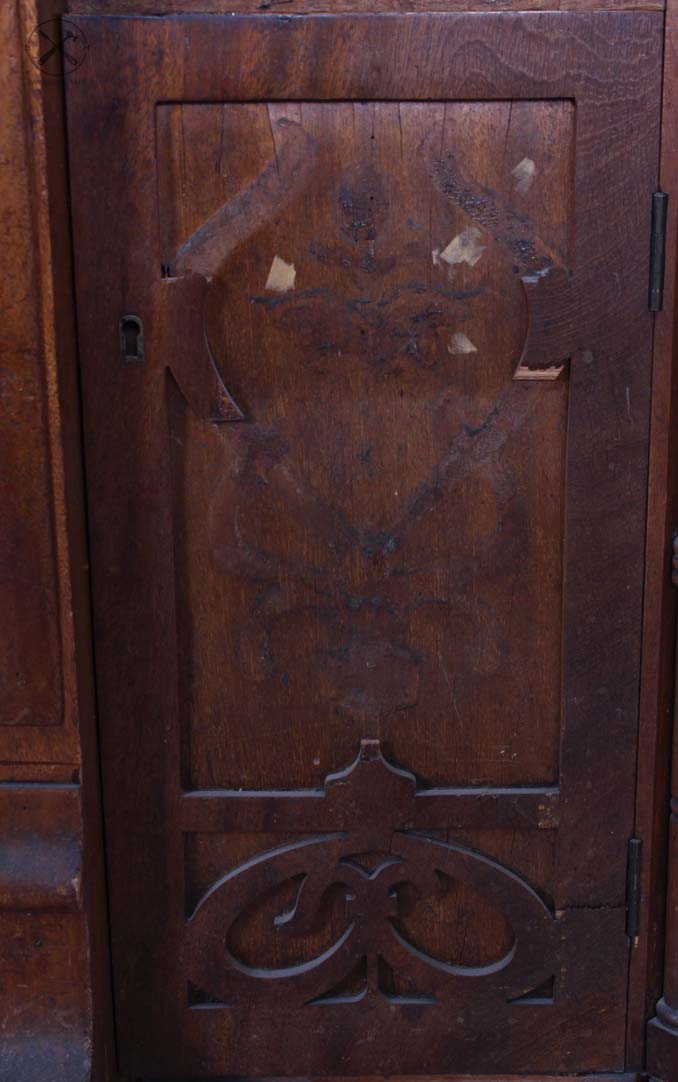
- large loss of veneer and numerous lack of panel fragments;

- the whole structure of the buffet is badly shaken.
You can follow almost all the restoration stages on our website (damage repair, damage repair and gluing, painting).
And we are proud to present you the result of the restoration work of Viktor Morozov's workshop.
RESTORATION OF AN ANTIQUE BUFFET OF THE EARLY 20TH CENTURY:
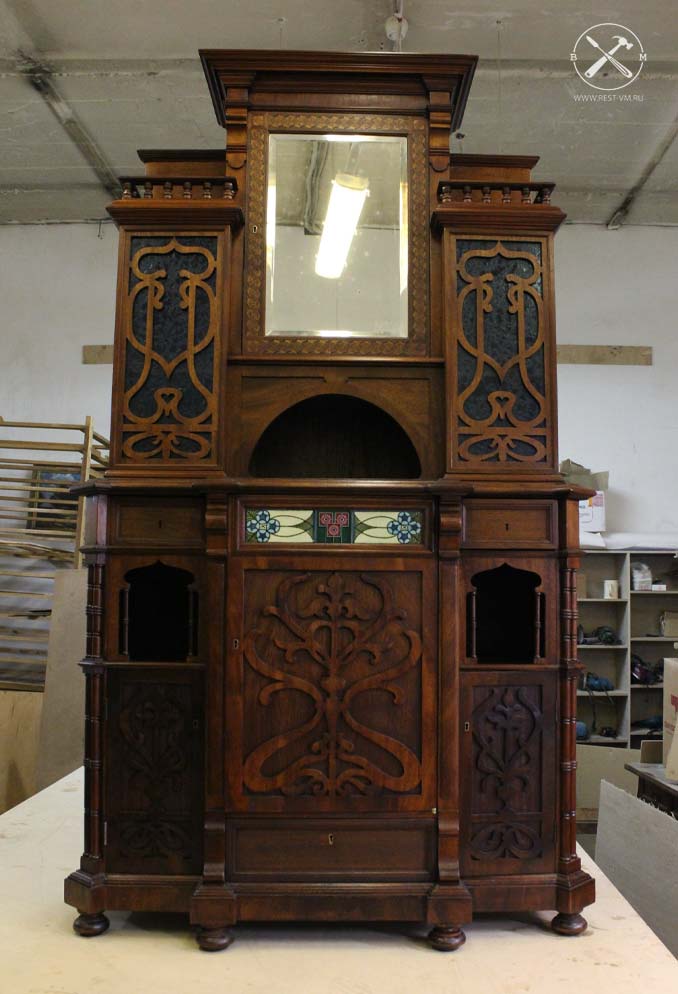
The old one was removed from the buffet paintwork. Produced about cleaning from dense dust pollution.

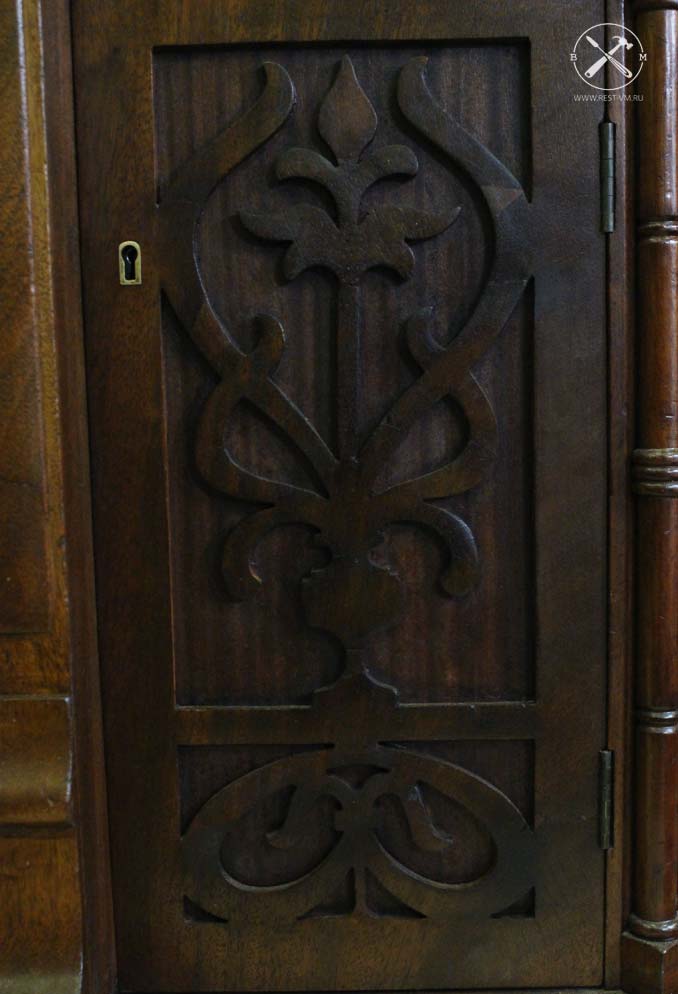
Then all were carried out necessary work for the restoration of lost elements (veneer, elements of carving and decor, chips).
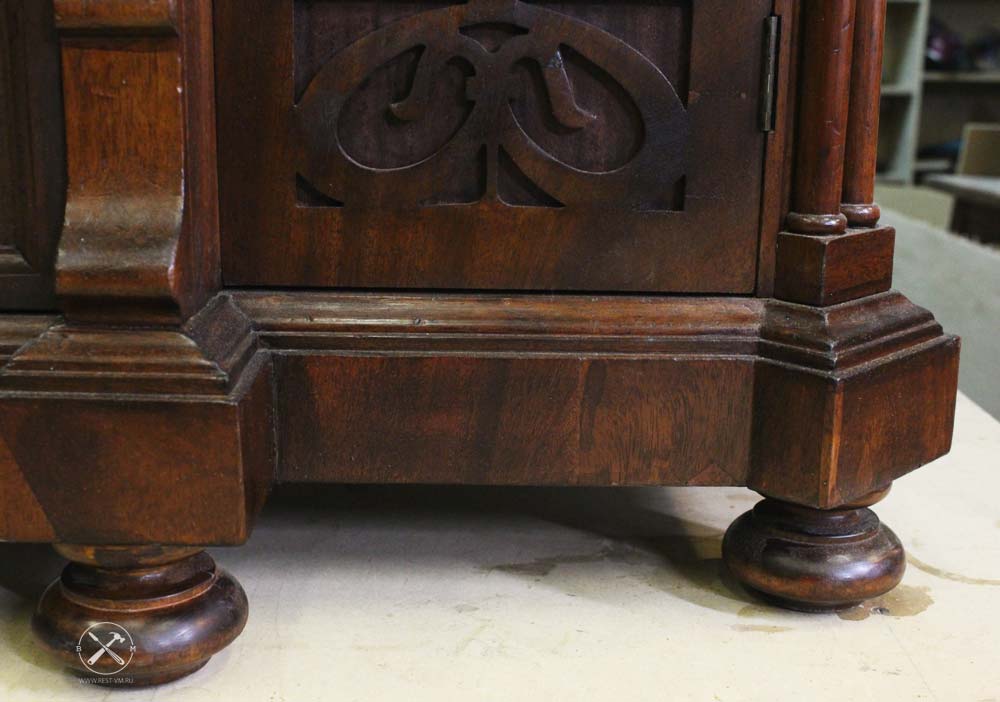
The lost legs and carving elements were handmade by our craftsmen.
At the end of the restoration work, the sideboard was covered with stain, tinted and covered with oil on top.
We want to pay attention to the huge number of different complex elements at the sideboard (drawers, shelves, sides, carved decorations):
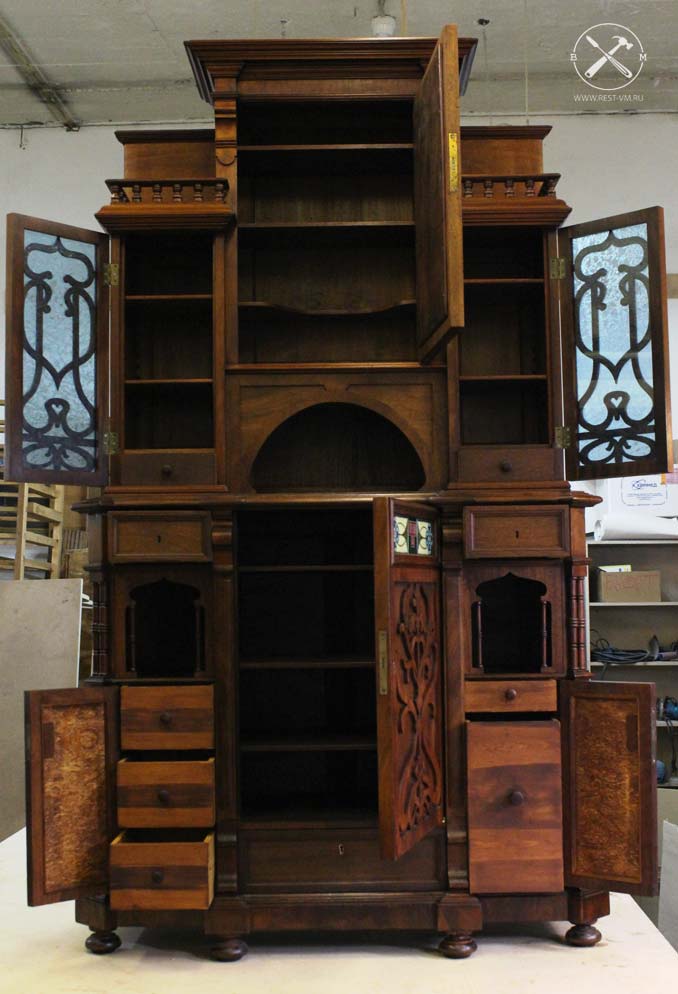
restored Bottom part which suffered the most:

We want to remind you once again that our restoration workshop no task to make old furniture- completely new. Our main task is to restore furniture destroyed by time and other influences, but at the same time preserve its spirit and history.

After completing all the work, here is the feedback we received from the owners:
REVIEW ABOUT THE WORKSHOP OF VICTOR MOROZOV.
"The masters have done a great job of restoring the buffet. Our whole family is very grateful to them for the attention with which they approached this project. The buffet was updated, but, at the same time, did not look like a remake. In his appearance, the texture of the material, and even in the smell, the atmosphere of the early 20th century, when it was made by St. Petersburg cabinetmakers, has been preserved. I am convinced that this testifies to the high skill of the restorers, who managed to preserve the spirit of that time and, at the same time, extended the life of such a beautiful and functional piece of furniture. I hope the buffet will delight all members of our family for many years to come!"
A. Sokolov.
We are very grateful for such feedback on our work, as we really tried to put our best efforts into the restoration of this family heirloom.
New works are ahead, and we are waiting for new orders and your feedback. Write to us at [email protected]
Come back to our site more often. Subscribe to our
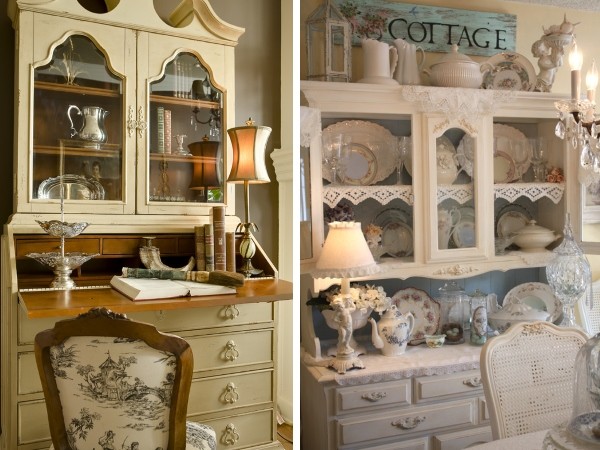
Remember these roomy kitchen cabinets, divided into two parts by a countertop? Above her were open shelves with glass doors, and in the lower part - drawers and closed cabinet. In the past, such a buffet was available in almost every home. And today they are used to give the interior a touch of old charm and Provence style. In this article you will find photos of buffets in design different rooms, as well as useful ideas for their restoration with their own hands. Enjoy watching!
Restoration of an old sideboard: modern ideas.
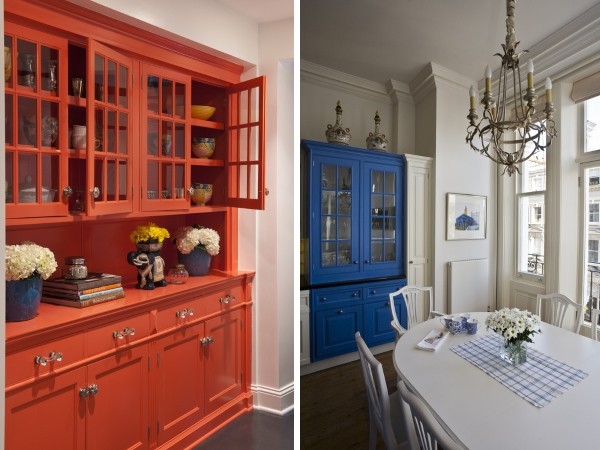
Surprisingly, an antique sideboard can be adapted and used in almost any room in your home. However, in order for it to complement the color scheme and style of the interior, it may be necessary to restore the old sideboard with your own hands. Here best ideas how to update an old sideboard with your own hands (examples with photos):
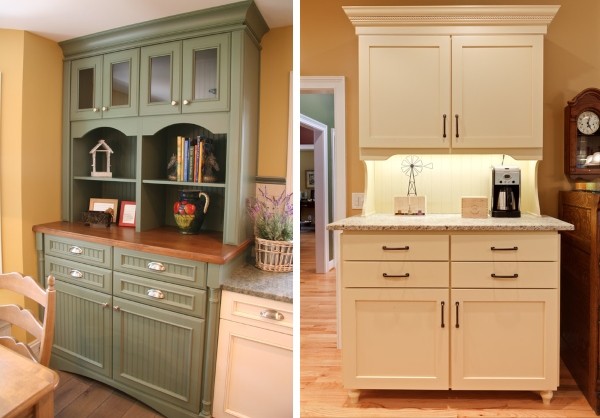
1.Paint the old sideboard in bright color that will complement your interior.


2. If you have a sideboard made of wood, then it is better to varnish it.
It is undesirable to paint antique wooden sideboards, as this will irrevocably reduce their value.
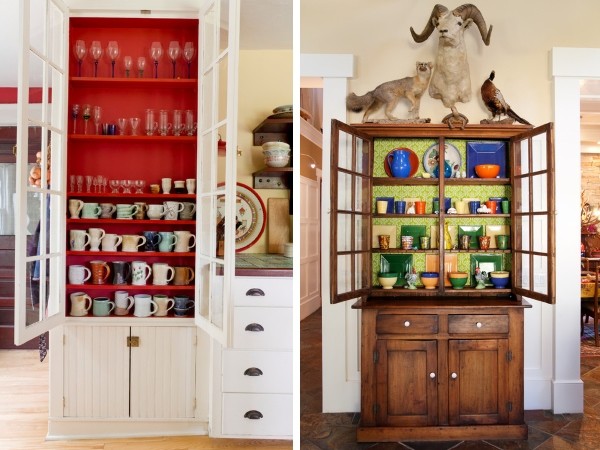
3. Apply neutral paint outside, and paint the inner cavity of the cupboard (the one behind the transparent doors) in a bright color.
4. When restoring, give the sideboard the effect of antiquity. Otherwise, what's the point of having an old buffet in the house if it looks like new? You can achieve a vintage look in the spirit of Provence style with the help of artificial scuffs, which are created by yourself using sandpaper, craquelure varnish or decoupage.

Remember that before applying any finish, be it paint, varnish or other coatings, it is important to carefully sand the sideboard surface with sandpaper, wash with soap and primer. Detailed Instructions on the alteration of old furniture, you will find in the article Restoration of Soviet furniture with your own hands. And below we present nice pictures interiors, the main decorations of which are old buffets after restoration.


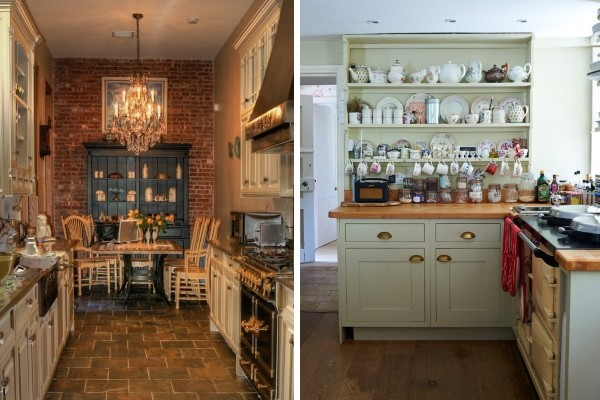
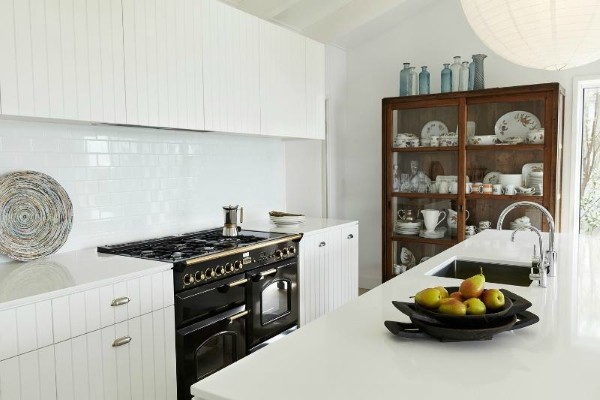

Antique sideboard for kitchen in Provence or country style.
The buffet cabinet is ideal for a Provence or country style kitchen, even if its color does not match the rest. kitchen cabinets. The top shelves of the sideboard can be used to store cups, decorative plates, jars for spices, tea boxes and various accessories. Spacious shelves at the bottom are perfect for large kitchen utensils such as jars of cereals, pots and pans. To make the buffet fit into the environment the best way, it is better to cover it with the same countertop as on the rest of the lower kitchen cabinets. vintage curtains and wall decor help to complete the charming design of the kitchen in a provincial spirit.
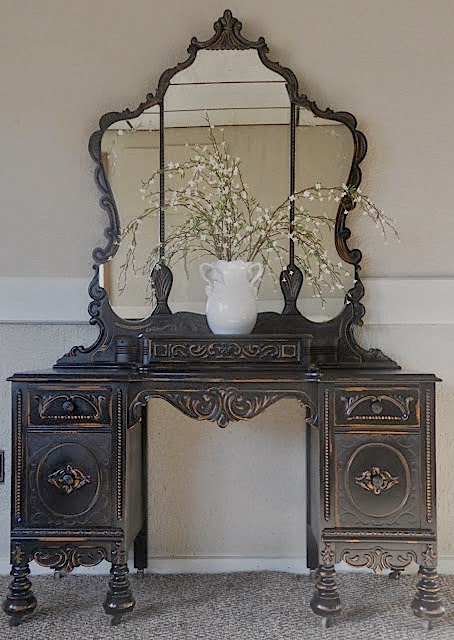


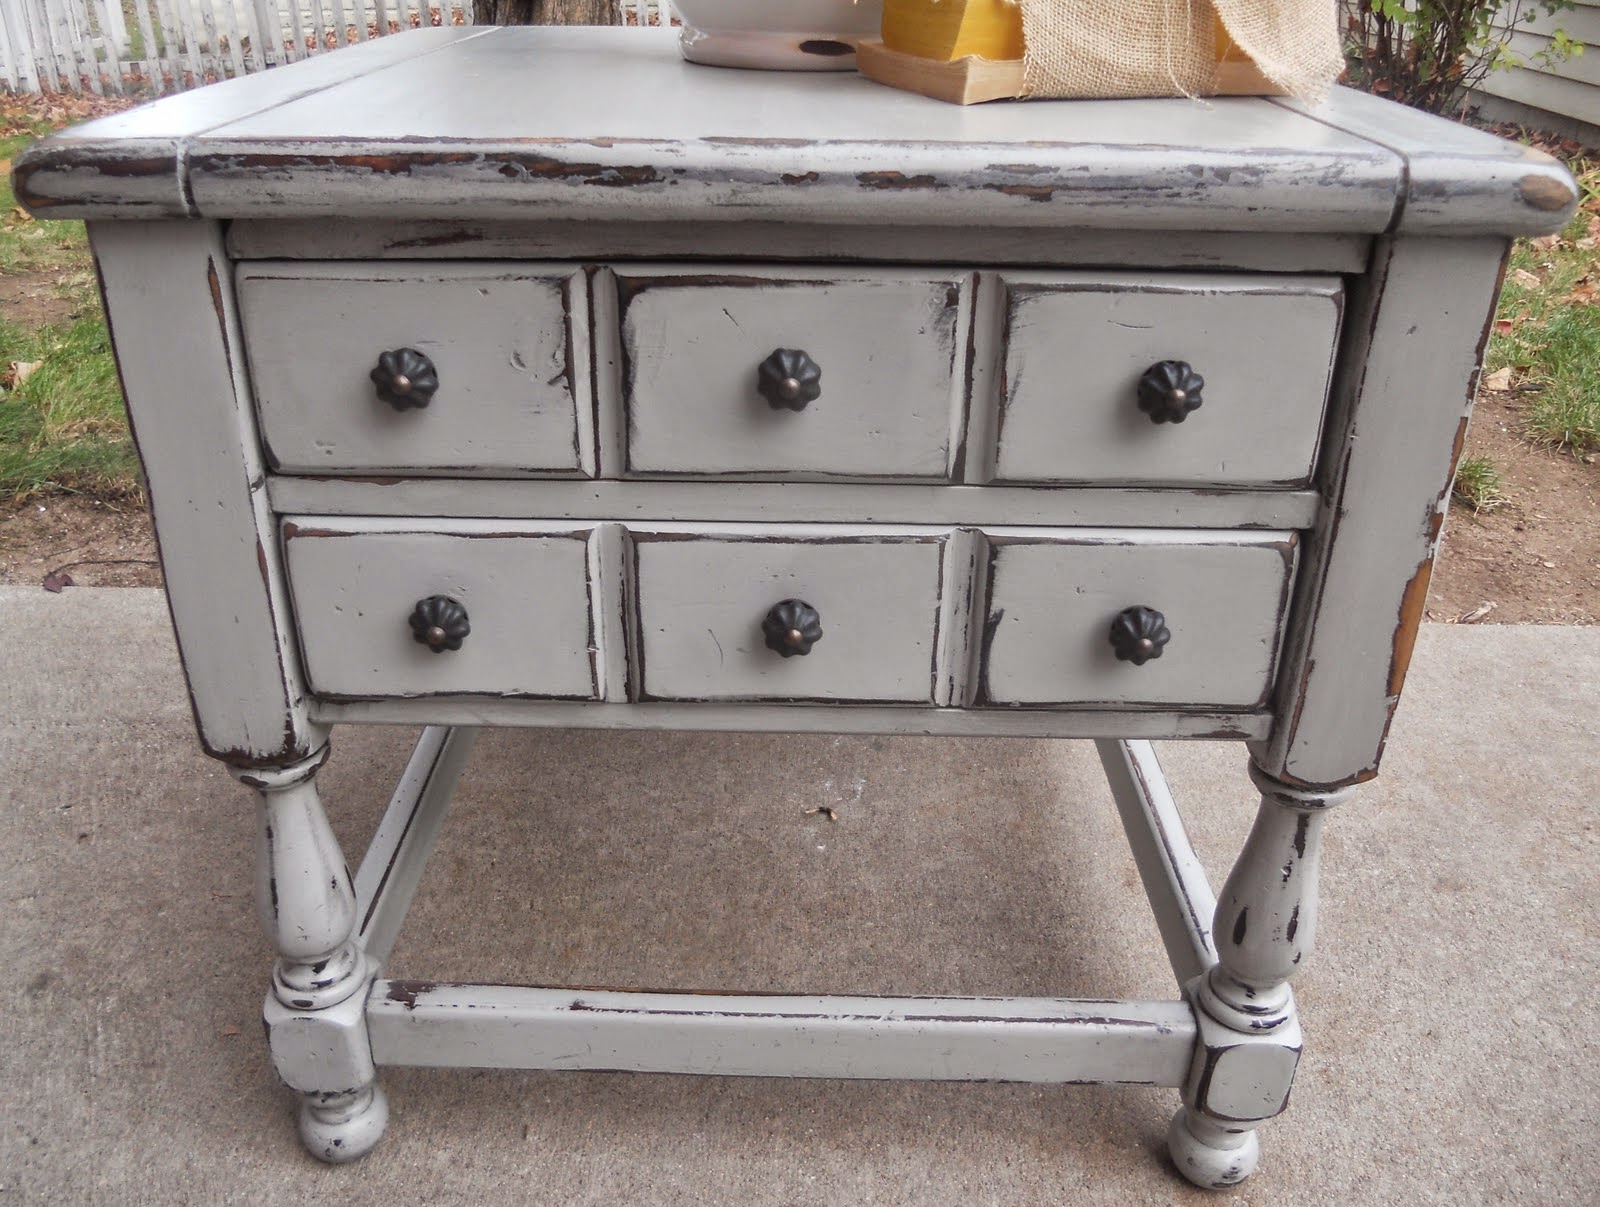
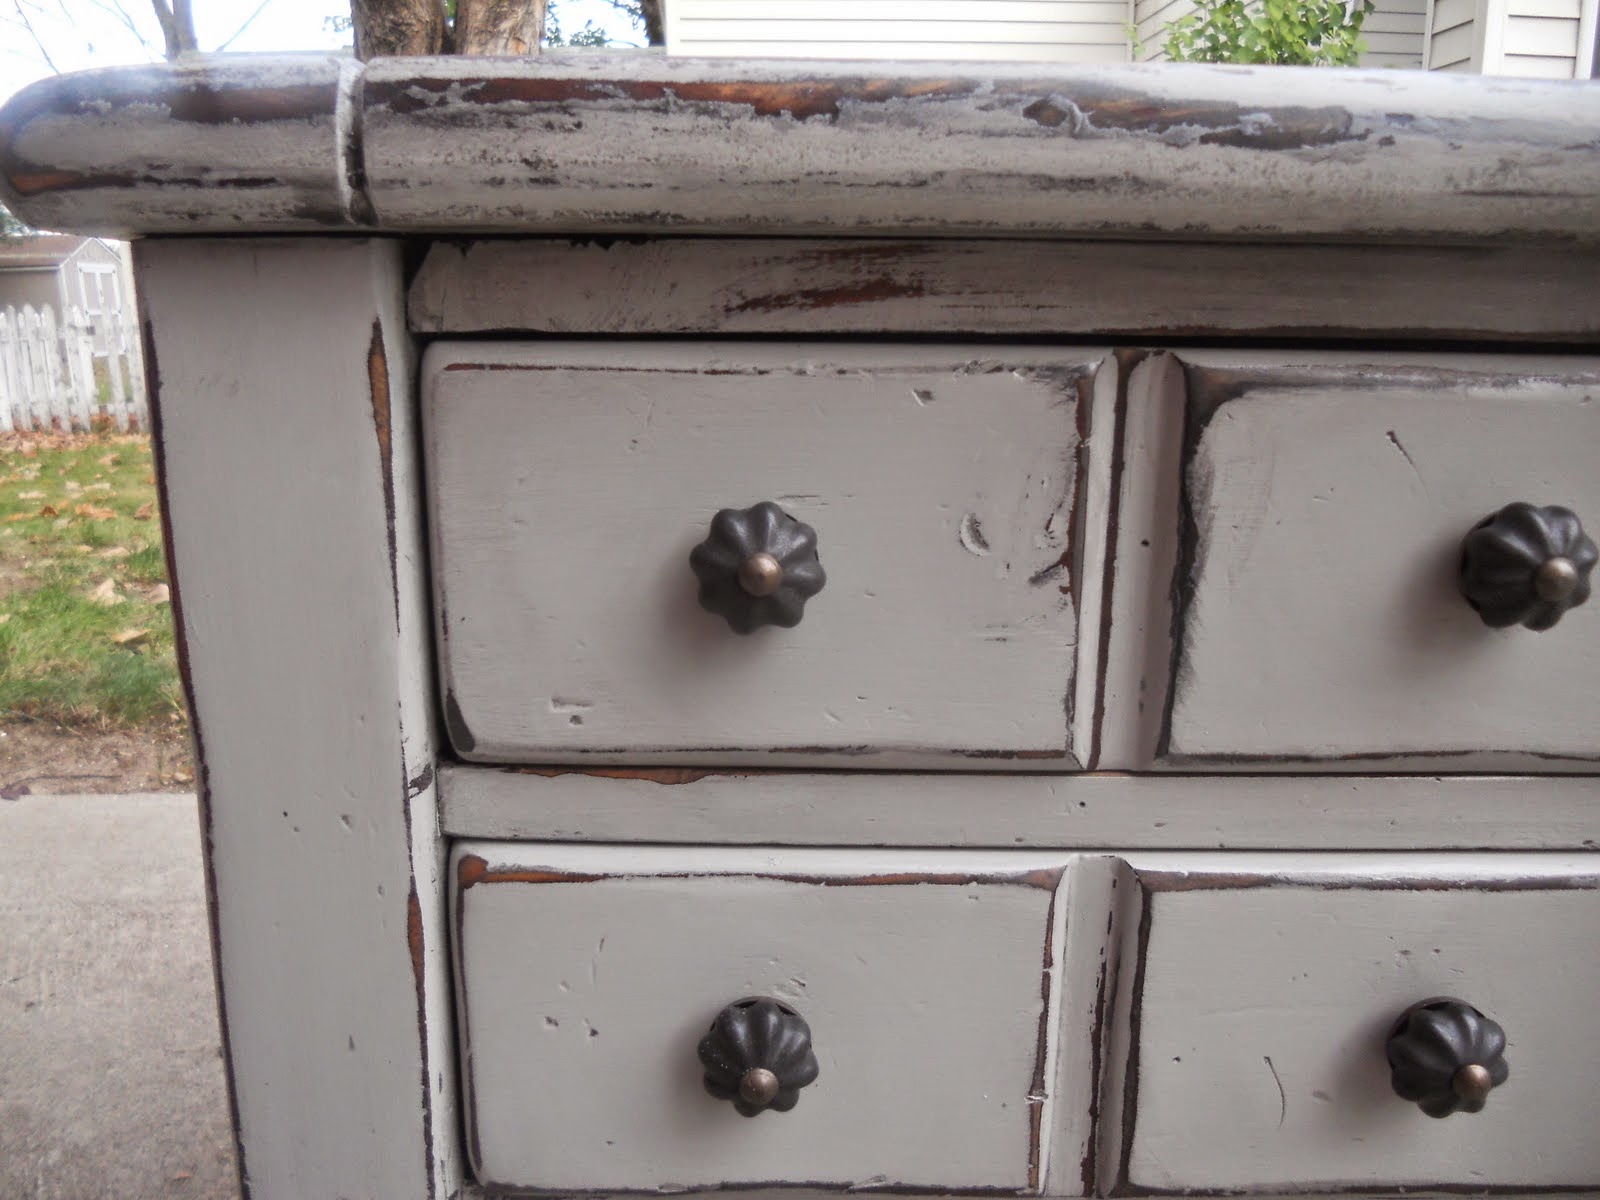
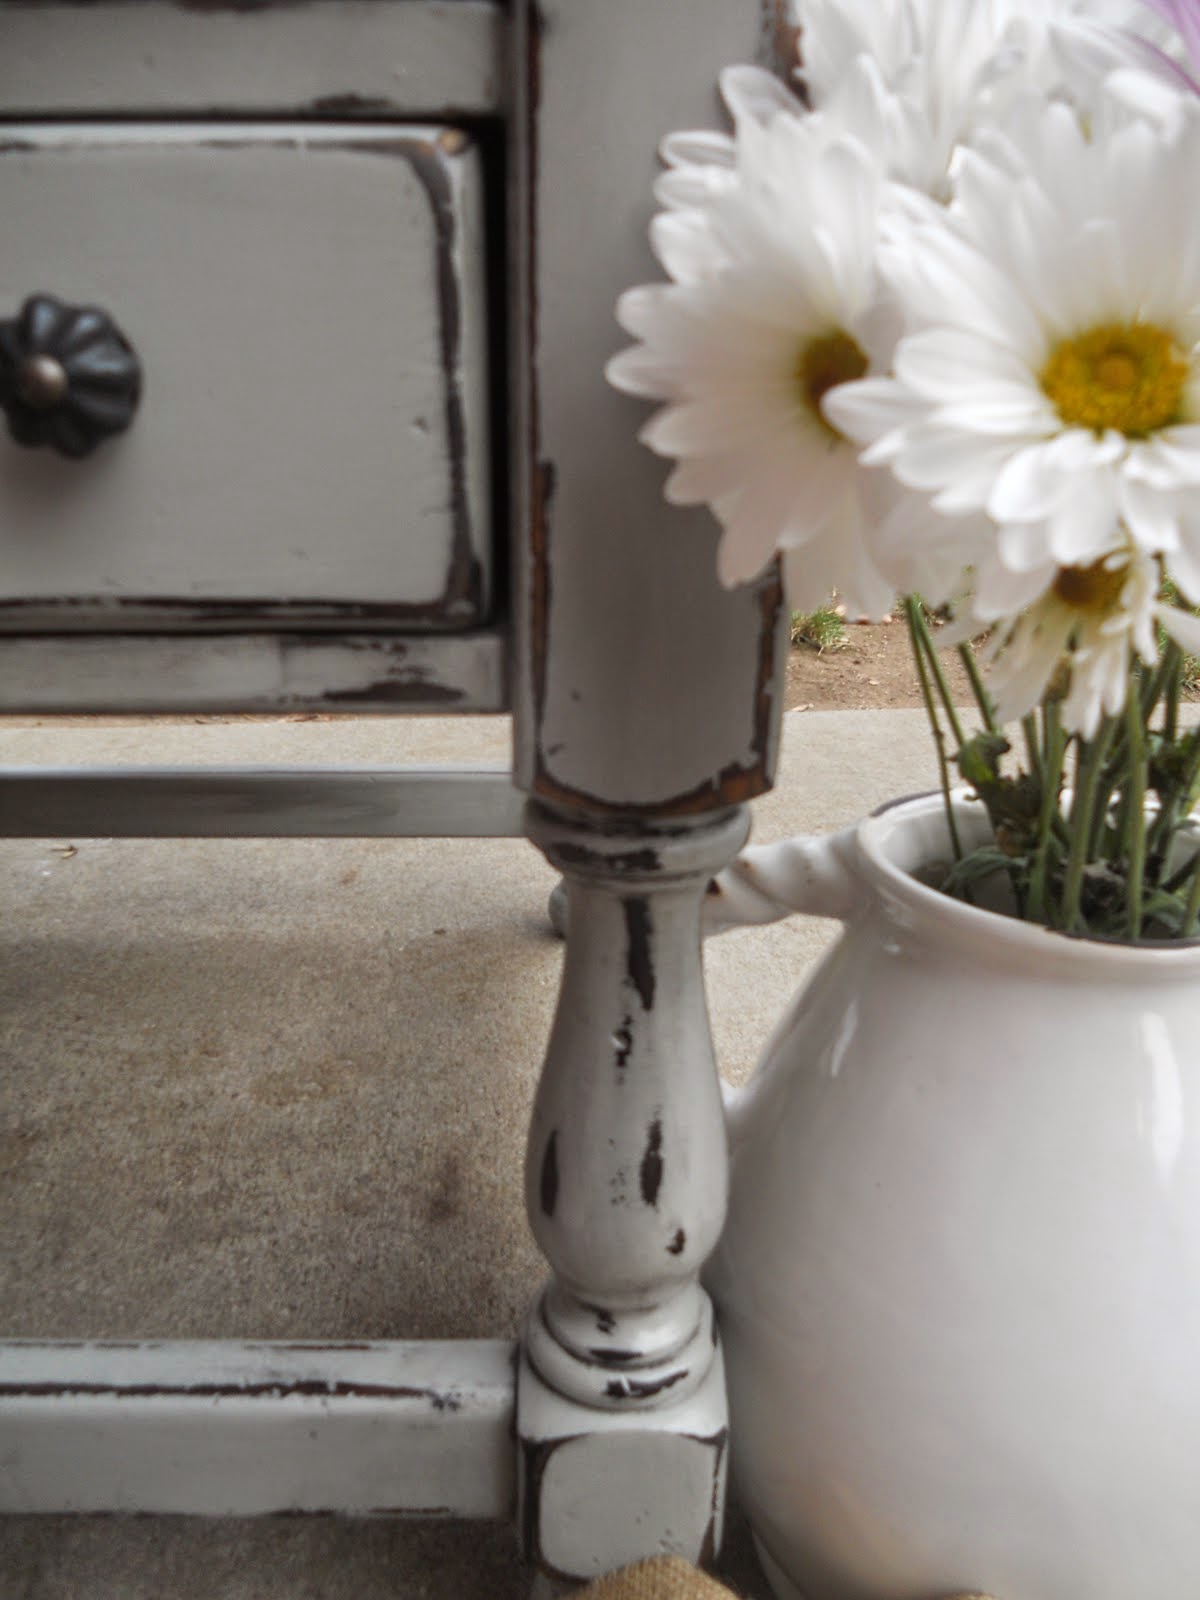
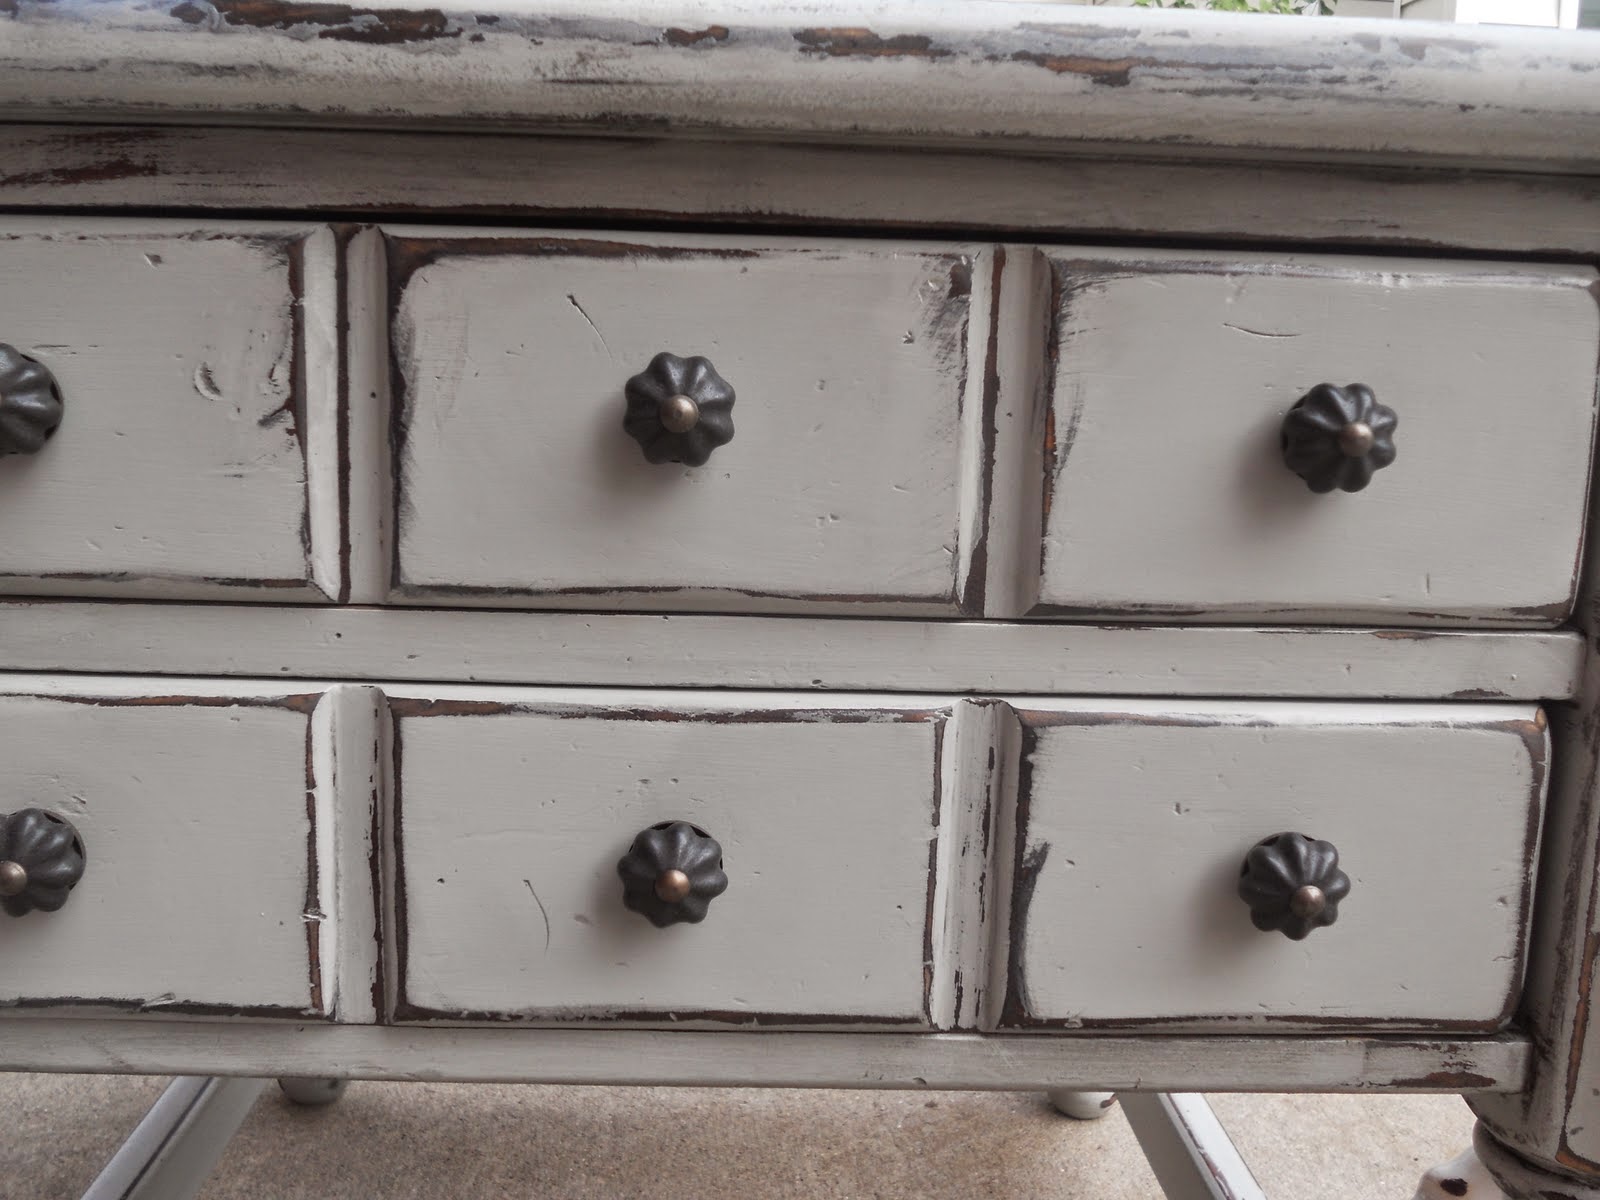
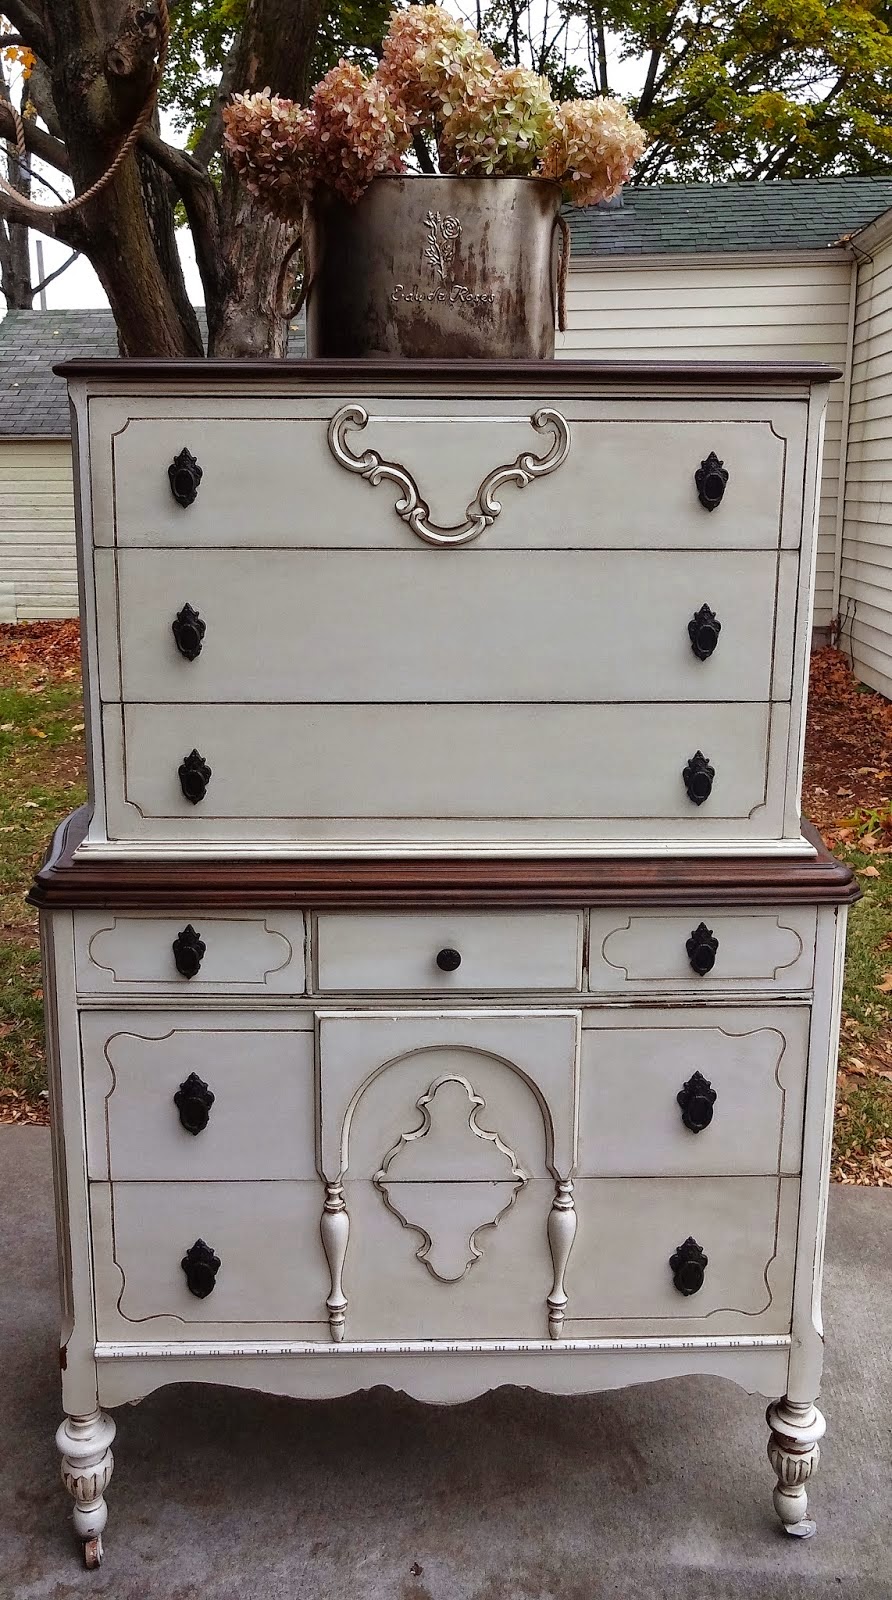
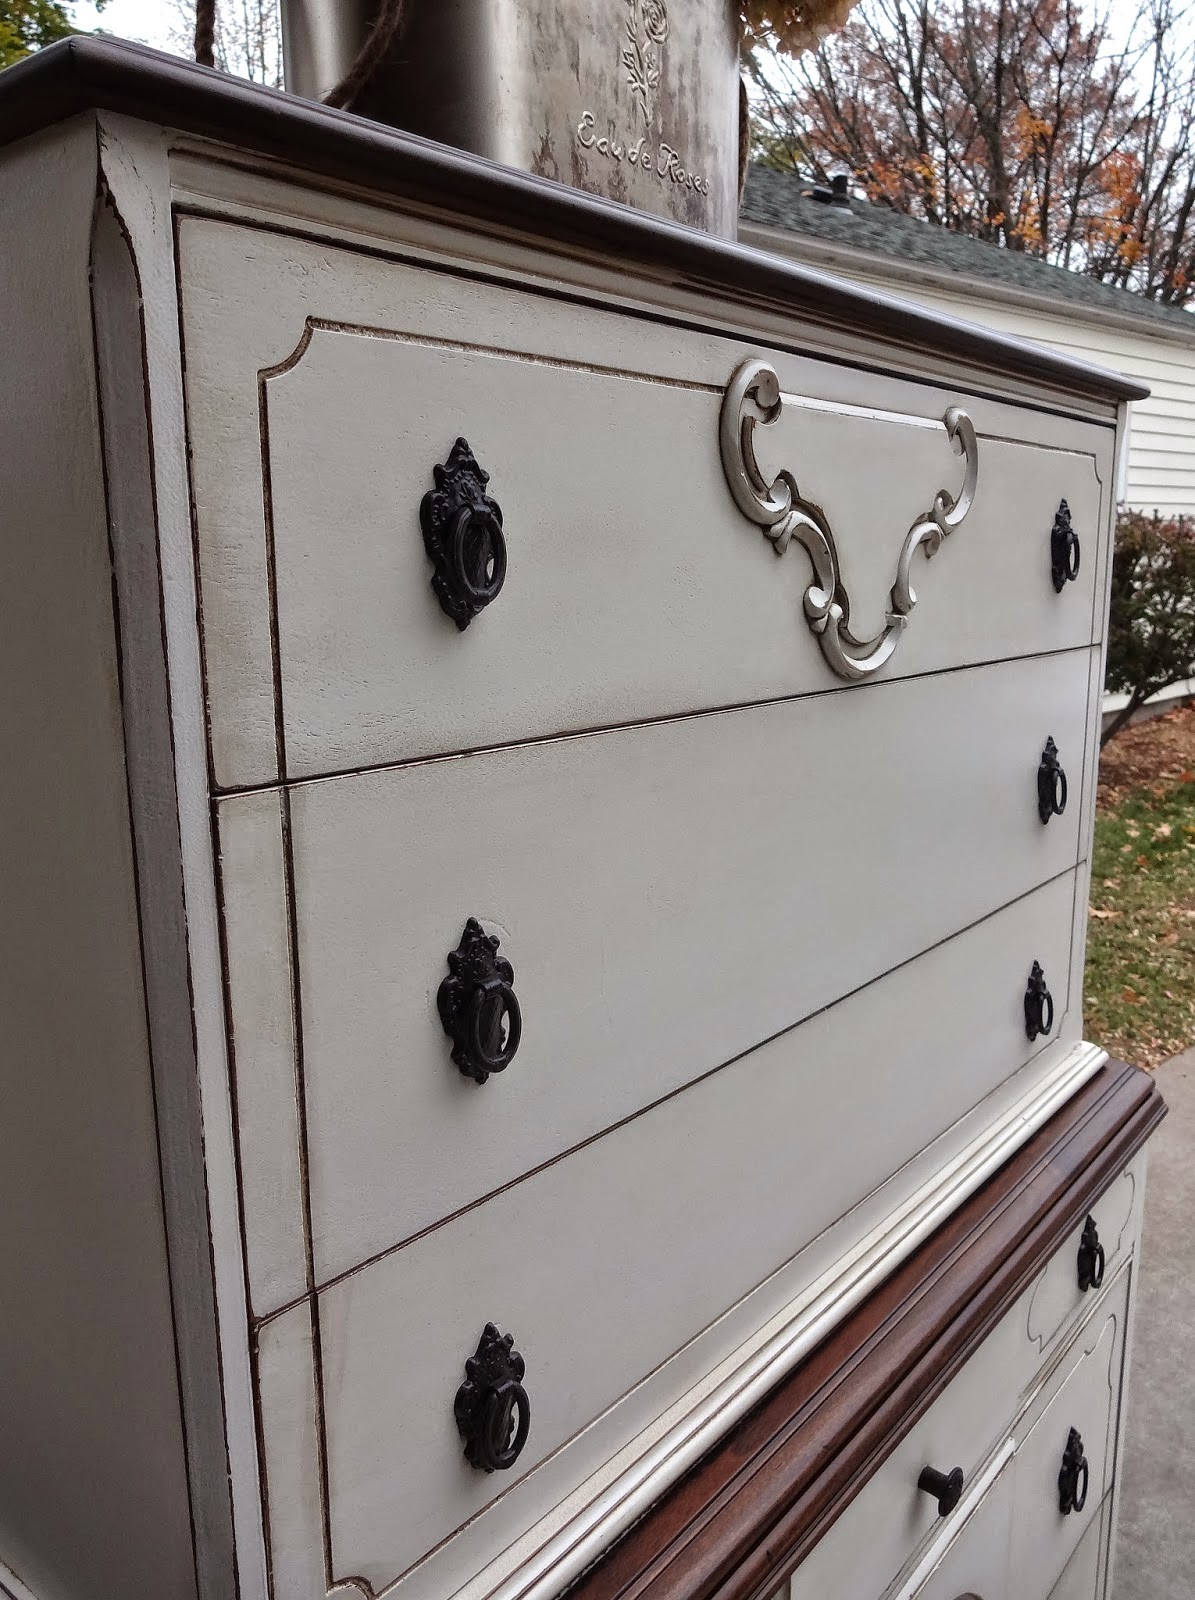
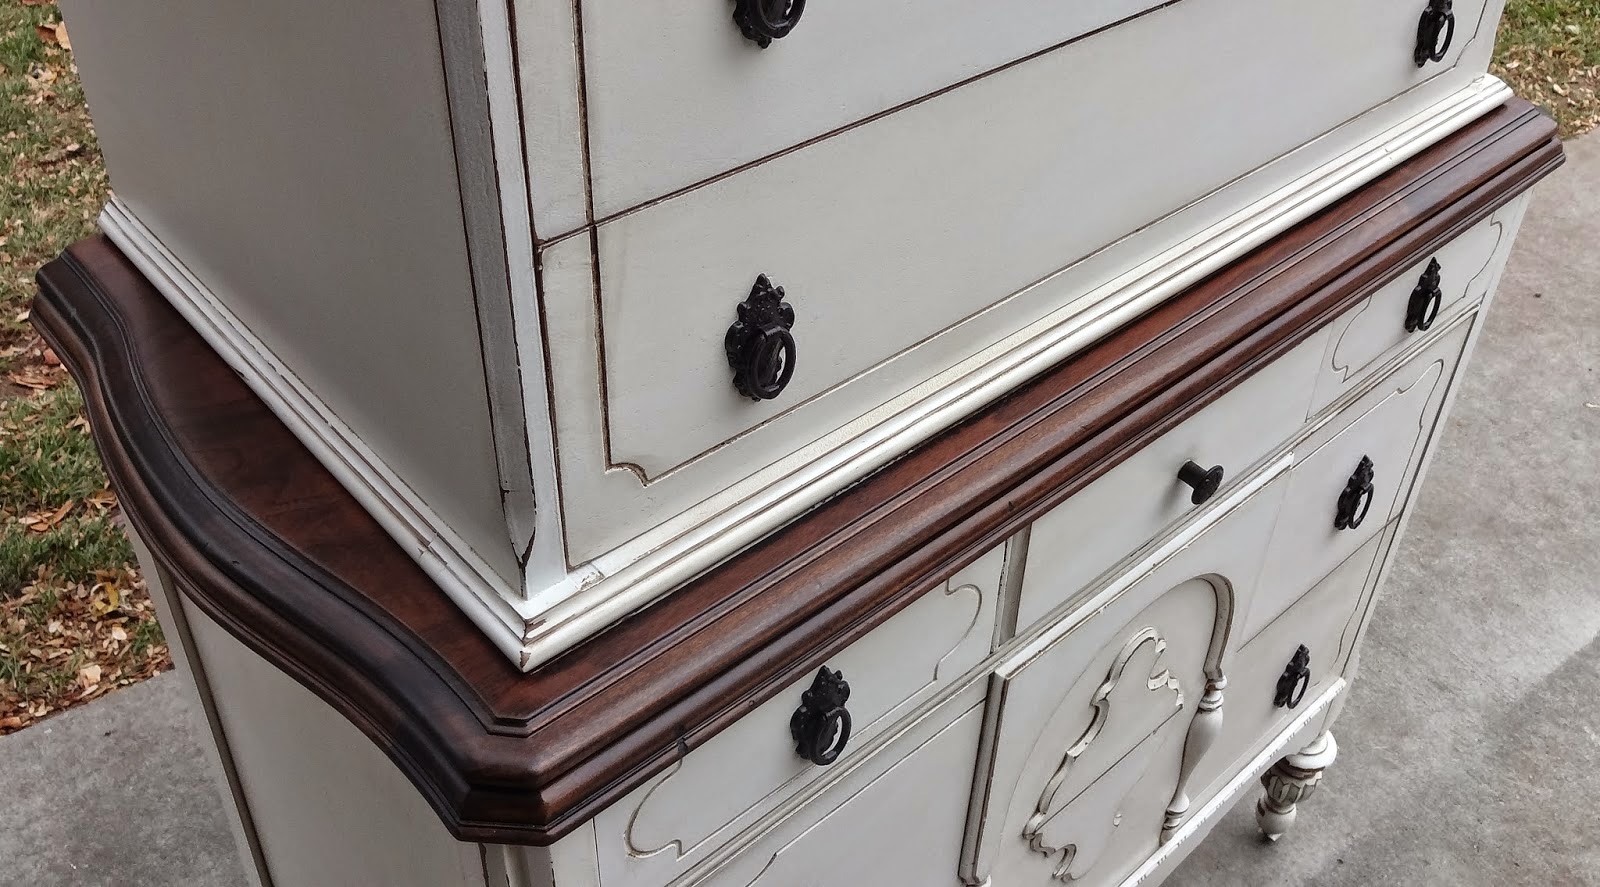
Another good find is an antique chest of drawers with high legs! What will the master come up with this time to emphasize the beautiful carvings on the facades and preserve refined style bygone era?

![]()


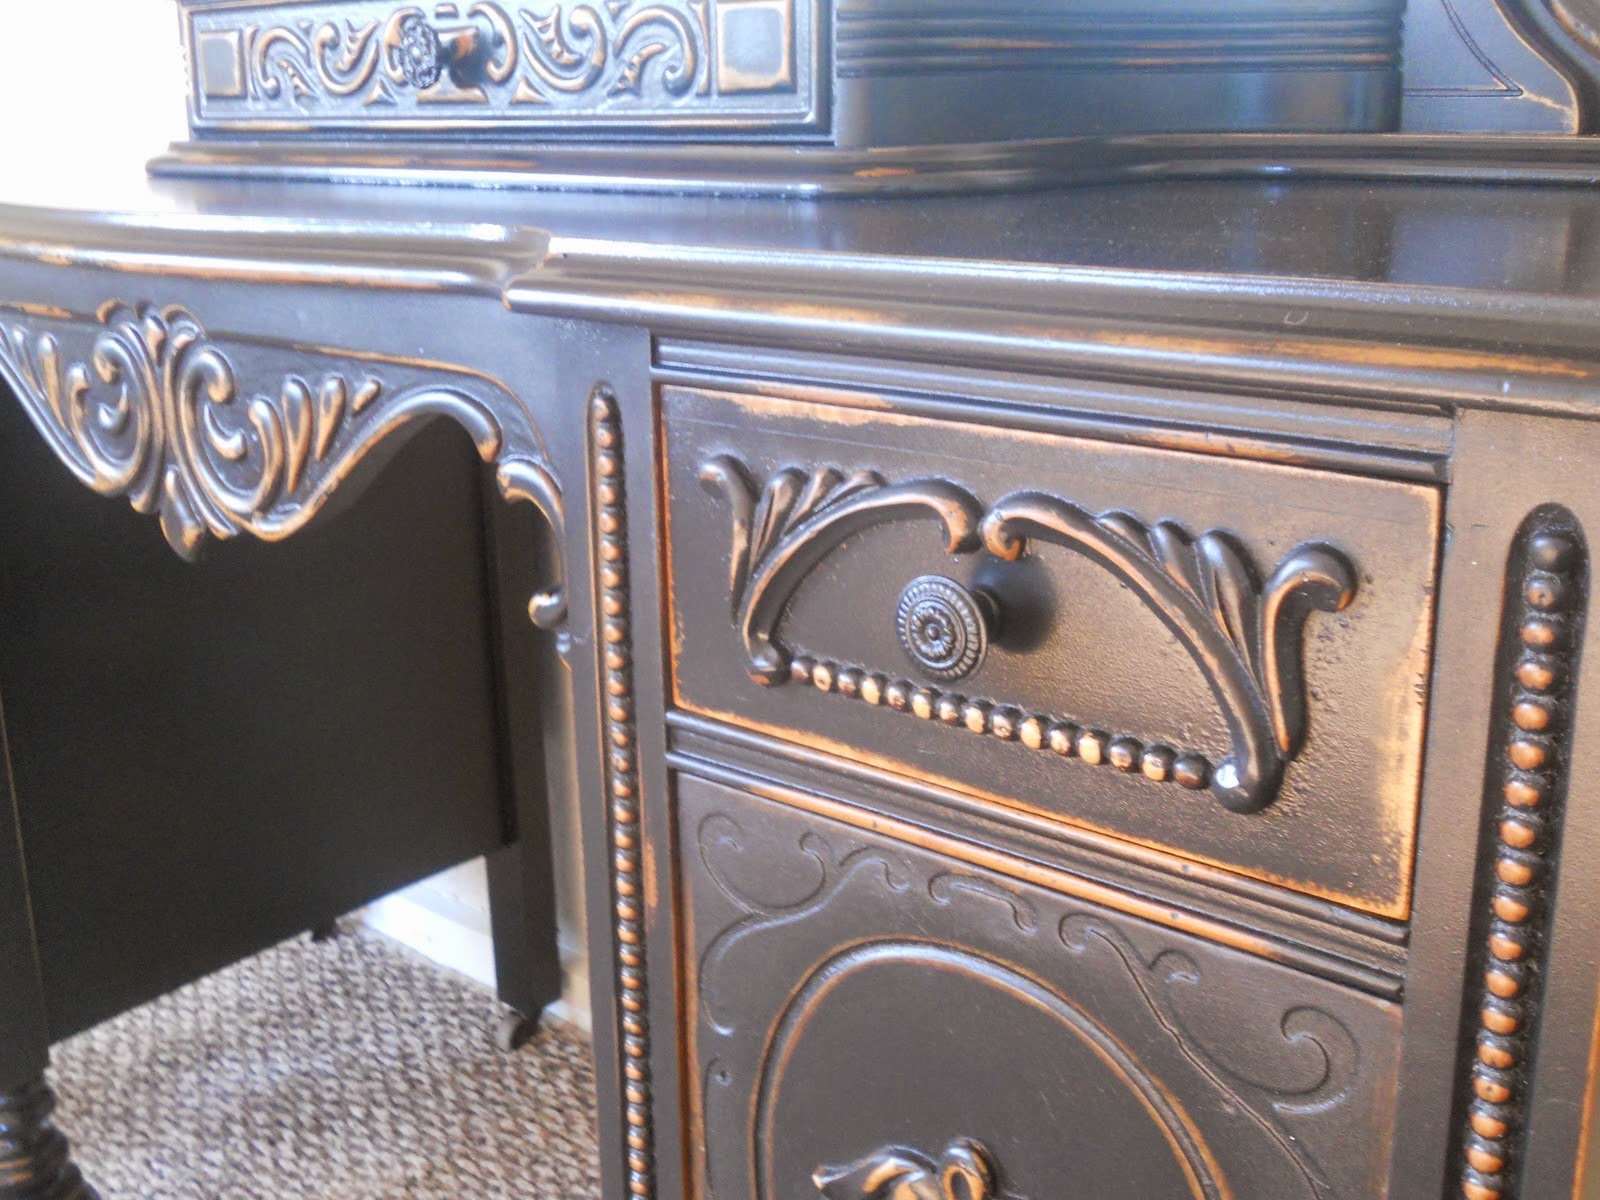
As you have already noticed, Liz restores antique furniture, but does not try to make it perfect, "like new". She clearly does not pursue this goal! On the contrary, it skillfully imitates the scuffs of old furniture. For an ignorant layman, such a restoration will seem strange: why age furniture that is already very old? To which a sophisticated connoisseur of antiques will give a convincing answer: why do I need a new and ideal one, if I want to see and feel its true historical spirit, when a real tree peeps out from under a layer of paint ... Hence the increased in Lately popularity of the effect of aging, which gives a respectable worn look to a brand new product. A similar technique is used by designers to recreate a certain style in the interior, such as vintage, shabby chic, Provence and country. Each craftsman has his own secret of finishing furniture, which they have been developing for more than one year, and therefore they are in no hurry to reveal it. In her blog, Liz shares her experience in the restoration of antique furniture, gives recommendations on the choice of varnishes and enamels. But he always explains that in each individual case final look very individual and depends on the mood and inspiration with which you take up the work.


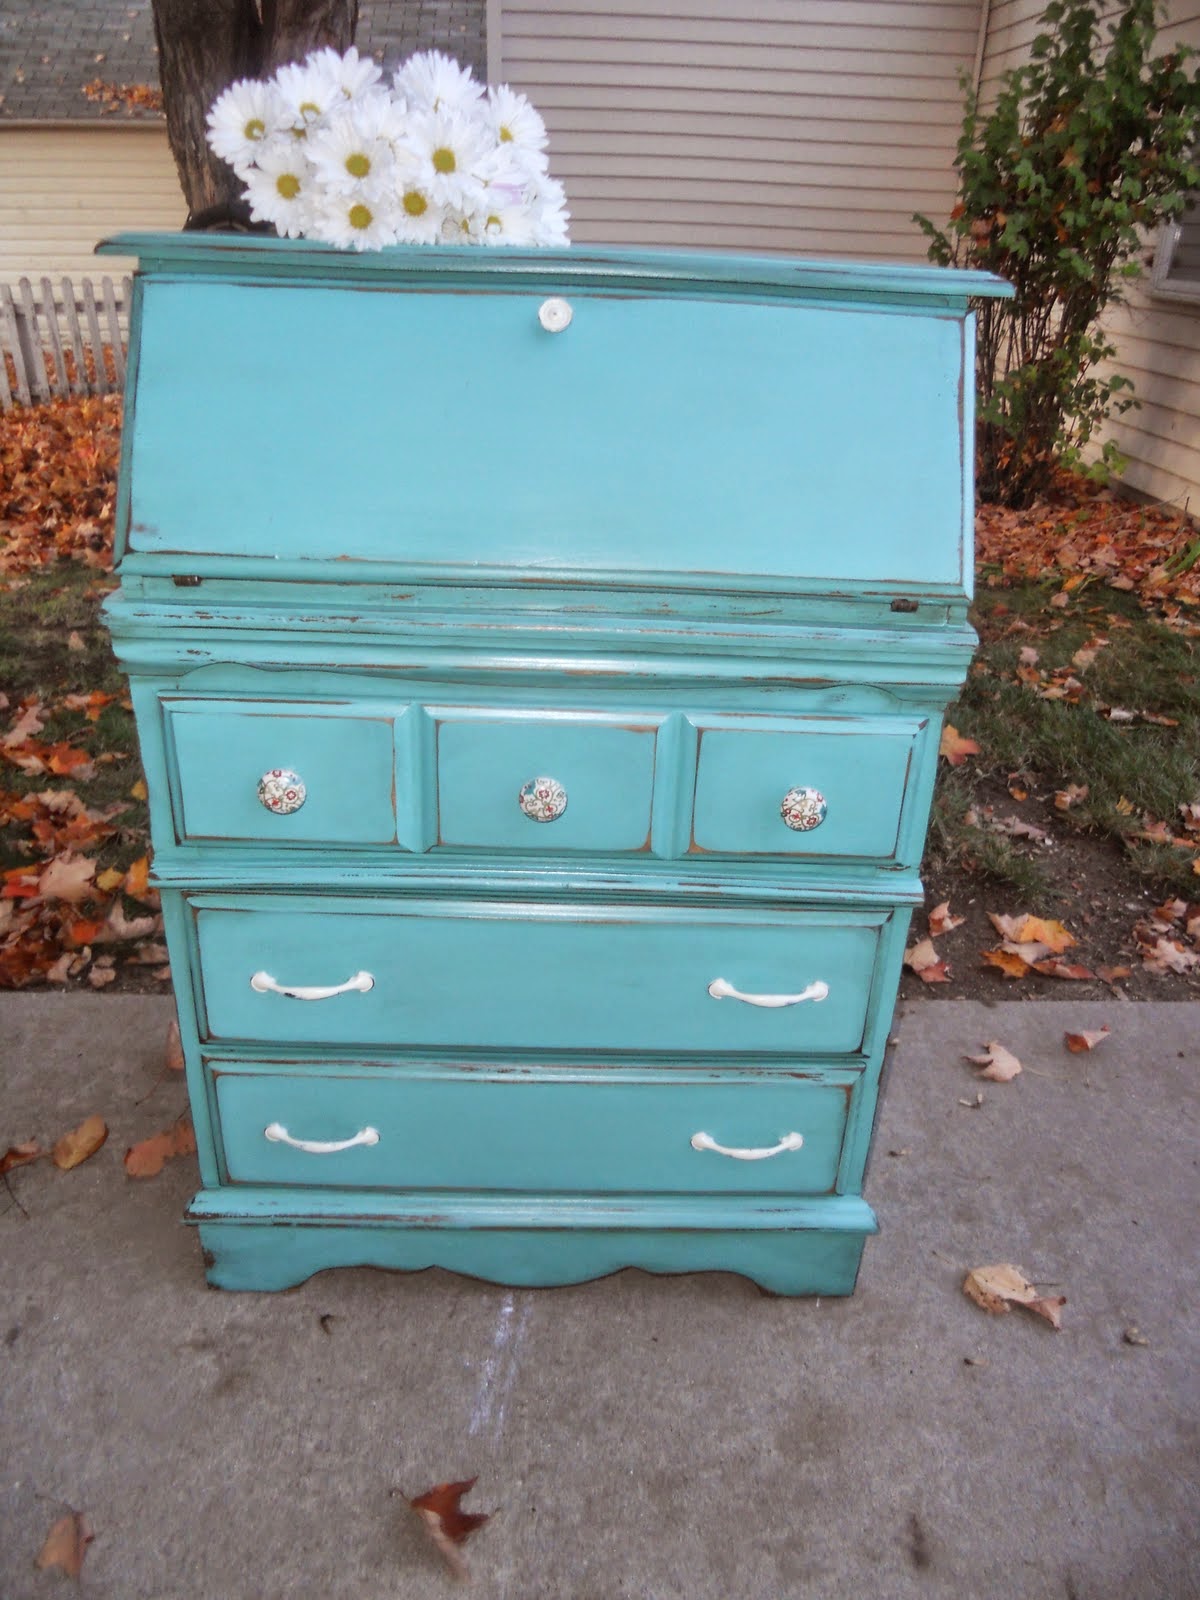
An amazing antique secretary chest of drawers has an unusual for modern furniture design. We're already so used to simple forms And standard models that a genuine antique is surprising and even a smile. The sky blue color turned this unpretentious secretary into a romantic item that fits perfectly into the interior of French Provence.


Shabby and battered, a sewing table that has lived for at least a hundred years, begins new life in white!

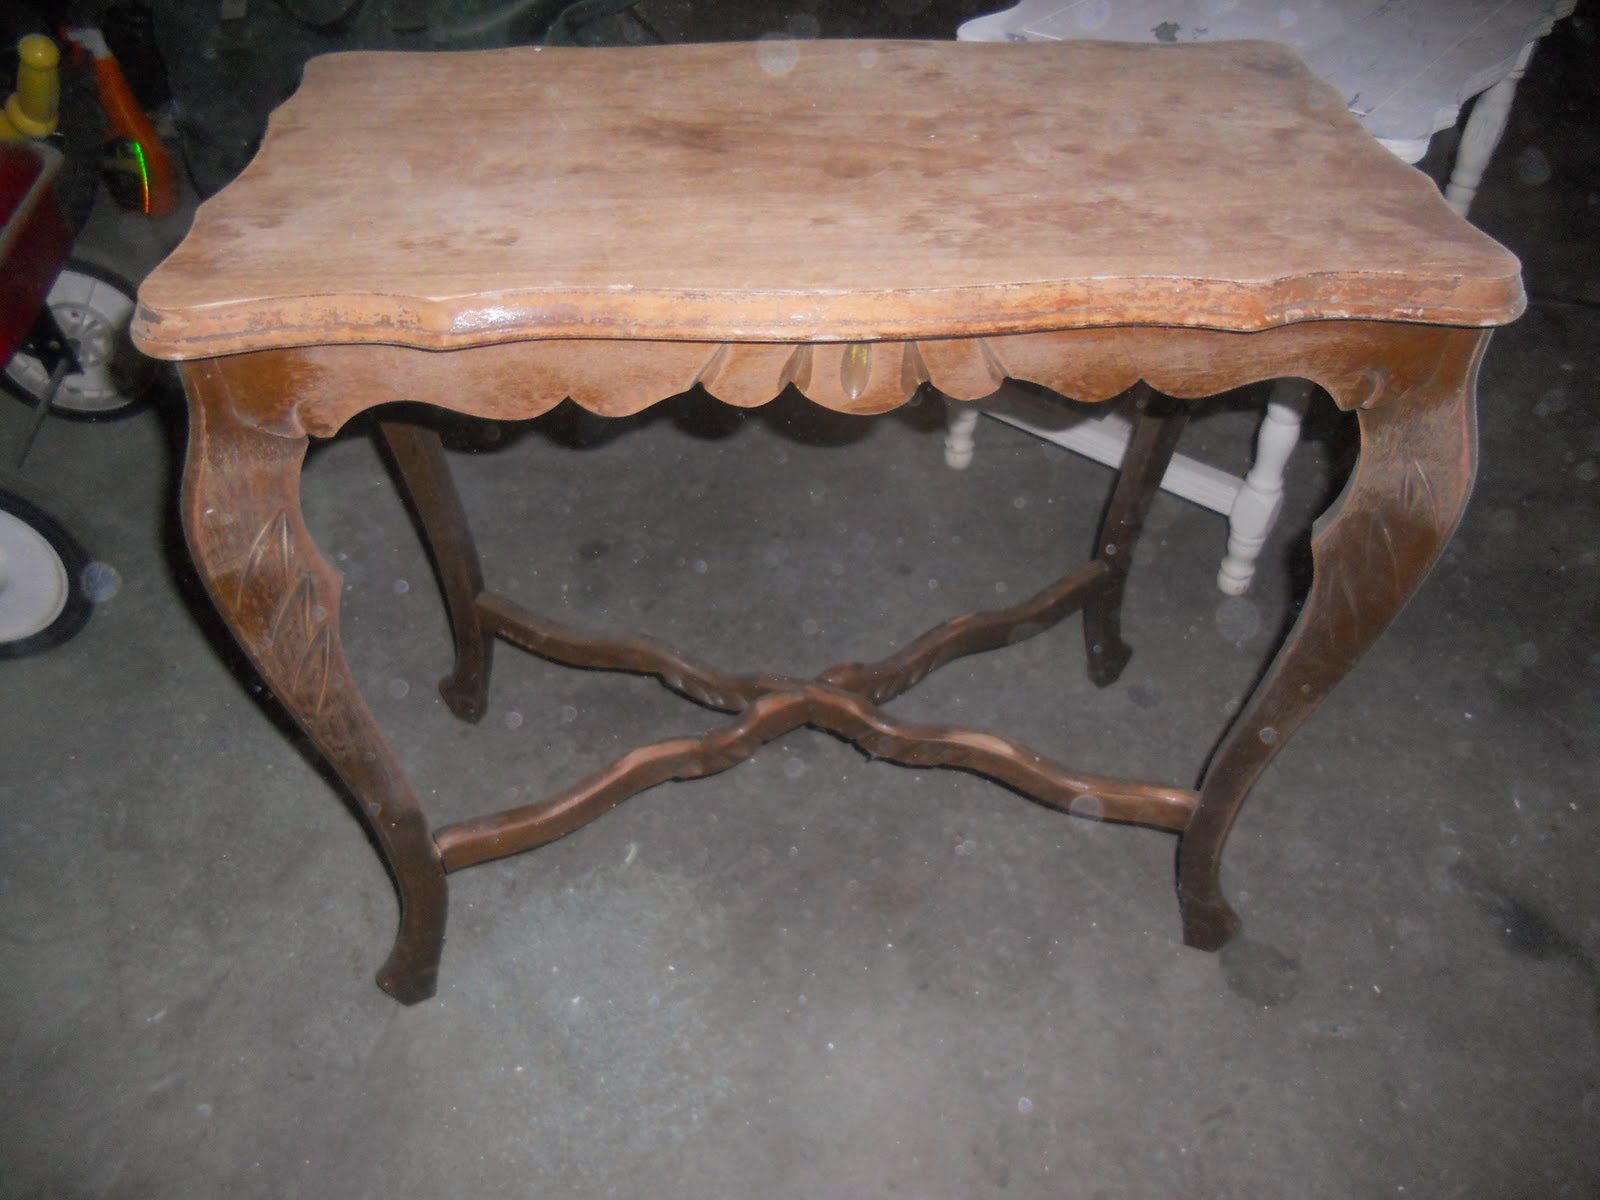
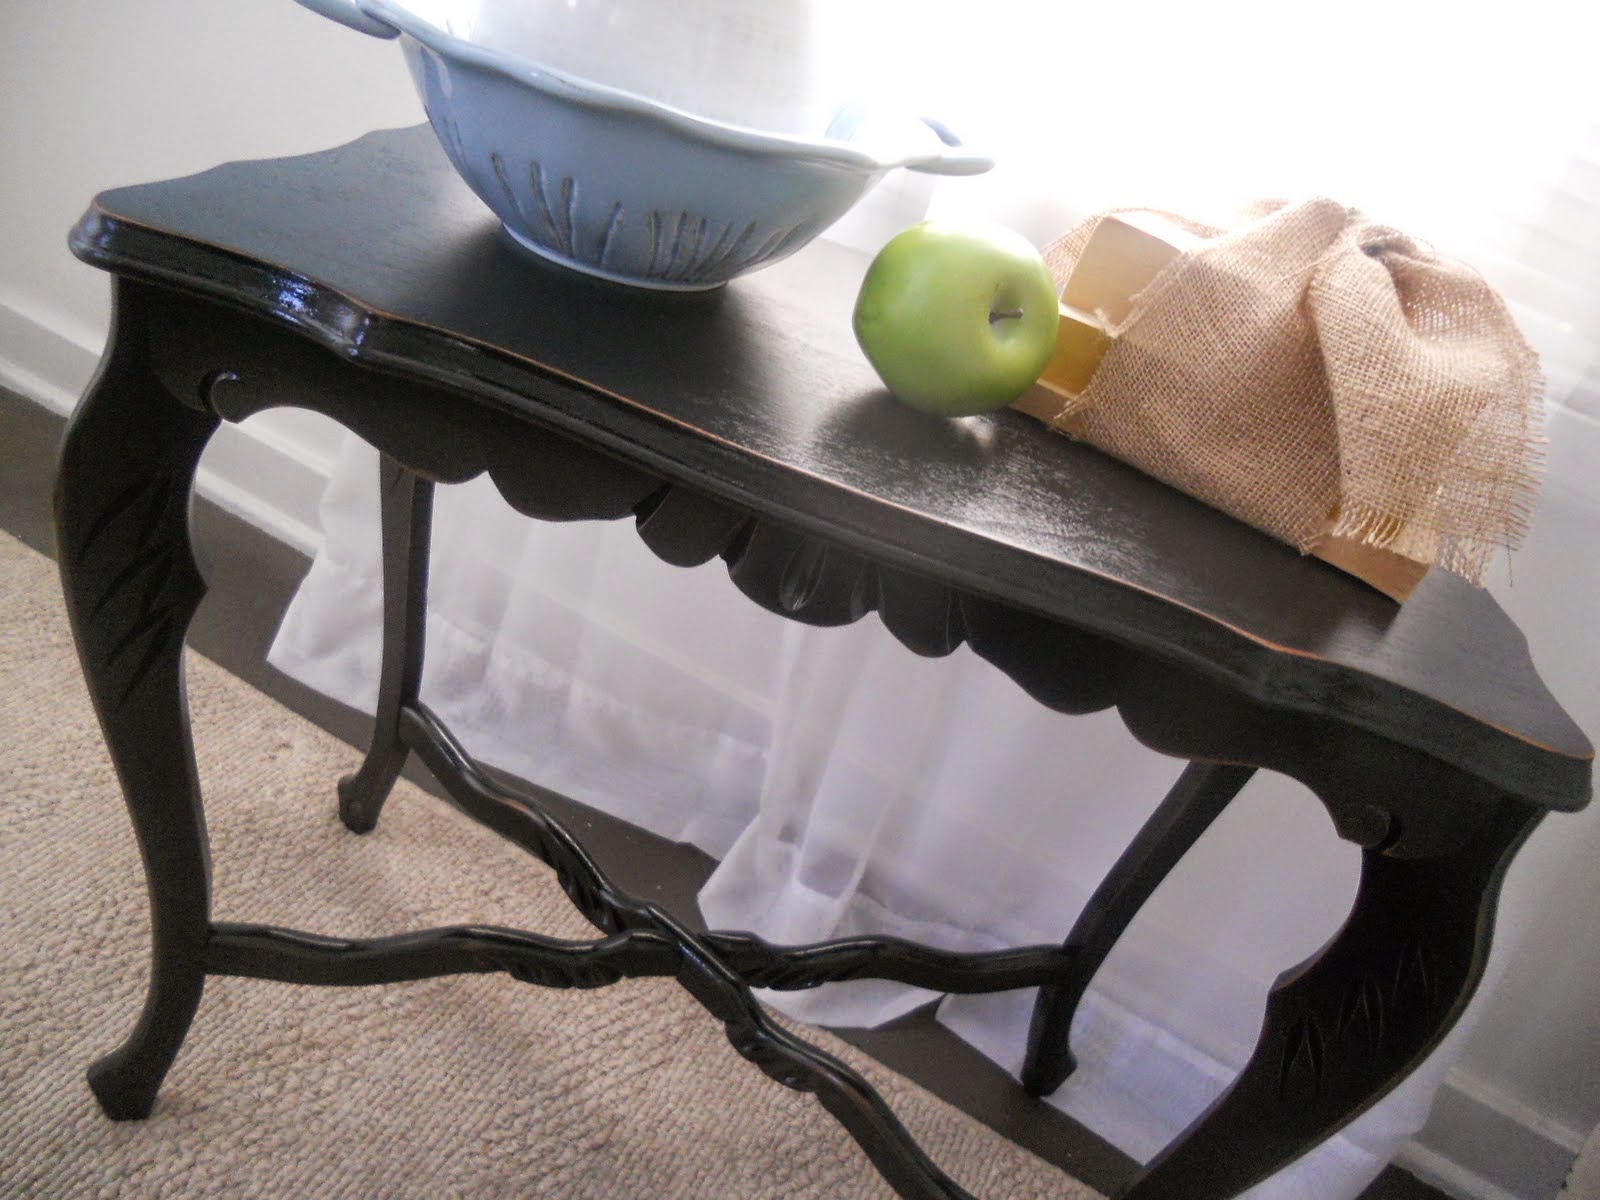
old coffee table has a deplorable appearance, but throwing away such beauty would be a crime! Therefore, through the efforts of Lisa, it turns into an elegant black table with expressive scuffs. Now it will become a worthy decoration of the living room and the pride of its new owners!


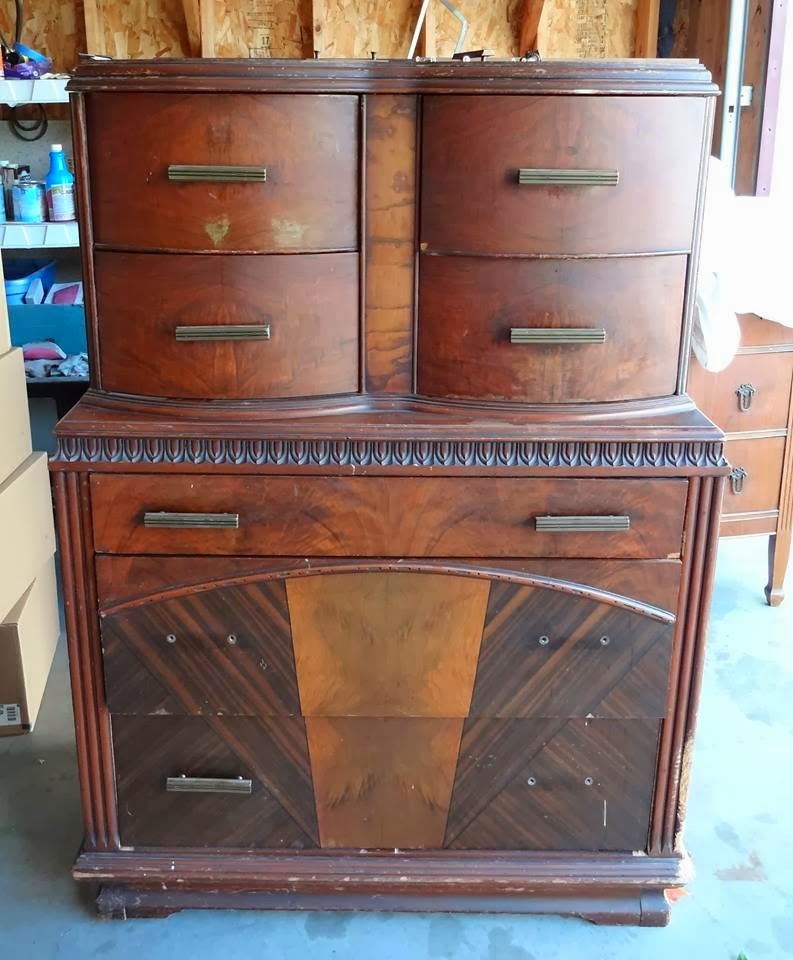
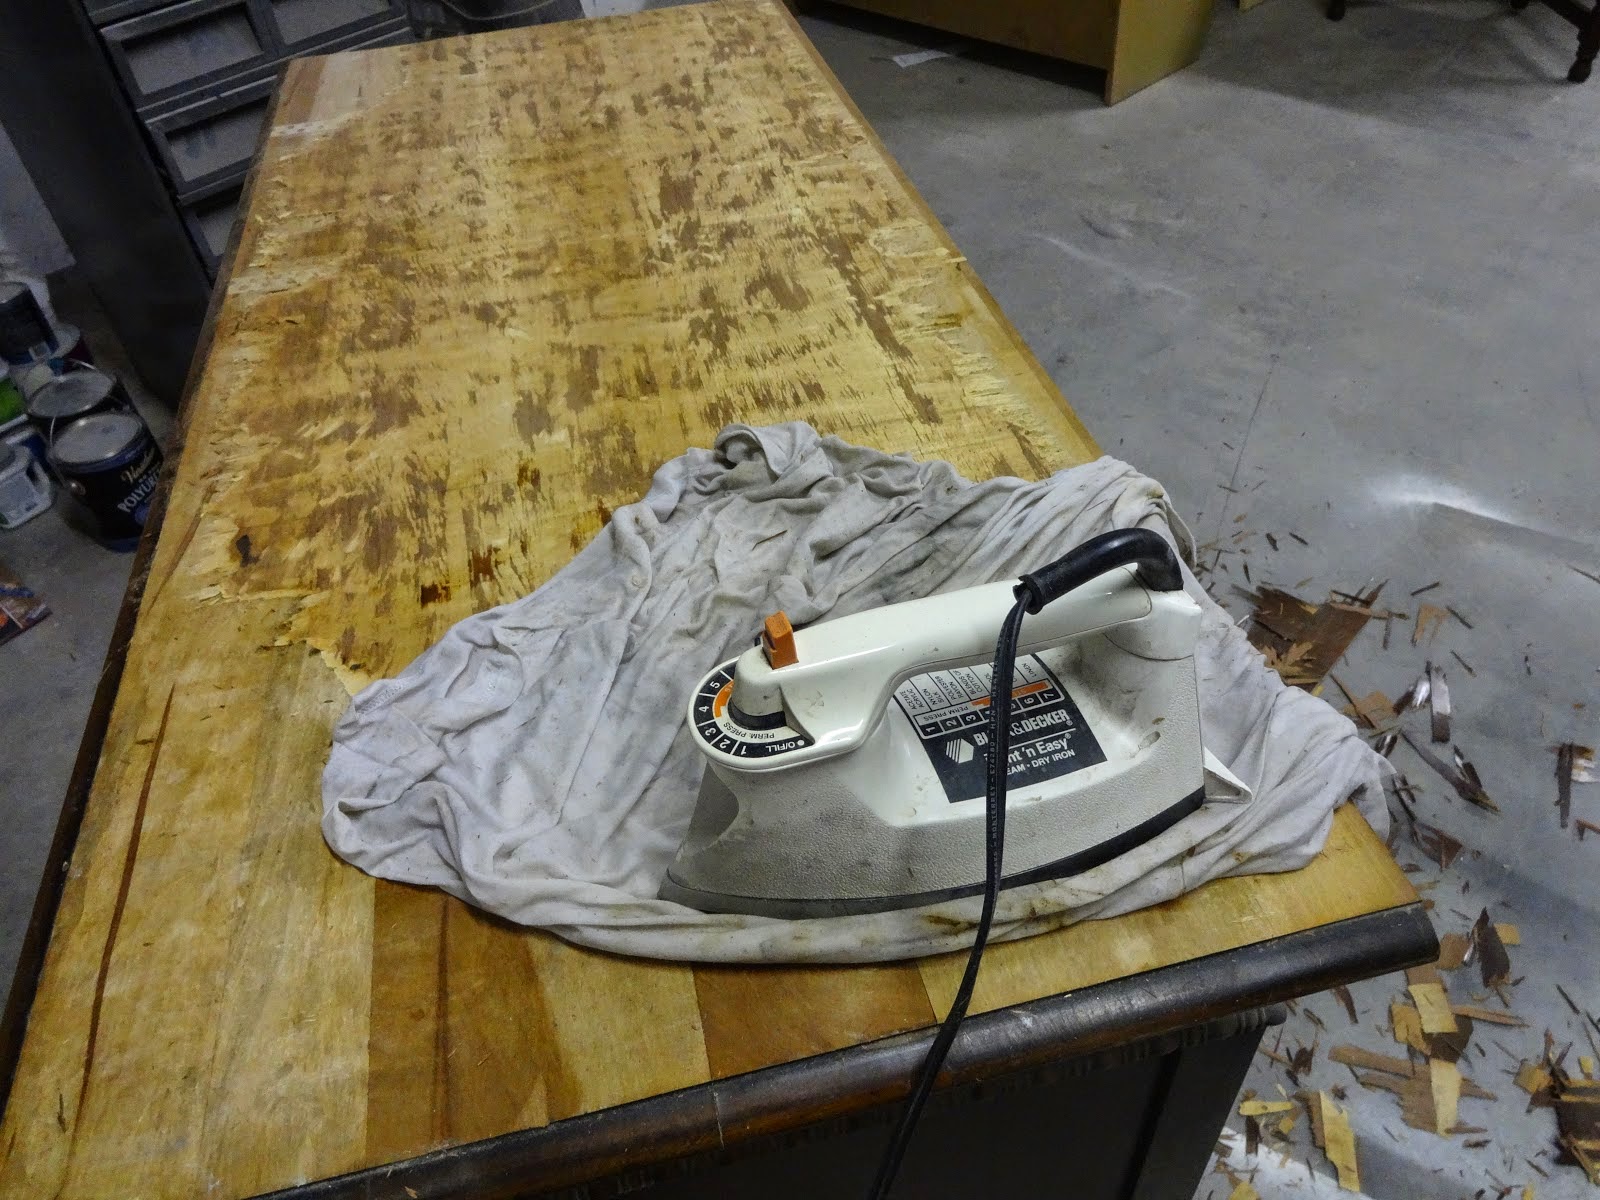
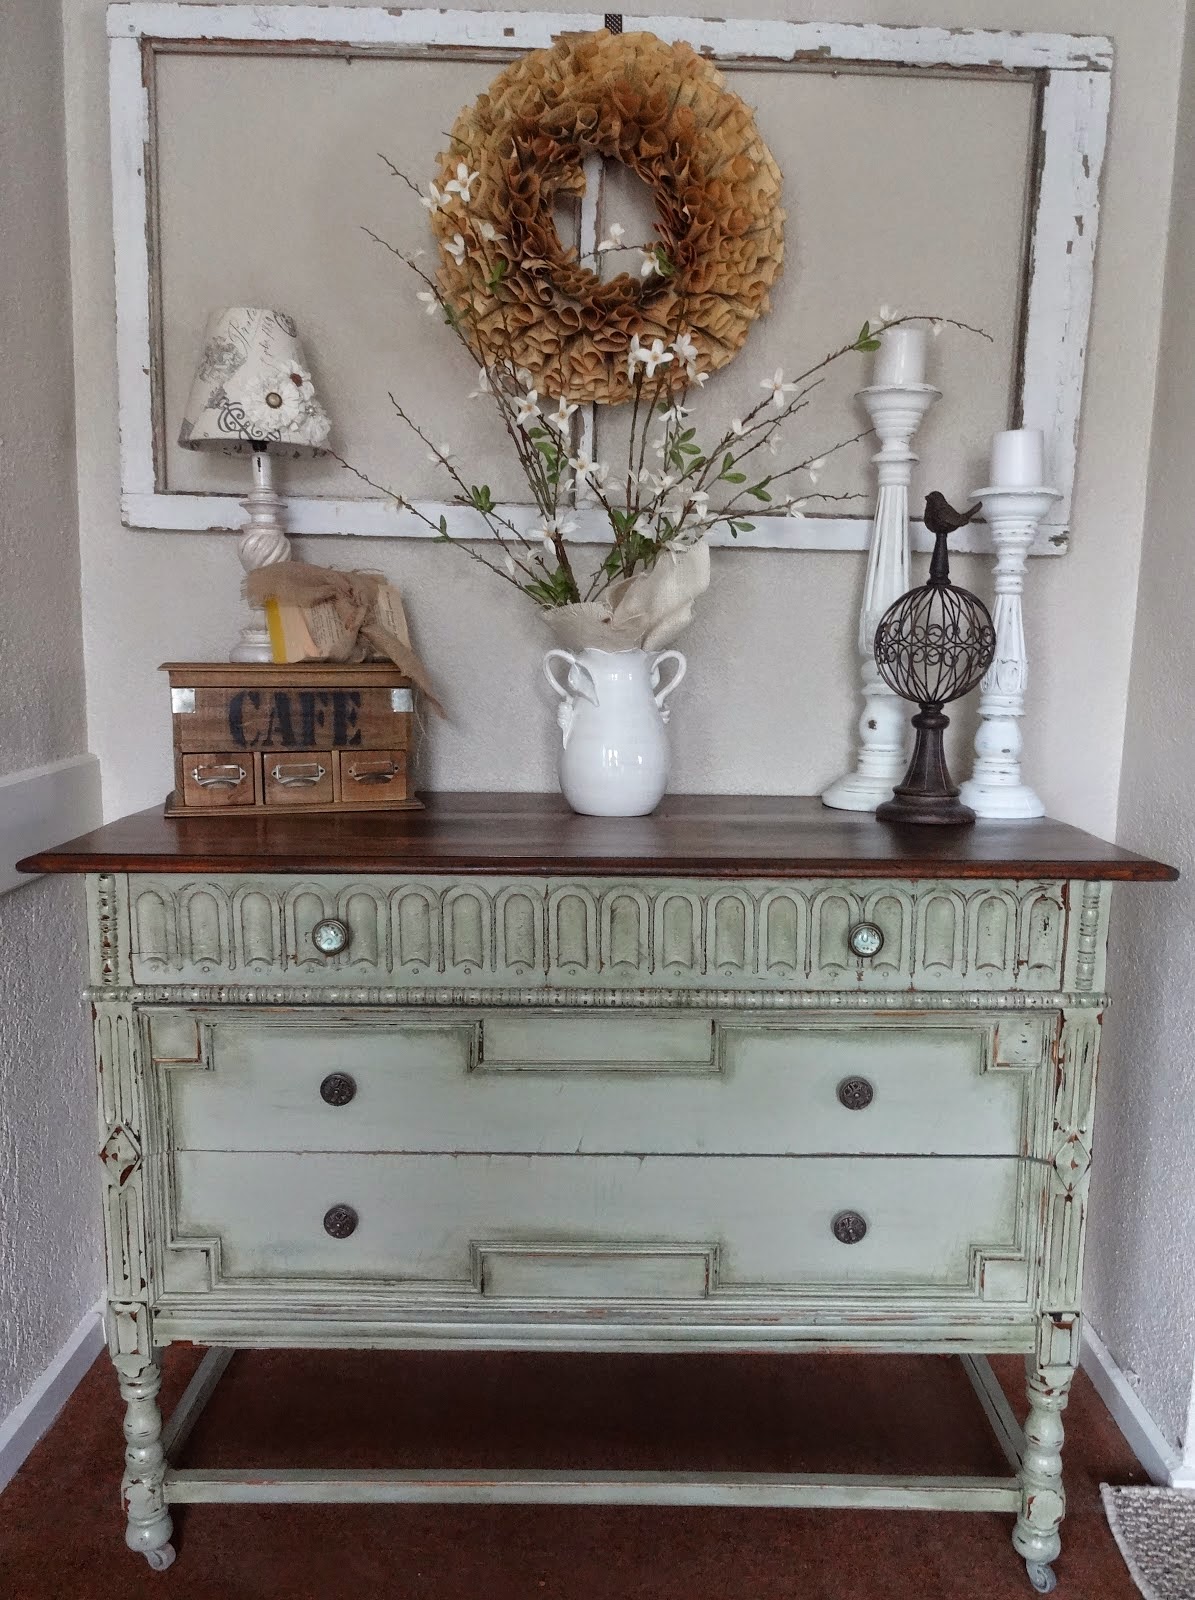
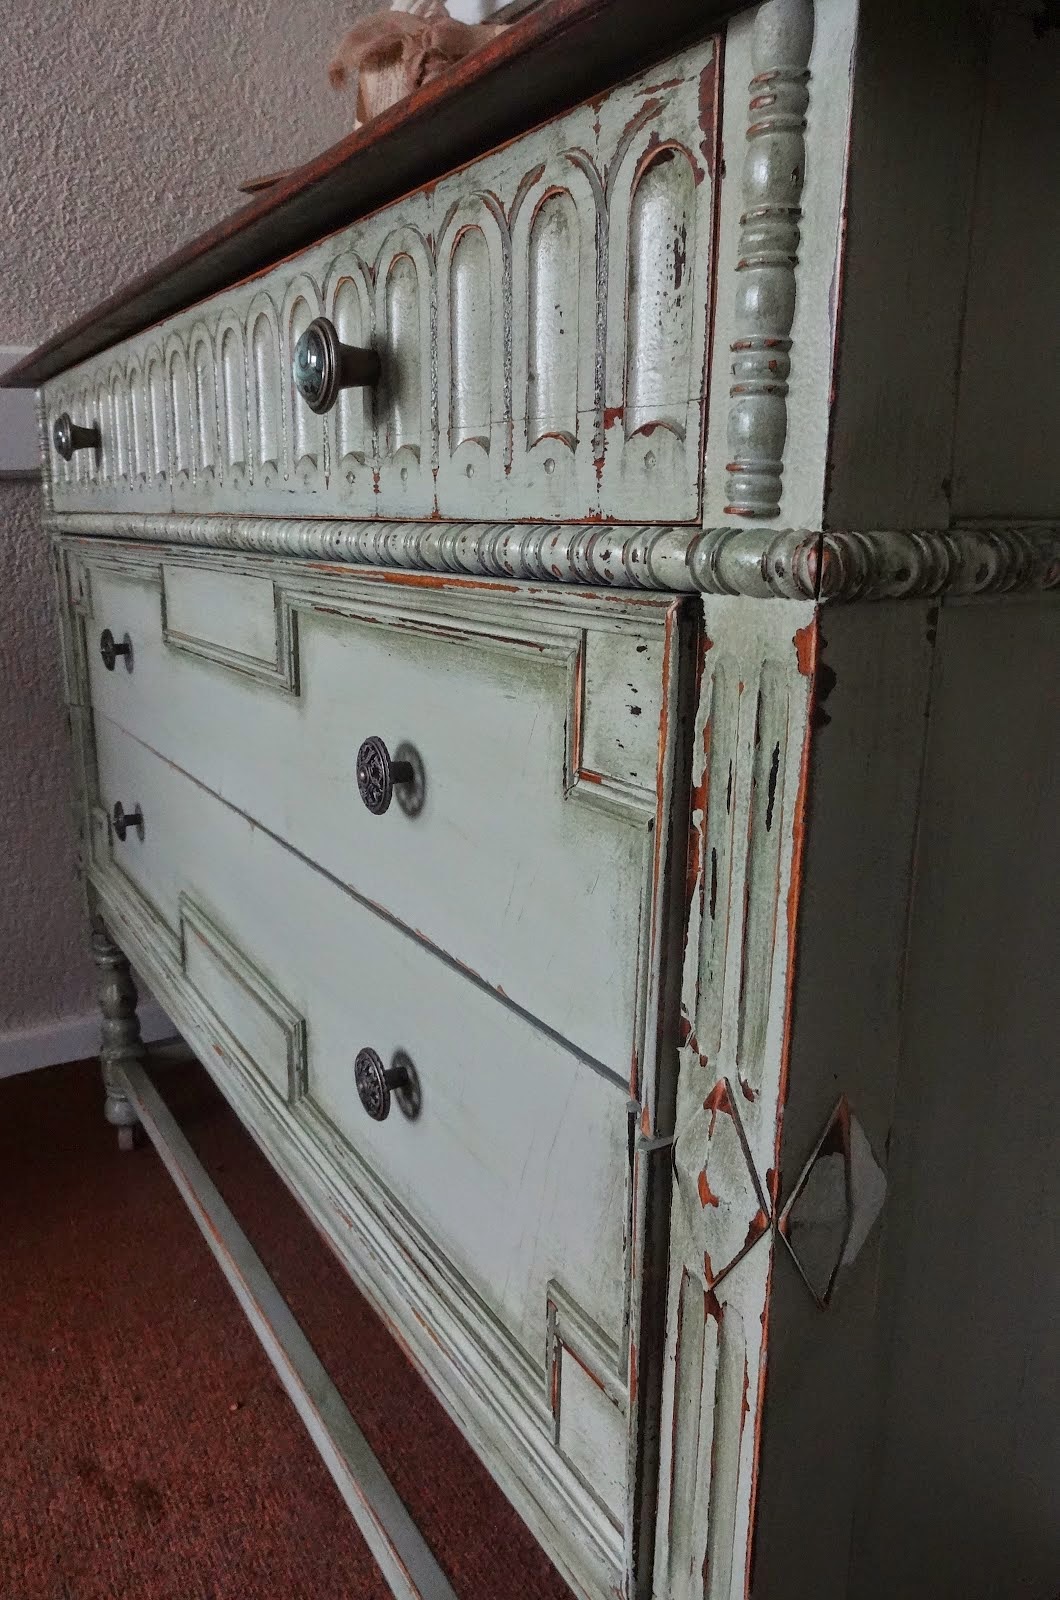
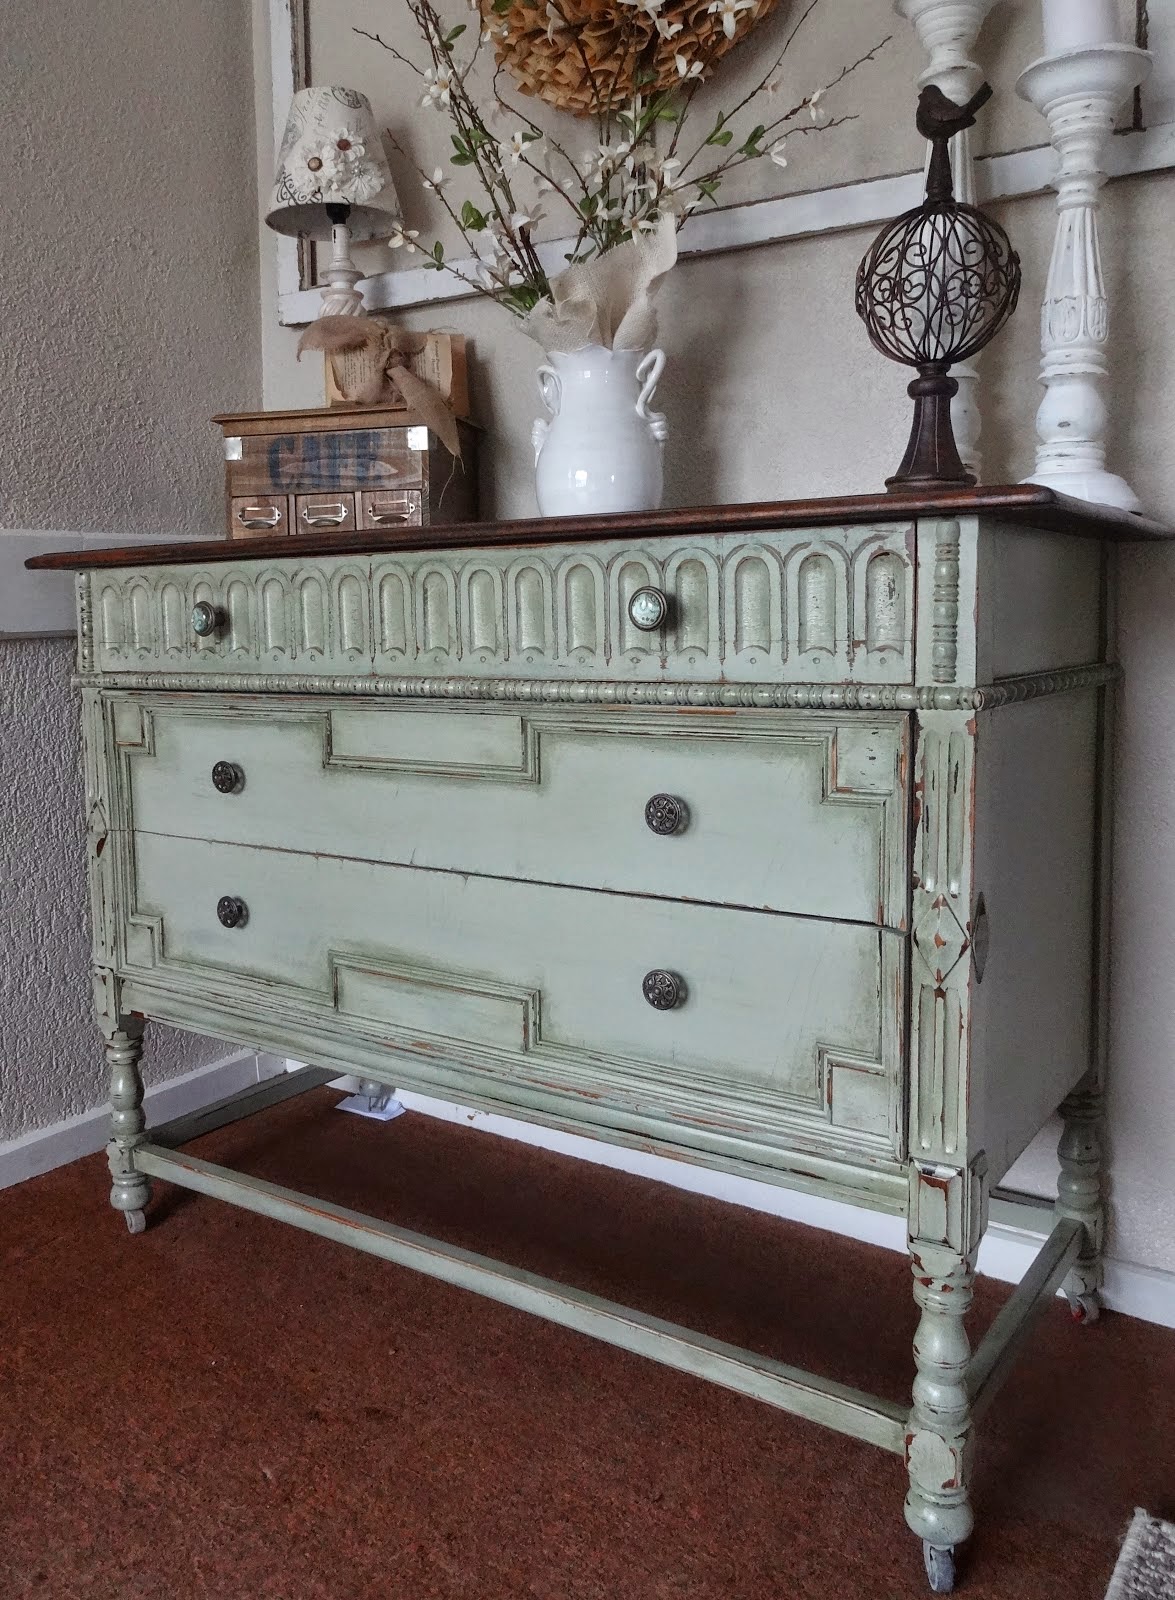
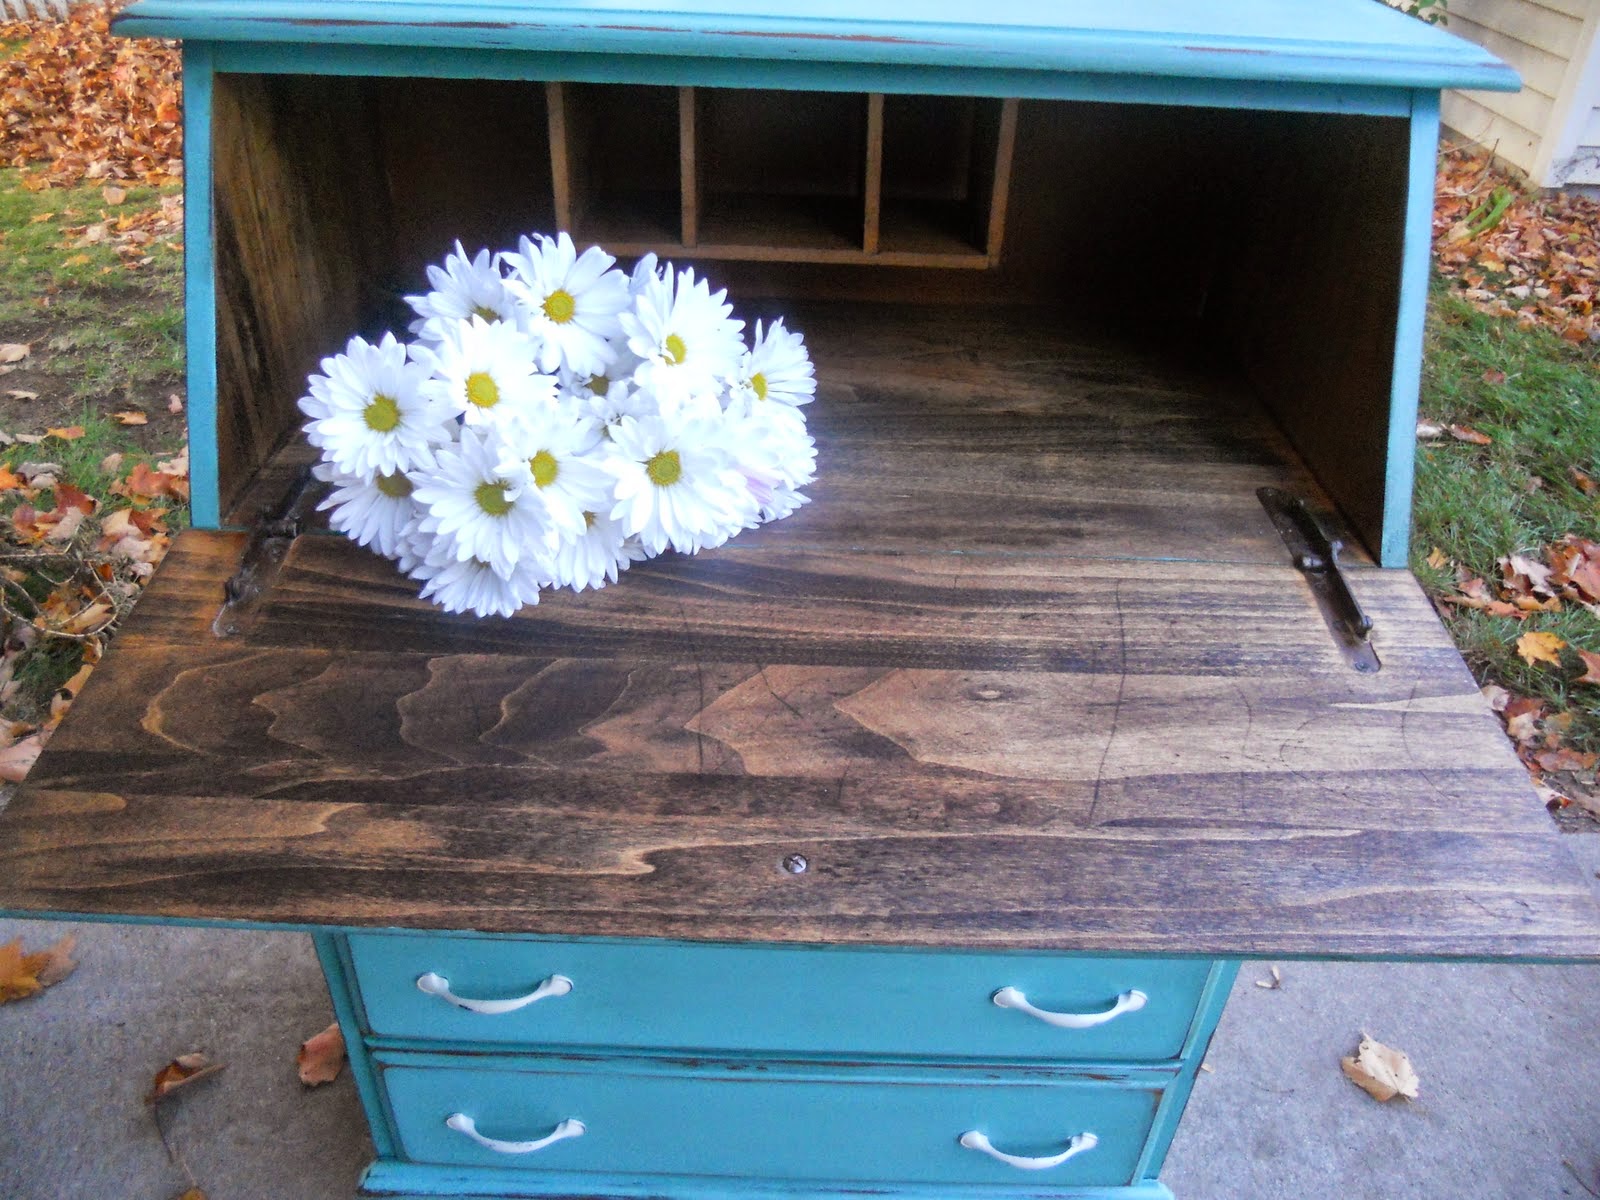
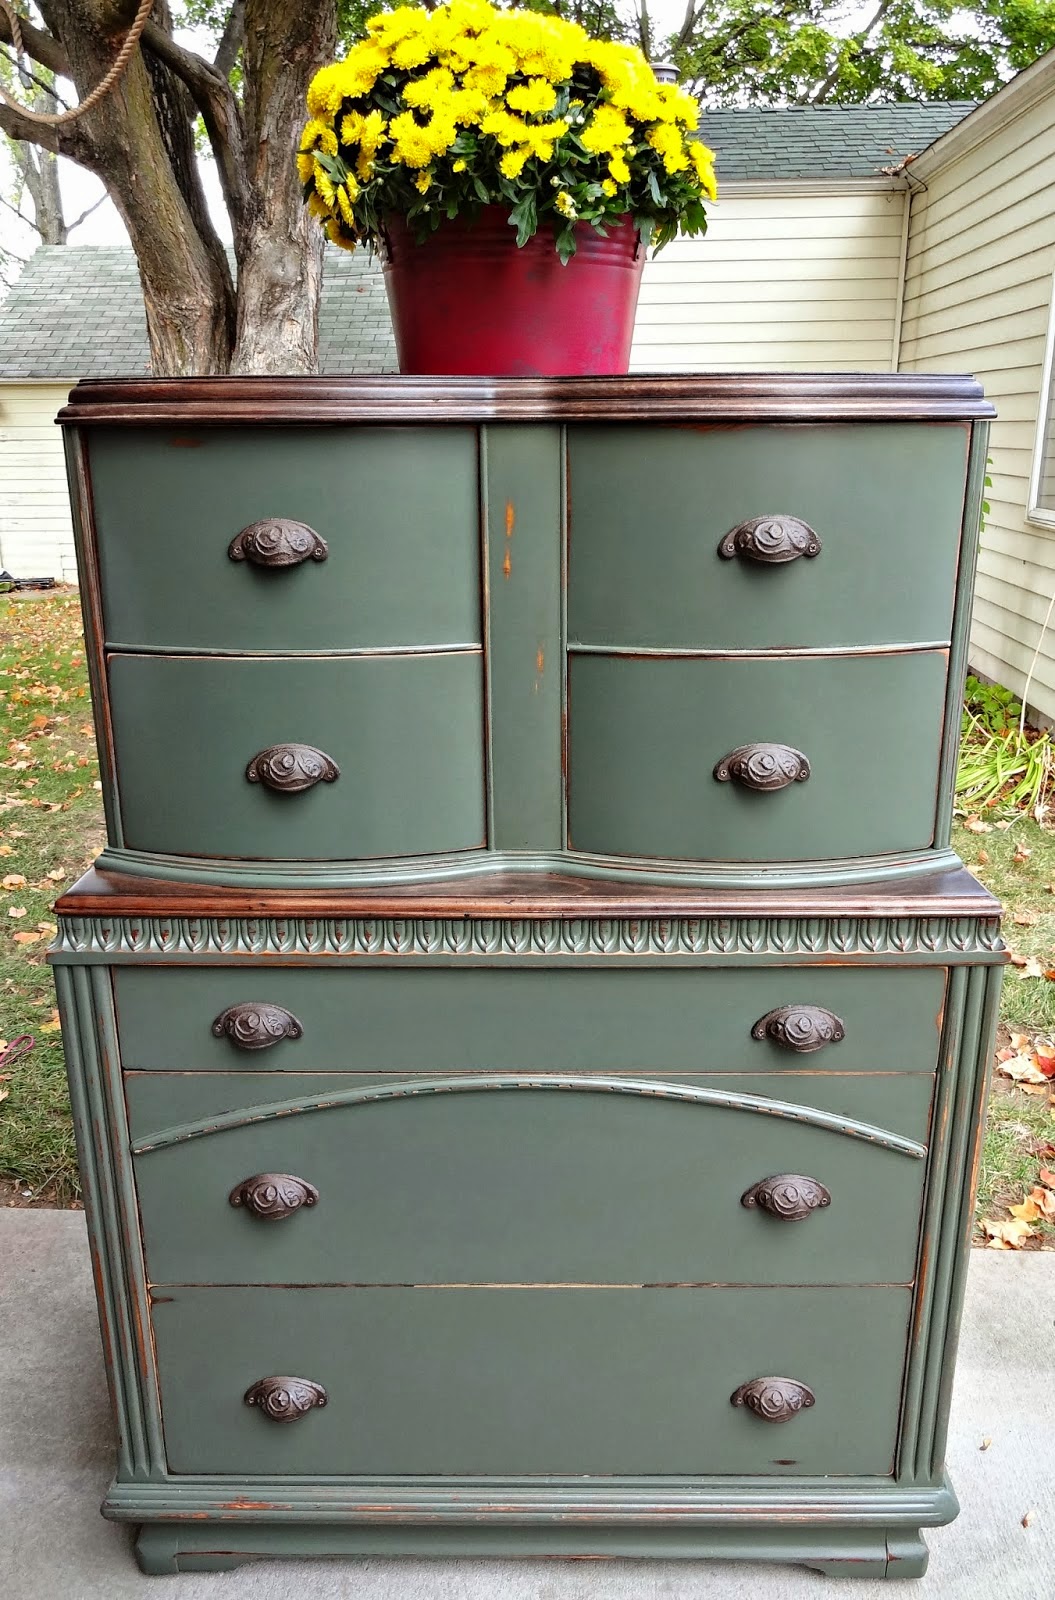
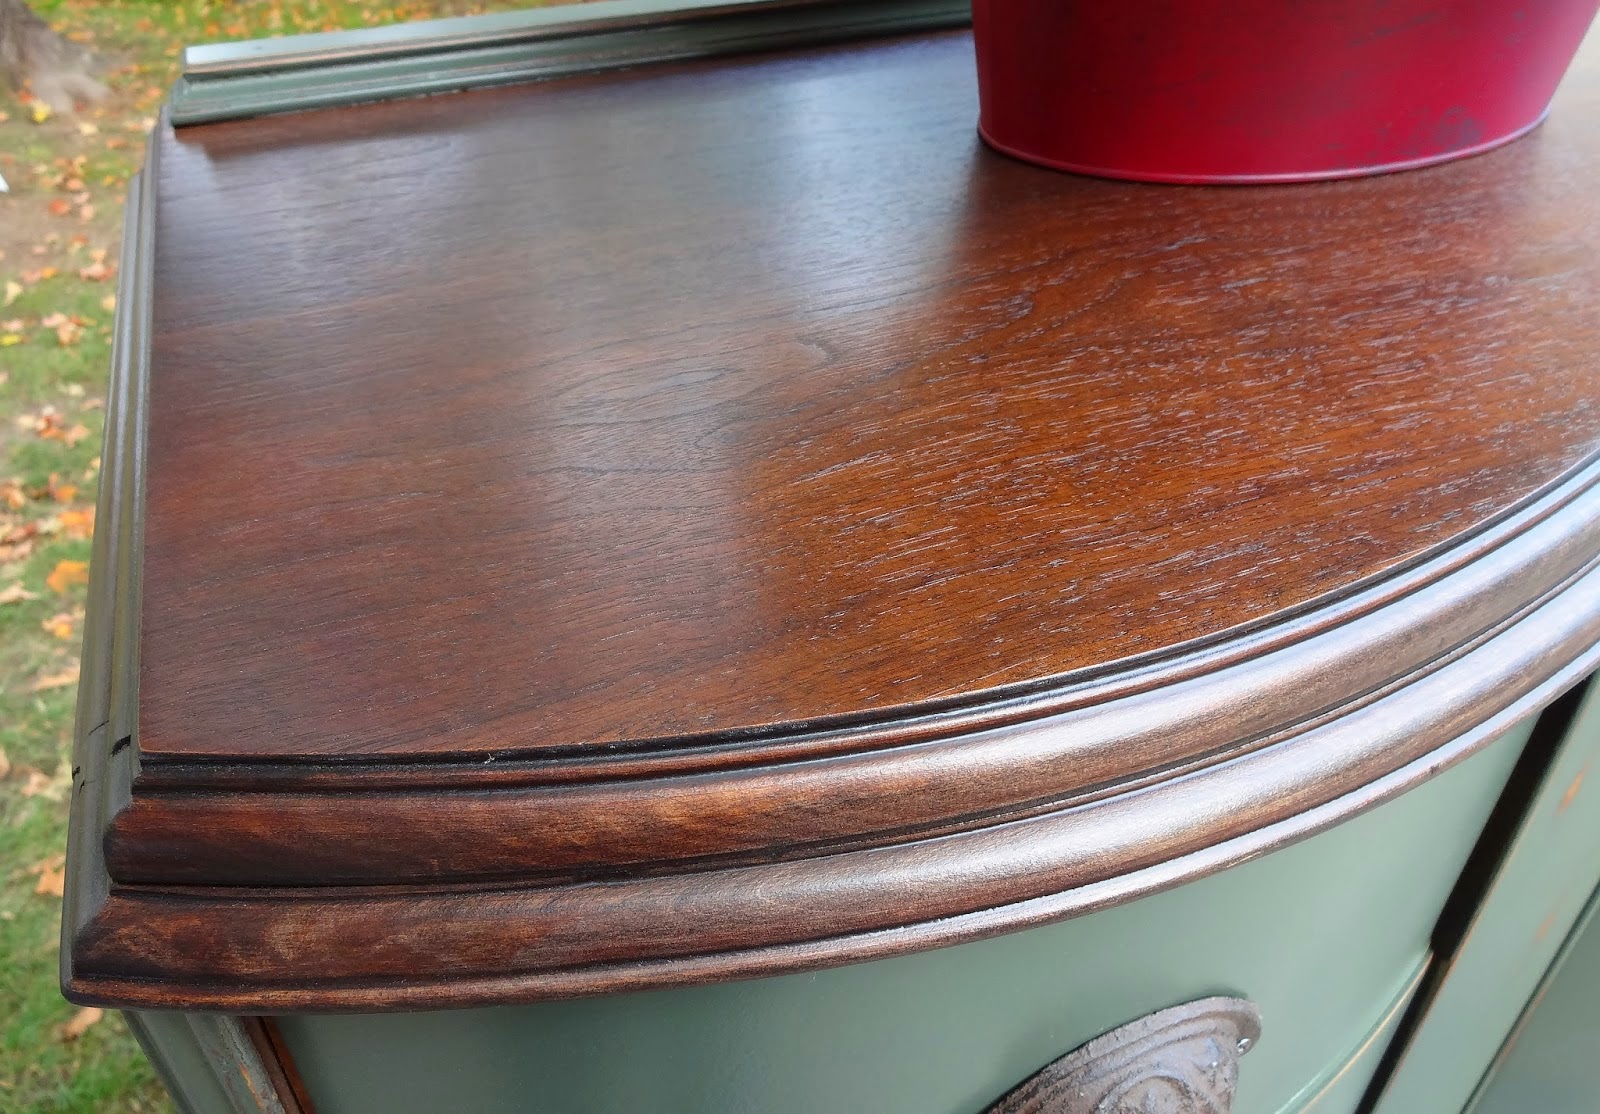
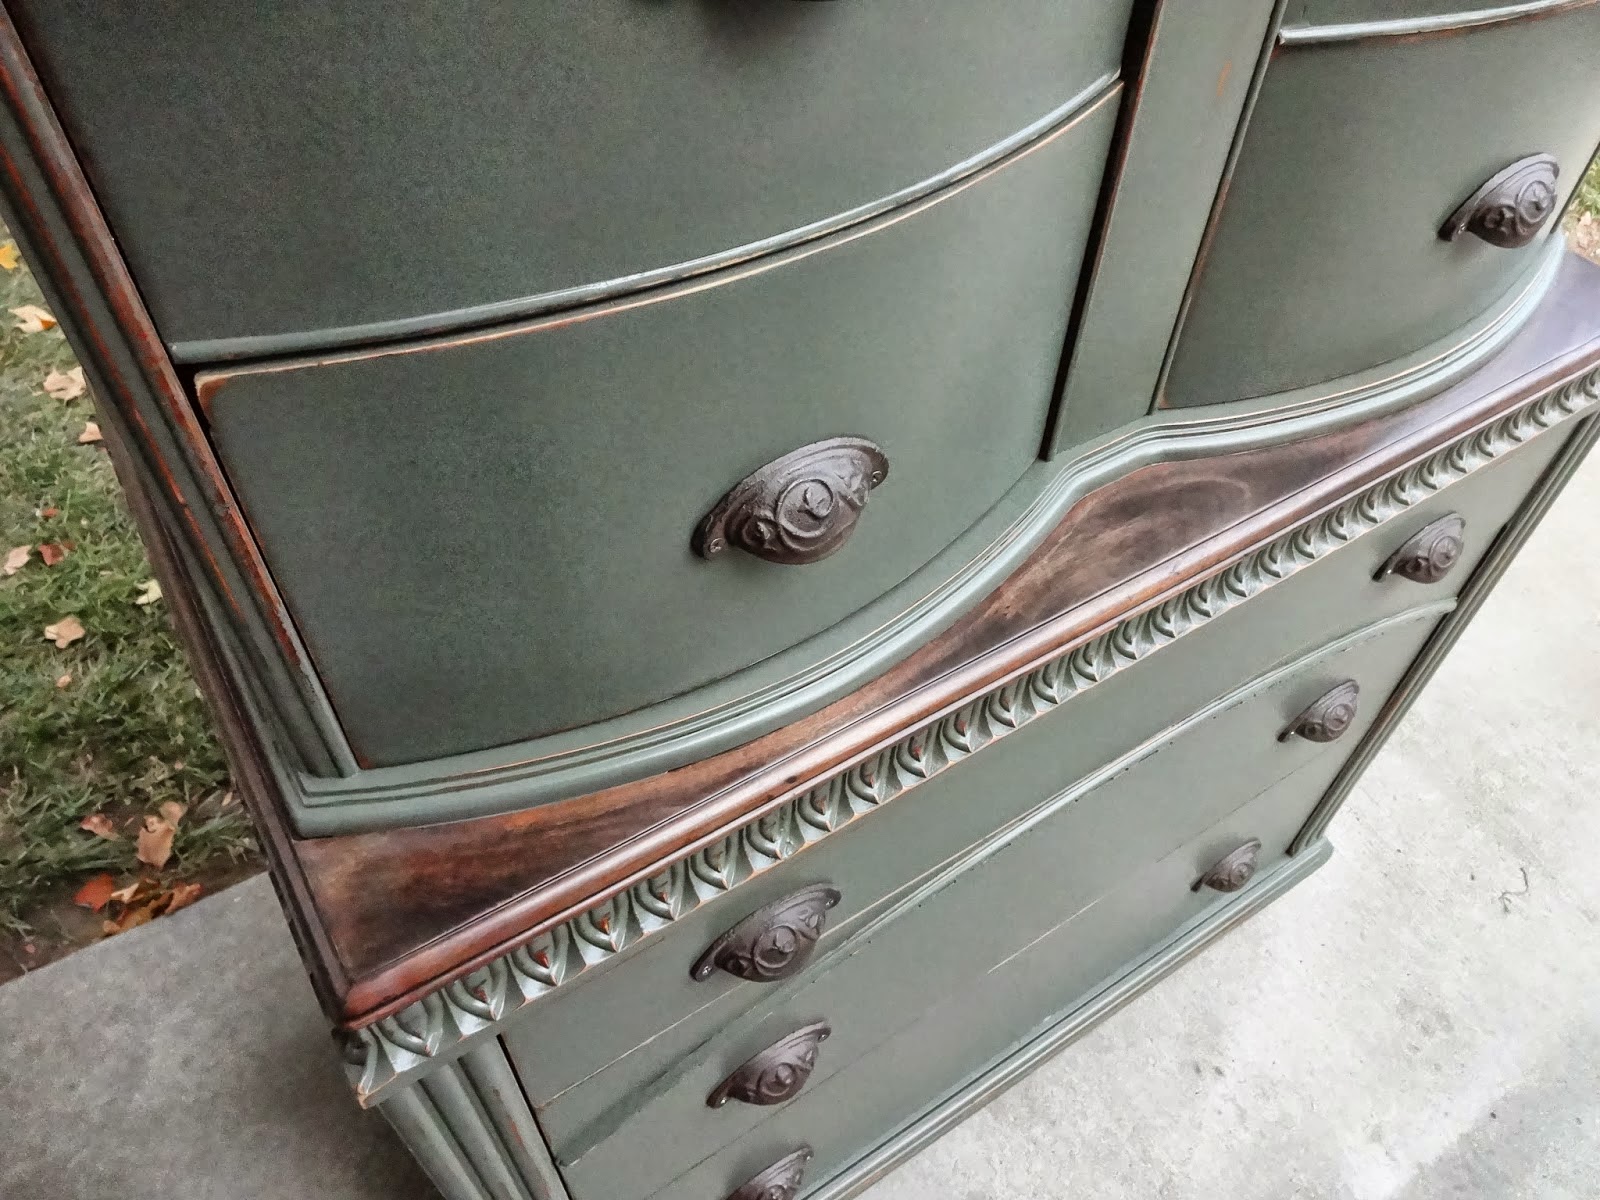
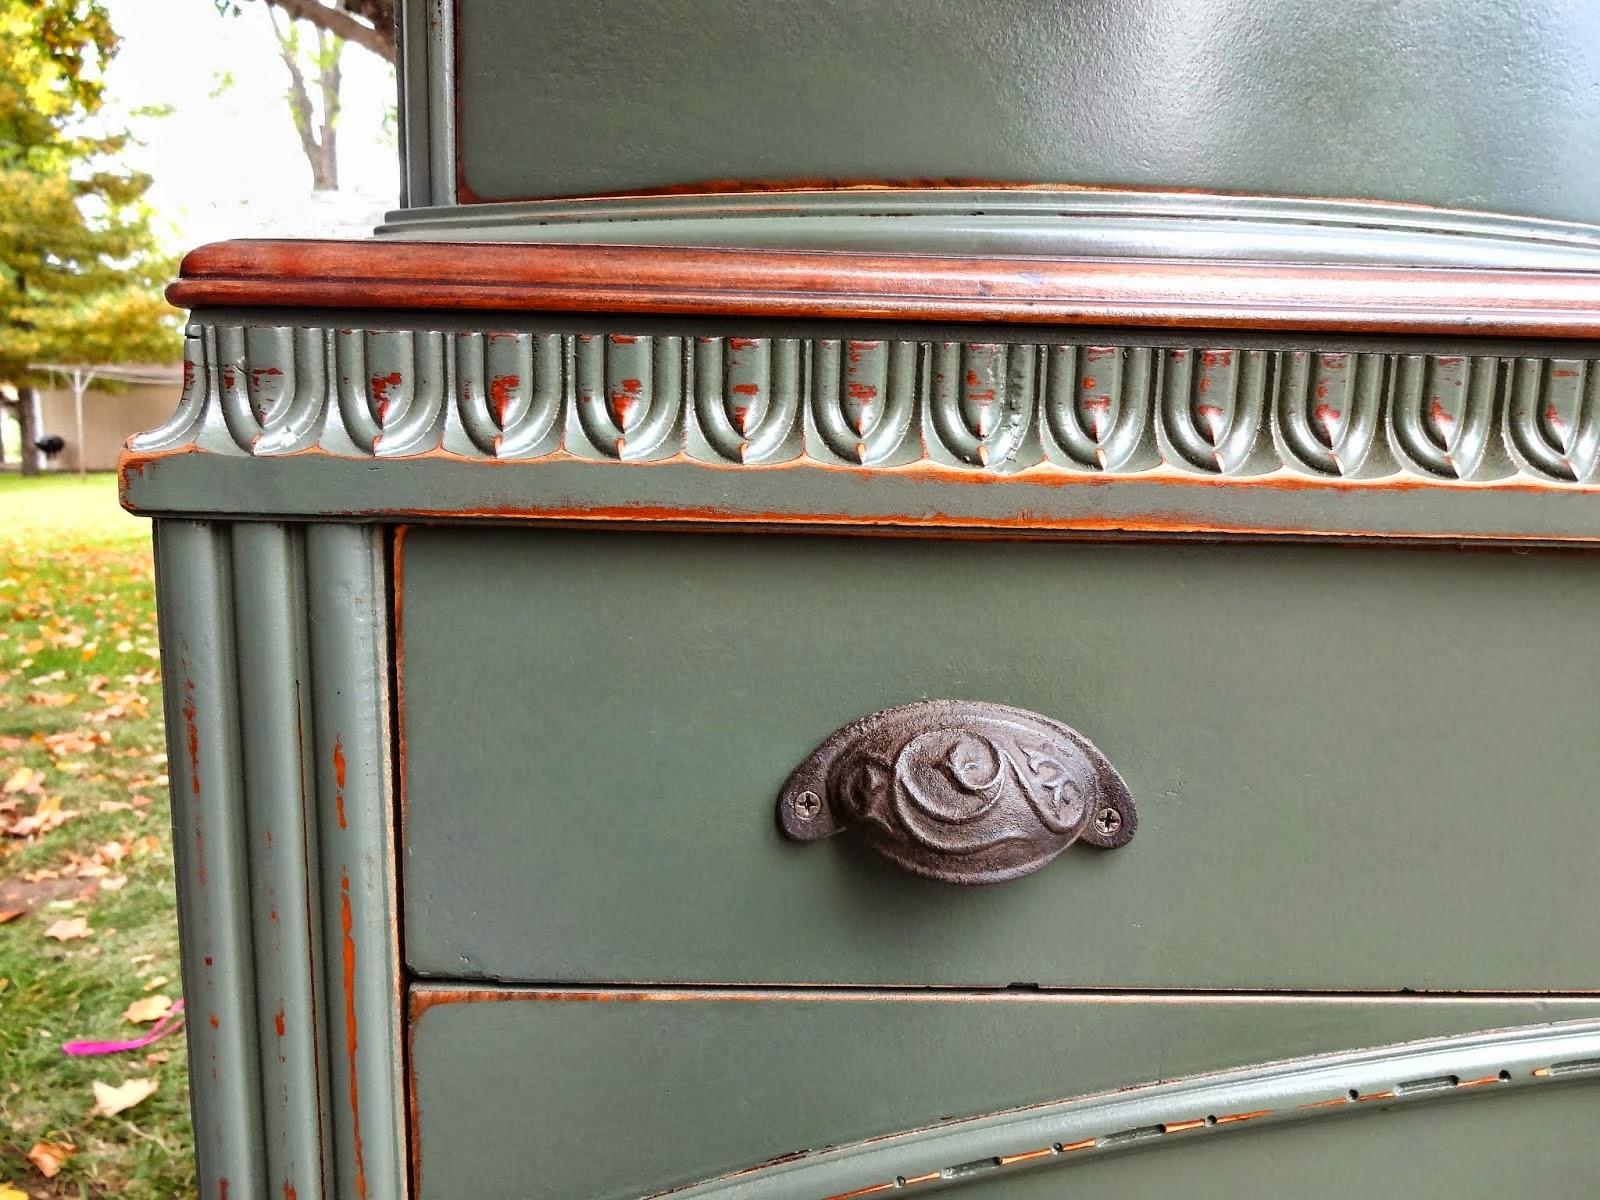
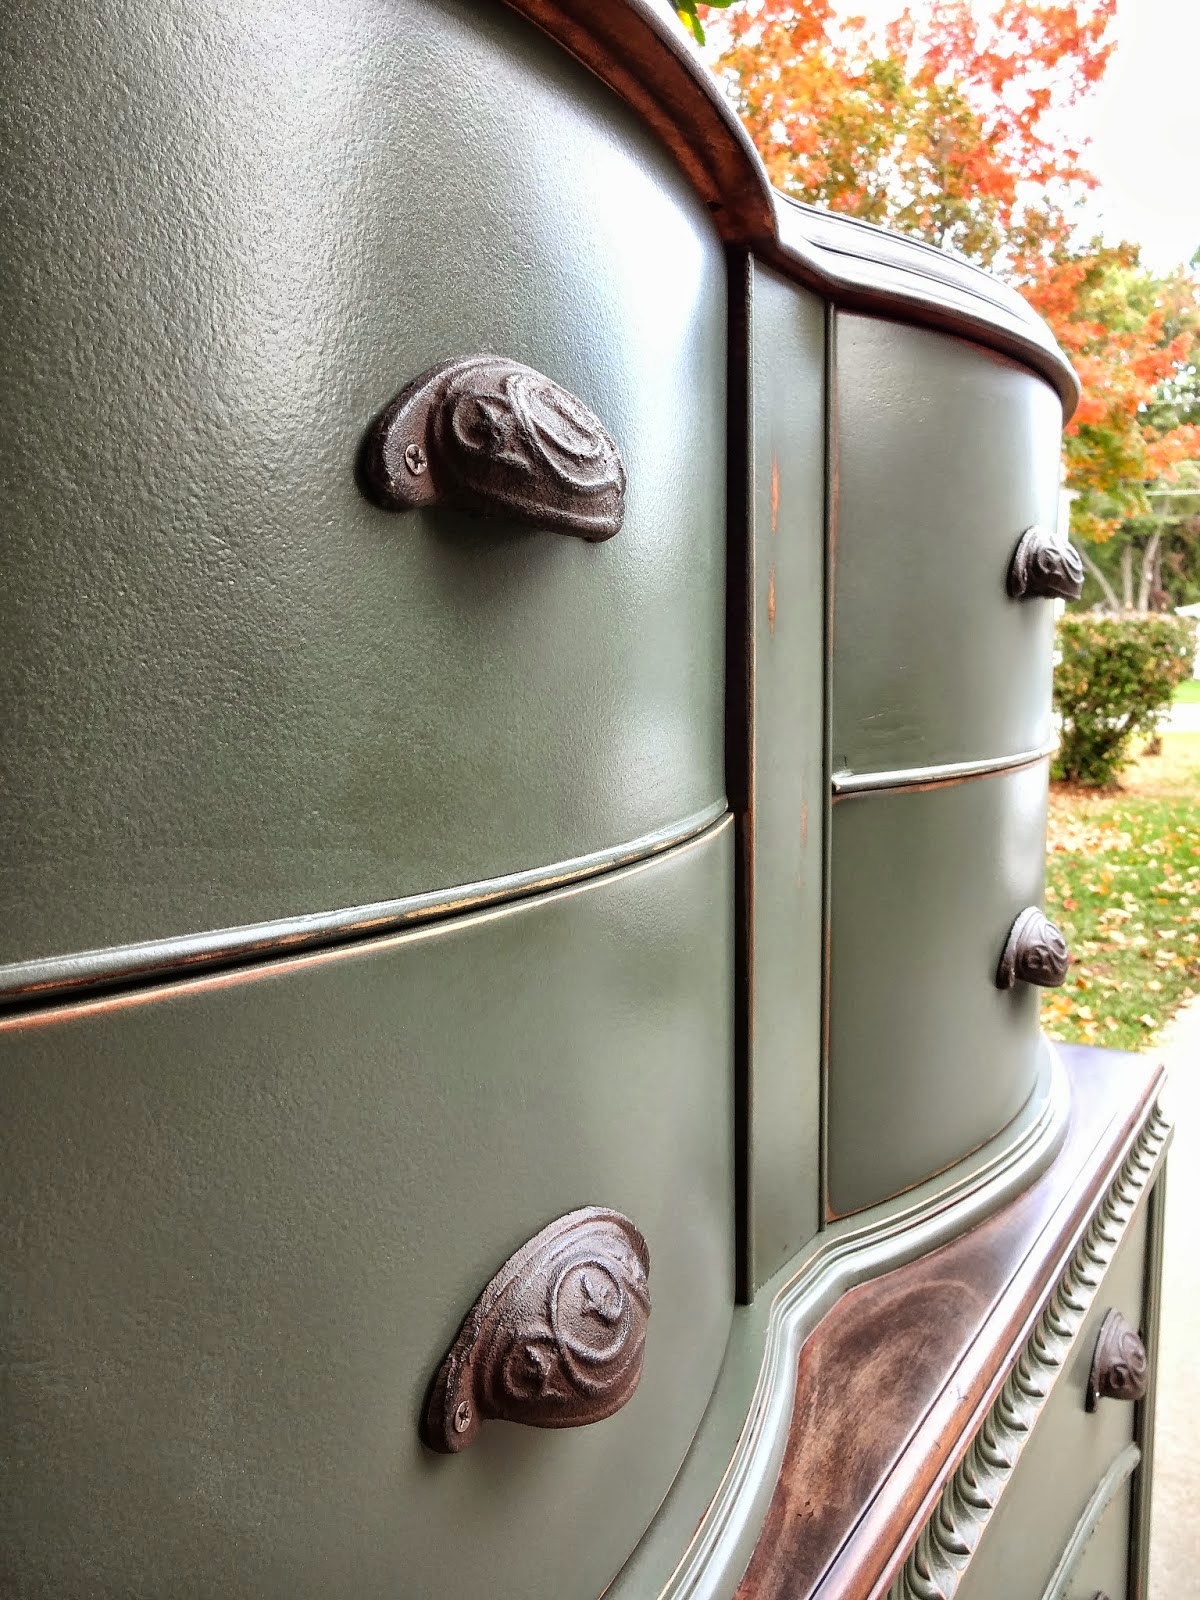
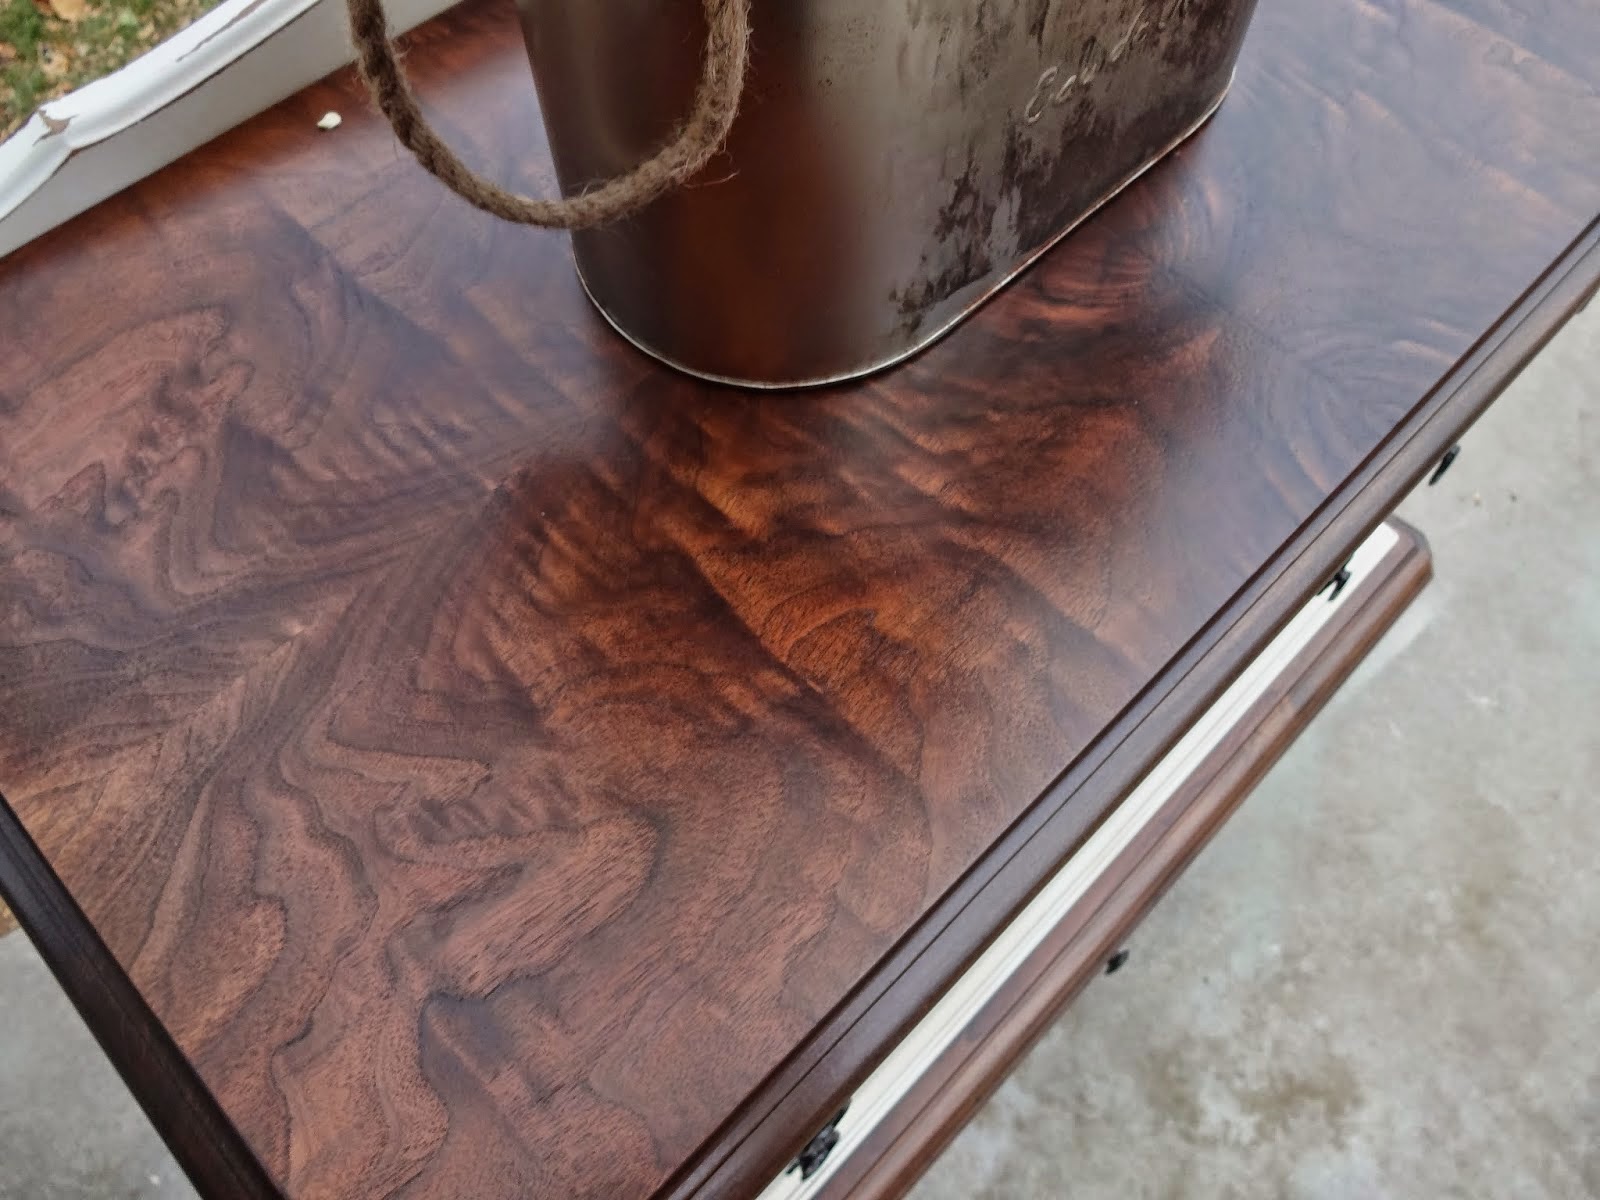
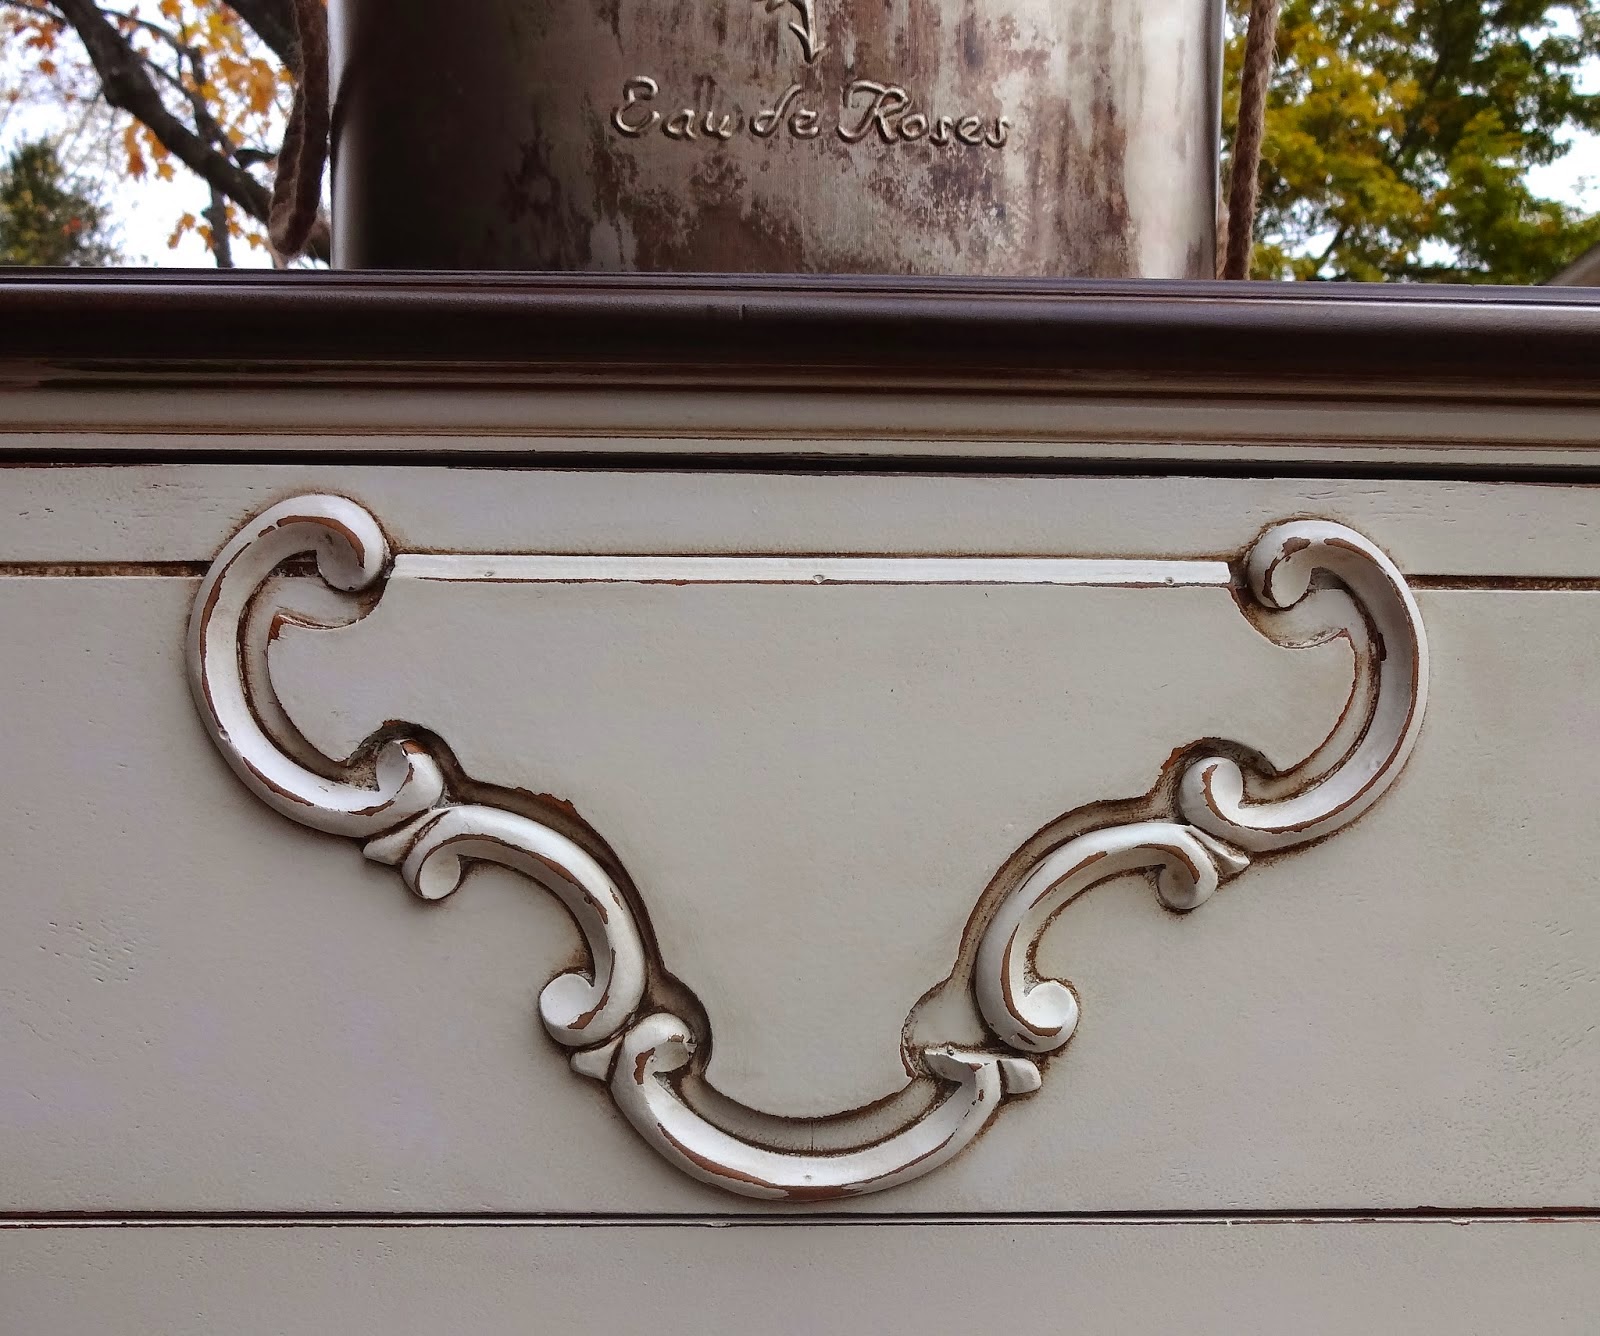
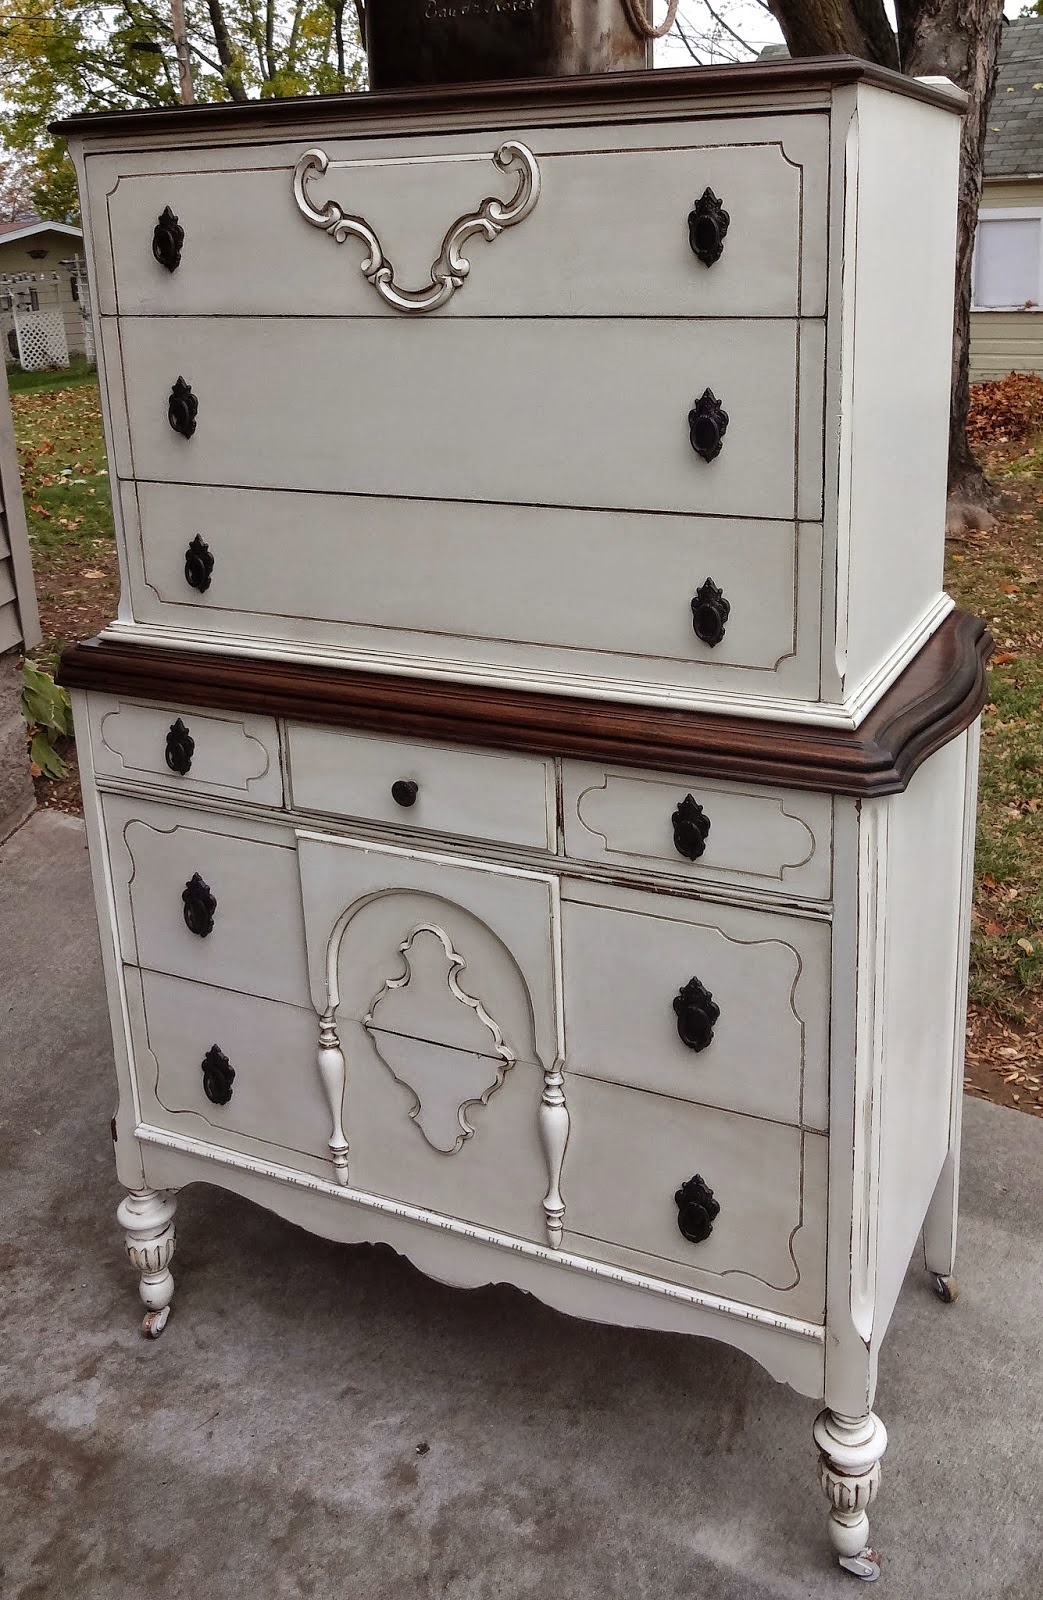
Look at this extraordinary and rare example of an old sideboard! Trapezoidal shape and convex upper facades - clearly reminiscent of female image, created once by a talented cabinetmaker! Unfortunately, his current state terribly, probably, for the last decades it was kept in some dusty shed ... Such a careless attitude towards antique furniture I'm surprised, but as we see, it happens! The front of the sideboard is decorated with veneer inlay, which emphasizes manual labor. However, the restoration of the former beauty requires too much effort, since everything external surfaces sideboards are covered with deep scratches and chips. () The only way out in this case is to sand and enamel. For such a beautiful masterpiece, Liz opted for a deep shade of mint with a hint of gray - not black, but masculine enough. The beautiful texture of the dark walnut remains visible on the top and sideboard lid. It turned out very modern and stylish!
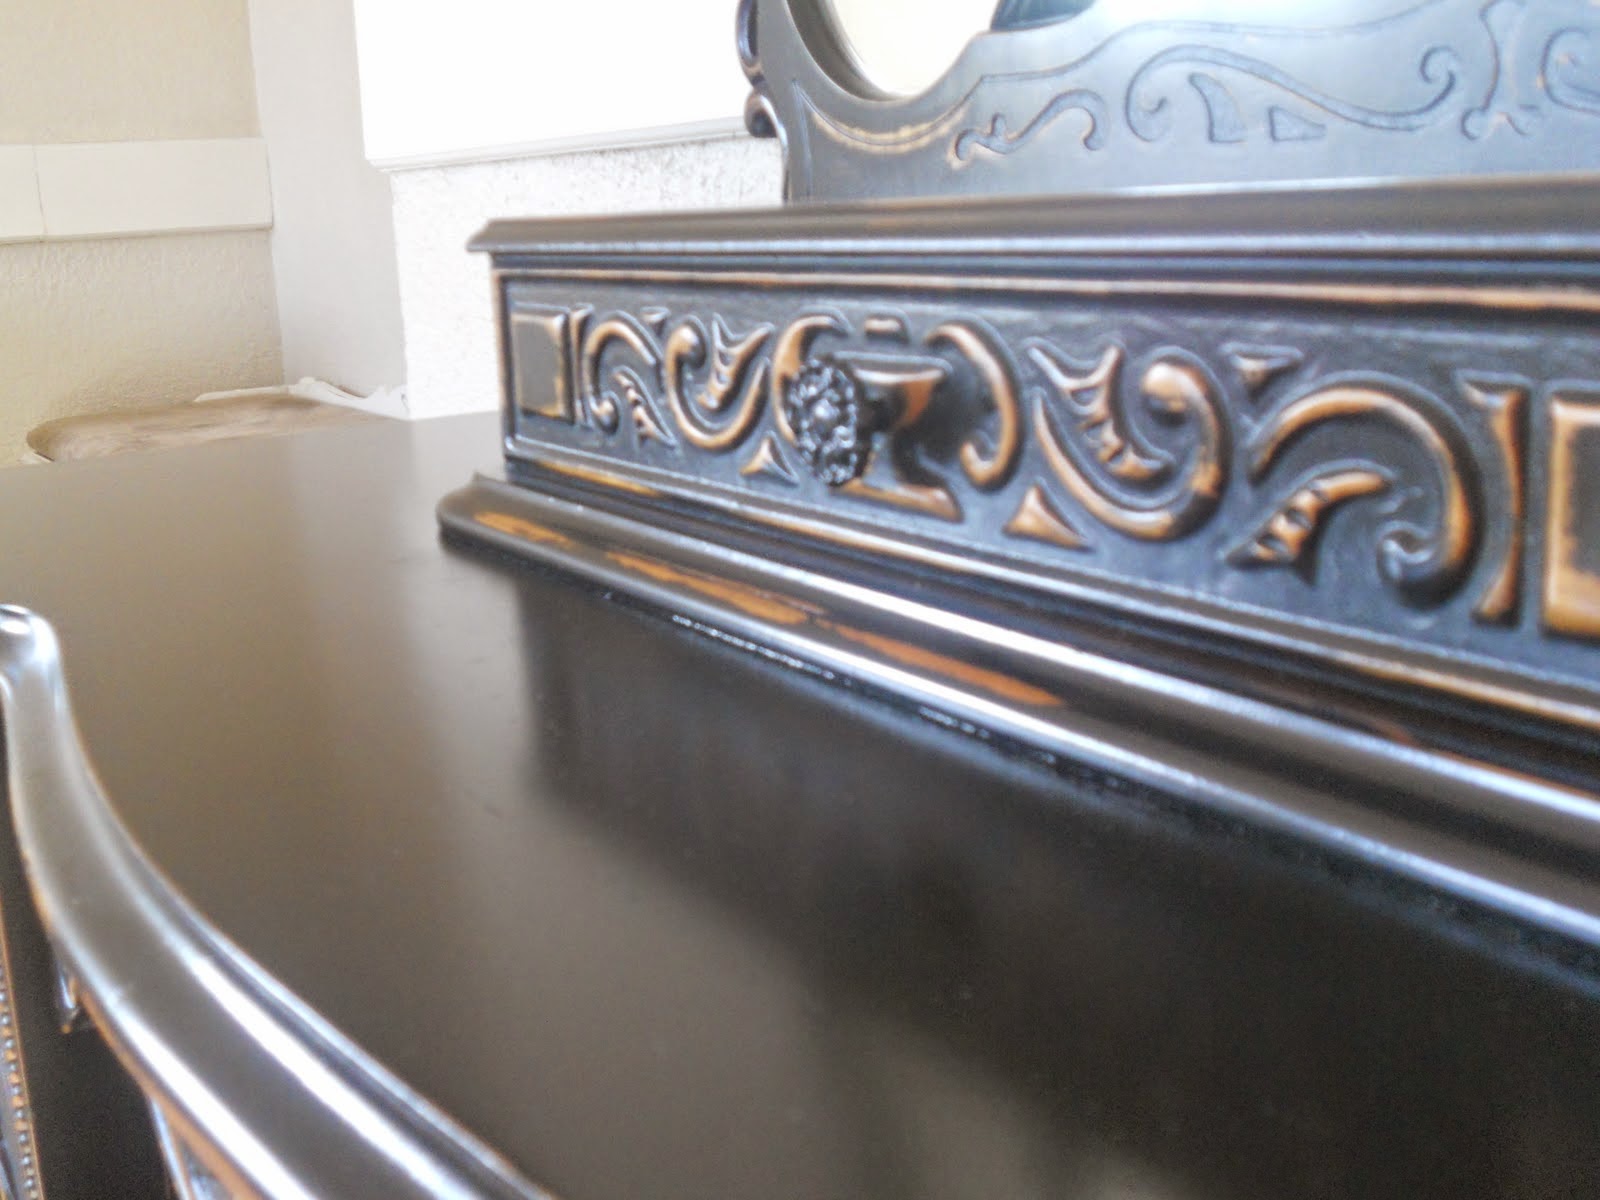
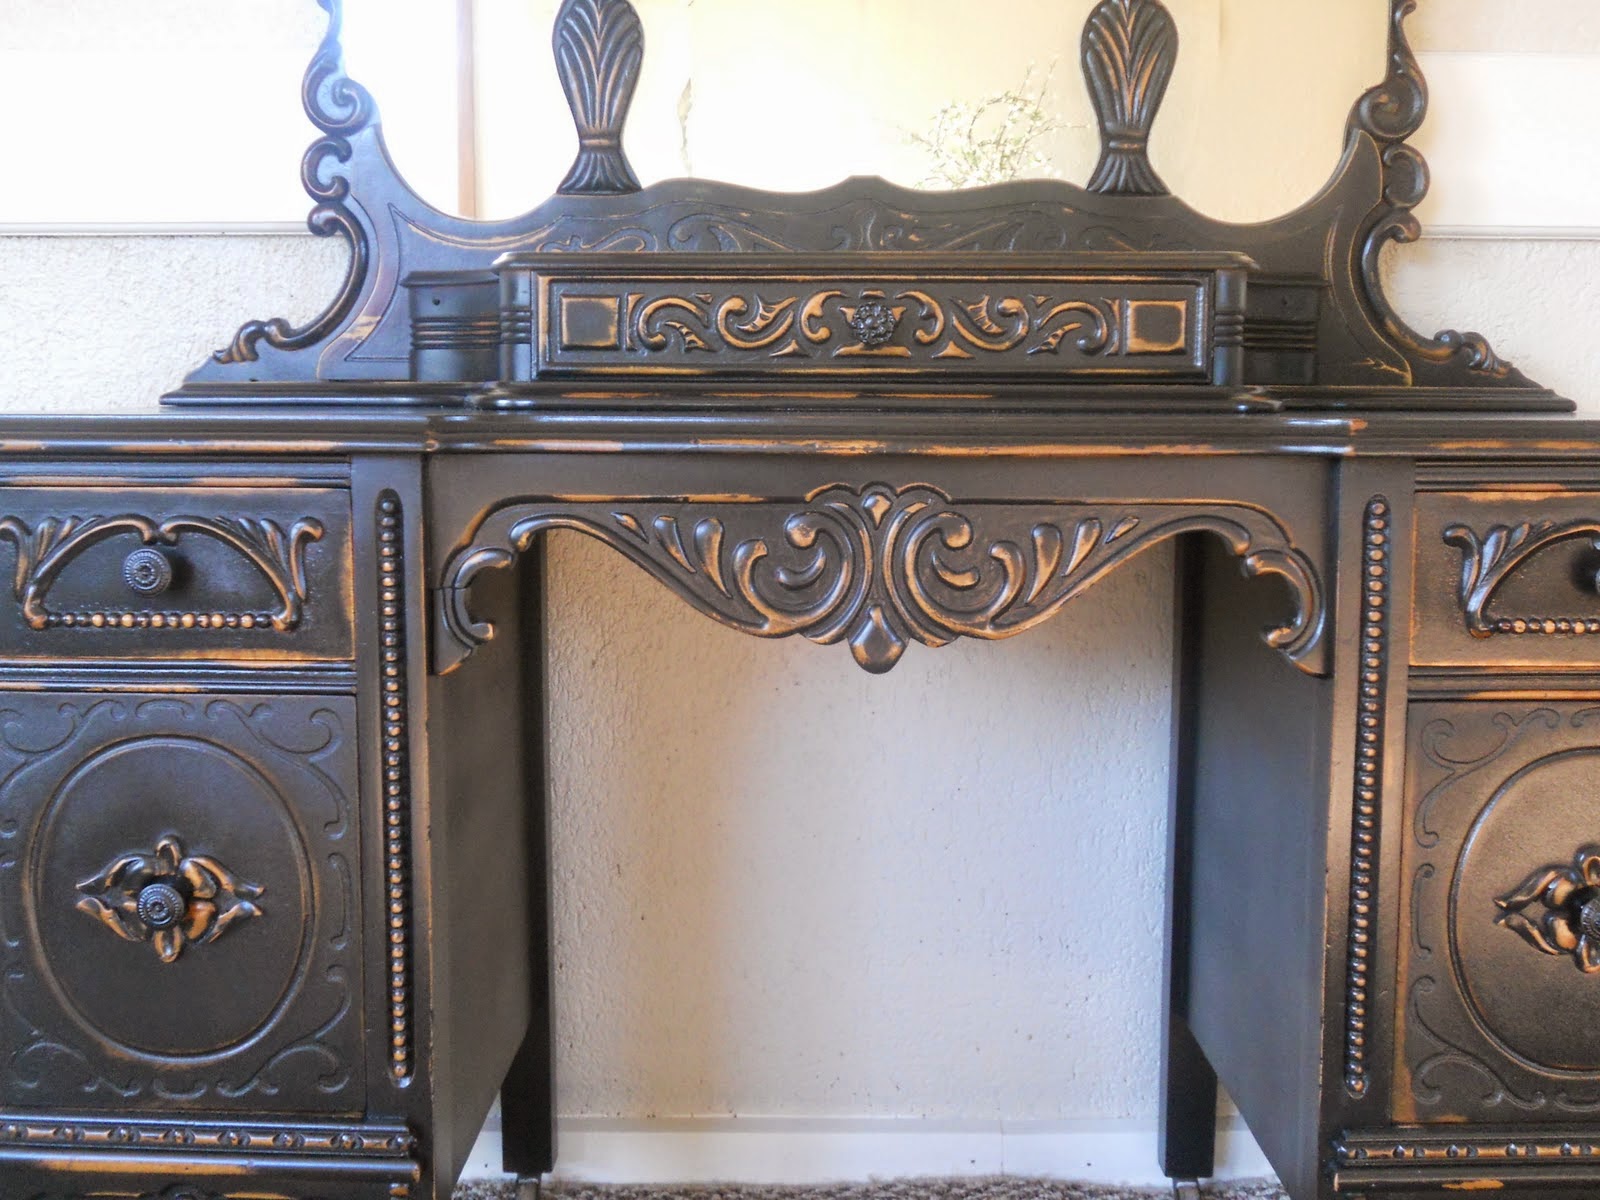
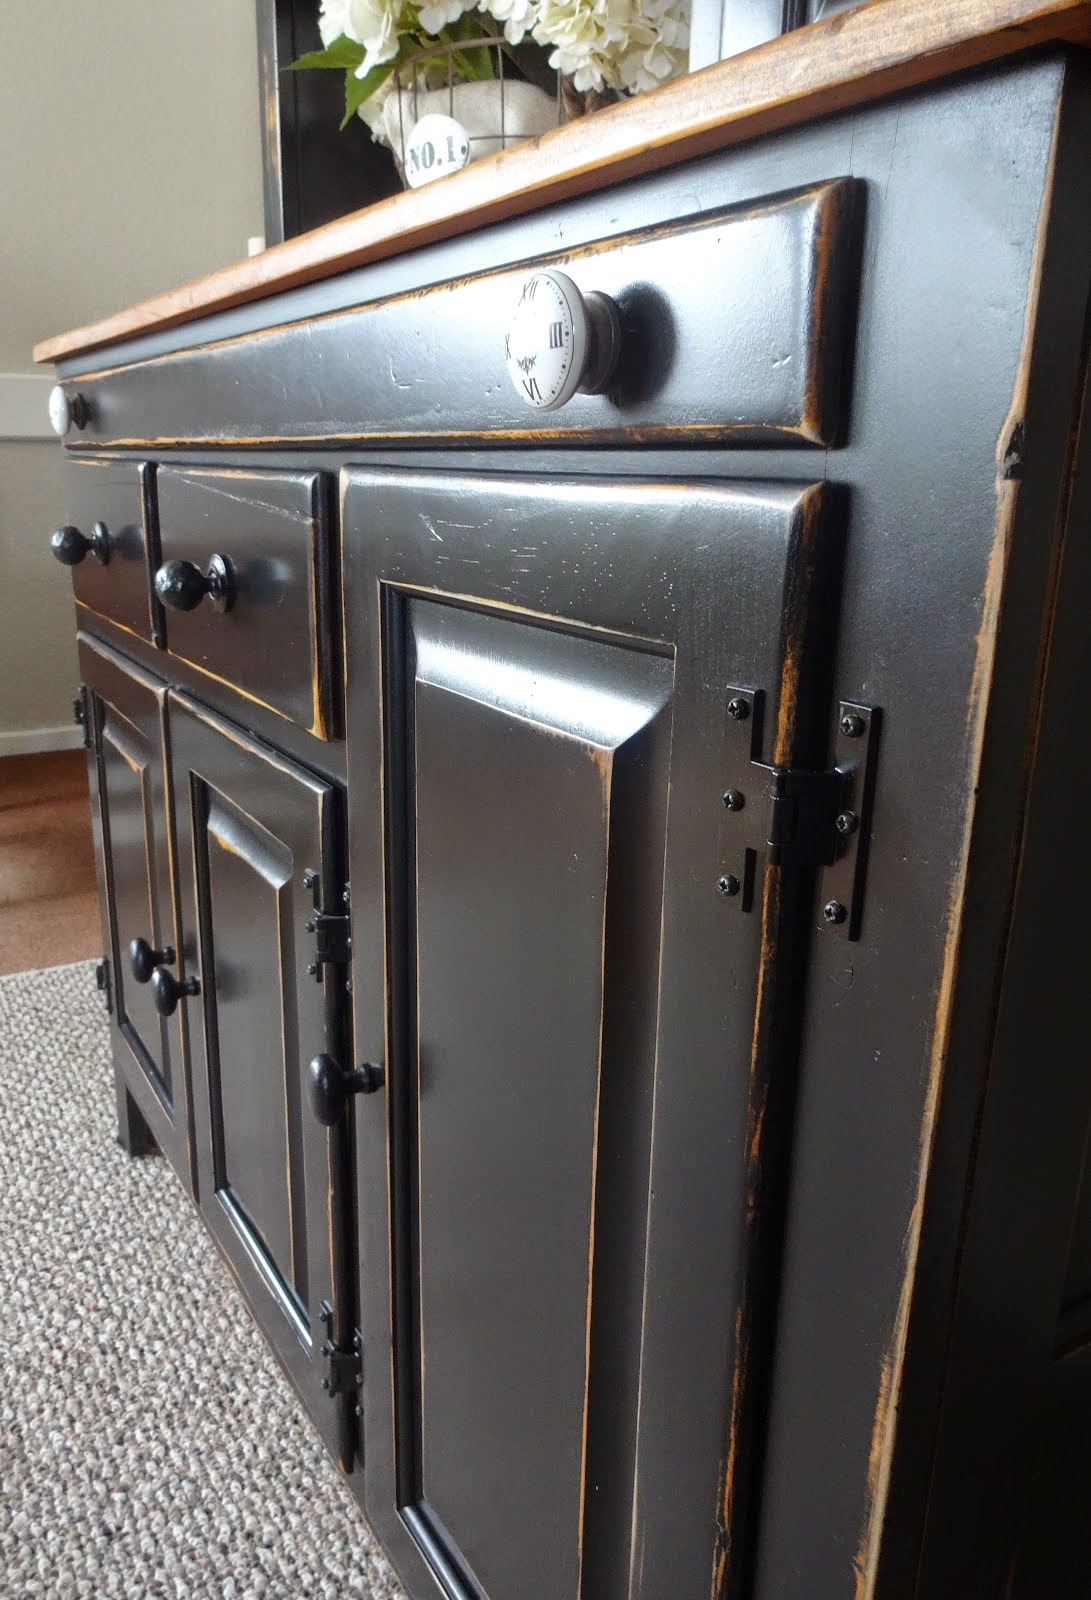
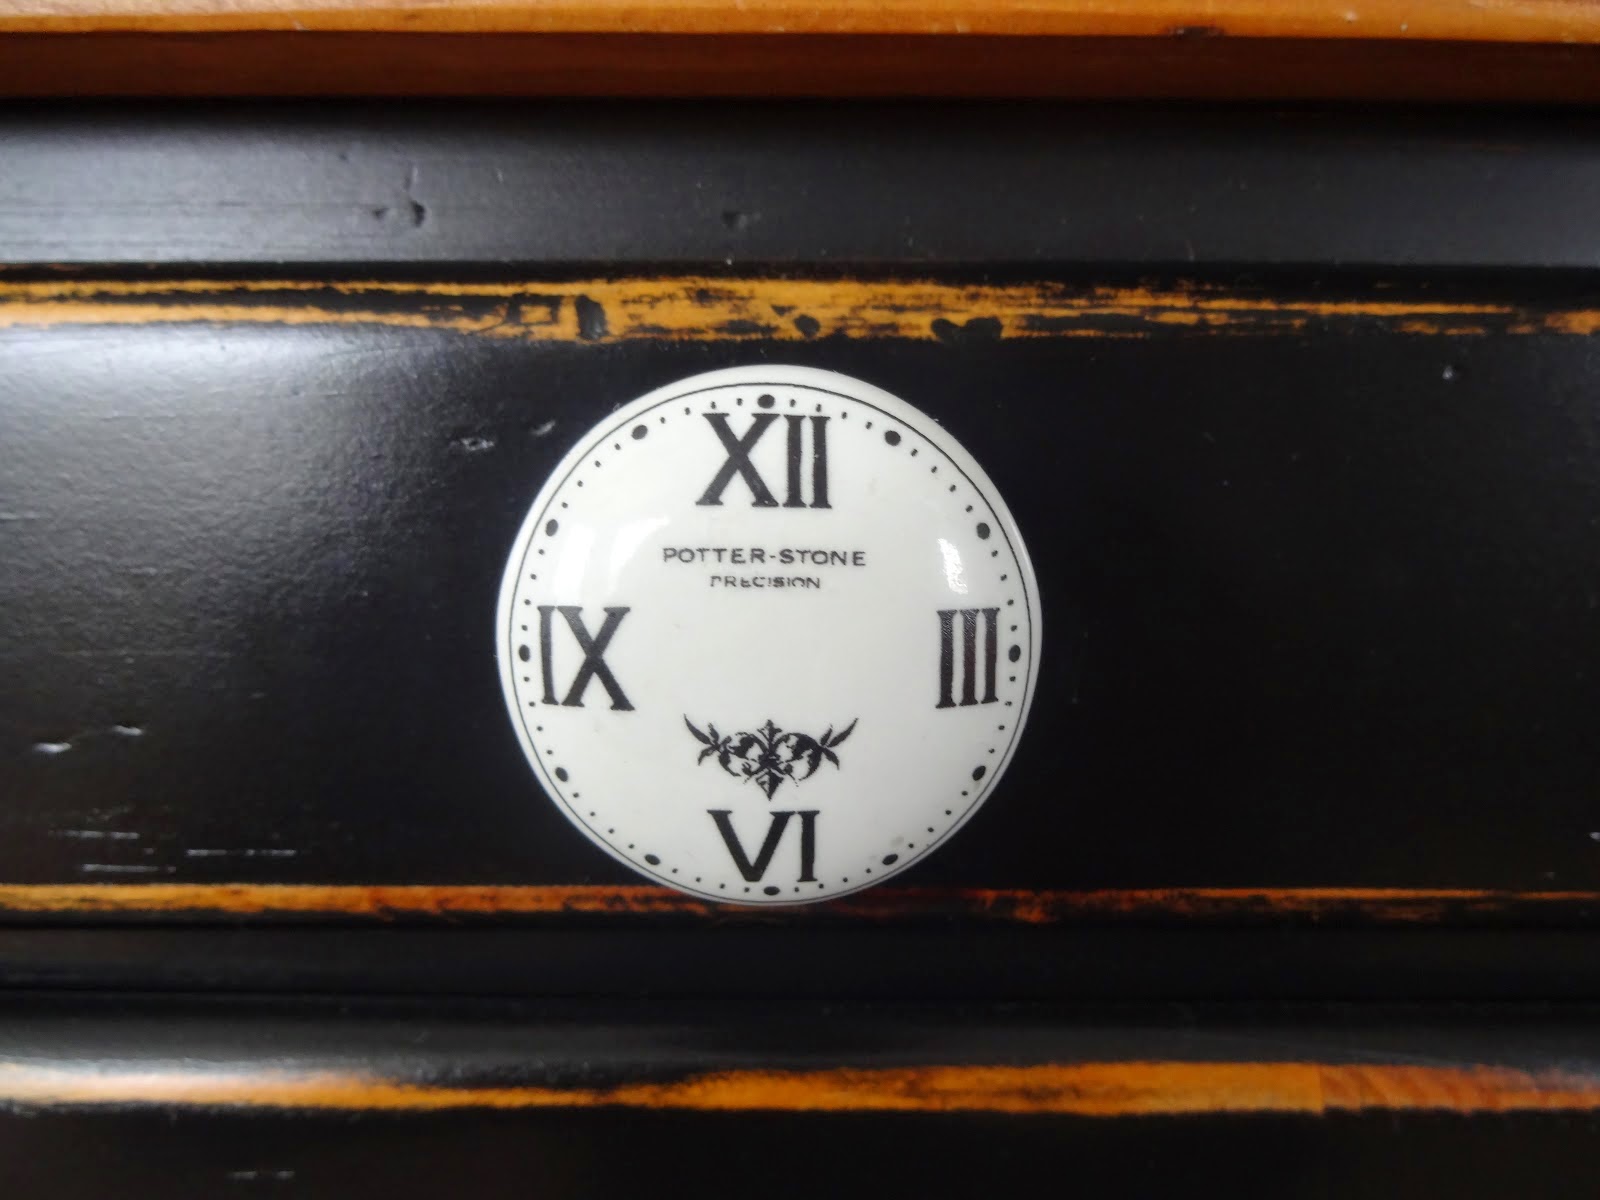
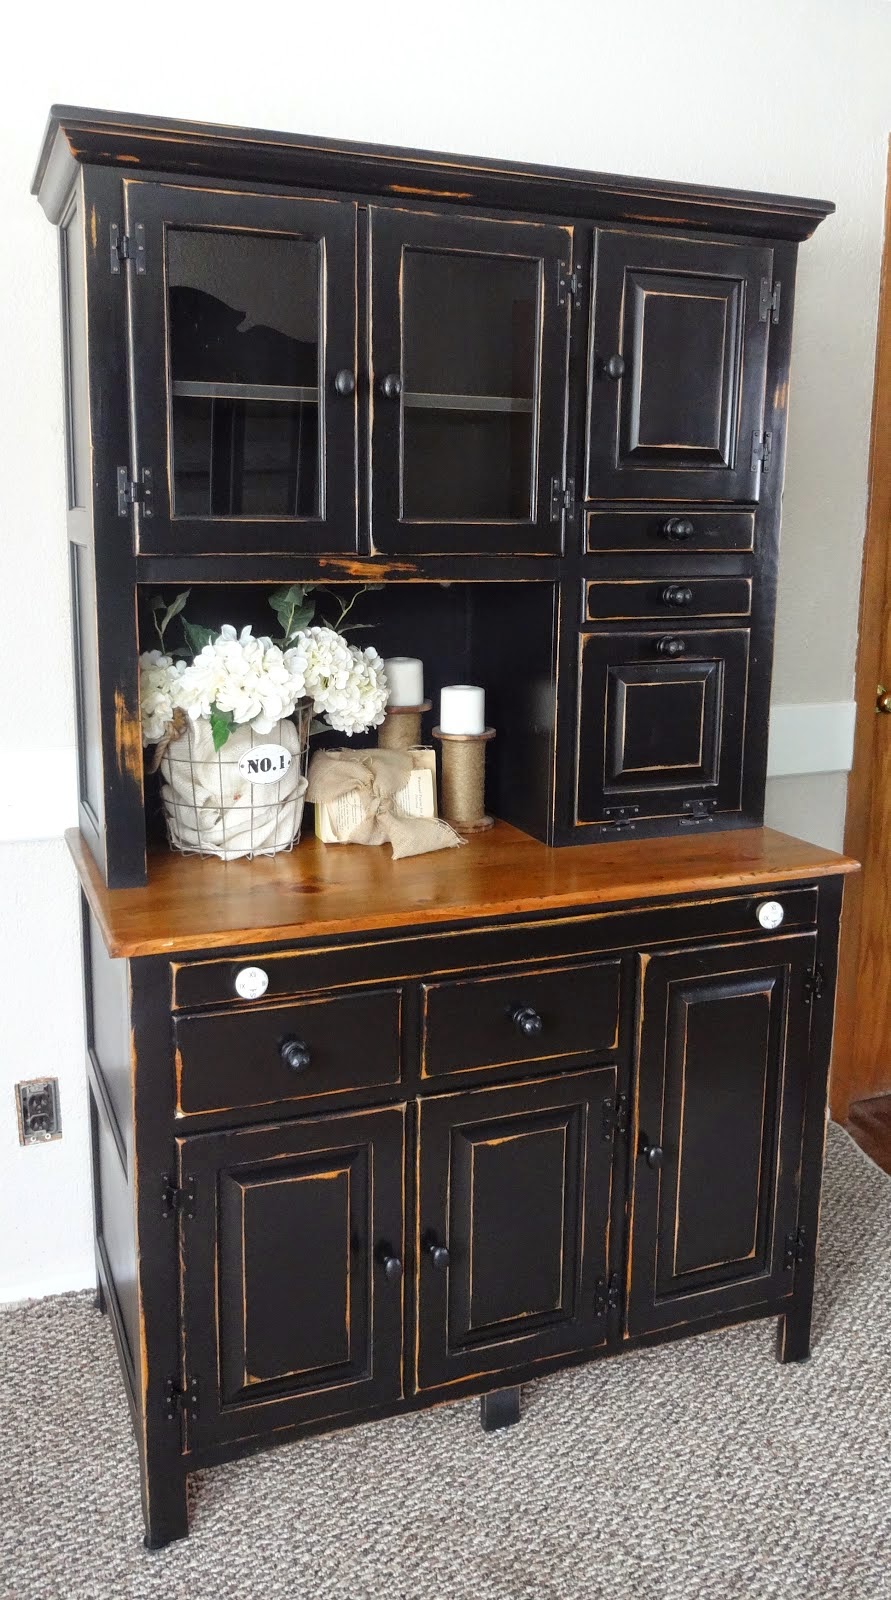
One more from pine - not as refined as the previous sample, but charming in a rustic way. Look how unrecognizably Liz transformed him! Black enamel adds a touch of elegance to the sideboard, while the worn effect emphasizes the original combination of drawers, doors and antique hinges. Delicious result, and I already want just such a buffet!


Once it was a respectable polished sideboard - a traditional piece of furniture of the 19th century. Now it has become a rarity worthy of admiration! But so that the old sideboard does not seem like a museum piece in the interior of your home, you need to give it a modern chic. This is what Liz does, restoring antique samples of past centuries.

This one delights with the skillful work of the master! It came to Liz in quite good condition, but required an update, which was still worth thinking about ... And artistic skills prompted Liz original solution. Leaving the relief details in the natural color of the veneer, she expressively emphasized their beauty with a black background. Thanks to this, the classic desk turned into something completely new.

From old wall only the buffet remained. It was a pity to throw away a convenient and favorite thing. Therefore, he avoided the fate of his brothers who were thrown into the trash. The decision was made to give it a second life. The transformation was to be drastic. Turn the classic, unremarkable, section of the German wall from the times of total scarcity, into stylish item interior.
Functional, unique, decorated in folk style reminiscent of country style, the buffet currently decorates a Moscow apartment.
buffet after refurbishment
How to make a new, exclusive, do-it-yourself out of an old sideboard
Look at step by step description from the photo on the House of Hope website.
See photos and descriptions of the main stages of work.
Important: the process is laborious and not fast. Each time it is necessary to dry all layers of paint thoroughly. Accurately and accurately perform all operations for applying decorative elements.
We will need:
- acrylic paint of the color you need
- acrylic building varnish
- stencils for drawing a picture on the doors and edging of glass doors
- masking tape narrow for drawing a picture on the side walls of our sideboard
- wide masking tape to protect glass and other surfaces
- special stencil brush
- brushes for application acrylic base and lacquering, door handles
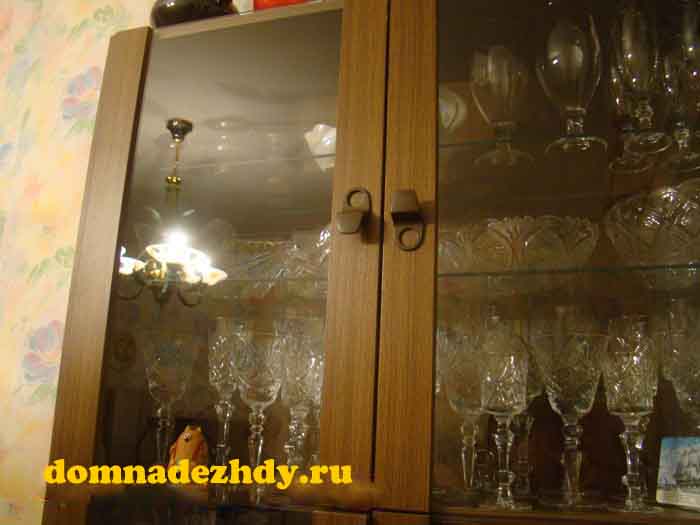
sideboard view before remodeling
This is what the buffet looked like before the makeover.
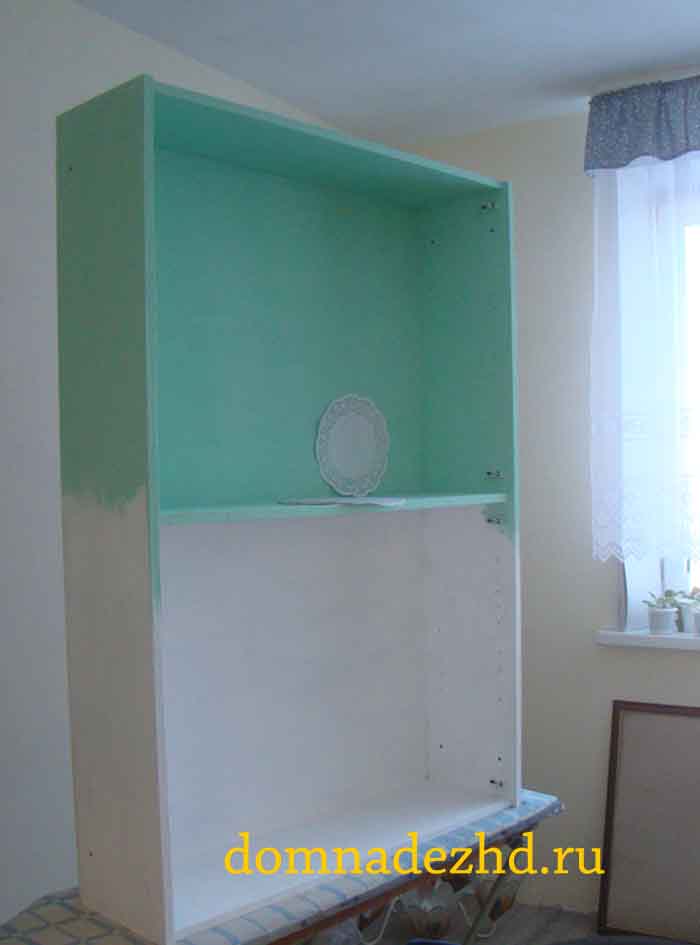
long laborious coloring
Carefully paint over all surfaces of the sideboard with a roller and brushes. Please note that at first I dismantled the entire sideboard: I removed all the doors, metal parts, the glass was sealed with a wide masking tape. There was one undisassembled skeleton of the cabinet.
So we paint over it first with white acrylic paint. I got the desired color for myself by mixing white paint and ocher color paint. Got ivory color. It is necessary to cover the walls several times. Always wait patiently for complete drying.
I then mixed white acrylic paint and turquoise to my intended mint color. This will be the main color of the new sideboard. I carefully painted all the surfaces with the resulting mint color.
The same fate befell all previously removed doors and shelves.
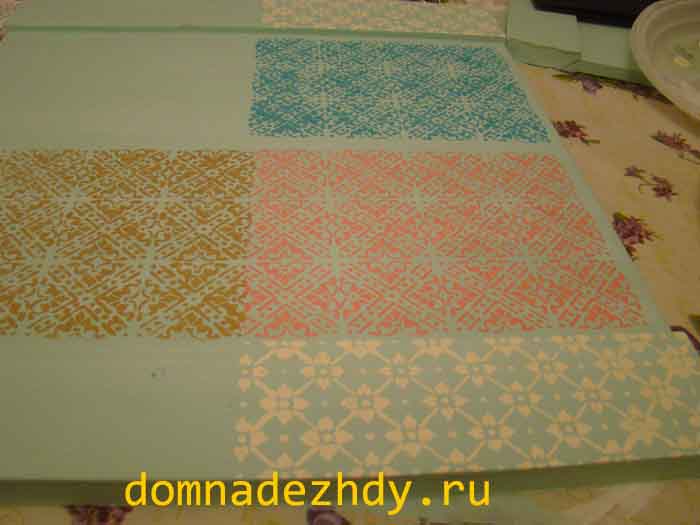
through the stencil we decorate the doors
Since, according to the idea, the doors should be decorated with a stencil pattern, I thought in advance about the combination of colors and the location of the stencils on the surfaces prepared for this operation.
Very carefully, with a stencil brush on the superimposed stencil, I applied the selected paint. A sponge is not suitable for this purpose, as streaks under the stencil may form and the work will be spoiled.
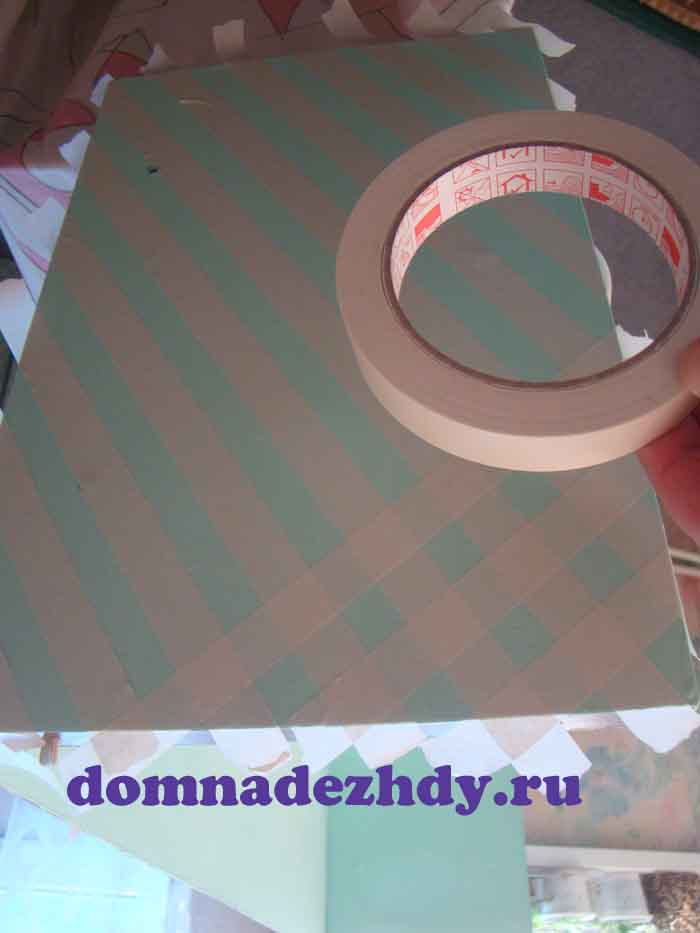
we make a "lattice" on the sidewalls of the cupboard
I glued the shelves and side walls with masking tape to form a lattice. I went over the resulting stencil with ivory paint.
The result is a lattice of light pastel colors.

finished work
As you can see, the pattern of the side grilles and the stencil pattern on the glass and lower one-piece doors are in perfect harmony with each other.
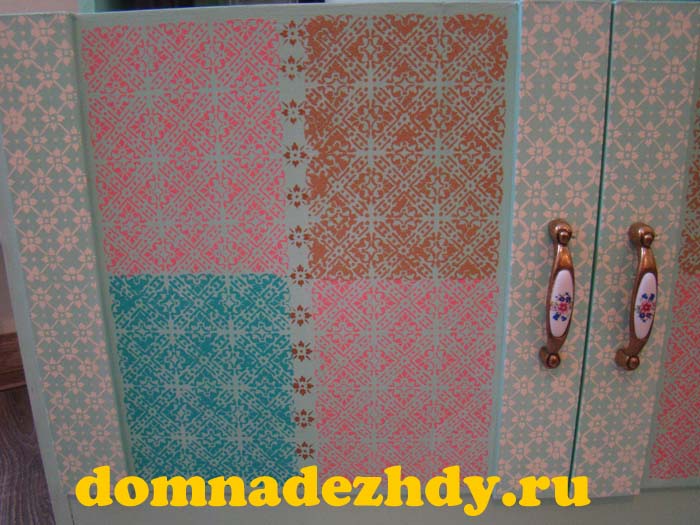
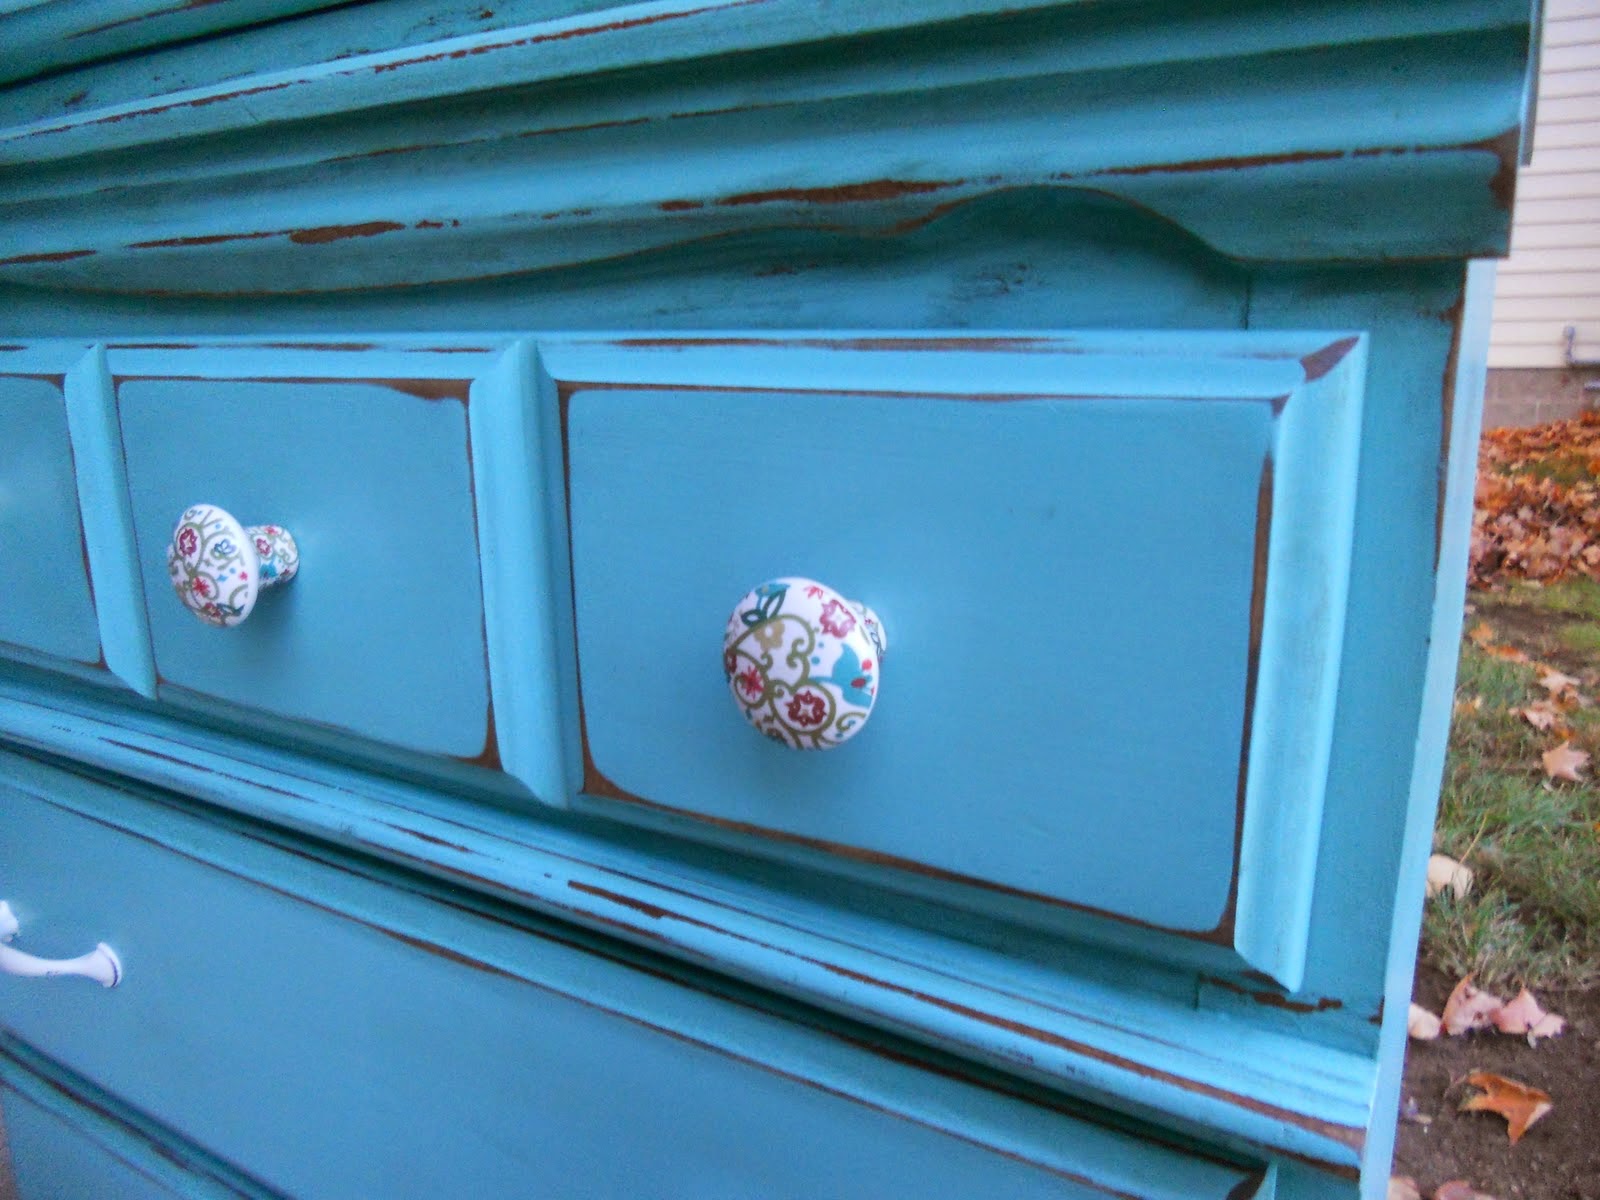
We attach the selected handles to all doors. Carefully mark the places for fasteners and just as carefully drill holes for the mounting bolts for the handles.
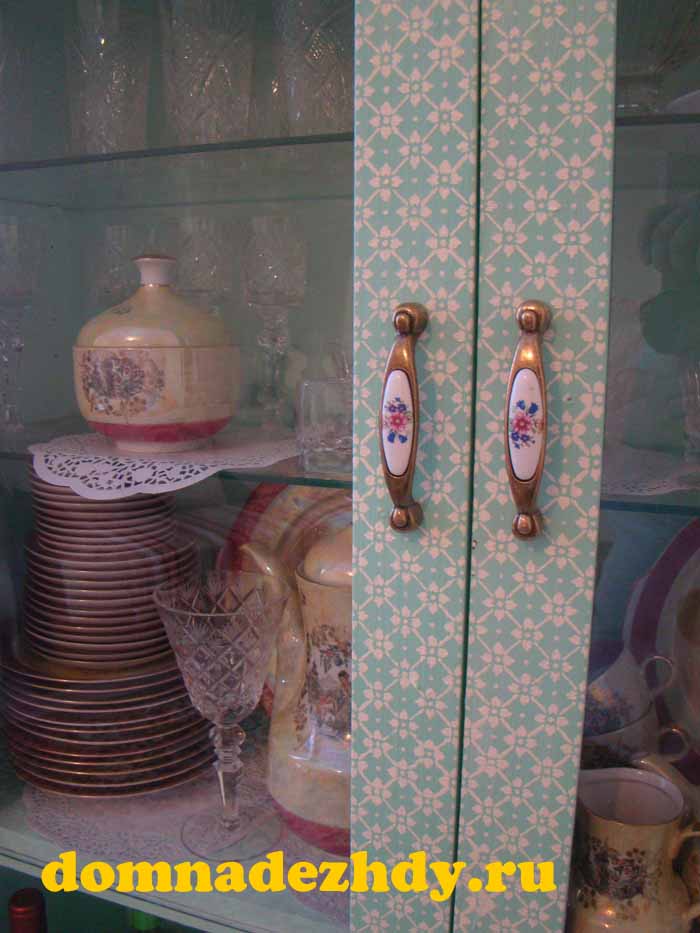
Now our old buffet from the German headset looks like this.
This is a real gem in the interior of the apartment. A special, author's buffet, transformed by one's own hands, radiant with the care and warmth of hands invested in it.
Note: Upstairs, on a refined sideboard, there are decoupage plates that I make myself.