How to make carved solid wood chairs. How to make beautiful carved wooden chairs for your home with your own hands
Carved elements in the life of peasants in the past performed not only a decorative function. Often, ornaments were applied to platbands, pillars on the porch and furniture in the house as a talisman against all kinds of evil that filled the world of the ancient Slavs.
Carved furniture serves as a rich decoration for the interior in the Empire or Baroque style.
Hand-made carved furniture modern master, it's just a beautiful element of the interior. Artistic carving woodworking, which only a professional can handle, is also used in classic interior, and in Baroque or Empire style design. To decorate his own home, a novice carver can use various techniques for working with wood, accessible even to a person without experience.
Main types of thread
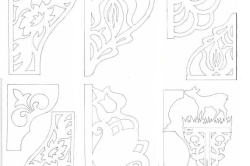
Figure 1. A sketch is transferred from paper using a pencil to wooden surface furniture.
According to the technique of execution, there are several main types of carving:
- flat-notched contour and geometric;
- openwork slotted (cut);
- flat-relief;
- sculptural.
The differences between them lie in how the design is applied to the wooden surface and in how the finished product looks. Thus, contour carving involves deepening the contour of the ornament with chisels and different shapes stings Depending on this, the grooves can have a rounded or acute-angled bottom. But in any case, the drawing will be a contour deepened into the surface.
Geometric carving involves creating an ornament from individual elements triangular in shape, connected to each other. The simplest peg element is performed in the following sequence:
- insert the toe (sharp corner) of the jamb knife into the top of the triangle 2-3 mm;
- lower the knife along the side of the triangle, cutting through the wood to the bottom right vertex;
- align the cutting edge of the knife with the cut line, move it towards you so that the toe moves to the lower left vertex of the triangle;
- pressing away from you, chop off a piece of wood.
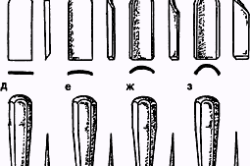
Tools for wood carving: a, b, c, d - straight, sloping, medium, steep chisels; d - cranberry; g - cerasic; z - knife-jamb.
By connecting the pegs in different sequences, more complex elements are obtained. Together with contour geometric wood carving, it is available to any beginner who wants to try his hand at a new hobby.
Openwork carving is done using a jigsaw and involves removing wood between the details of the design, forming a lace pattern. If you have a tool and the skills to work with it, this type of carving can be used to decorate the head of a bed or create carved shelves and screens.
Flat-relief and sculptural wood carvings require skills and are quite difficult to do with your own hands. In the first case, the master is required to have good spatial imagination, the ability to understand what the resulting relief design will look like, and the ability to select wood from the recessed parts of the pattern so as to realize the plan. In the second case, sculptural compositions or figurines of animals and people are created from wood. This also requires skill and artistic talent, so it is not accessible to everyone.
Return to contents
Tools for work
To make carved jewelry you will need the following tools:
- chisels with different tip shapes and different sizes;
- blunt knife;
- jigsaw;
- drill;
- pencil, carbon paper, clear varnish.
The best material for carving is dense, homogeneous wood that does not split during work: linden, birch, oak.
You can start learning the art of carving using ready-made cutting boards from the store or pick up smooth boards without knots or damage. With a little practice, you can move on to making furniture.
Return to contents
Furniture installation

To begin with, you can make a shelf on the wall using the technique openwork carving. To do this, you first need to draw on paper the shape of the side of the shelf with a pattern. The ornament is thought out so that each of its elements is connected to neighboring ones or to the contour at least at 3 points.
You can use ready-made ideas from Fig. 1. or create your own version of the drawing based on them. Enlarge the diagram using scaling (by cells) and transfer it to the tree.
Drill a hole for a jigsaw file with a drill and cut out those parts where there should be through gaps in the openwork. Sand the edges of the ornament with sandpaper. For horizontal shelf surfaces, use a thin board or plywood 5 mm thick.
The same detail will serve back wall shelves. If desired, it can also be decorated with carvings, the pattern of which will repeat the openwork of the sides. A technique that is suitable for this purpose is contour or openwork wood carving.

Figure 2. To make a screen in chinese style It is better to use hard wood.
A more difficult work to perform is a carved screen in the Chinese style. It is assembled from individual parts with ornaments, which are attached with glue to a frame of 4 bars. All structural elements and general form the products are clearly visible in Fig. 2. For carved parts, the openwork carving technique was used. The ornaments cut with a jigsaw are complemented by contour (frame around the dragon and its image, floral ornament, circles) and geometric carvings (squares on the panel with the dragon). Parts of the screen connected furniture hinges on self-tapping screws.
To make a bed, you need to purchase blanks for its frame: a board for the frame and carved elements, thick plywood for the backs, a block for the legs. Do-it-yourself wood carving on the headboards of the bed can be made using the openwork technique, complemented by contour carving, as in the example described for making a screen.
You should start with a design on paper, which will include the size and shape of the backs, the design of the thread and the location of its elements. The sawn openwork parts are glued to the plywood. Its sheet can be pre-cut along the contour of the edge of the design if you plan to make curly carved backs.
To create an openwork composition, you will need to make cuts in the right places and in plywood base. The middle part of the head of the bed can be made soft by covering it with foam rubber 2-4 cm thick and covering it with fabric. In this case carved elements will be located only along the edge of the back, forming a carved frame.
By treating your work with care and attention, carefully performing operations during carving and assembling furniture, you can, even without having special education and furniture maker skills, to create beautiful things for the interior of a house or apartment with your own hands. And with experience, such a pleasant hobby as wood carving can easily turn into a source of income.
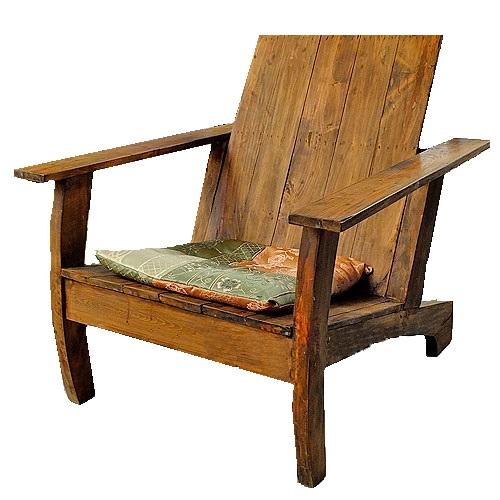
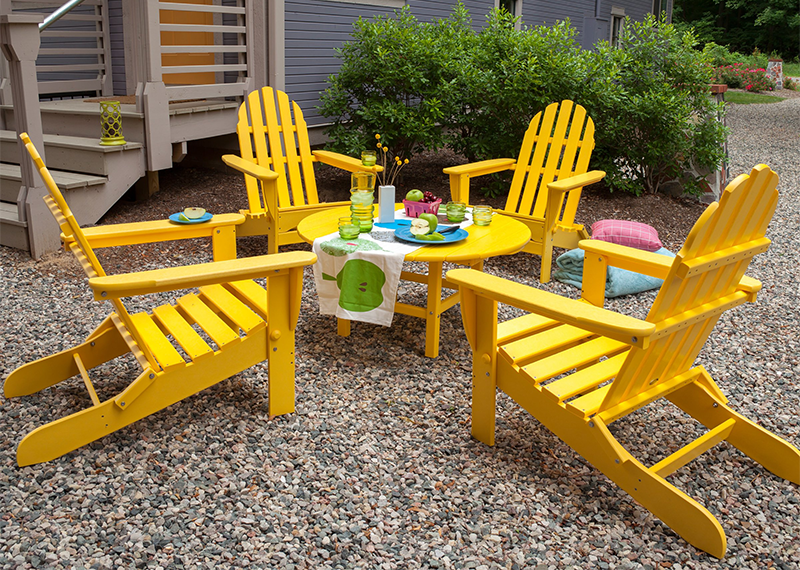
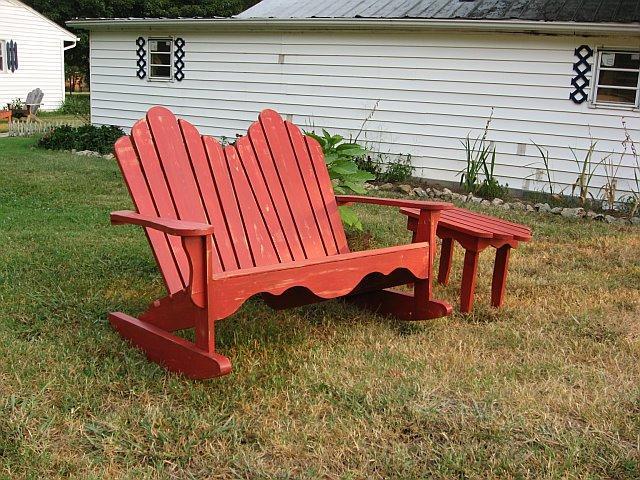
Make yourself comfortable. On a cult chair. And contemplate the beauty of nature. The Adirondack chair is a symbol of luxurious and comfortable country life. You don't even have to buy it - now you can do it wooden chair for the cottage and home with your own hands!

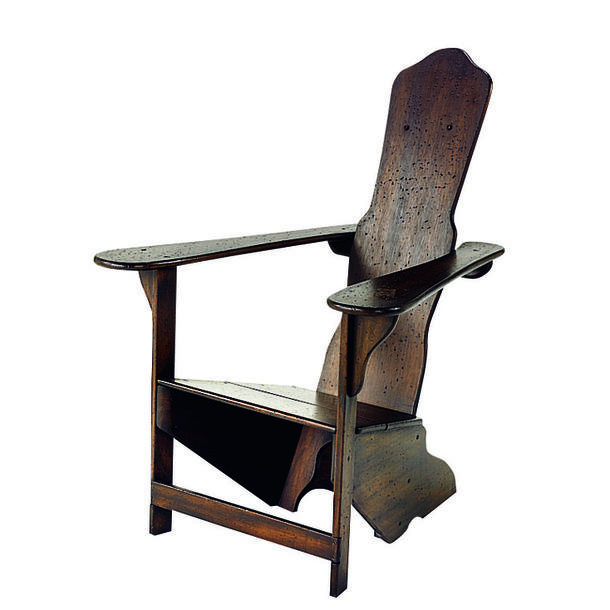
Furniture as a cult: the legendary Adirondack chair
Sitting on an Adirondack chair, American fishermen slowly fish from the Hudson River, sitting on it, drinking cool cocktails in Haiti, businessmen tired of the hustle and bustle, European aristocrats reclining in this chair, enjoying the sunset on the Cote d'Azur. And so it has been for more than 110 years.
![]()
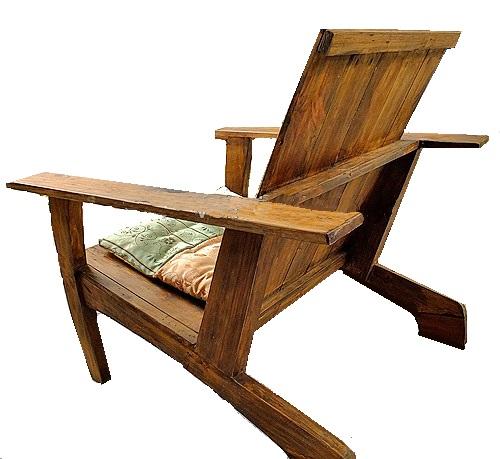
Today, this comfortable chair is used all over the world, but only those who know its history stroke the wood of its wide armrests with special trepidation and admire its thoughtful design.
One day back in 1903, a certain Thomas Lee went on vacation to a beautiful place in the Adirondack Mountains in New York State. Enjoying life in summer house surrounded by nature, he one day realized that what he needed was a comfortable chair. So that you can take it to the river or just sit near the house. So that there is somewhere to put a cup of coffee or a glass, so that you can sit in it with a pillow more comfortably and for a long time. And he made himself such a chair... from 11 rough boards found in the barn.
When his friend, a local carpenter, saw this simple furniture, he appreciated it. And even in 1905, he quietly received a patent and put the chair into production, and for the next 20 years he sold comfortable dark brown and green chairs throughout the country. Gradually, the Adirondack began to be copied all over the world.

Jokes aside, interior designers today continue to admire this chair. Reinterpreted designer models of the same “Adirondack” from Gino Levi-Montalcini, Gerrit Rietveld and many other designers are known.

Today we will try to make an Adirondack chair with our own hands!
To make a designer chair for a summer house, you will need
Prepare materials and tools:
- boards 6 meters: thickness 25 mm, width 14 or 15 cm - 2-3 pcs.;
- wood screws 40 mm - packaging;
- wood screws 70 mm (for perpendicular connection of boards) - packaging;
- drill;
- drill ∅ 3 mm;
- screwdriver;
- carpentry clamps (preferably);
- square;
- roulette;
- meter ruler.
It’s great if you have a jigsaw, a circular saw and an electric plane at home, but if you rarely do carpentry work, just order a cut from a workshop (often such workshops operate at construction supermarkets).
As for the boards, everything is very conditional: you can make everything from the same ones, or you can take a board 1.5-2 cm thick for the back and seat, but for the legs and lower crossbars you can take boards up to 7 cm thick. You can generally take boards from old pallets.
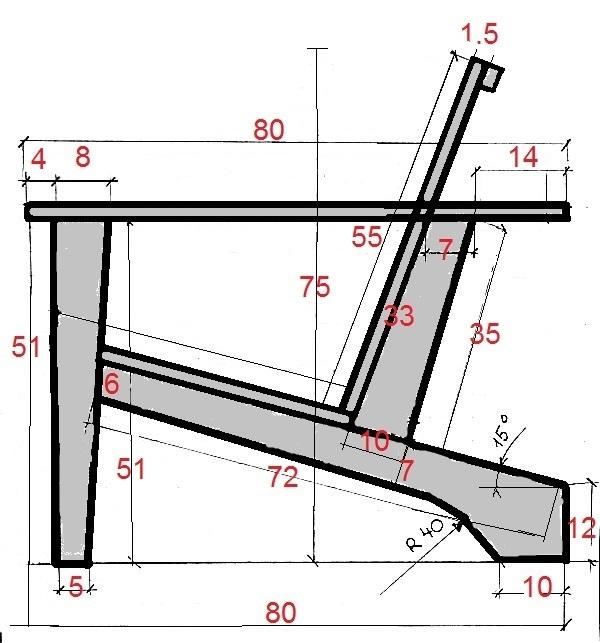
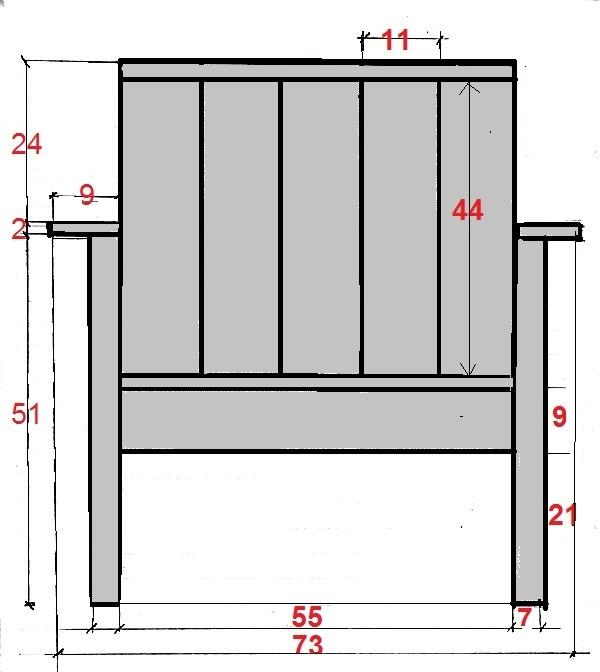
When cutting, sometimes you have to cut out a lot of knots - in this case, you will need a little more wood. In a word, just show the drawing below in the workshop and tell us about your wishes for the final look. And of course, if the boards are not planed, ask for them to be planed and chamfered: you should take home smooth, beautiful details.

Wooden chair: cutting and installation
There are now many variations on the theme of the Adirondack chair. We chose the simplest basic model.
In the drawing, the lower supporting beams are made with a bend, but for simplicity you can cut them out as solid parts.
Let's start assembling. To prevent the boards from cracking, before screwing in the screws, you need to drill holes for them with a drill: a 3 mm drill. We screw in the screws, you can also coat them with universal sealant glue - very convenient. At the assembly stage, it is better to use clamps or call someone to help you.
In order not to confuse you with long descriptions of which part to screw to which, here is a video:
Here the installation is shown in detail in a little more complex model with a curved seat and a rounded back, but the assembly principle is the same. Play the video several times and repeat the sequence.
All that remains is to properly sand the wood and paint it.

Armchairs, as well as other furniture that can be used both indoors and outdoors, are very comfortable. To make it last as long as possible, follow 3 rules:
- If the furniture will be used near water or in a humid climate (for example, you have a summer house by the sea), choose fine-pored wood: larch, oak, and resistant sound areas are suitable coniferous wood(). In drier climates, you can use other types of wood, or even use beech and hornbeam for shipping pallets and crates.
- If you want to either display the tree outside or sit in it in the house, it would be ideal to cover it with azure for external and interior works Belinka Tophybrid, Toplasur is also quite suitable. If you want to completely paint over the wood structure and give bright color, use Email Universal paint.
- Remember that if the tree is exposed to moisture (street, wet room), it must be covered with an antiseptic primer. If the furniture is always in the living room, nursery or bedroom, primer is not needed.

Ready!
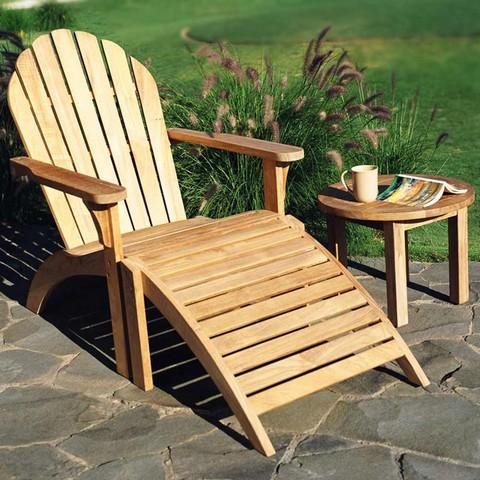
That's it: place a couple of small pillows on the chair, pour lemonade into a glass and enjoy nature in comfort!
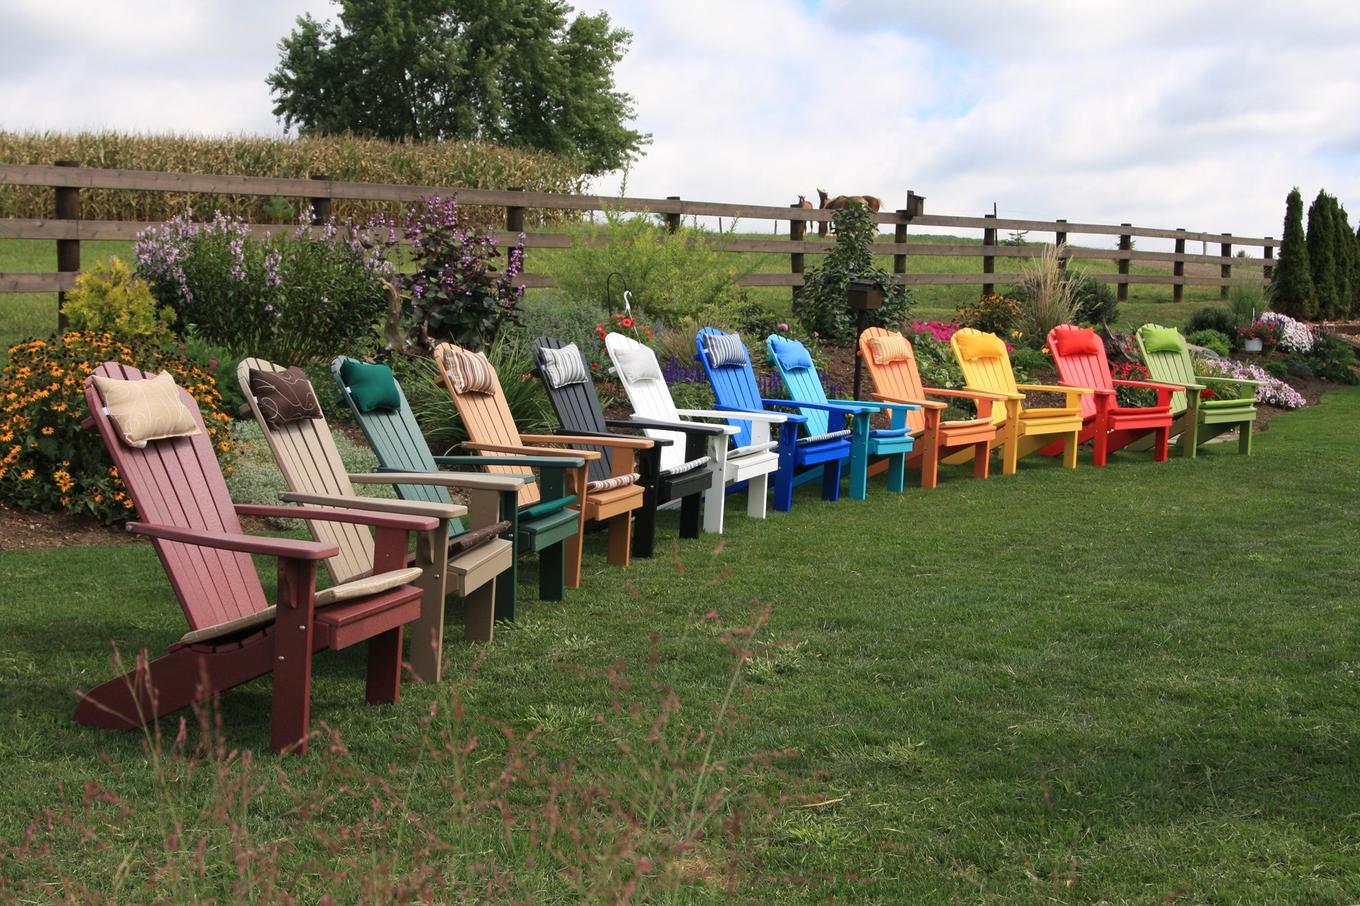
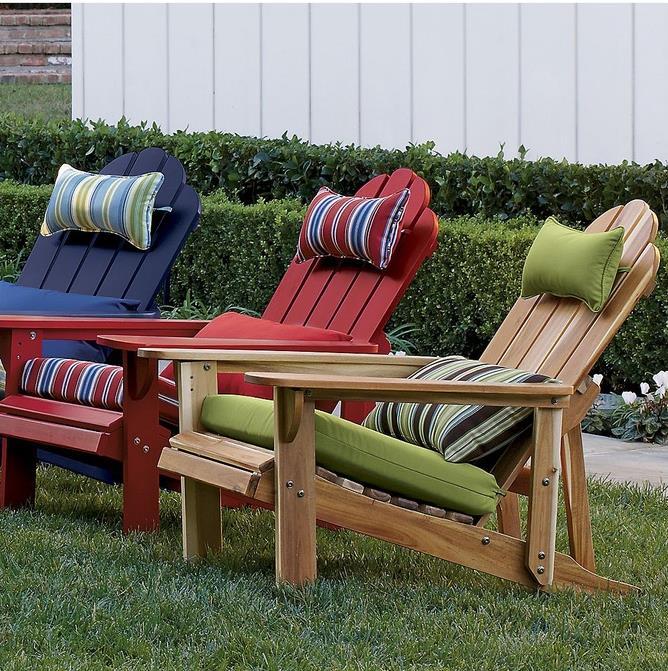
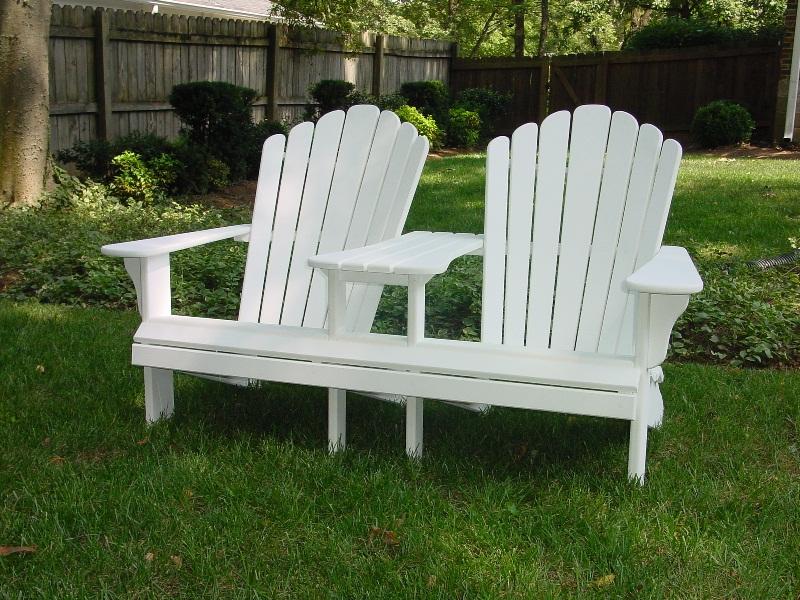
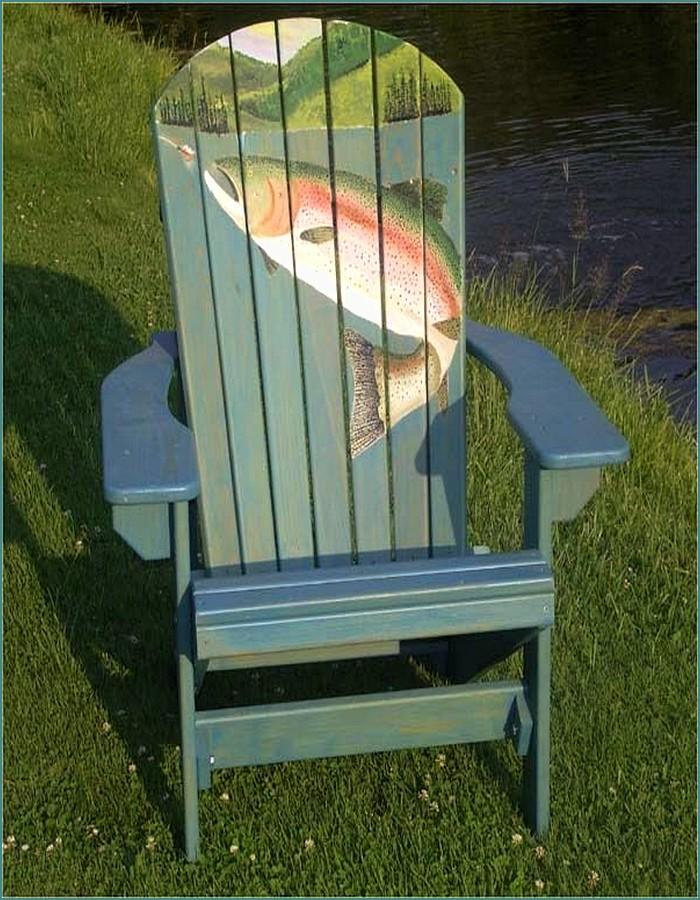
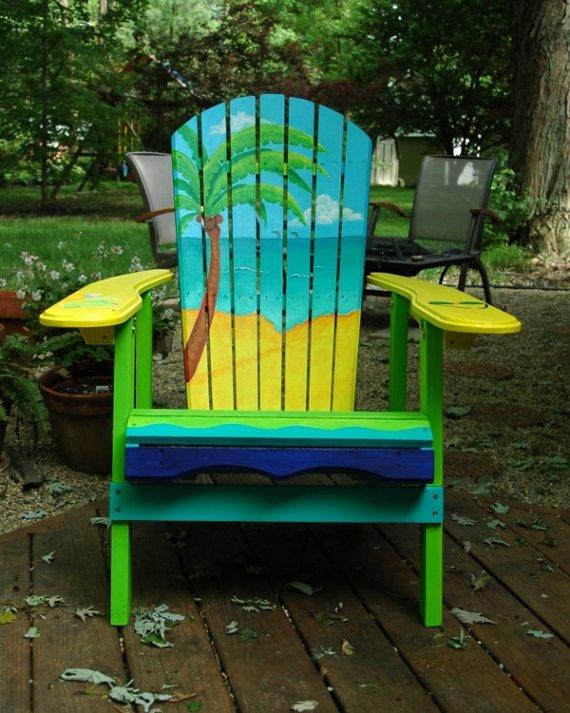
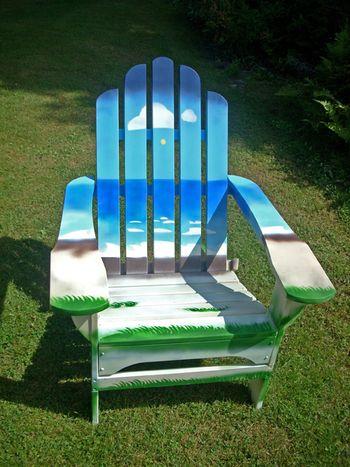
Several photo ideas for furniture design in the Adirondack style


Have questions about how to paint furniture? We will answer for free in the “Ask a Question” section on the website belinka.ru.
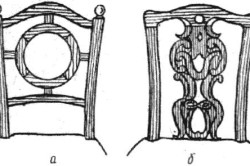
- Examples of carvings for a chair
- Stages of making carved furniture
- How to assemble chairs?
Carved furniture has always been popular, but its cost in stores is sometimes too high, especially when it comes to complex designs. Having some experience working with natural wood, you can make an unusually beautiful and stylish furniture for your own home.
Compression of chair joints when gluing: a - with clamps and a belt tie, 1 - a clamp, 2 - a belt tie, 3 - a piece of a block or board, b - with a rope.
Tables, chairs, armchairs, cabinets - all this is available for making yourself. All you need is skill, imagination and patience, since wood carving is a long and painstaking process.
If you have no experience in performing such work, then you can start by making a small stool with carved legs. Gradually you can move on to making tables, armchairs, and carved panels for the room. The work must be done based on certain rules and requirements, choosing the type of thread that is most suitable.
Examples of carvings for a chair
Wood carving can be traditional and extraordinary. The choice of a specific method depends on whether you have experience and what tools are available. Methods for decorating furniture include:

Figure 1. Drawing of a stool.
- Through thread, which is considered one of the simplest. Two methods are used: kerf thread, when sections are cut out, and slotted thread, when through holes knocked out with cutters or chisels. If a relief ornament is used, then this type of through carving is called openwork.
- Flat grooved thread. It has a flat background and decorative elements as if they were going deeper into it. There are many subtypes of such carvings. Popular is contour cutting, based on cutting grooves with an angled chisel and knives. Staple carving is the leaving of a mark on wood in the form of a bracket. The ornament turns out to be unusual. Geometric carving is performed in 2 stages. This is tattooing a design and trimming it, as a result, beautiful triangular patterns are obtained, they are rhombuses, honeycombs, swirls, radiances, chains, etc. Black varnish carving involves using a varnished surface as a background. Patterns of varying depths are cut into the finished background. The result is an unusual and contrasting carving, which gives the product an original look. appearance.
- Relief carving for furniture, which is often used, but it is necessary to have experience in such work. It features flat-relief carving, that is, a type of ornament with a selected background. The difference is that the background is made below the ornament; it is specially selected for this purpose with a chisel. Kudrinskaya carving with images of birds, animals, flowers is unusual, incredibly beautiful garlands with leaves. The art originated thanks to the master Vasily Voronov from the village of Kudrino, where its name came from.
- Sculptural carving is a separate type; it is used extremely rarely for furniture, as it requires skill.
If you have no experience, then it is best to start with simple options, gradually improving skills. In addition, for complex types of threads, special machines are used that allow processing of volumetric parts. Return to contents
Stages of making carved furniture
A DIY stool is an option for beginners. To work, you need to prepare certain materials and tools:
Dependence of the quality of the structure on the design: a – a fragile part due to large number connections, b – a durable part made of a solid carved board.
- Pine boards. They are the easiest to process, have a beautiful appearance and aroma of pine needles. You can take not only pine, but also birch, alder, linden boards; oak or elm are suitable for work.
- A set of carpentry tools, including a hammer, chisel, jigsaw, saw, drill.
- Screwdriver and set of fastening elements.
- Stain for painting furniture of the chosen color; instead, you can use oil or paint. Transparent glossy or matte varnish is used to protect wood.
Before making a carved chair, you need to draw up a drawing, select a design for the carving, and draw up a diagram for its implementation. If you have no experience, then it is better to start with simple patterns.
You can even use it for the back plywood sheets, which are easier to cut than wooden plank, and their cost is lower.
An example of a diagram for a stool is shown in Fig. 1.
Where to start? The process of carving and making a chair includes the following steps:

- They begin to make carved chairs and stools by processing wood, since the appearance of the piece of furniture, durability, and absence of cracks on the surface will depend on this. Wood is taken in autumn or winter harvesting so that the movement of juices in it is minimal. These blanks will not crack. If ready-made boards are used, they must be perfectly dried and free from major defects, for example, falling knots, resin stains, cracks, etc. The best materials For home furniture, pine, oak, birch, alder, linden, and birch are considered.
- For work, you need to choose only high-quality tools that are designed for carving. Today in stores you can buy ready-made sets, but their cost is quite high, and individually such tools can be much cheaper. Many people have some of them at home. These are chisels, joints, surface planers, cranberries, corners, malka, tsarazik, files, mallet, hammers, cuts, jigsaws, drills and others. It all depends on what kind of carving is required, what the level of complexity will be.
- The boards are laid out on horizontal surface, begin cutting. To do this, it is necessary to apply markings to the surface of the boards in accordance with the drawing. It is advisable to put a designation on each element to make it easier to assemble finished parts. If you have a circular saw, cutting will be much easier. If you don’t have one, you can use a jigsaw. If you use thicker elements for furniture, you will have to glue them together with PVA.
- After all the parts are cut and glued, it is necessary to clean up. Beginners make the mistake of using sandpaper. During production wooden furniture At this stage you only need to use a scraper. Then the finished carving blank is mounted on a workbench, and a pattern is applied to the surface using a simple pencil and a stencil (if used). The part must be secured carefully, since during work it is necessary to maintain maximum precision and accuracy, otherwise your hands can be easily damaged.
- When the markings are applied, you can start cutting. It all depends on what method will be used for the job. For simple options, just cut holes various shapes using a jigsaw. If complex volumetric threads are used, special machines will be needed. Therefore, experts recommend starting with simple forms.