Various beautiful DIY crafts. Various DIY crafts
Crafts from plastic bottles
What can be made from plastic bottles? In this article we will tell you what crafts from plastic bottles you can make with your own hands with your children. Plastic bottles - universal material for making crafts. We will tell you how to do:
Children's crafts from plastic bottles
- vases made from plastic bottles
Crafts for the garden from plastic bottles
- garden crafts made from plastic bottles
1. Crafts from plastic bottles. Toys made from plastic bottles
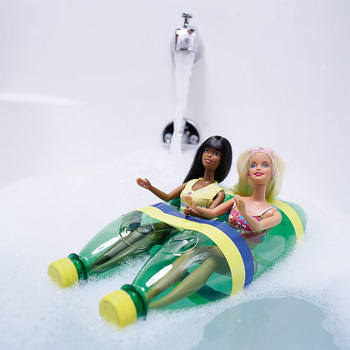
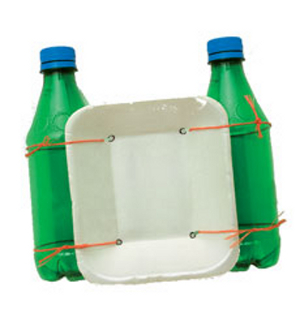
Catamaran made from plastic bottles
By connecting two plastic bottles together with electrical tape, you can make a toy catamaran for dolls.
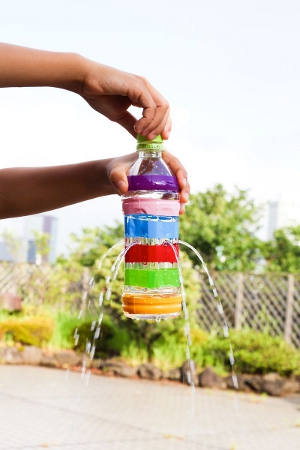
Craft from a plastic bottle for children - fountain
On a hot summer day you can't imagine best entertainment for children than playing with water on fresh air. From an ordinary plastic bottle you can make an educational toy for experimenting and playing with water in the country or on the beach.
Make several holes in the bottle using a sharp object. In the photo below, the holes are made in the center of the bottle, but in fact, it is better to place them at the bottom of the bottle. In this case, the maximum volume of water from the bottle will be used. Plug the holes with your palm and fill the bottle to the top with water. Screw on the lid. Remove your hand from the holes. Surprisingly, water does not pour out of the bottle through the holes.
Now unscrew the cap slightly and you will see water begin to pour out of the bottle through the holes. It is the air entering through the neck of the plastic bottle that displaces the water from the bottle.
This toy can be used as a washbasin in the country.
Crafts from plastic bottles for children using the papier mache technique.
You can make interesting crafts for children using papier mache technique from plastic bottles. Boys will probably be interested in a homemade airplane made from a plastic bottle, and girls will be able to make a whole home zoo.
The principle of making toys from plastic bottles using the papier mache technique is as follows. First, the frame of the future craft is made from cut and whole bottles. Everything is held together with tape. Additional parts are cut out of cardboard and also attached with tape or tape.
After this, you need to tear or cut the paper into small pieces. This can be either regular printer paper or special corrugated paper for children's crafts. Dilute PVA glue with water in a 1:1 ratio. Then, dip each piece in diluted glue, attach it to the frame of bottles. Thus, cover your craft with 4-6 layers of paper.
When the glue is dry, paint and decorate your plastic bottle craft.
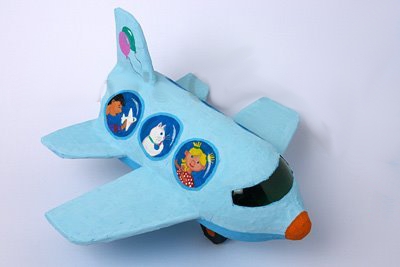
How to make an airplane from plastic bottles >>>>
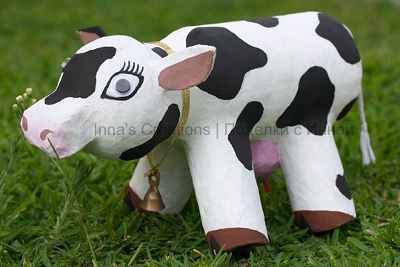
From plastic bottles with your own hands. Cow >>>>

Children's crafts from plastic bottles. Tropical fish >>>>
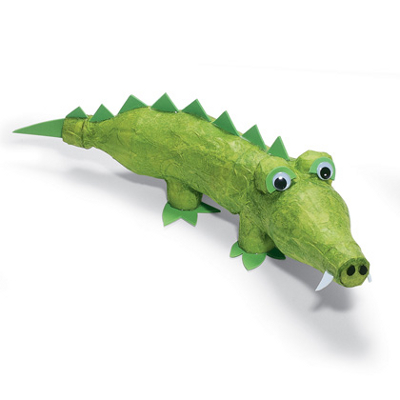
Children's crafts from plastic bottles. Crocodile >>>>
And a few more links to master classes on making crafts from plastic bottles for children:
2. DIY plastic bottles. Vases made from plastic bottles
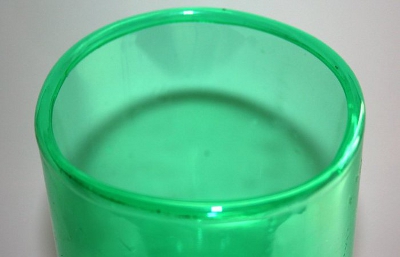
The easiest way to make a vase from a plastic bottle is to simply cut it top part and decorate. In this case, it is advisable to use an iron to round off the homemade vase the edges. It will be more beautiful and safer this way.
To round the edges of a vase made from a plastic bottle, place a sheet of paper on top of it and bring a hot iron (the paper is needed to prevent the plastic from sticking to the sole of the iron). The sharp edges of the bottle high temperature wrap up. Be careful - do not hold the iron for long and constantly check what is happening under the paper. Link >>>>
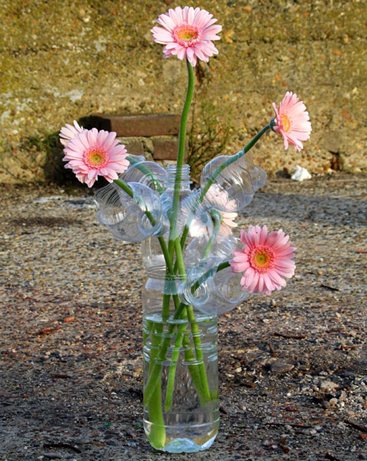
We would like to invite you to make a creative vase craft. To make it you will need several plastic bottles. You can use one big bottle(1.5 liters) and 4 small bottles (0.5 liters). To make a vase from plastic bottles you will need plastic glue or a glue gun. For instructions on making a vase from bottles, see the link >>>>
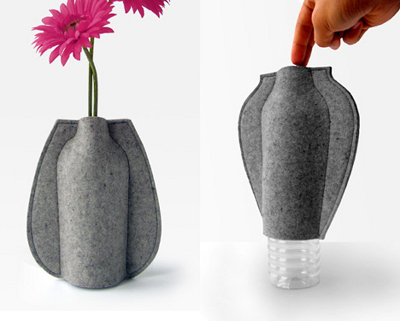
You can make a cute felt case for a plastic bottle. Insert the bottle inside the case - the vase from the plastic bottle is ready!
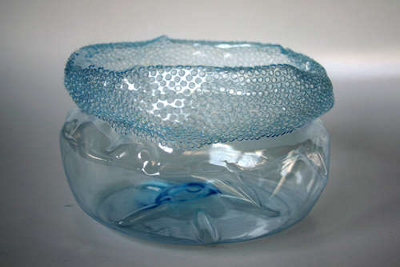
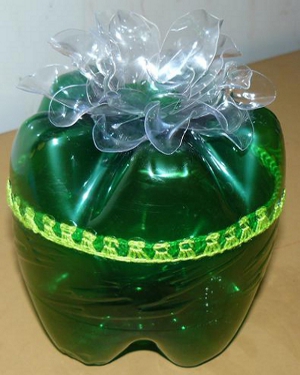
You can make a beautiful, “airy” vase from a plastic bottle if you first hold the cut bottle over the fire to give it shape. Then make numerous holes in it with a soldering iron. But it’s still better not to store food products in it!

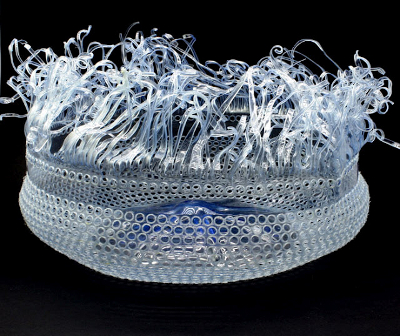
And one more idea on how to quickly and easily make a vase from a plastic bottle.
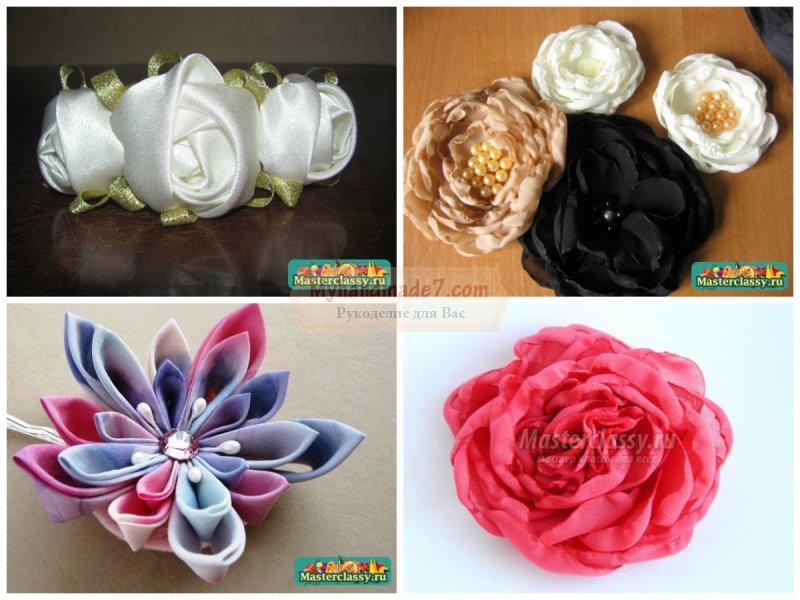
3. Crafts from plastic bottles photo. Flowers from plastic bottles
Making flowers from the most various materials Today it is one of the most popular types of crafts and needlework. You can make original artificial flowers with your own hands from ordinary plastic bottles.
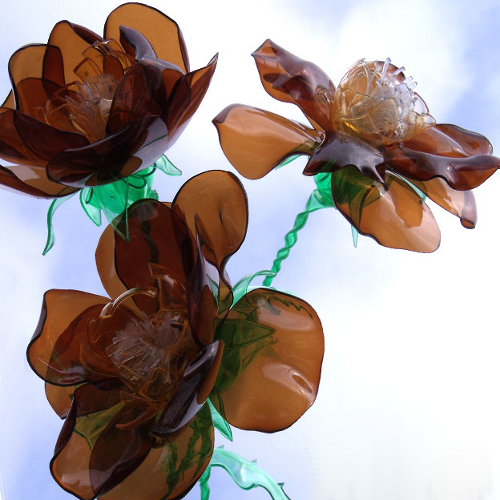
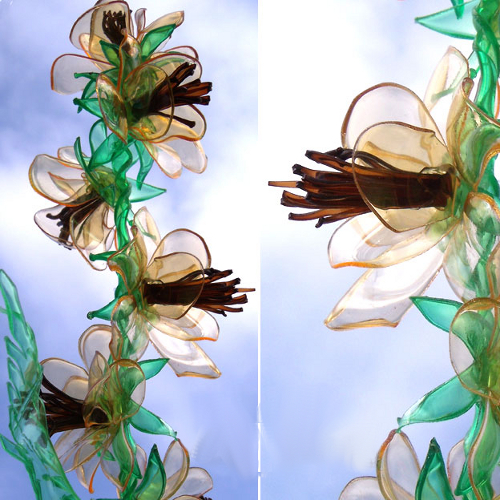
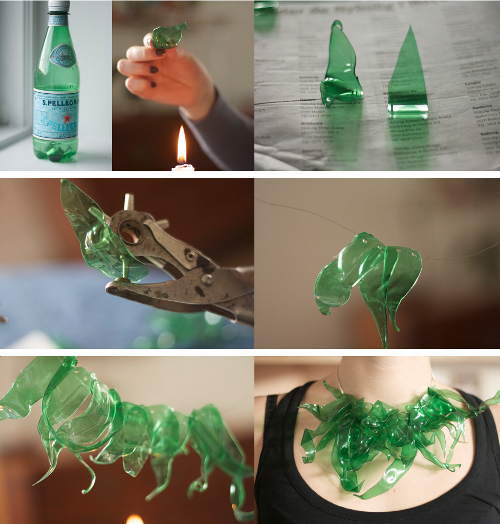
For a detailed master class on making flowers from plastic bottles, see the link >>>> To make this craft from plastic bottles, you will need, in addition to plastic bottles different colors, you will also need a candle and a glue gun. However, instead of a glue gun, you can use just glue. Attention! Be very careful when working with fire!
Separate instructions on how to make flower stems from plastic bottles can be found at the link >>>> To do this, you need to cut the plastic bottle in a spiral to get a narrow strip of plastic. Then twist it over the fire.
![]()
4. From plastic bottles with your own hands. Boxes and boxes made of plastic bottles
Take two bottoms from plastic bottles and glue a zipper between them with a glue gun or plastic glue. The coin purse is ready!

You can also sew zippers onto bottles.
![]()
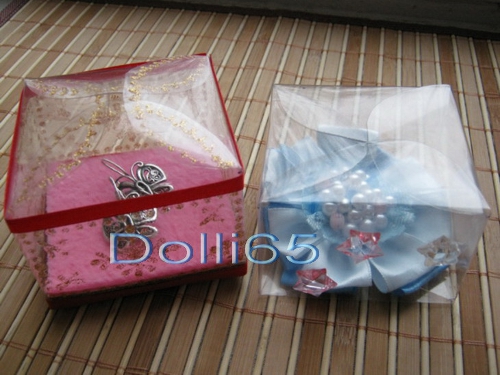
Decorate the box with a flower, also made from a plastic bottle. We described above how to make flowers from plastic bottles.
From a plastic bottle you can make a beautiful packaging box for a small gift for a loved one.
![]()
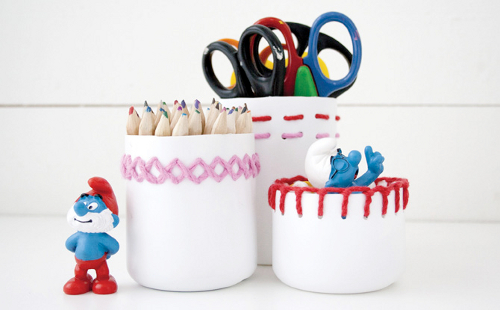
Mothers or grandmothers who know how to crochet can make convenient and practical boxes for storing children's books from plastic bottles.
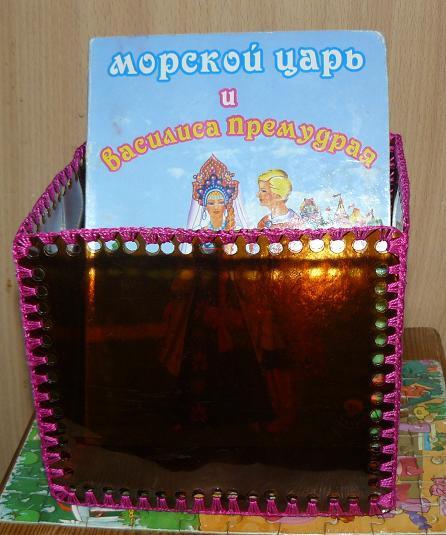
For detailed instructions on how to make this craft from plastic bottles, see the link >>>>
Link-2 >>>>
5. Crafts from plastic bottles master class. Jewelry made from plastic bottles
Who would have thought that plastic bottles could be made stylish jewelry! Bright, fashionable bracelets or delicate, airy necklaces...
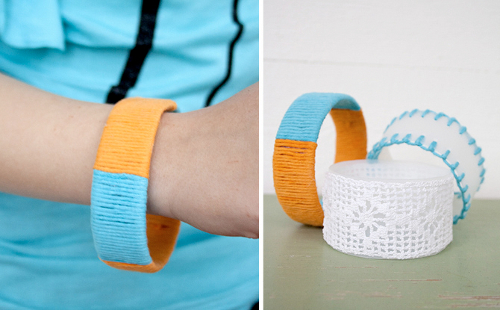
Bracelets made from plastic bottles
Cut a plastic ring of the thickness you need from the bottle. Wrap it with colored yarn or elastic fabric, cover it with lace or trim it with thread. Stylish, summer decoration ready!
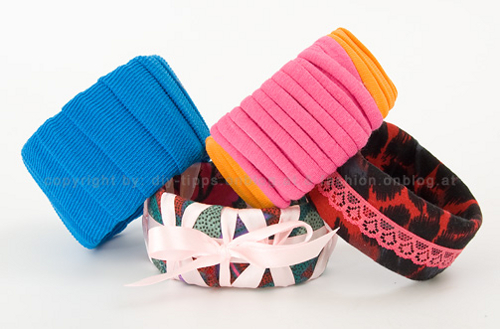
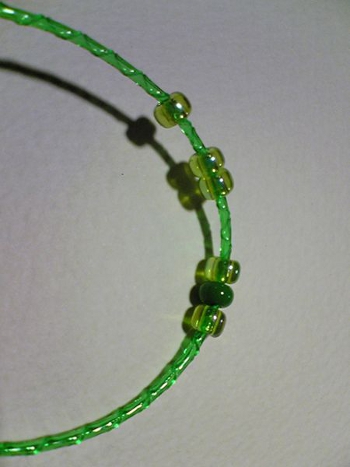
You can also buy inexpensive beads and tie them to a plastic ring with colored yarn.
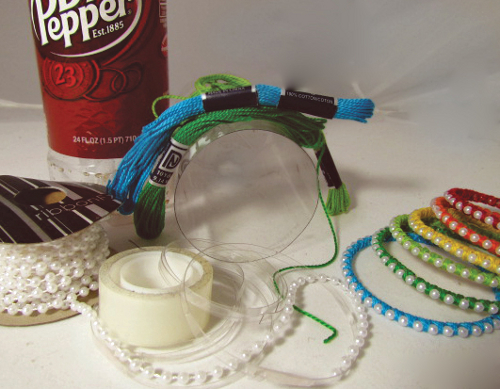
For a detailed master class on making this craft from a plastic bottle, see the link >>>>
Above we talked about how to make flower stems from a plastic bottle. These beautiful spirals can also be used to make jewelry from plastic bottles.
You can make a beautiful necklace from a plastic bottle using the same principle as flowers. Cut from the bottle various shapes petals and leaves. Hold them over the fire for a short time until they take shape. Put them on a fishing line.

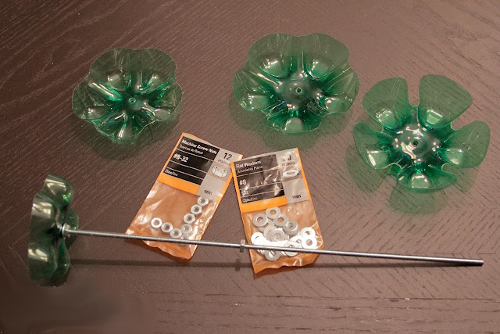
And from the bottoms of plastic bottles you can make a stand for jewelry.
![]()
To make this craft from plastic bottles with your own hands, you will need, in addition to the bottles themselves, a threaded metal rod, as well as nuts and washers.
6. Plastic bottles crafts for the garden. Crafts from plastic bottles for the garden
You can make many useful things for your garden from plastic bottles. For example, vases made from plastic bottles. We have already talked about how to make a vase from plastic bottles in this article above. For other ways to make a vase with your own hands, read the link
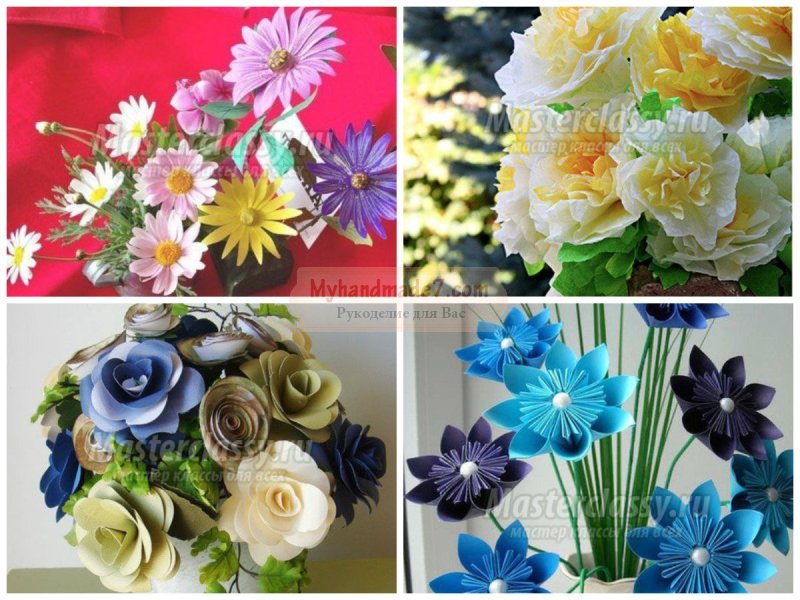
Of great interest to the beginning needlewoman are crafts from different materials , however, there are so many ideas that at first your eyes may simply run wide. If you don’t know where to start mastering new techniques, then we offer you several master classes. We will start by making flowers that are liked by all women without exception, which are an integral element of the decor of living rooms and kitchens. In addition, you can take any materials for their implementation, from those that can be collected in the park, for example, leaves, to materials that must be carefully selected based on their quality, for example, beads.
To do crafts flowers from different materials, paper, wire, plastic, wood, beads and even stones are suitable. You can make quirky, amazing, unique buds with your own hands using fabric, ribbons, and it’s not at all difficult, thanks to step-by-step master classes you will quickly understand all the intricacies.
Making crafts from different materials- the activity is exciting, but you also need to choose necessary tools to work with them. Fabric flowers can be widely used, and a tiny bouquet can be attached to a dress to make it a bright and individual outfit. You can embroider a dress for a little princess with neat buds; you can use them to decorate a handbag or hat.
Making crafts from different materials
Flower bouquets can decorate your home, make rooms brighter and more comfortable. They will please your eyes all year round. If you made what we suggested to you, then such a craft can also be a wonderful gift for your close friend for the holiday. Special attention We recommend this idea to be used by men who like to give sweets to their loved ones for minor celebrations. If you make such a bouquet with your own hands, and it is not difficult to do, because you just need to be able to cut out the details from paper using scissors, then thanks to such decoration even a simple gift will look like a manifestation of sincere love and care.
If you look closely at professional crafts from different materials photo, then you can see that the flowers are made with all shades and precise detailing. Linen, silk, crepe de Chine, cambric, satin, voile, chiffon, crepe satin, velvet, pan velvet are best suited to perform stylish accessories with your own hands. If you choose natural shades, then the buds will look very natural. Be sure to starch the selected fabrics before work. For example, for natural silk it is better to take gelatin, and for cotton - potato starch. The dry material must be dipped into a hot solution, squeezed out and left to dry, then smoothed with an iron.

Pictures of crafts made from different materials must be bright, so you can use dyes, for example, photo paints, gouache, aniline paints, food coloring, ink. Glue is used as a fixative; since you will be working with fabrics, the glue must be highly durable, it must dry quickly and not leave marks after drying. You can choose gelatin glue or flour paste.
For the buds you need a stem, which is made using wire, copper or aluminum. And to wrap the stem you need to take crepe or tissue paper of various colors (green and brown).
To make a closed bud, you need cotton wool. You can’t do without the threads that are needed to sew the parts together; use strong nylon threads, floss, iris, cotton. And to give the craft a natural look, you can sprinkle the middle with yellow pollen, it can be tinted semolina.

Crafts: flowers from different materials
They can look original and consist of large elements; these should be done by novice craftsmen, and those who have already gotten their hands on them can make bouquets with many small details. In this case, you must first prepare patterns of leaves and petals. The blanks must be drawn on thick paper, cut out, and then applied to the fabric to cut out as many parts as necessary. In a similar way, crafts of numbers from different materials for early child development. Each petal must be given the desired shape, bent or twisted in the desired direction, and then the bud must be collected. You need to start with the stem, to which the stamens, made of thread or cereal, are attached. Next, the petals are attached.
The first bouquets may come out with some flaws, but if you practice, your crafts will soon be perfect. You can also try it, it will tell you about all the intricacies of this complex technique.

If you're into sewing, you probably have a lot of scraps of fabric that you probably throw away, but you can use them for crafts. From natural fabrics that have small floral prints, very delicate roses are obtained, they are simple to make, and the design of a nursery with such elements cannot be compared with anything. Scraps can also be used to make patchwork toys, which can become excellent educational toys.
These rugs are very easy to knit despite their rich and complex look! I found them on some foreign blog. At first I was delighted by their brightness and cheerful appearance. Still, in our Soviet houses the carpets were always gloomy, I don’t even know why they were - ugly ones symbolized wealth in the house, probably because of their price... But now it’s not about them... but about beautiful knitted rugs!
Carefully looking at the photographs of these cheerful rugs, I immediately understood how they were knitted. Once upon a time, about 15 years ago, I attended a crochet circle and there we knitted potholders. I must say that that same oven mitt still hangs in my mother’s kitchen to this day, she has never used it, she says that it is too beautiful to grab something hot.
Well, we knitted these potholders in the same way as these rugs are knitted! Very simple! All you need to know is how to knit chain stitches, double crochets and... that's it! The base of such a rug is knitted on the basis fillet knitting . You don’t even need to make sure that the arches are neat, because you will then cover these arches with double crochet stitches. How to do this, look at this photo. The only thing worth noting is that the density of your rug will depend on how many double crochets you tie into each arch, i.e. the more, the denser your rug will be. And yet, when you knit a mesh base, you don’t have to knit 2 air loops, you can do one

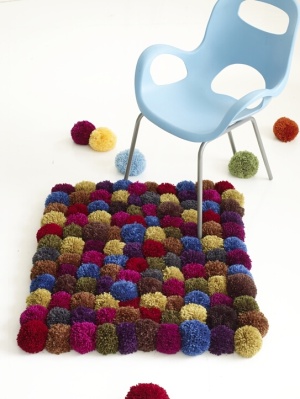 What is not at all difficult to make are rugs made from pompoms. In some models you don’t even need to knit anything. Make yourself balls and put them together into a rug.
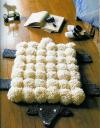

Under the model of a rug with a sheep, you must first knit a lining in the shape of this very sheep, and only then sew pompoms onto it. Same with the bear. I liked the bear the most. This could be knitted for a child. My baby loves to sit on the floor both in winter and in summer, so I’m thinking of knitting one for him :).
 The pompoms themselves are made by the most in a simple way. Cut out two circles from cardboard, cut holes inside each in the form of small circles. And then take the yarn and wrap it around these very circles. The pictures show the main steps.
By the way, you can avoid fussing with cardboard and use special device for pom poms. One of the options is shown in the photo. I myself have never resorted to these accessories, because I never had to make a lot of pom-poms, just a couple of pieces for children’s hats. But to make such a rug from pompoms, I think you should buy this accessory, because you will have to make a lot of pompoms, and the cardboard will constantly fray and you will need to cut out new ones. It's not expensive. Around 50-60 rubles.