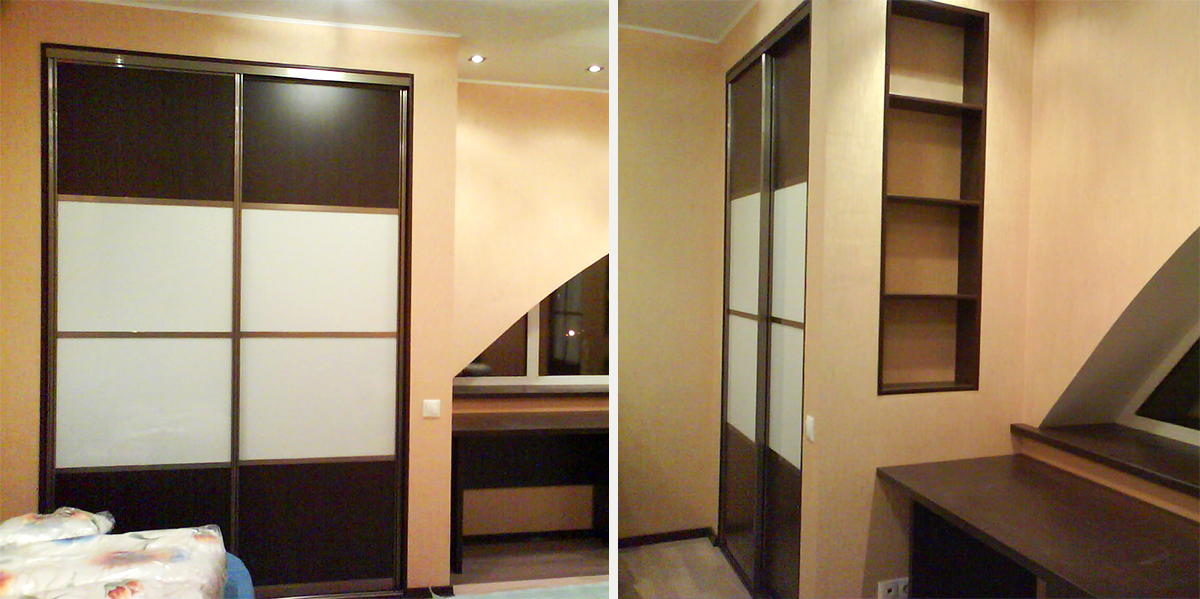
An excellent design solution to make a built-in wardrobe from hl
As for the built-in wooden furniture to order, the main disadvantage, according to potential customers, is its skyrocketing price. And so you want to show your own imagination and implement interior ideas! Here, drywall can come to the rescue, which most people perceive mainly as a sheathing material. It is inexpensive and easy to work with, everyone who has encountered the installation of gypsum plasterboard structures has managed to make sure of this. It is also quite appropriate in the furniture direction, since it is quite easy to make a built-in wardrobe with your own hands from this material, and the cost will be several times lower than for an analog from chipboard.
Advantages and disadvantages of plasterboard furniture
The main advantage of GKL cabinets is the relative cheapness - we have already mentioned. However, the advantages are not limited to it.
However, some restrictions may not appeal to potential users.
- A cabinet made of plasterboard can only be built-in, that is, stationary. It cannot be rotated or moved to another place if after some time it seems more suitable. Fans of permutations will obviously not like it.
- Despite their strength, drywall cabinets are not designed to store tools or sharp objects. They will withstand their weight, but can be damaged during placement if the wall is accidentally touched with a sharp edge.
- It is undesirable to hang doors on hinges on a built-in drywall cabinet. The load on the rack profile may be higher than the calculated one. In addition, the constant opening and closing of the door gradually distorts the vertical element. Therefore, sliding wardrobes are more often made from gypsum boards. If you definitely need classic doors, the frame will need additional reinforcement, for example, with wooden blocks embedded in racks or a double profile.
If you are not embarrassed by the immobility of future furniture, and you are not going to keep sharp objects in it, you can start creating a built-in drywall wardrobe with your own hands.
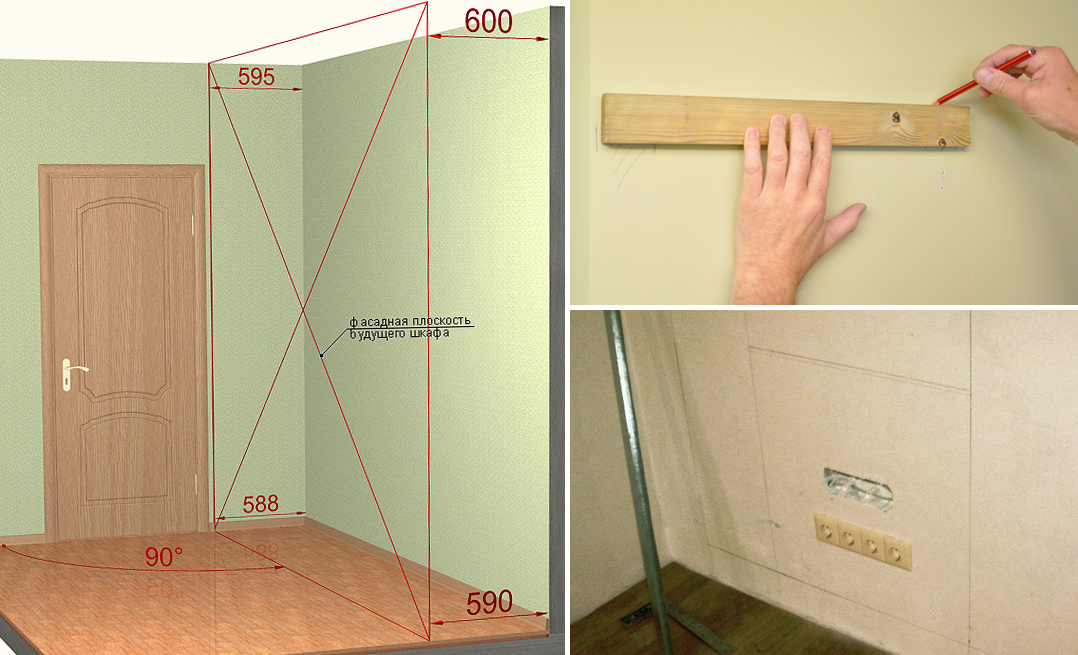
Sketch and markup
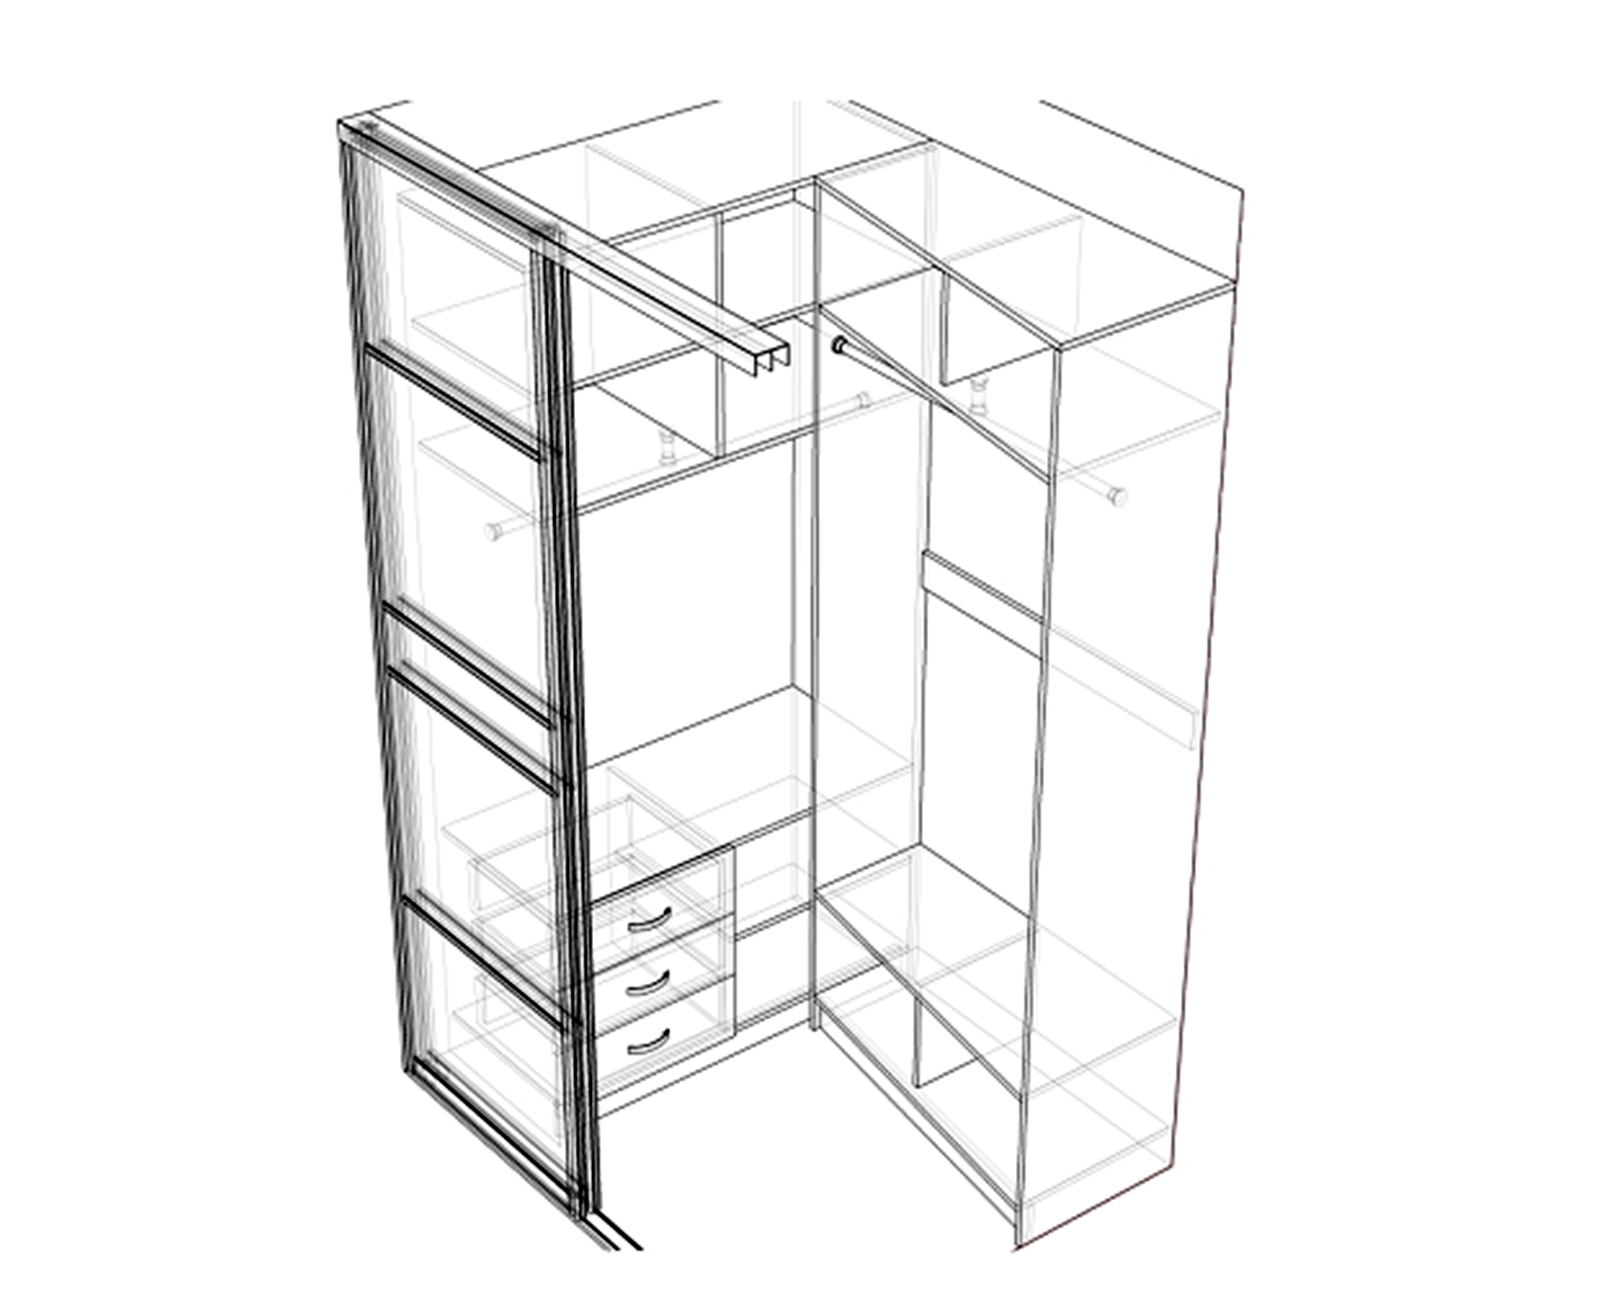
First of all, we determine where the structure will be located, what dimensions it will be, how many shelves are supposed to be made, what are the dimensions of the longest clothes - this must be taken into account in order to correctly place the bar under coats, jackets and dresses.
Before purchasing all the necessary materials for the wardrobe, you need to decide what you will make the frame from.
Wooden slats withstand a much greater load and the screws on them fix the GKL more reliably, but they are subject to dimensional fluctuations from temperature / humidity changes, rotting and other damage.
It is easier to work with a metal profile, it provides maximum evenness of the structure and maintains stability in any conditions. Usually, a galvanized frame is still mounted under a built-in plasterboard cabinet.
Creating the basis for the built-in wardrobe
In any design made of plasterboard, the main thing is the crate, and the cabinet is no exception. The corresponding characteristics of your wardrobe directly depend on its reliability and geometry. Therefore, when mounting the frame, literally each of its elements is verified by the building level and fastened with the correct step.
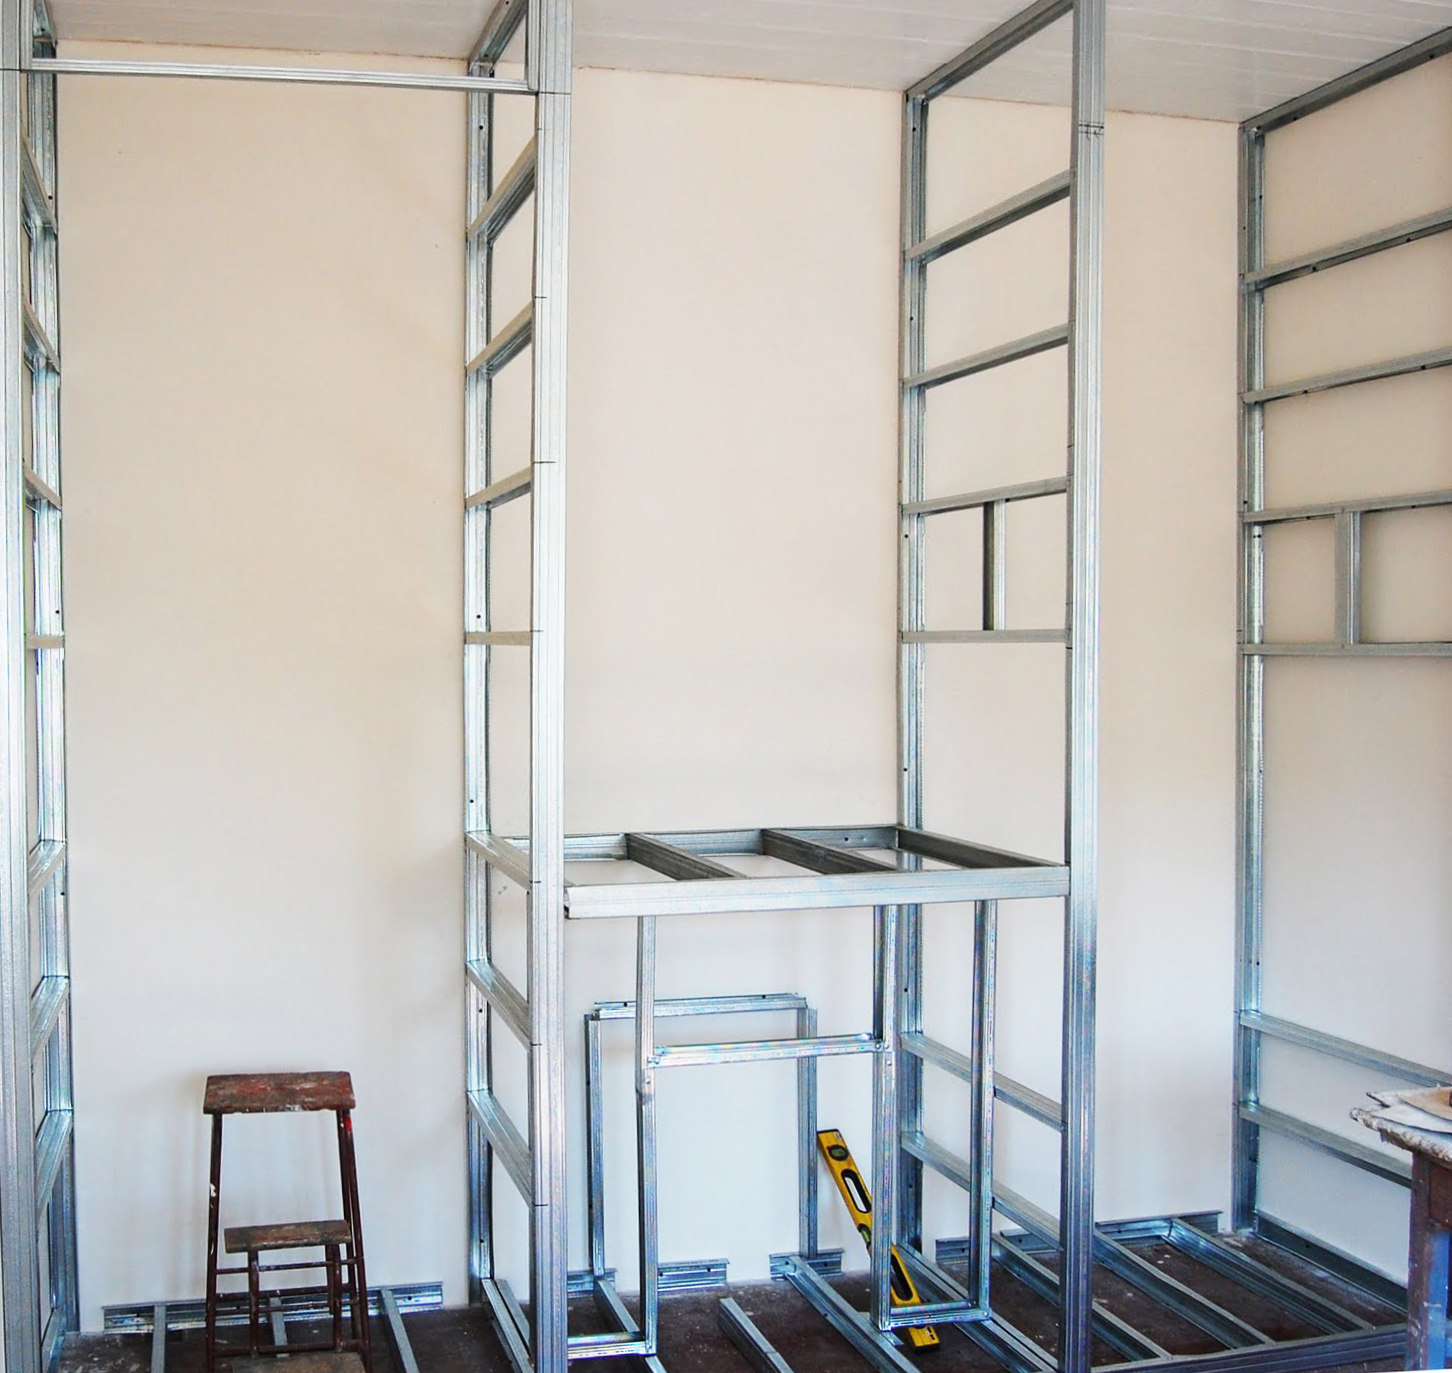
When the entire frame of the built-in drywall cabinet has been created, you can proceed to its sheathing.
The final stage of installation work
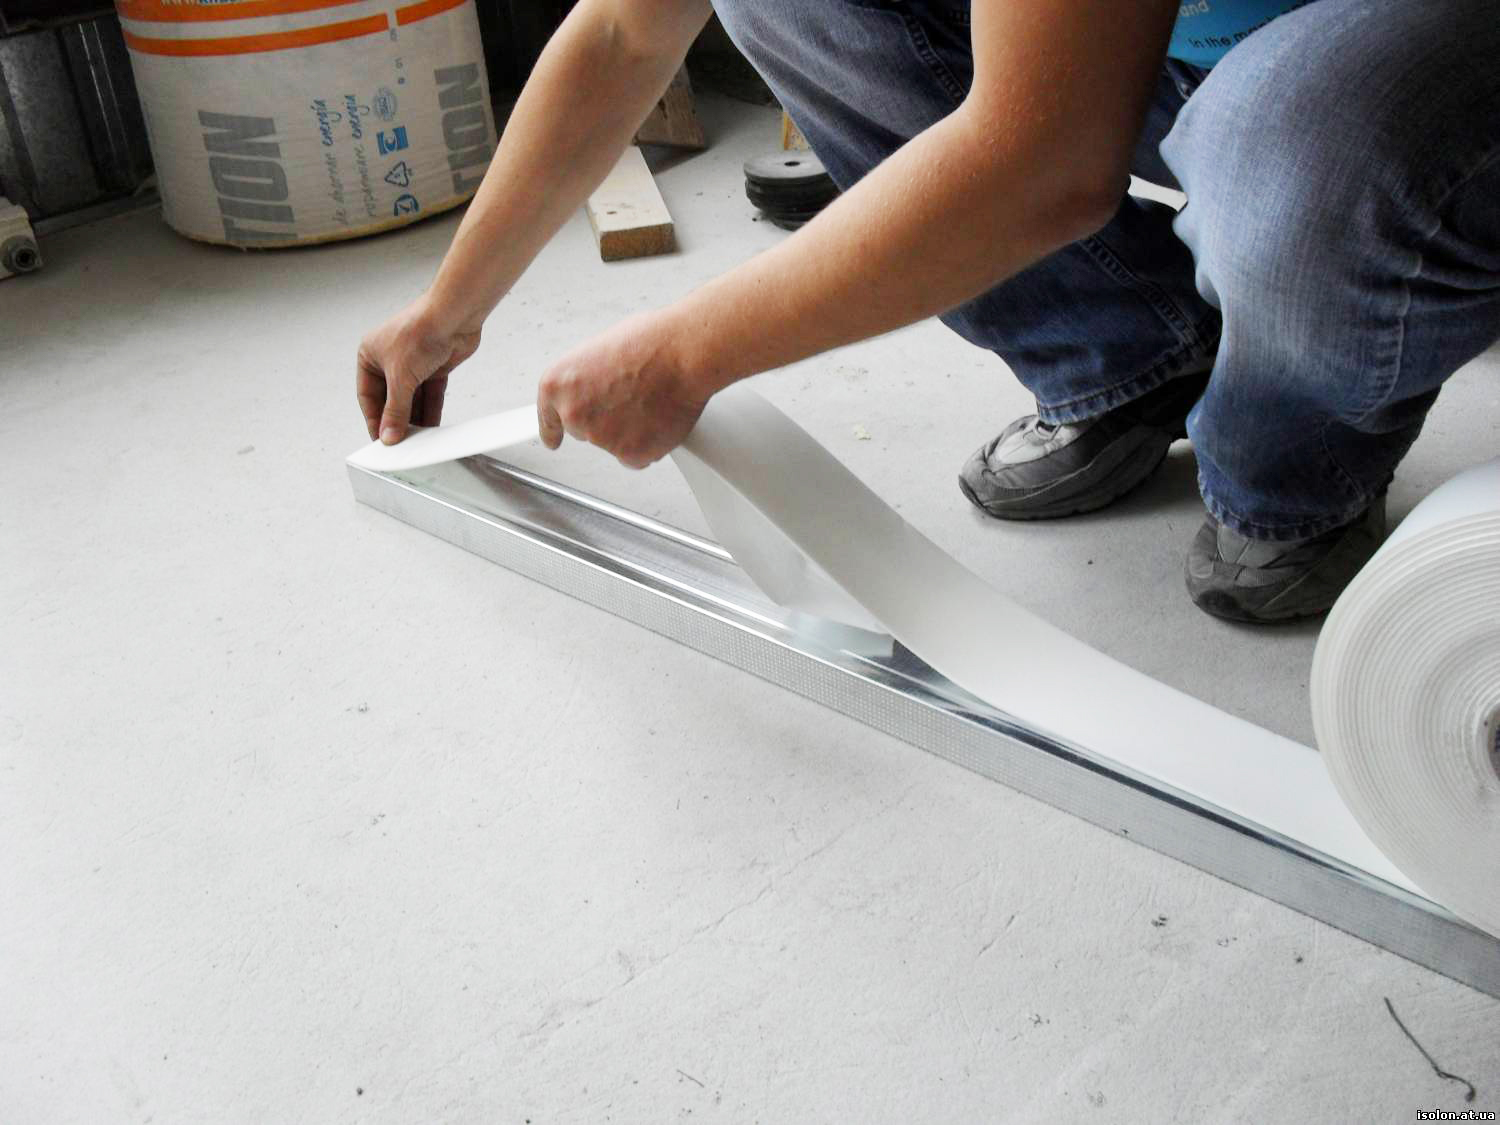
Facing with GKL plates is carried out in the traditional way: the sheets are cut out and fixed to the profile with self-tapping screws. Next, we act like this:
Our advice: do not try to make doors or drawers yourself, unless you are a professional furniture maker - you will only waste time and materials, and in the end you will be left with an unsatisfactory result. In the end, you have already saved on the box of a built-in drywall wardrobe by making it yourself.
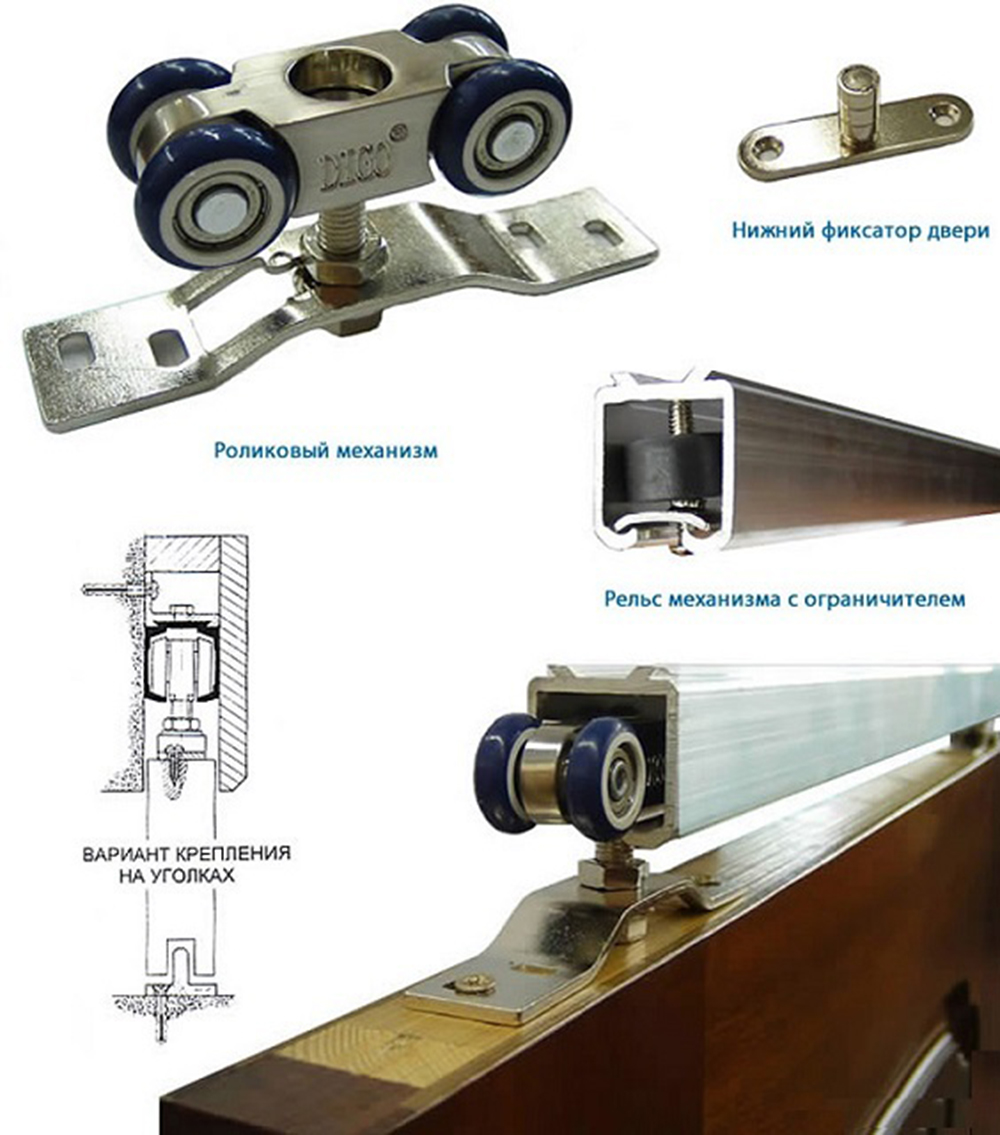
- When the door leaves are delivered, the lower and upper rails that come with them are mounted.
- Doors are put in place; the facade is installed first, which will be closer to the back wall.
- A stopper is mounted, located in the upper rail.
After you have finished making a built-in wardrobe with your own hands, all that remains is to decorate its outer surface - for example, paste over it with wood-like film. What finish would you suggest?