Do-it-yourself bumpers in the crib: a manifestation of parental love and care
Reading time: 4 minutes
Expecting a baby is a delicate, quivering, exciting business. Parents in search of the "best" visit a lot of children's stores, study a huge amount of literature about babies, equip a room. By the time the crumbs appear, dads and moms are preparing in advance. They buy everything: diapers, undershirts, nipples, diapers. But the children's room, or rather, the baby's bed, deserves more careful attention from future parents. Here attention is paid to everything: beauty, convenience, safety. To create an increased comfort zone, special attention is paid to the bumpers in the crib for newborns.
Security territory
 Baby crib... and lots of questions. What material should it be made of, which size is best for the baby, where to put it and how to decorate it?
All this is important, but the main thing to be aware of is the issue of the safety of the baby. It is the sleeping place that should be protected from the otherworldly eyes of guests, from beloved pets, from children's hyperactivity, when the baby suddenly decides to climb through the holes. Everything needs to be foreseen.
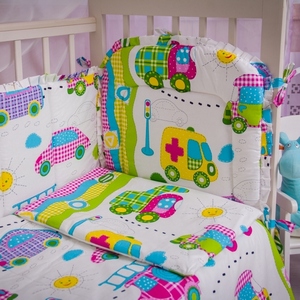
baby bed bumper
Solution found. These are performing two functions at the same time - protective and decorative. 90% of parents use bumpers (bumpers) to frame their sleeping place and express the most flattering compliments in their direction. The only drawback of this device is the price range, which cannot be described as optimal. The fabric is natural, the colors are favorable for children's perception, the model is modern, which means that the price is high, and this is not available to everyone.
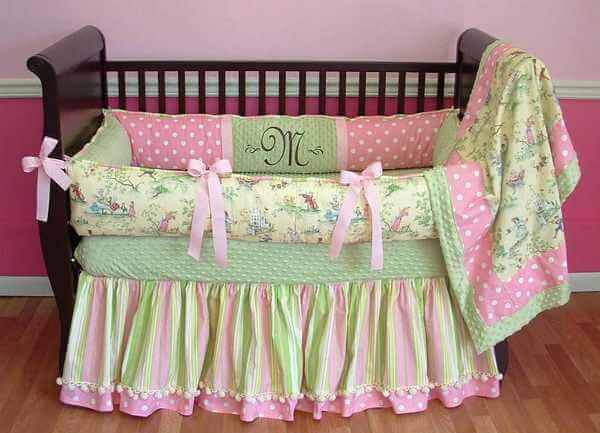
But today this issue is easily solved with the involvement of one's own strength, creativity and creative thinking. You can independently make protective bumpers for a crib, focusing on the design of the room, taking into account the size of the bed and based on individual preferences.
For sewing protective bumpers, pediatricians recommend using only those that have passed dermatological tests and have a quality certificate. Natural, hypoallergenic fabrics include cotton, chintz, calico,. When choosing a fabric for sewing “protection”, this should not be overlooked.
"Protection" from chintz and foam rubber
Materials and tools:
- Main fabric - (flannel can be used. The main thing is the density and naturalness of the fabric). Fabric length - 5-5.5 meters (the amount of fabric is indicated taking into account the width of 1m 10 cm)
- Filler - foam rubber. Its length is 2 meters (it will be enough if the width of the filler is 1m 50cm). To make the product look aesthetically pleasing, it is necessary to choose foam rubber 1 cm thick.
On a note
Before sewing, textiles must be washed to take into account the degree of shrinkage of the material.
Step-by-step instruction 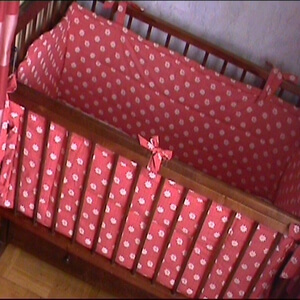
- Taking measurements. It is necessary to measure the baby's crib both in length and in width. It is these values that will become decisive when cutting fabric. It is important that the measurement accuracy is high.
- Cutting out fabric. Oddly enough, but when sewing "protection" you can do without a special pattern. It is enough to apply measurements on the textile fabric with a pencil. If you have cutting skills, you can draw a pattern on paper, and then transfer it to the fabric. This will be more professional.
- Cutting out structural elements.
- Edge stitching. All edges of the cut out elements, except for one, should be stitched. The unsewn edge is needed in order to fill the side with foam rubber. You can sew on a frill if you wish. Usually the basis for the frill is a ribbon in the color of the main textile or its main colorful elements. The main fabric can also be used for the frill.
- Marking and cutting foam rubber. Using a felt-tip pen or marker, you need to mark the filler and cut it out. It is important that its size is half a centimeter smaller than the main fabric on each side.
- Filling the cover with foam rubber. This stage will be successful if you first cut the filler in half vertically and carefully distribute it along the entire length of the side.
- Closing the last hole. The process can be performed both on a typewriter and manually.
- Attachment of fixing tapes (strings). It is better to sew on ribbon ties at a time when it is possible to accurately and clearly determine their place (it is desirable that there is a bed at hand). If this is not possible, then it would be more correct to sew ribbons in the middle of the sides and along their edges.
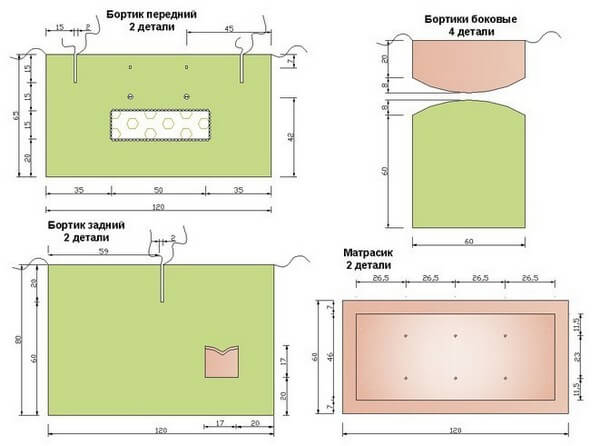
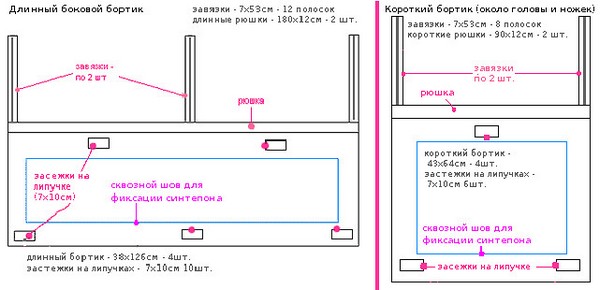
Sides based on coarse calico and synthetic winterizer
The proposed tailoring option is created taking into account the standard dimensions of the bed for babies (length - 1m 20 cm, width - 60 cm). The resulting side has dimensions: height - 30 cm, in the place of the head of the crumbs - 45 cm.
What is necessary?
- Two canvases of colored calico should be cut. The size of the resulting pattern must correspond to the following values:
- The length of the first canvas (element A) is 1m 80, the width is 30 cm. The quantity is 2 pieces.
- The length of the second cut (element B) is 1 m 40 cm, the width is 30 cm. The quantity is 2 pieces.
Total: 4 cuts of colored calico.
- Preparation of a semicircle 60 cm long (element C), where the extreme points in height reach a value of 30 cm, and the average value (in the middle) is 45 cm.
- Cutting a fabric strip 7 cm wide (this size is enough to create a ruffle). The length of the frill is determined according to individual preferences.
Manufacturing steps: 
- The resulting fabric strip must be fixed (stitched) along the entire length. This is done from the cut side. The front edge folds up and folds form.
- Cut out elements A and B are sewn to element C on both sides (one element on each side).
- The fabrics are folded upside down.
- The ruffle is inserted inside the canvases and sewn on.
- Creation of Velcro. It is necessary to prepare 16 ribbons: 8 of them measuring 6 cm by 10 cm, and 8 - 6 cm by 20 cm, providing for an allowance for seams). Next, the cut strips are folded in length in half, and then sewn. Velcro is sewn to the resulting ribbons, 2 cm long and 3 cm wide.
- Velcro is fixed on coarse calico canvases. The soft and hard parts of the adhesive tape are located on different canvases.
- Fixing tapes are sewn from the outer part of the fabric so that the long ones are located in the place of the direct fastening of the side, and the shorter ones are right in the middle).
- At the final stage, it is necessary to turn the element B not on the left side and stitch the side and bottom sides.
- In element C on the side, fold the edge and create loops in order to sew on buttons on the other side.
So that the protective sides do not “bulk” and do not gather at the bottom, you should sew additional tapes and throw them over the top side of the baby’s crib.
The process of manufacturing a protective bumper for a baby crib is simple, but painstaking and responsible. As the saying goes, "what you can't do for the sake of your beloved and long-awaited child." The important thing is that it will be reliable, safe and loving.