How cabinet furniture is arranged: furniture materials and components
The kitchen and wardrobe are almost the easiest types of furniture for beginners to assemble (not counting only bedside tables and shelves). In general, furniture for the living room and bedroom usually requires a more serious approach, the use of non-standard materials, glass. This article will help beginners understand how to make furniture on their own.
Wood in its pure form is almost never used in cabinet furniture; the array is considered an expensive elite material.
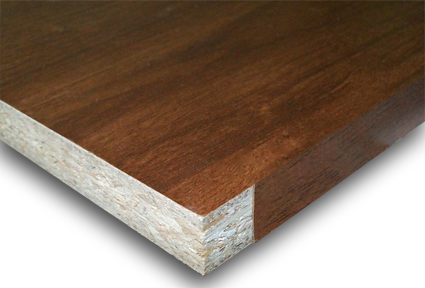
Now the tree is being replaced with a cheaper material - laminated chipboard (abbreviated chipboard). Most often, these plates have a thickness of 16 mm, on sale you can also find laminated chipboard with a thickness of 10 and 22 mm. 10mm sheets are typically used for filling closet doors, while 22mm sheets are used for bookcases and shelves where high bending strength is required. Also, sometimes with the help of elements from chipboard 22 mm they decorate the structure.
Almost all furniture parts are made of 16 mm chipboard (except for doors and facades).
Laminated chipboard
The cutting of chipboard is carried out on special machines along the guides. Of course, you can saw it off at home with a jigsaw, but then there will be chips and wavy bumps on the edges. It is almost impossible to saw off a chipboard exactly with a jigsaw at home.
edges
The most vulnerable spot of chipboard is its cut. It is easiest for moisture to penetrate through it, therefore, with poor protection, the ends may soon swell. Therefore, the ends are closed with the help of edges, there are several types of them.
- Melamine edge - the cheapest, but poor quality. You can stick it at home with an iron.
- PVC edge 0.4 and 2 mm is the best option. It can be glued only on a special machine, so they make it immediately when ordering a cut. To save money, 0.4 mm is glued to invisible ends, and 2 mm to external ones, which will experience constant loads and friction.
- ABS edging - similar to PVC, only made of environmentally friendly material.
- Mortise T-profile - inserted into a groove previously made by a cutter. Rarely used.
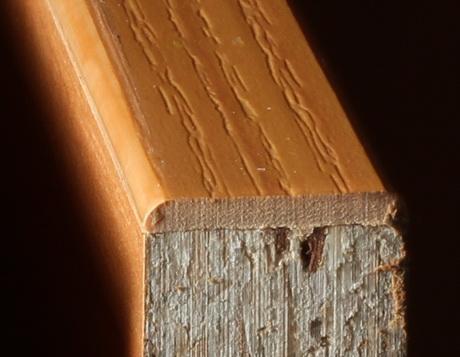
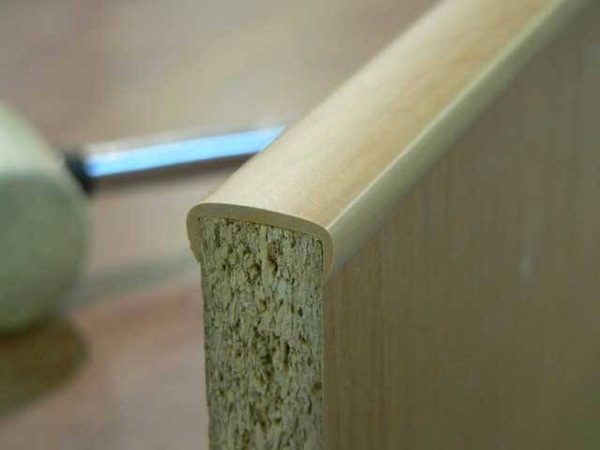
- Overhead U-profile - can be easily glued at home on liquid nails. The main disadvantage is that the edges will protrude by several millimeters, so dirt gets clogged under it. On the other hand, this drawback allows you to hide a poor-quality cut.
- Facades made of laminated MDF. This is a pressed material, more moisture resistant and dense, compared to chipboard. Most often, the surface is laminated "under the tree." But no matter how strong the film is, over time at the edges it can move away and crack. The main advantage of this material is its low price and fast production.
- In addition to standard blank facades, there are also options with figured cutouts for stained glass. Glass is attached to the lining on the reverse side.
- Softforming - such facades are similar to ordinary MDF, but have a characteristic two-color layout with a relief on both sides. They can only be used in dry rooms, bedrooms or living rooms.
- Postforming - even better and more durable products. Thin plastic is wrapped around the edges by 90° or 180°, which eliminates unnecessary seams at the corners. Chipboard or MDF boards are used as the basis. Usually, postforming is done in a strict form, without unnecessary pretentious decorative elements.
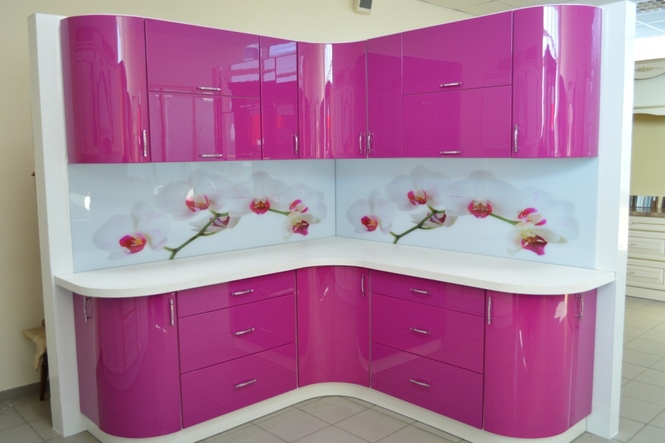
- Plastic facades are of high quality, but expensive. They consist of a base (chipboard / MDF), lined on both sides with thick plastic. They always have a strict design and a flat surface, glossy or matte. The edges of the slab are sometimes protected with ABS edging or aluminum profiles. Recently, super-gloss acrylic plastic has become especially popular.
- Facades made of wood and veneer are suitable for lovers of natural materials, but they are expensive. In addition, there are long disputes about environmental friendliness: it is believed that there are so many varnishes and impregnations here that only one name remains from the tree.
- Enamel painted facades. They have a significant drawback - the surface is vulnerable to scratches and deformations, has a low chemical resistance. They used to be popular for their rich color, but with the advent of glossy acrylic plastic, everything has changed.
- Aluminum facades with glass - suitable for a high-tech kitchen. They look modern, but are difficult to manufacture and install. For their fastening, non-standard fittings are used.
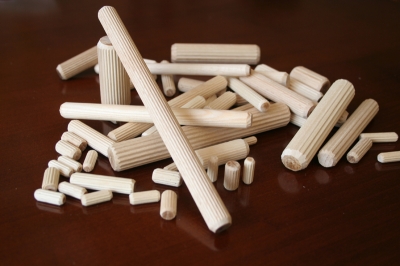
- Wooden dowels - inserted into pre-drilled holes in both parts. They are used for pre-fixing and strengthening the load "on the cut", then the parts are fixed in a more reliable way.
- Furniture corners are a popular but outdated type of furniture fastening. Among the minuses: appearance, loosening over time and bulkiness.
- Euroscrew (confirmat) - furniture screw. This is the main fastener of details in modern furniture. Furniture makers almost never use ordinary self-tapping screws. Confirmates have a large thread, so they hold inside the chipboard much better.
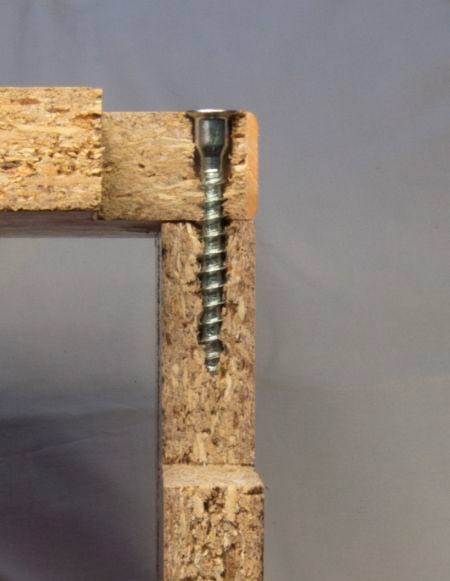
Holes for them can be drilled right in place. For this, a special drill is used, which makes a hole with a different diameter for the thread, neck and head of the Euroscrew. The most commonly used confirmations are 7 * 50 mm. When drilling, special attention should be paid to the perpendicularity of drilling, so as not to spoil the coating of the part with a through hole.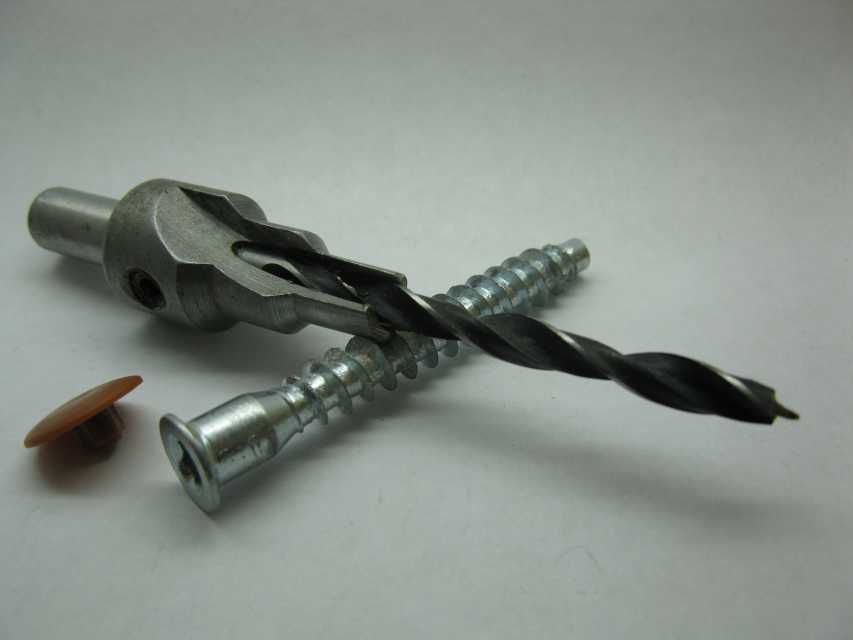
Furniture screws are tightened with a hex wrench or a screwdriver bit. The caps for the Phillips screwdriver cannot be tightened tightly to the end.The main disadvantage of this type of fastening is that the caps screwed flush remain in sight. To hide them, use plastic plugs in the color of chipboard.
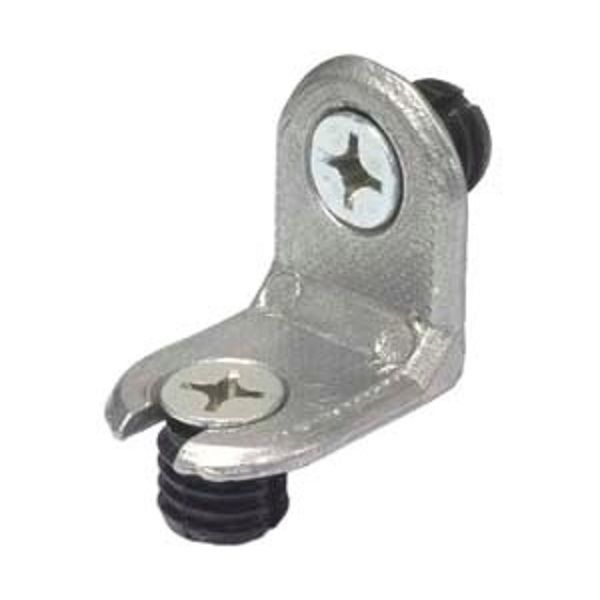
- Eccentric ties are a modern and correct way of fastening. It leaves a hole only on the inside of the product, but requires very precise drilling.
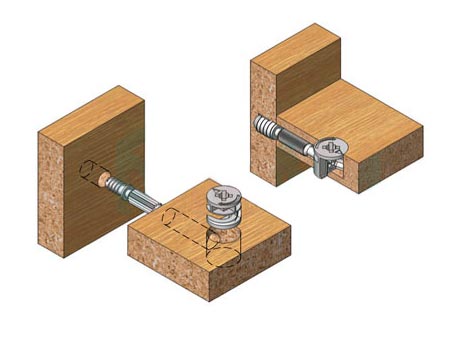
To obtain the necessary holes, a Forstner drill is used. It doesn't make much sense to bother using them to assemble elements that will be hidden, but they are well suited for attaching drawer doors.
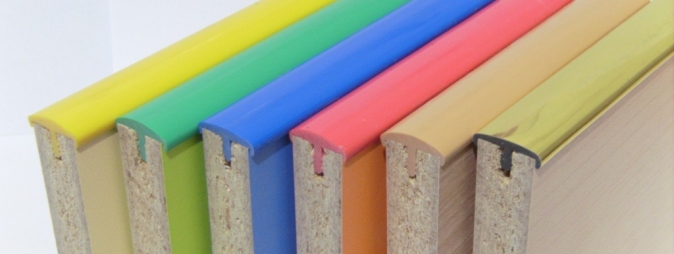
 PVC edge 2 mm
facades
Kitchen facades and furniture doors are usually made of more elegant material. But if you are making a drawer door inside a closet that no one will see, you can also use a regular 16 mm chipboard with a 2 mm PVC edge for it. But cabinets in the kitchen should look more presentable.
The facade is a separate furniture element. It is usually made to order. If the dimensions of the facades are non-standard, their production may take several months.
You can easily navigate by standard sizes: usually the facades are made 2 mm smaller than the cabinet itself on each side. Therefore, for a standard 600 mm cabinet, a 596 mm front is used.
The height of the kitchen cabinet also depends on the facade and ranges from 715 to 725 mm for floor cabinets (without legs) and low wall cabinets, and 915-925 mm for high wall cabinets. 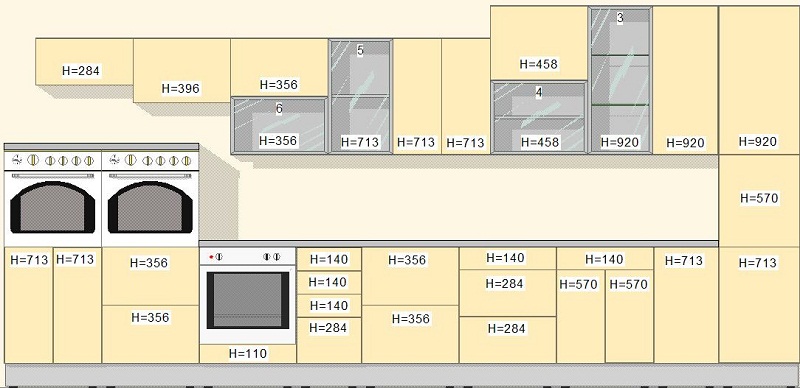
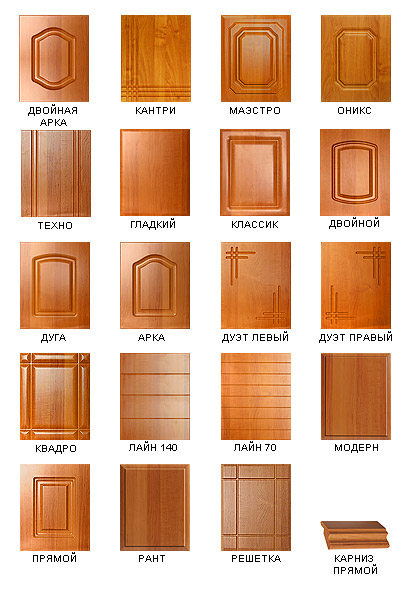
Types of facades
Since the facades perform mainly a decorative function, the choice is huge, they differ in appearance and material.
 Facades from MDF
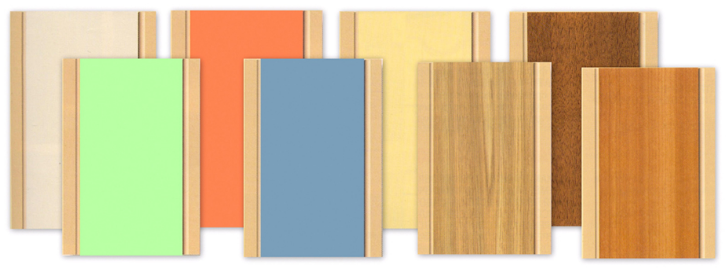
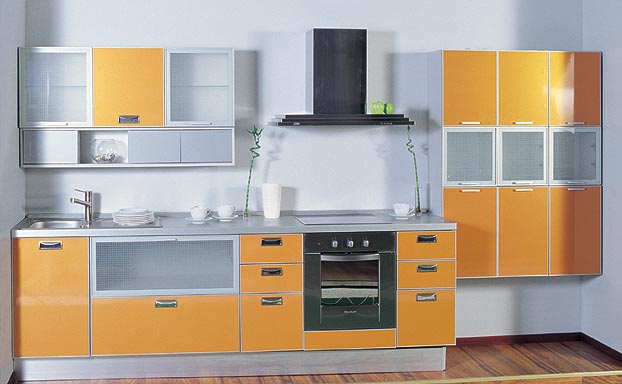 Plastic facades in aluminum profile
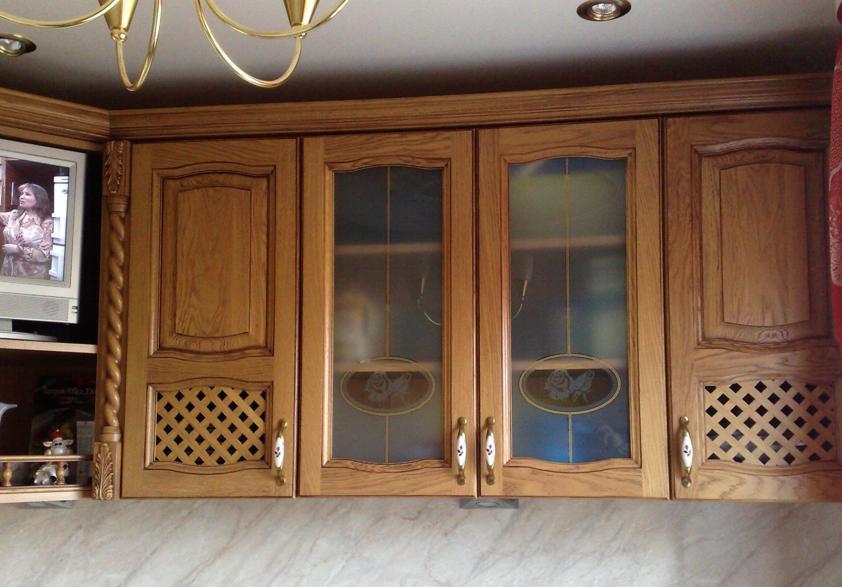
Back walls and drawer bottoms
The back wall and bottom of the drawers are most often made of HDPE. The smooth side of the sheet should look inside the cabinet / drawer. The thickness of the sheets is 3-5 mm, the color is selected according to the chipboard.
Some people prefer to attach HDF to a furniture stapler, but this cannot be done. Over time, the staples loosen and the structure can warp. It’s not worth talking about the bottom of the boxes - the stapler is clearly not suitable for fastening. 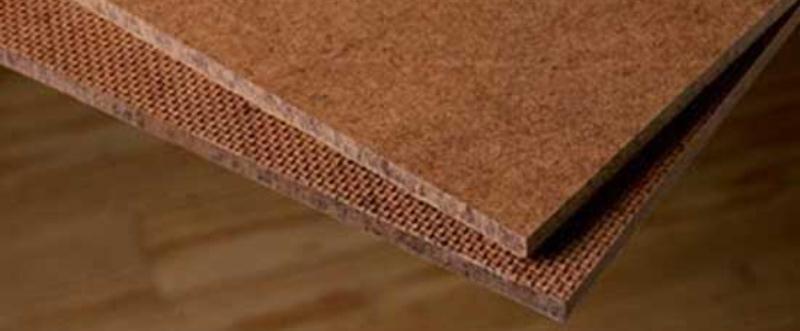 Furniture HDPE
Sometimes it is inserted into the groove prepared by the cutter, but all dimensions must match to the millimeter.
Most often, HDPE is attached to nails or self-tapping screws. It is better to use self-tapping screws with a press washer, but before screwing them in, you need to drill a hole, otherwise the product may crack.
In rare cases, for example, to create a "stiffening rib" in a tall cabinet or in drawers with high loads, fiberboard is replaced with chipboard. These materials can also be combined.
Countertops
A countertop is a horizontal work surface on which you can cook, eat, read, write, etc.
Most office and writing tables, as well as cheap dining tables, have a top made of the same chipboard as the main parts. The thickness is 16 or 22 mm, it is obligatory to frame the PVC with a 2 mm edge.
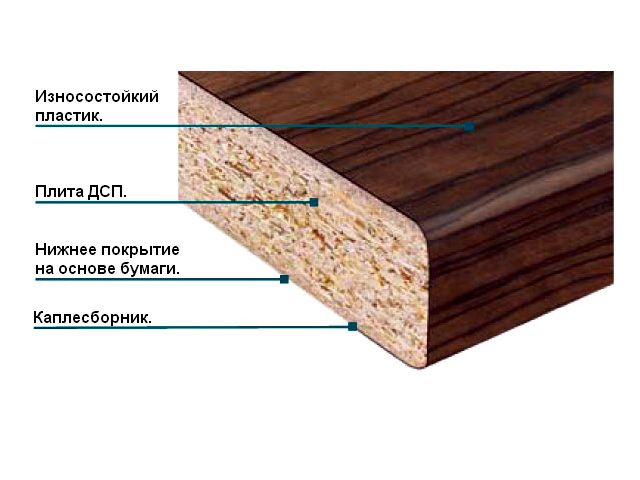
For the kitchen, special countertops are used. They are a sheet of chipboard with a thickness of 28-38 mm, which is covered with durable plastic on top using postforming technology. Moisture-resistant countertops are green on the cut, and ordinary chipboard is gray. A proper kitchen worktop should have a drip tray that will prevent dripping liquid from entering the fronts and drawers.
The weak point of such countertops is the saw cut edge. Usually they are covered with a simple melamine edge, so they become unusable in the first year of operation. To avoid this, it is recommended to protect the edges with special aluminum profiles (end plate), and to protect against moisture, pre-lubricate the saw cut with silicone sealant.
There are also other types of profile: corner and connecting strip, which are needed to join several cabinets with different countertops.  Corner, connecting and end strip for worktop
Another element is a decorative corner that closes the gap between the wall and the countertop. 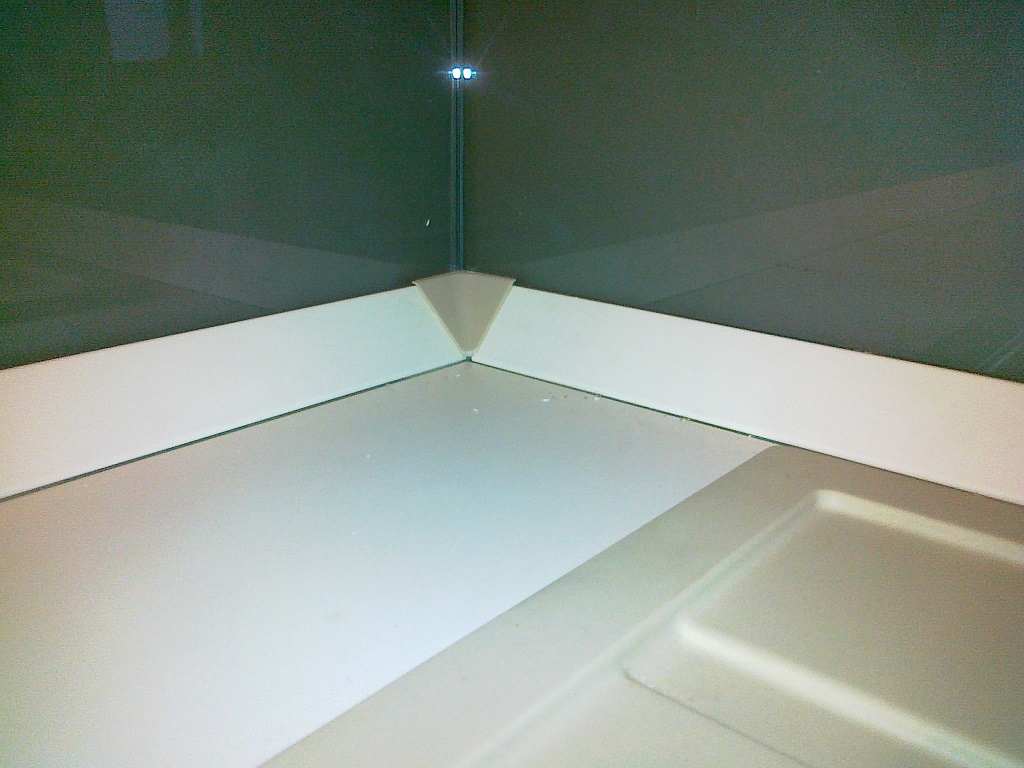
A wall panel is sometimes used to finish the apron. Unlike tiles or mosaics, they are more practical due to the absence of seams and inexpensive compared to glass aprons.
The fastening of the tabletop to the cabinets is done from below with short self-tapping screws to the horizontal struts so as not to spoil the smooth front surface.
Countertops made of natural or artificial stone are of higher quality and more durable than others. Natural stone is heavy and requires special care due to its high porosity. And artificial stone does not have such shortcomings, it can be given any size and shape. The main disadvantage of stone countertops is the high price; for a small kitchen, they cost from 40 thousand rubles. and more.
An alternative option is a tile or porcelain stoneware countertop. You can make it yourself, but the tiles cannot be mounted on ordinary plywood or chipboard. Previously, the base must be sheathed with cement-fiber sheets.
Location of parts
A detail is any element of cabinet furniture: covers, countertops, walls, facades, shelves. Each item can be either nested or invoiced. Choosing the right type of location is very important.
Consider examples of two kitchen cabinets: one of them will stand on legs, and the second will be suspended.
Floor cabinet:
As you can see in the photo, the operating voltage in the floor cabinet is directed downwards from the cover and in the first version is naturally transmitted through the parts to the legs of the cabinet.
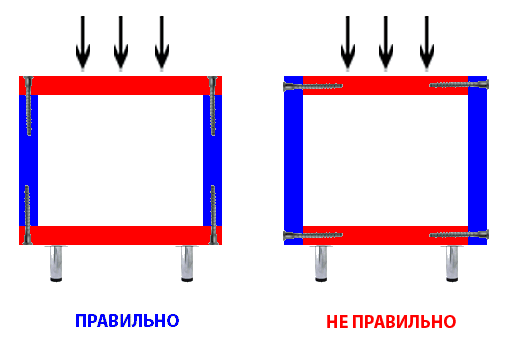
In the second, incorrect version, the load is transmitted through the confirm (furniture screw), and because of this, it will be pulled out of the part for a break.
Wall cabinet:
In the second example, the opposite is true: the load will go to the bottom shelf, and the attachment point will be on top. 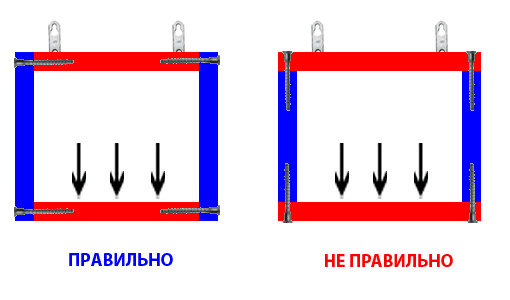
If we apply here the same fastening scheme as in the floor cabinet (option 1), all 4 bolts will be constantly under load to pull out of the wood. Therefore, it is better if the confirmers experience a fracture load (see the “correct” diagram).
Furniture fasteners
Furniture fasteners are hardware (metal products) that are used to connect parts. Most often, the connections are made at right angles.
 furniture corner
furniture fittings
From inexpensive manufacturers of accessories, we can recommend the Chinese Boyard, from serious world manufacturers - the Austrian Blum.
Drawers and guides
There are many ways to make furniture boxes. The easiest of them is to assemble the perimeter from chipboard. If a beautiful facade is required, it is screwed on top of the main frame from the inside (like the countertop). Also, the facade can be mounted on eccentrics as the fourth wall of the box.
But the main thing is not to assemble the drawer, but to fix it correctly.
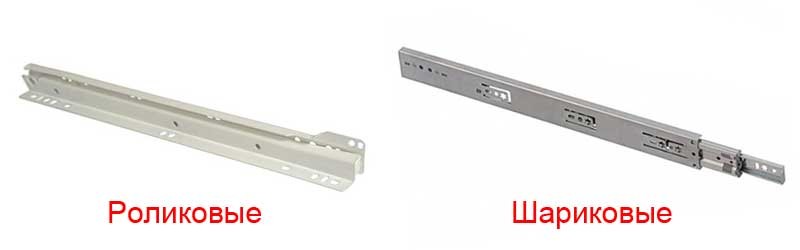
Guides for boxes are divided into roller or ball.
Doors for wardrobes
The sliding wardrobe can be separate (with side and rear walls), or built into a niche or corner (with one side wall). The internal filling can be anything: ordinary shelves and mezzanines, drawers and baskets, clothes rails, special hangers for trousers, ties, etc.
Related article: .
The main element of the wardrobe is sliding doors. You can’t save on them, you need to buy high-quality fittings, otherwise then you will be tormented with falling and jamming doors. It is not a problem to find domestic Aristo sliding systems in almost any city in specialized stores.
The sliding wardrobe usually has 2-3 doors. They consist of a profiled frame, inside which decorative elements are inserted: mirrors and glass, laminated chipboard, rattan, bamboo, artificial leather sheets (on the basis). Each door can be assembled from a combination of several of these materials, which are separated by an aluminum profile. In width, it is not recommended to make doors more than 1 m.
Standard profiles are designed for a web thickness of 10 mm. But how to insert a 4 mm thick mirror into it? To do this, a silicone sealant is put on the edge of the mirror. So that in the event of a blow, broken glass does not hurt anyone, you need to order a mirror with a film glued to the wrong side.
The movement of the doors goes along the guides, they are installed from above and below. The lower doors provide forward and backward movement, and the upper ones fix the door relative to the depth of the cabinet.
The bottom rollers are usually made of plastic, have a shock-absorbing spring and a height adjustment screw. The top rollers have a rubberized surface.
With the proper approach, home-made furniture turns out to be cheaper and better than those exhibited in stores. But besides this, it will be exclusive, precisely suited to the needs of the owners and the features of the room.