Do-it-yourself furniture from a furniture board: from drawings to assembly
Cabinets, shelves, tables, chests of drawers - whatever is made of a furniture board! Where does the popularity of slats and bars, glued together using a special technology, come from? Everything is very simple, this material is environmentally friendly, durable, in no way inferior to solid wood furniture, and at the same time, its dimensions can be much larger than that of a conventional board. About creating products from it, about how to make a furniture board with your own hands, read on. Cabinets and chests of drawers, assembled independently from safe material, will delight you with an acceptable price-quality ratio and form an indescribable effect of the naturalness of the home environment.
Where to begin
A home craftsman who decides to assemble his furniture board should take care of having at hand:
- a belt and surface grinder (you can use an emery cloth screwed onto a block, but this will lengthen the process);
- clamps or homemade devices for tightening boards;
- plywood and thin slats for rallying lamellas;
- tool for measuring length;
- thicknessing rack with clamp;
- milling machine;
- lumber;
- electric planer;
- circular saw;
- pencil
- hammer;
- drills;
- glue.
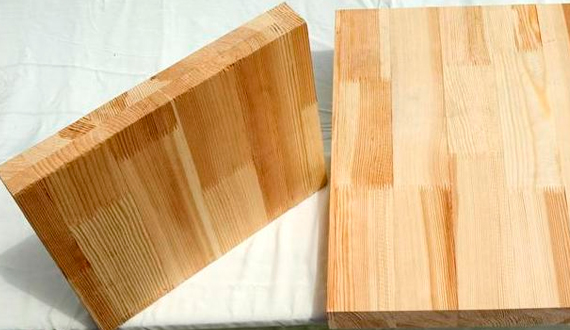
Rice. 1. Blanks for furniture board
Then you should decide on the size of the future wooden canvas. So that the result does not disappoint, adhere to the following recommendations:
- the length and thickness of the workpieces must be greater than the final parameters;
- on a separate sheet there are boards made of wood of only one species;
- you can use only dry and even blanks with a minimum number of knots;
- the ratio of width to thickness for lamellas (non-jointed blanks) is taken as 3x1 (the internal stress of the wood with a similar aspect ratio is not enough to split the lath).
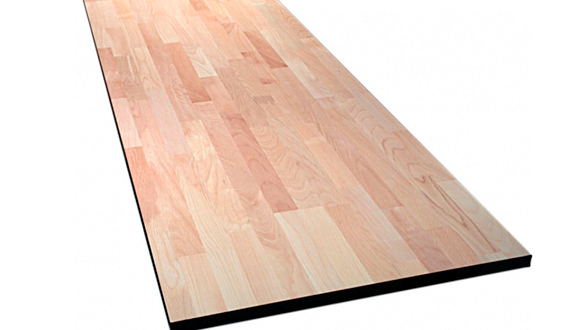
Rice. 2. Furniture shield
It must be taken into account that during shrinkage, warping of wood goes in different directions. It occurs most intensively along the tangential direction (along annual rings), weaker by 2 times - along the radial direction (along the core lines).
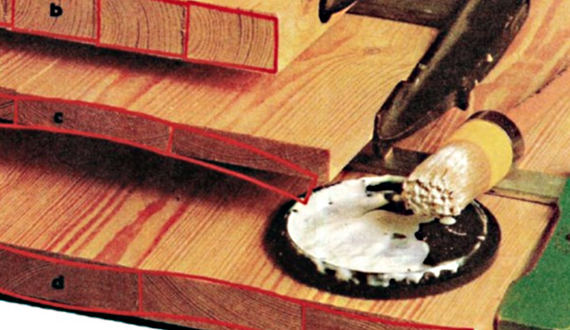
Rice. 3. a) the core is connected to the core; b) the sapwood (the outermost layer directly under the bark) is fused to the sapwood; c) and d) we use workpieces with a serration (random arrangement of wood fibers) noticeable to the naked eye, we orient them along the lines of annual rings.
Gluing technology
To minimize warping during shrinkage, we select and lay boards next to each other with an optimally similar arrangement of annual rings. We mark them in any noticeable way, for example, by drawing a figure. Then, it will help not to waste time looking for the right lamella (non-jointed blank). The ends of the blanks before gluing must be planed off.
Further procedure:
- Fold the slats into a pack, coat the ends with glue (blanks placed in a plastic bag stick together more slowly).
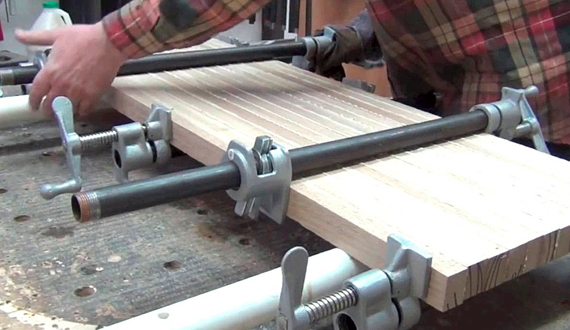
- We tighten the glued wood with large clamps. You can use a waima (a device assembled from scraps of blanks). The tightening moment is achieved by wedges hammered between the stop and the end face of the lamella. Or clamp boards between metal shelving brackets. The principle is the same - grip along the edges is done using wooden bars and wedges.
- Thorough drying of the spliced fabric. To make the surface even and smooth, we plan the shield, grind it and remove excess glue.
Rice. 4. Lamella joining
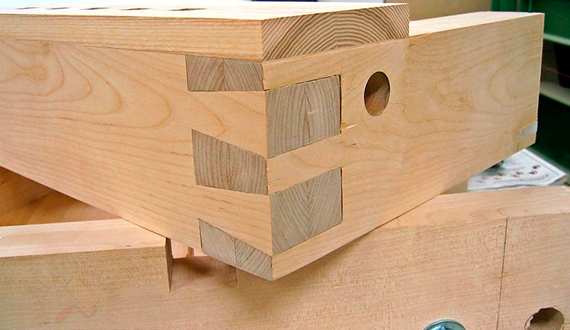
Rice. 5. Connecting wooden elements
It is acceptable to use different ways of connecting lamellas. A shield made without glue can provide powerful interfacing. To understand this, explore the options illustrated below.
Rice. 6. Furniture panels
An example of furniture from a furniture board assembled by oneself can be a table for working at a computer. To install this multifunctional, compact product, you will need:
- 3 shields with dimensions 2000x600x18 mm;
- 3 - 2000x400x18 mm;
- 2 - 2000x200x18 mm;
- edged board 12x120 mm;
- plywood in 6 mm;
- dowels.

Rice. 7. You can assemble a computer desk of any size from furniture panels. Choose the color, number of shelves and drawers at your discretion.
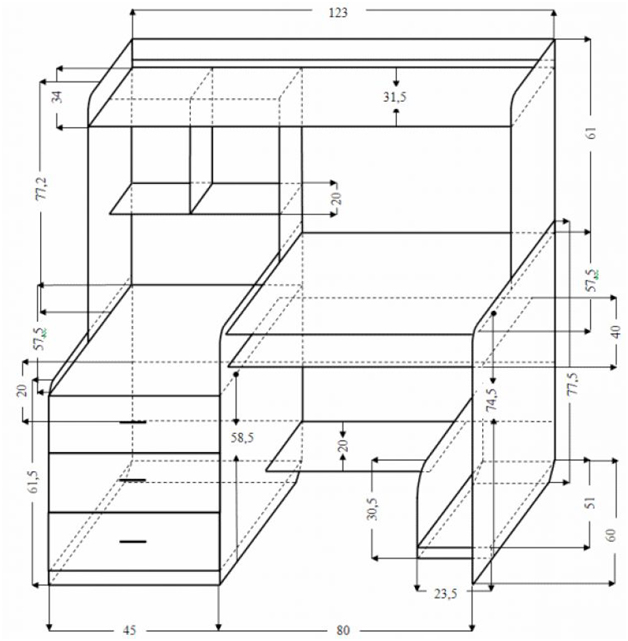
Rice. 8. Computer desk: assembly diagram with dimensions
First of all, we draw up drawings, take measurements, then proceed to the direct manufacture of the table:
- We cut a large shield on the countertop, side walls, bottom and top of the cabinet.
- We plan the corners of the sidewalls of the upper outer part, give them smoothness.
- In the sidewall that will fit snugly against the wall, we make a recess for the plinth (5x5 mm).
- In the center of the side inside the vertical wall, to achieve the required rigidity, we install a transverse panel. We fix on self-tapping screws.
- We cut down sharp corners and make recesses for the plinth in a niche, which is intended for the system unit.
- We carry out a frame for shelves placed above the table.
- We attach the frame to the already connected parts.
- We cut the middle shield for the top shelf, the small shield will go to the middle partition connected to the tabletop.
- From a small shield we make a shelf with a jumper and place it above the cabinet.
- We make drawers. The walls are made from edged boards, the bottom is made from a sheet of plywood. We connect everything with screws.
- We install ball or roller mechanisms for drawers and countertop shelves.
- We cut out the tabletop for the keyboard from a shield 40 cm wide. Trimmings can be useful for decorating drawers from the outside.
- All products are disassembled.
- Table elements are processed by a grinding machine.
- All components are covered with 2 layers of varnish.
- After it dries, the final assembly of the entire table is performed.
- We install handles and decorative elements.