How to make a countertop for the kitchen yourself: choose the material and do it yourself
How to make a countertop in the kitchen yourself? Such a question arises after a person has walked through the trading rows and asked the price of the designs that interested him. Prices bite, and the desire to do everything yourself increases.
If you think it over well, then the question of how to carry out the work with your own hands will not seem insoluble. There are many designs and technologies that are quite within the power of many people.
Kitchen countertop features
The kitchen table has its own specific and functional features. It has a certain dominant position in the interior of the kitchen. At the same time, it should carry the main functional purpose - all food preparation work is carried out on it. This condition provides that the countertop will be exposed to significant mechanical loads (impact, compressive, abrasive, cutting, vibrating, etc.) and extreme temperatures in different directions (from frozen food to hot dishes just removed from the stove). The coating must be resistant to the action of aggressive substances (acidic, alkaline media, fats, etc.), have increased water resistance, not absorb fats, and be easy to clean from dirt.
Kitchen worktop design
The kitchen worktop is designed based on the following setting parameters:
- the form;
- dimensions;
- the height of the location and the presence of special elements.

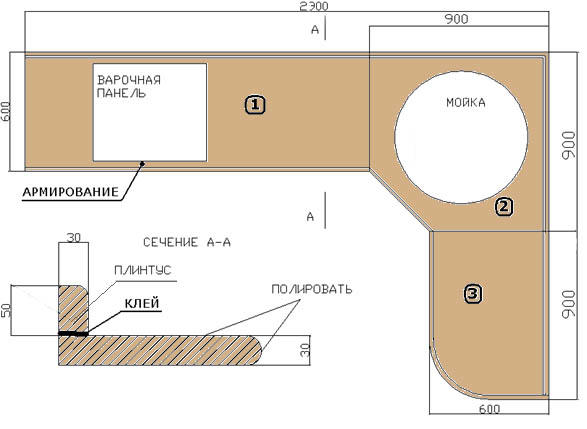
The dimensions and shape of the countertop are selected taking into account the dimensions of the kitchen, the location of the table, the ratio of sizes with other furniture, the required working area and the taste of the owner. Usually, its standard width is about 60 cm, the thickness does not exceed 5 cm, and the length is consistent with the kitchen set. Convenient height - no more than 1.2 m.
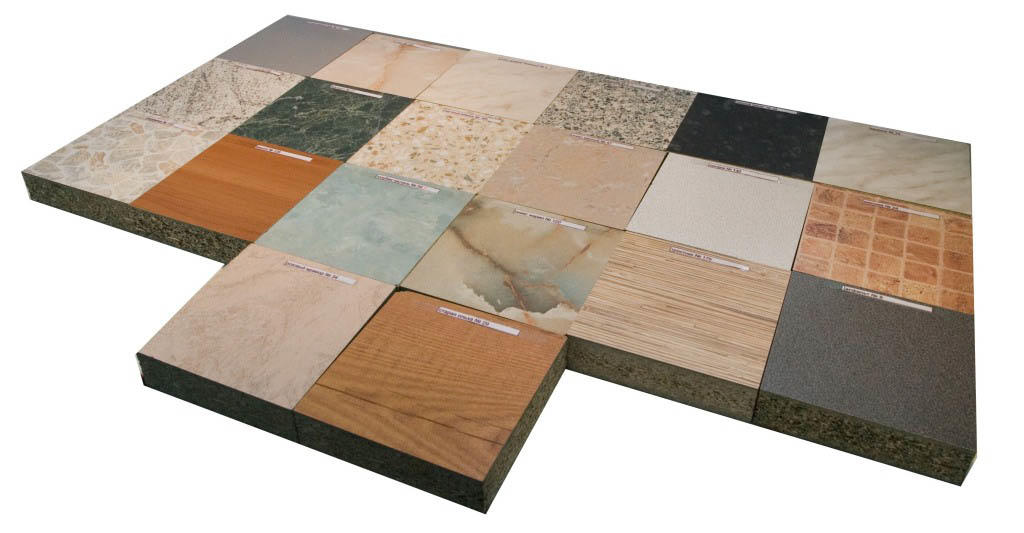
According to the material, the kitchen worktop can be different at the discretion of the owner and financial possibilities. Main materials: wood, chipboard, MDF, concrete, ceramics, plastic, stone (natural and artificial), concrete, metal.
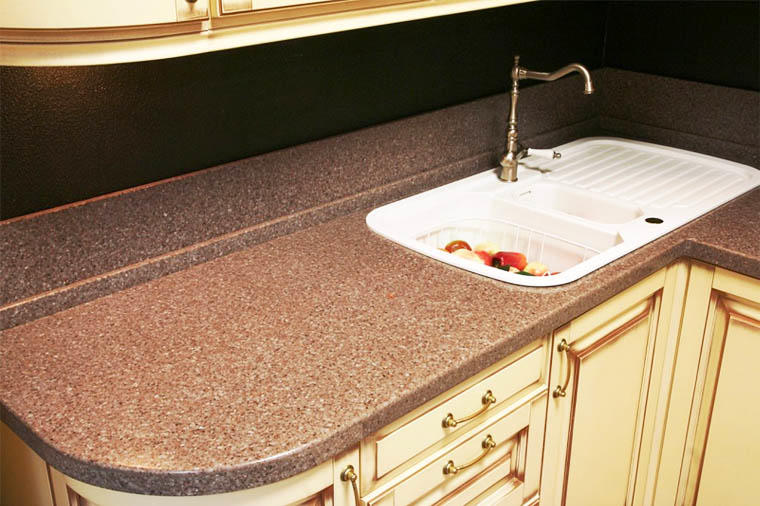
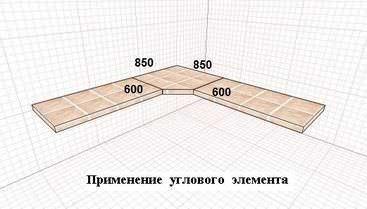
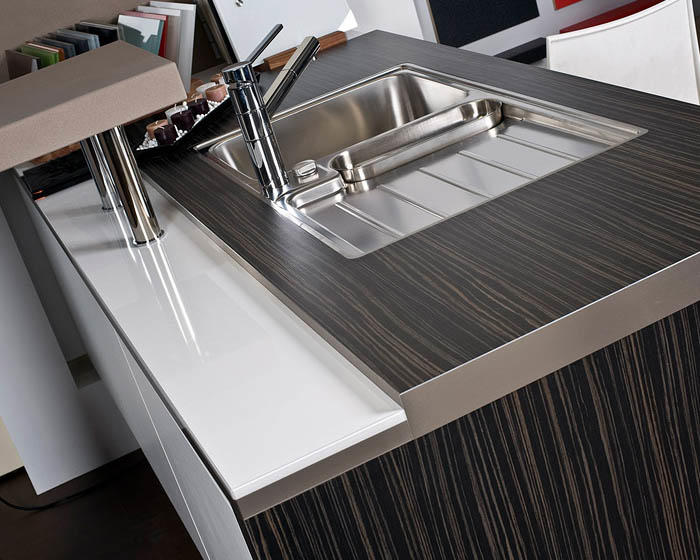
At the kitchen table, additional functional elements can be made - a built-in sink, tides for cutting food, reinforced zones for shock loads, etc. According to the location of the table in the kitchen, the following varieties can be distinguished: corner, island (central), elongated designs.
Making concrete countertops
The concrete countertop is mounted on the existing kitchen table frame. Do-it-yourself manufacturing begins with the installation of formwork. It is best to mount it on an old countertop, and in the absence of one, you can use a sheet of plywood or fiberboard as a base, for which they are cut to a given size. Along the edges of the base, the sides of the formwork made of boards or timber are attached so that their height corresponds to the thickness of the table top. If according to the plan it is necessary to make a built-in sink, then its location is limited to additional sides, for which a wooden bar is attached with screws. The entire internal volume of the formwork is carefully covered with a plastic film to hold the solution.
Concrete preparation
Do-it-yourself concrete mortar is prepared with the following composition: Portland cement M400 (1 part) is mixed with sand (2 parts) and fine gravel (2 parts). The solution is mixed with water to the consistency of liquid sour cream. It is recommended to mix the solution using a construction mixer or a drill with a nozzle.
Stages of work
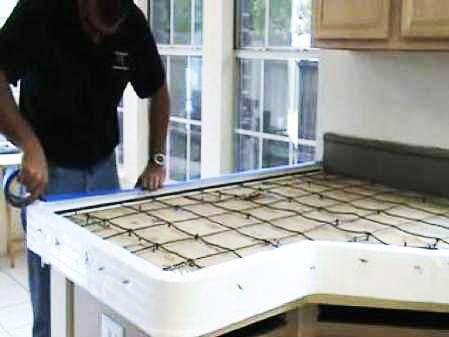 Before pouring concrete, it is necessary to reinforce the countertop. To do this, steel wire with a diameter of 6-8 mm is laid in the form of a mesh with a cell with a side size of about 5-6 cm. The reinforcing mesh rises above the formwork base by 20-25 mm. The mesh should not reach the sides of the formwork at a distance of at least 10 mm.
Concrete mortar is poured into the formwork, and its sides are used as a guideline for the thickness of the pour. The solution should be applied with a compaction with a spatula. The surface of the countertop is carefully leveled and dries for 2-3 days. You can improve the quality of manufacturing a concrete countertop for a kitchen with your own hands by using a polymer cement mixture intended for self-leveling floors instead of concrete. Such material will provide a smooth fine-grained structure.
Forming the surface of a concrete countertop
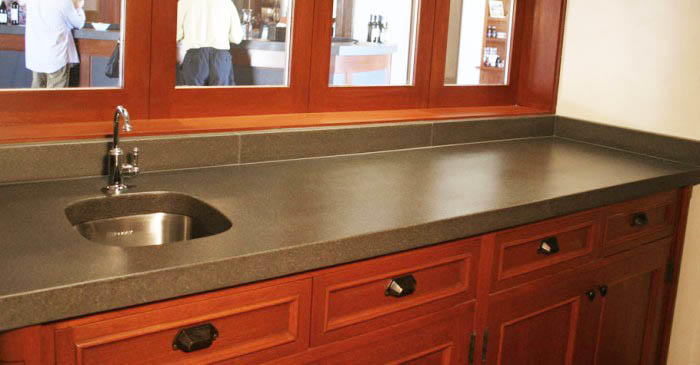
A do-it-yourself concrete countertop can be decorated in several ways: grinding the surface to imitate granite and applying ceramic tiles. A grinding machine with a power of at least 1 kW is used to process concrete blanks. First, grinding is carried out with a coarse-grained disc to eliminate large irregularities and surface gravel. Then a fine-grained grinding wheel is installed and the table surface is brought to a smooth state.
Using a vacuum cleaner, dust is removed from the surface and a layer of standard concrete pore filler with a grease-repellent effect is applied to it. After the impregnation has hardened, a suede coating impregnated with grinding paste is fixed on the machine disk, and the tabletop is polished with your own hands. The surface of the concrete will take on the appearance of granite.
How to make a concrete kitchen countertop (video instruction)
Liquid granite countertop
Tile worktop
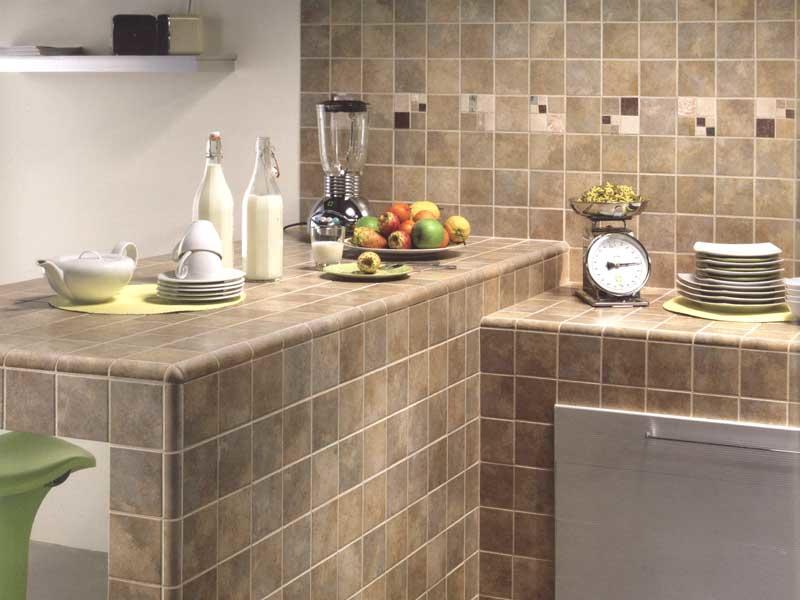
The second option for decorating the countertop with your own hands can be done by applying ceramic tiles. The tile is laid on a standard adhesive composition, which is applied to the tile with a notched trowel. The thickness of the adhesive layer is 2-3 mm. Beacon crosses are installed between the tiles in the corners to obtain identical seams. The seams themselves after laying are filled with a standard grout (preferably epoxy-based), to which pigment can be added to give the seams the desired shade.
In order to finally make the tabletop with your own hands, you need to veneer its ends. For these purposes, you can use a plastic or aluminum profile. The metal element looks more preferable, as it strengthens the strength of the butt. To fasten them, use self-tapping screws and thin dowels.
We make a do-it-yourself tile countertop (video instruction)
Well, you can learn more about the manufacture of countertops and see examples of finished results in this article.
Required Tool
In order to make a concrete or tile countertop for a kitchen table, you will need the following tool:
- electric drill;
- construction mixer;
- grinder machine;
- hacksaw;
- hammer;
- screwdriver;
- scissors;
- putty knife;
- notched spatula;
- Bulgarian;
- Master OK;
- a vacuum cleaner;
- paint brush;
- hacksaw for metal;
- tile cutting device;
- rubber spatula;
- roulette;
- level;
- metal ruler.
Manufacturing of countertops from chipboard
Tool for countertops based on chipboard:
- Bulgarian;
- electric drill;
- screwdriver;
- construction mixer;
- hacksaw;
- electric jigsaw;
- grinder machine;
- scissors;
- paint brush;
- spatula rubber and scallop;
- level;
- roulette;
- metal ruler.
The simplest countertop is made of chipboard sheets with plastic cladding. A chipboard sheet with a thickness of 18-20 mm is marked and cut to the intended dimensions using an electric jigsaw or grinder. The ends of the sheet are treated with silicone sealant. The base of the tabletop can be made from two sheets of chipboard, connected together with screws or using a construction stapler.
Sheet decorative plastic is cut so that it is 2-3 mm larger than the chipboard blank in all directions. With an adhesive composition based on epoxy or polyester resin, plastic is glued to the base of the countertop. After drying, the excess coating is cut off with a construction knife. The ends of the tabletop are formed similarly to the concrete structure.
The surface of a chipboard-based countertop can be made from mineral chips, for example, the Royal Stone brand. To do this, a thin layer of polyester resin primer is applied to the chipboard base. The stone layer is formed separately; for which liquid stone is poured onto the glass in two layers. A mixture of liquid stone is mixed with cobalt (1.5%) and a hardener using a construction mixer. Mixture consumption - 3 kg per 1 sq.m of surface. After polymerization of the stone layer, it is glued to the chipboard with adhesive based on polyester resin. The surface is polished with a sandpaper or a grinder using a grinding paste.