Wall decoration with butterflies: templates, manufacturing and design procedures, video instructions. Butterflies on the wall - the perfect wall decor (75 photos) How beautiful to stick butterflies on the wall
To make the interior comfortable, you need to pay more attention to details. One of these details may be the presence of wall butterflies. They are a symbol of lightness and are associated with the summer season, when it is warm and sunny outside, so if a person wants to provide real comfort in his home, then butterflies created by himself or purchased in a store will be an ideal option.
In the interior
Butterflies in the interior are presented in the form of a panel, which is made of a variety of sheet material, and then attached in an elegant application to one wall or several at once. There are many options for materials for creating butterflies, as well as many variations on how to hang them, it is the combination of these factors that affects how the presented decor element will look in the interior.
Butterflies can be mounted on the wall, both in an arbitrary form, and create a single three-dimensional picture.
Attention! If you make this decorative element with your own hands, then it is recommended to select a lighter material, then when the wind blows, the butterflies will rustle their wings, creating the effect of being ready to fly up.
What style are they suitable for?
The presented decor element is suitable for decorating almost any style, but they look especially bright in the presence of the following styles of room decoration:
- provence;
- high tech;
- modern;
- minimalism;
- classic.
The main thing is to ensure that the color of the butterflies is combined with the overall color scheme of the interior design, because otherwise, the decoration will turn out to be ridiculous and tasteless. But it is desirable that the butterflies differ in color by at least 1-2 tones, because otherwise they will simply merge with the walls.
The following combination will be organic:
- red and green on a beige wall;
- Yellow, brown and black on a gray or white wall;
- rich blues or reds on a pink wall.
Preparation for work
To create a picture of paper moths, you need to carefully consider the future composition, and then proceed to prepare the stencils. If your own imagination does not suggest any ideas, then you can get acquainted with photographs of compositions with wall butterflies on the Internet. The image of a whirlwind or simply a scattering of moths in suitable places is popular.
Having decided on the future composition, you need to choose the material from which the decorative elements will be made and create a stencil. In the absence of the necessary materials at home, you will have to visit any stationery store or arts and crafts store.
Moths are created on plain paper or vinyl using stencils. It is advisable to purchase several stencils, then when mounted on the wall, the butterflies will differ not only in size, but also in appearance, which will look more original.
What material to use?
You can cut moths from almost all materials:
- paper;
- cardboard;
- vinyl film;
- the cloth.
All presented materials are characterized by a number of advantages and disadvantages.
Paper
The presented material is suitable for people who first encountered interior decoration with the help of moths, since paper is the easiest way to create beautiful butterflies. Due to the low cost of the material, you don’t have to worry about how much paper it will take to cut butterflies. You can opt for colored paper, which can be purchased at any stationery store.
If a person prefers variety, then you can go beyond just one color and cut out moths from long-read glossy magazines. As a result, the owners of the house will become the owners of the scenery, consisting of butterflies of different colors.
You can attach butterflies from such material in any way. The big plus is that when the moths are fully glued, they will not stand out much above the wall surface, but if only the central part of each individual butterfly is glued, then they can be made to sway in the wind.
Cardboard
Moths made of cardboard will be several times stronger and more reliable than paper ones. When cutting out these butterflies, you have to make a little more effort, but you can shape them as you want, since the cardboard easily takes shape and retains it forever.
You can bend the wings of insects or make them rounded. To carry out these actions, you need to wet the cardboard a little and, using a load, bend it in the desired way. When completely dry, the cardboard will forever remain in the desired form.
Difficulties may arise during the fixing of cardboard decorative elements, since they will have to be fixed more reliably.
Vinyl film
Vinyl film, which belongs to self-adhesive materials, is just perfect for creating decorative moths. The film is glossy and colorful, as a result of which the moths are not only characterized by rather bright colors, but also shimmer in the light.
It is quite easy to cut out butterflies from such material, and attaching the resulting moth to the wall is even easier, since you only need to remove the protective layer from the film and then stick it in the desired place. If the owners of the apartment want the moth to move its wings, then the protective layer must be removed only in the center, in the form of a thin vertical strip.
Textile
Fabric is an ideal material for creating butterflies if liquid plain wallpaper, drapery or any fabric that is soft to the touch act as wall decoration. Moths cut from the specified material will only complement the interior, adding comfort to the room.
How to fix?
In order for the created moths to hold firmly on the wall and not fall off the next day, it is important to carefully select the method of attachment, there are several of them.
Glue
Using glue to attach butterflies to the wall, the owner of the apartment can be sure that the described decorative elements will hold tight. Glue can be used either in the form of a pencil or PVA. The main thing is to ensure that a very large amount of glue is not used, as it will protrude beyond the edges of the moths and ruin their appearance, while leaving marks on the wallpaper.
Glue is considered a simple way to attach the presented decor elements to the wall.
pins
To attach your own butterflies, you can use pins of different sizes and shapes. At the same time, in order to add a picture of butterflies fastened with pins, the pins should be selected with some beautiful head or decorated with different pearls. Pins are suitable in cases where the walls are finished with plastic panels, ordinary or cork wood, and drywall.
If wallpaper was used as wall decoration, then you can perform a slightly different action. Using pliers or pliers, bend the end of the pin 1-2 centimeters at an angle of 90 degrees. After completing these steps, the bent end of the pin is brought under the wallpaper, thus fixing the moth.
Attention! To connect the pin and the butterfly, you should use Moment glue.
Styrofoam
A small piece of polystyrene is taken and, with the help of glue, it is connected to the butterfly on one side and to the wall on the other. This mounting option is rather unreliable, since the foam is not a strong enough material and if it breaks, it will be very difficult to separate the remaining part from the wall.
Threads
With the help of thin threads or fishing line, moths are hung by the eaves from the ceiling or chandelier. This method of fastening makes it possible to create a three-dimensional picture.
Wall decoration with luminous butterflies
To create this type of decoration, the butterfly should be attached to a white wall, and a table lamp should be located nearby.
For this decoration option, you will need the following components:
- stencils;
- phosphor paint (preferably several colors at once);
- pencil;
- several sponges;
- palette and brushes;
- glue (recommended in the form of a spray).
After preparing all the described things, you need to perform the following actions:
- Initially, you need to make several stencils that are attached to the wall with glue.
- Sponges are cut into several parts, each of which is attached to the brush handle.
- If it was decided to use paint of several colors, then each color is prepared separately on the palette, and then alternately applied to the stencils already attached to the wall.
- As soon as the paint is completely dry, you need to remove the stencils, turn off the lights, and then enjoy the unusual view of glowing butterflies.
Attention! To analyze whether the paint is lying down correctly, it is recommended to carry out the described actions in subdued light.
Master class step by step
Those people who have decided to make butterflies for decorating walls on their own should familiarize themselves with several master classes on how to create them.
Colored paper moths
To create butterflies from colored paper, you will need the following materials:
- thick colored paper;
- a printer;
- sheets of white paper (templates will be created from them);
- cardboard (the density is chosen such that it can be bent);
- simple pencil;
- scissors;
- glue.
Having prepared the presented components, you can proceed to the creation:
- You need to print several templates and then cut them out of paper. If you use pictures of different sizes, then the final result will be more interesting.
- Cut out templates are applied to cardboard, circled with a simple pencil, and then cut out. If possible, then the templates can be immediately printed on cardboard.
- The templates are traced on the back of colored paper and then cut out. It is recommended to create more instances. Each of the specimens is bent in half, this is necessary to provide the moths with the effect of fluttering wings.
- A small amount of glue is applied to the fold of each butterfly, and then the blanks are attached to the wall. The central part of the moth should be lightly pressed with a finger against the wall, this is required so that the moths do not lag behind.
Attention! To give the butterflies more realism, they should be placed on the wall in such a way that they fly in one direction.
Origami
A rather original solution would be to decorate the wall using origami moths.
To make such a moth, you will need the following components:
- paper (sheet from a book or newspaper);
- paint - used to darken the edges of the wings;
- thin wire;
- pliers;
- simple pencil, ruler and scissors.
Having prepared all these things, you can proceed to the creation of butterflies:
- A 4 * 4 square is cut out of a book or newspaper sheet (it is allowed to use a 5 * 5 square).
- The paper is folded in half twice.
- After that, the square is folded diagonally in two directions.
- The paper folds inward, folds inward, as a result, a triangle should form.
- The two tips of the upper layer of the triangle are bent to the top.
- The triangle is turned over to the side, while the lower corner must be bent up so that it goes beyond the moth.
- The formed triangle is bent to the other side and glued to the base.
- The edges of the wings are darkened.
- A bird with bent mustache wings is created from wire.
- The butterfly unfolds in a small triangle upwards, its wings are bent and they are given a realistic shape.
- The wire is dipped in glue and attached in the form of antennae.
The made butterfly can be attached to the wall in any of the ways.
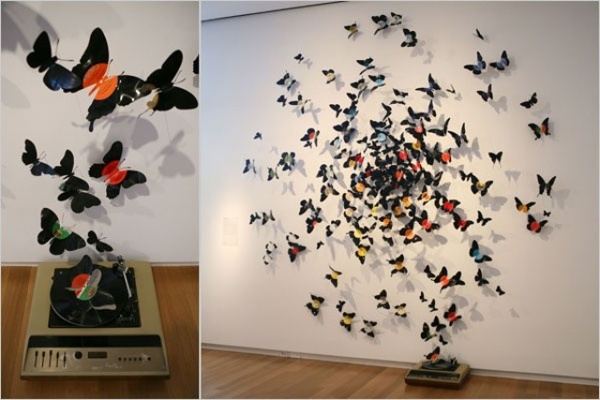
From vinyl records
Making butterflies out of vinyl records is easy if you follow a plan. You need to prepare a number of components:
- unwanted vinyl records;
- black and white chalk (can be replaced with colored pencils - you need any two colors);
- moth patterns;
- scissors.
Having prepared the auxiliary elements, you can directly proceed to the manufacture of butterflies:
- The middle of the template is marked on the vinyl record. The outline is outlined in white chalk on a vinyl record, and in black on a sticker located in the center of the record.
- You need to take a baking sheet, lay foil on it, and then place a vinyl record on the foil. The oven is heated to 400 degrees, and a baking sheet is placed in its upper part. The plate must be removed as soon as it begins to deform - after about 45 seconds.
- Cut out the butterfly using sharp scissors. If during this action, the plate begins to harden again, it must be placed back in the oven to soften. Vinyl cools quickly, so you need to cut the moth not only carefully, but also at a fast pace. It is possible that the plate will have to be warmed up several times.
- After you manage to cut out the butterfly, you need to carefully bend its wings.
After completing these steps, the butterfly can be attached to the wall.

Clay
The manufacture of moths from polymer clay is popular.
You will need the following components:
- moth-shaped baking dish;
- polymer clay (2.5 butterflies take 60 grams of material);
- white thread - a moth will be hung on it.
Having picked up all the components, you need to follow this plan for creating a butterfly:
- Using a polymer clay baking mold, workpieces are cut out, while using a needle in the center of the workpiece, you need to make 4 holes. The wings of the moths are folded back at different angles and they are placed in a glass baking dish. The clay is baked in the oven for 15 minutes, the temperature is selected as indicated on the packaging of the clay.
- If after baking the moths you need to increase the holes in the center, then you can take a sharp knife and carefully increase the holes. You can also use sandpaper and gently sand the edges of the products. If there is a desire, then the finished figures can be opened.
- The thread is threaded crosswise through the holes and tied in a knot at the back. Through the created knot, you need to pierce a pushpin and attach the butterfly to the wall.
Such butterflies, looking rather unusual, give the interior a certain elegance.
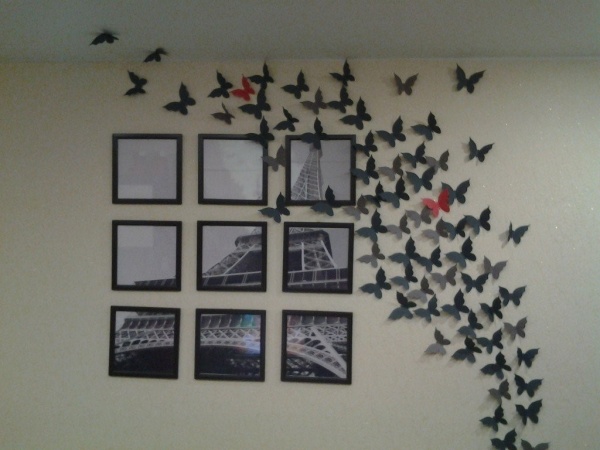
From the pages of a book
From the pages of an old book, you can make not just individual moths, but a whole wreath of them.
To do this, prepare the following items:
- an old book (in its absence, you can use unnecessary magazines or newspapers);
- thin branches (a willow branch will do);
- three wire hangers;
- hot adhesive;
- decorative elements in the form of beads, beads, shells and pearls;
- several strings;
- scissors;
- simple pencil.
Having prepared these elements, you can directly proceed to the creation of a wreath:
- You can use a ready-made stencil and simply circle it on the page of the book, or you can draw moths yourself. In the second case, you need to fold the page of the book in half, draw half a butterfly on it, and then cut it out.
- You need to collect willow branches and soak them in water, this will make the branches softer and protect them from breaking during bending.
- At the same time, you need to bend a wire hanger into a ring and wrap it with twigs, which should be pressed tightly one to one. The wreath is left to dry. After the wreath dries, the twigs are fixed with hot glue.
- To create antennae and a calf from butterflies, you need to take a few beads and two pieces of twine. With the help of hot glue, the beads are fastened together, while the glue has not yet cooled down, you need to insert two pieces of twine into the hole. After that, the body is glued to the paper blank. It is necessary to check that the wings are slightly bent - this will provide a fluttering effect.
- You need to beautifully place the moths on the wreath and attach them with hot glue.
The wreath can be placed not only on the wall, but also on the chest of drawers.
If the presented method of creating moths from the pages of a book seems too complicated, then you can use another method. This will require the following items:
- Old book;
- adhesive;
- scissors;
- frames for photos of different sizes;
- white paint.
Having prepared these elements, you can start creating moths:
- The frames are painted white (if desired, the color of the paint can be changed).
- Butterflies of different sizes are cut out of an old book.
- Butterflies are glued, the middle one is glued to the center of the largest moth, and the small one is glued to the center of the middle one.
- Butterflies are placed in photo frames and then on the wall.
It is not difficult to create a decoration for a room consisting of butterflies on your own, the main thing is to calculate your strength and start making simple decorating elements, for example, butterflies from colored paper. And those people who are fond of origami should definitely decorate their apartment with moths made using this technique.
If the time has not yet come for repairs, but you want to unusually diversify your home, you can easily do it yourself. Decorating an apartment or house with beautiful butterflies made of paper, cardboard and other materials is an interesting and stylish solution that does not require a lot of time and money.
The ceilings and walls in the apartment can be decorated using any material available at home, but the following can be considered the most popular:

To keep cute jewelry securely, you must use the following types of fasteners, which you can see in the table:
| Way | Characteristic |
|---|---|
Wallpaper glue or PVA glue  | The easiest option, suitable for placing jewelry on cabinets and other interior items |
pins  | Suitable for wallpaper, fabric and plastic panels |
Chains, thread or wire  | With these tools, you can pin butterflies to the ceiling or fixtures. |
Double sided tape  | Using adhesive tape, you can attach the workpiece to any place |
Important! Use templates of different sizes for decorations, then they will look more interesting and realistic.
Creating butterflies: a universal master class
This master class can be used when creating a composition using any stencils. To create jewelry you will need:
- cardboard and colored paper;
- stencil sheets;
- a printer;
- pencil, glue and scissors.
Step 1. Draw yourself or print several different stencils on the printer. After that, you need to cut them out of plain paper.

Step 2 Attach the cut stencils to the cardboard, carefully circle them and cut them out. If desired, draw the silhouettes directly or translate the template using carbon paper.

Step 3 Outline the patterns, but do it on the back of the paper. Make several copies, cut them.

Step 4 Bend the workpiece a little - this will create the effect of developing wings.

Step 5 Apply a little glue to the center of the fold and attach the butterfly to the desired surface, pressing with your finger for a few seconds.

Step 6 Use your imagination - place the butterflies in one or different directions, along the edges or in the middle of the wall. Try placing the butterflies next to each other or at a distance from each other - look for the option that you like the most.

Beautiful origami butterfly
If you like making different paper figures, you can make a butterfly in this way - such an unusual craft can cheer up guests and family. This is a simple scheme that you can easily make yourself.
Step 1. Take a square sheet of colored paper or cardboard. Fold it twice in the center, then unfold it again. Now the sheet is divided into four identical squares.

Step 2 Fold the paper diagonally so that four more lines appear on it. It turned out that the square is divided into eight triangles. Draw triangles on opposite sides to each other.

Step 3 Fold the top triangles in half, leave the bottom ones as they are.

Step 4 Turn the workpiece upside down, the small part should be on the bottom. Wrap the corner, act carefully - the edges should not tear.

Step 5 Tuck in the sharp edge. Flip the piece over so that the folded corner is facing you.

Step 6 In the middle, make a fold with your fingers and fold the butterfly - if you skip this step, the wings will not be able to open. Origami decoration is ready.


Important! So that the butterflies do not merge with the interior, make them noticeable. Don't be afraid to use bright colors to make your craft stand out.
Stylish vinyl butterfly
If you have an unused vinyl record at home, you can create an unusual interior decoration. For this you will also need:
- sample;
- foil;
- baking sheet;
- colored markers and sharp scissors.
Step 1. Take the material and measure the middle of the stencil on it. Carefully draw around the outline, draw with a white felt-tip pen on the plate, and use black on the sticker in the center.

Step 2 Lay the foil on a baking sheet, and place the vinyl on it. Preheat the oven to 400 degrees and place the baking sheet with the workpiece in the upper area. After 50 seconds, remove the plate - it should become soft and pliable.

Step 3 Use sharp scissors to cut out the pattern. This must be done before the vinyl dries. If it still dries up, place the plate in the oven again and repeat the action.

Step 4 Fold back the wings after cutting out the butterfly. The craft is ready.


Butterflies made of polymer clay
Polymer clay is a plastic material for modeling, which looks and feels like plasticine. You can make original blanks from it. You will need:
- butterfly baking molds;
- polymer clay (at the rate of 120 grams for five butterflies);
- a skein of white thread for hanging crafts;
- stationery buttons.
Step 1. Using a baking dish, cut out the blanks, make four small holes in the middle of the products.

Step 2 Fold back the wings and place the butterflies in a glass dish. Put in the oven and bake for 15-20 minutes at 110 degrees.

Step 3 Insert the thread into all holes with a cross and form a knot. Push a button into it.

Step 4 Attach the resulting decorations to the surface. If the edges of the product are not formed, sand them. Color the butterflies in different colors if you want to add some color.

Butterflies on walls and objects: ideas
Choose a winged insect color that matches your interior. For example, pink butterflies can be placed above a pink sofa.

Decorate the ceiling by placing butterflies around the chandelier. They will be beautifully illuminated, creating a good mood for all the inhabitants of the apartment.

Walls can be decorated with heart-shaped pink and black butterflies by gluing blanks in the living room or bedroom.

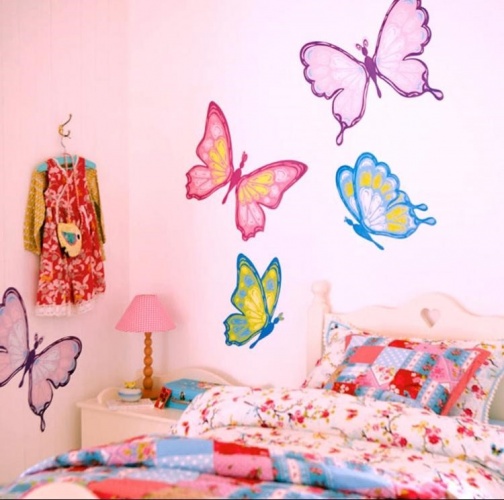
For the room in which the baby lives, you can cut out several templates of different shapes, and then transfer them to multi-colored paper and place them on the wall in the form of a swirl.

To diversify the interior, before placing the blanks on the wall, use a brush to apply luminescent paint to the butterflies. After it is completely dry, your butterflies will begin to glow in the dark.

Another original idea: butterflies can be placed in a spiral shape.

With imagination and a few hours of free time, you can create a real work of art. An unusual and difficult, but very beautiful version of a craft in the shape of a heart.

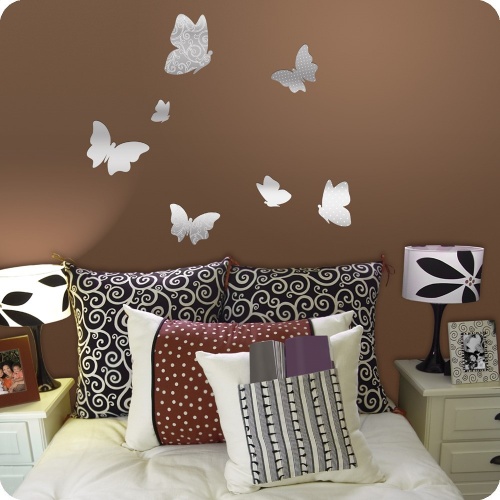
A stylish solution for the bedroom: butterflies can be placed in frames of different sizes and shapes.

Butterflies can also be attached to curtains. In this case, you can use corrugated paper - it will make the butterflies airy, light and voluminous.

Laconic version of the placement of butterflies made by hand. It doesn't take a lot of time, but it looks very nice.
Important! The philosophy of Feng Shui says: butterflies are a symbol of joy, love and happiness. This symbol plays a very important role in the ancient teachings.
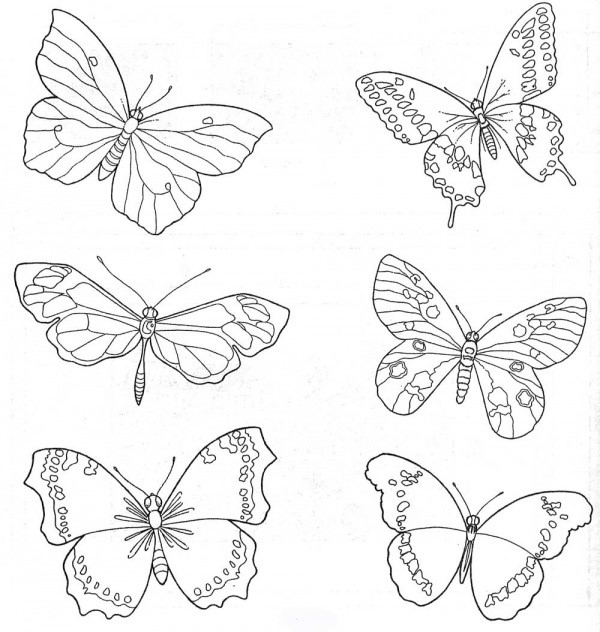
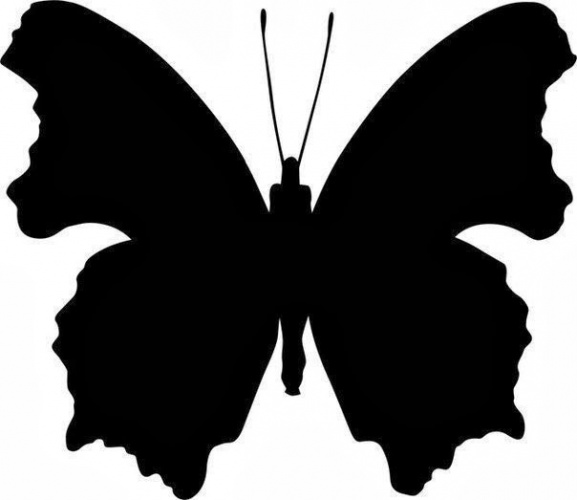
Butterfly patterns: cut out yourself
There are many different templates that you can use to make stencils and transfer them to paper. You need to choose the size and shape yourself, it is only a matter of your imagination.
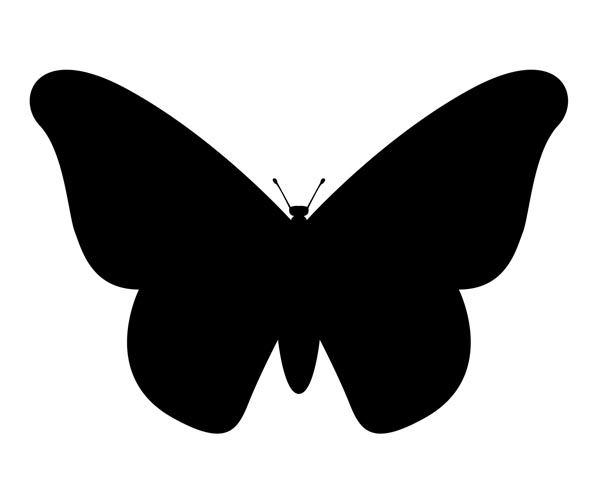
Classic butterfly for decorating walls and furniture.

Another version of the classic butterfly.
Large butterfly with outstretched wings.

Cute curly butterfly with round antennae.

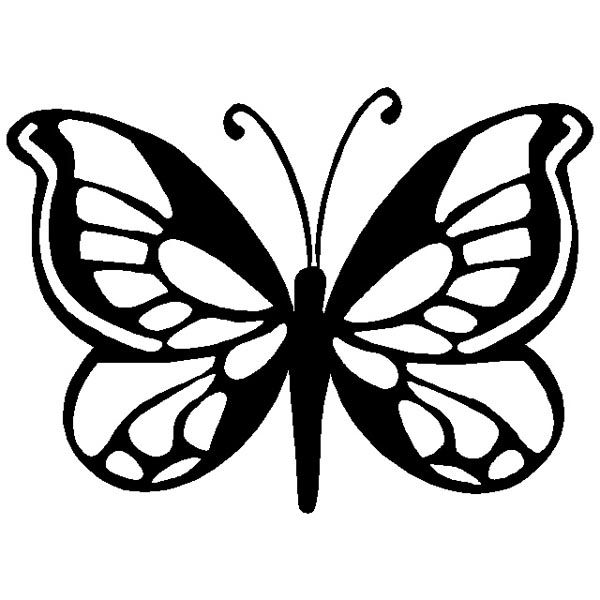
Beautiful butterfly with unusual wings.


Funny pink butterfly for children.


A beautiful butterfly with antennae.

Template for decorating walls and furniture: side view.


Gorgeous butterfly with patterns and sharp antennae.

Butterflies made by yourself are a great way to decorate, which will give the room a fresh and updated look. If you creatively approach the issue, put a little effort, imagination and effort, you can create a real masterpiece that will delight you and your family members for a long time.
Video - Paper butterfly patterns for interior decoration
Today on the Internet you can often find a request on how to make a butterfly out of paper or other improvised material, because you don’t always have the desire and funds for major and even cosmetic repairs, but you want to change something in the interior.
This decor is an appliqué made of sheet material using special templates. You can make and fix such a panel on the wall in various ways, and the final result depends on how to do it.
Butterflies in the interior will please the eye every day, attracting the attention of guests. Let's get acquainted with how to make such a craft with your own hands. There are several original and uncomplicated ways. 
Where to begin
In the world of design solutions, such a trend as decorating walls with butterflies has recently appeared and gained popularity. These crafts create an atmosphere of sophistication, fill it with romance and lightness. However, as in any process, do-it-yourself interior decoration is preceded by preparatory work:
- Initially, you need to decide on the surface where you want to place the intended panel or image.
- You should calculate the shape and total area of the pattern, whether it will occupy a certain area or be distributed over the entire wall.
- It is important at the preparatory stage to choose the material from which the decorative elements will be created. It is also worth remembering about compatibility with the interior of the room.
- Consider the shape, size and color of crafts. A colorful composition on a light surface is the best solution. As for the size, it is better to make wings of different sizes and shapes than to stick to one pattern. Butterflies made with asymmetry turn out to be as realistic as possible. There is no need to observe strict mirroring; upon completion, slight deviations will add volume and dynamism to the composition.
- It should be thought up in advance, but it is better to draw a sketch of the overall composition on paper. It can be a descending stripe, a flying circle of moths, a heart of butterflies of the corresponding color, etc.
 Depending on the decision, it is necessary to prepare the necessary tools and material from which the wall decor will be made.
Popular and accessible materials
You can create decorative butterflies from various sheet materials, the main of which are the following:
- paper;
- cardboard;
- the cloth;
- film, including self-adhesive.
Each of the presented materials is good in its own way.
 Using paper, you can later paint it in any suitable color, which will allow you to stylishly place butterflies in the interior. You can immediately use colored paper, which is sold in any stationery store. If you want to make multi-colored wings, you can use already unnecessary glossy magazines, which in the end will allow you to get a colorful and beautiful composition. Paper crafts can be attached to the wall in any convenient way, while they will not protrude significantly above the surface level.
If paper products are too thin and fragile, you can use cardboard as a base. This option will be many times more reliable and stronger, although working with cardboard is somewhat more difficult. The advantage of cardboard is that it easily takes a given shape and retains it. So, wings or other parts can be rounded or bent, thereby making a voluminous butterfly. This is done by wetting the cardboard, giving the desired shape and drying in a given form. However, along with the advantages, cardboard has a significant drawback - if paper butterflies are easy to fix with your own hands, then you will have to tinker with cardboard. 
Butterflies made of vinyl records and plastic film look original. Such crafts will delight the eye with shape and color. It is as easy to cut crafts from film as it is from cardboard. You can fix plastic film butterflies like plain paper, and with vinyl crafts it’s completely easy - just peel off the protective layer of the film in the right place.
Another practical option is to make fabric wall butterflies. You can make a composition on the entire wall or select a separate panel. In any case, the fabric craft looks no less “soulful” than the previous options. It is better to fasten the fabric to the wallpaper with glue, and completely cover the craft with it. Or you can form a three-dimensional composition - soak the fabric in an adhesive solution, let it dry, and then attach the product to the wall. 
Butterflies made of paper or cardboard: step by step instructions
Paper or cardboard butterflies are the most budgetary, but at the same time original option on how to decorate a wall with your own hands. They can be multi-colored, decorative, openwork, silhouette, solid and even fluttering - it all depends on the creator's imagination.
One of the main advantages of such butterflies on the wall is the variety of colors and the possibility of additional transformation with the help of paints.
You can attach, as mentioned earlier, cardboard and paper moths both with double-sided tape and glue, and with a pin. 
So, let's start making a butterfly on the wall on our own. This will require the following:
- paper or cardboard;
- pencil;
- scissors;
- eraser.
The whole technique for creating crafts comes down to how to cut a butterfly out of cardboard or paper. First, a square of arbitrary size should be cut from the base material, and then folded in half. Then draw a sketch of a moth in all details. For these purposes, there are various templates on the Internet. Of course, you can draw butterflies on your own, guided by your own imagination, but it is unlikely that you will be able to get a large number of absolutely identical blanks. That is why it is better to use ready-made stencils, which are enough to circle around the contour with a pencil and cut out. 
After the required number of products has been made, you can start decorating the walls with butterflies with your own hands. To do this, first on the surface you need to mark with a pencil the places where the crafts will be attached. After that, using glue or tape, you can fix the butterflies on the wall.
If cardboard butterflies are used in the interior, you can bend their wings to create a fluttering effect. For these purposes, the edges of the wings should first be wetted, then the desired bend should be given. When the craft dries, the given shape will be preserved. Origami butterflies can also be made from cardboard, and children can be involved in this process. 
Fabric butterflies: step by step instructions
Butterflies come out of fabric in a very original way, and you can use different materials. A predetermined pattern is cut out of thin fabrics, and then soaked in a soapy or adhesive solution. As soon as the products dry, start decorating the wall.
If you need to make a small number of crafts, then the option of a felt butterfly is suitable. For this you will need the following material:
- felt;
- decorative ornaments (beads, buttons, beads, etc.);
- tulle;
- glue;
- ribbon.
 Initially, you should draw a stencil on paper, then cut and transfer the workpiece to the main fabric. Separately, 6-8 petals need to be cut out of tulle. The rest is a matter of everyone's imagination. With the help of glue, decorate the fabric blank with decorative elements, and drape the wings with petals (2 for each wing), and for the lower ones, the tulle blanks will need to be folded in half. A ribbon should be sewn to the butterfly so that it can be hung. In general, the process of creating a bright felt butterfly is shown in the photo.
Such a craft can not only decorate a wall or other surface, but also use it as a souvenir, present and New Year's decoration.
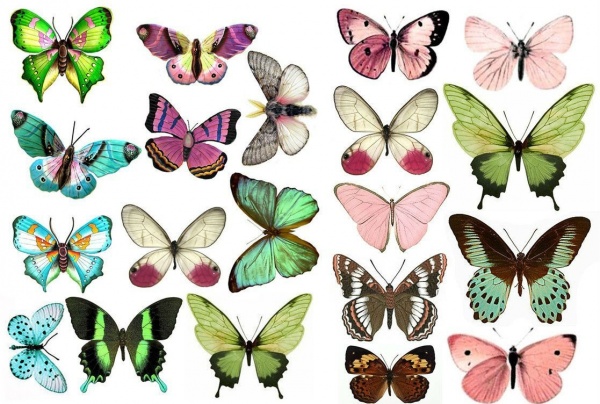
Photo gallery
In our gallery you will find 32 more photos of original butterfly ideas for decorating your interior.
At the final stage of repair work, there is certainly a desire to add a twist to the updated interior. The opposite situation, when no major changes are expected in the near future, also gives rise to the idea of enlivening the atmosphere with original decor. In both cases, handmade butterflies will help to decorate the wall. The creative process is able to captivate all family members, depending on the chosen concept, everyone will find something to their liking.
Preparatory work
Butterfly wall decoration is a relatively new trend in the world of design solutions. Winged flowers will make the atmosphere refined, filled with romance, lightness and carefree dreams. The implementation of creative ideas into reality is preceded by a preparatory stage:
- Choose the most suitable wall for the butterflies. A wide view will allow you to more often admire the original decor.
- Calculate the shape and area of the image on the wall, whether it will occupy a small area or be scattered over the entire surface. In addition to direct mounting on the wall, butterflies can be made into a panel, framed or hung from a wall lamp.
- Decide what material is better to make butterflies. Take care of its compatibility with the interior of the room. The article provides traditional and extravagant ideas for creating moths.
- Consider the color, size and shape of the jewelry. Bright shades on a light wall are the best solution. Butterflies of different sizes look much more spectacular than those made from one stencil. Butterflies made with asymmetry will help to get as close as possible to the natural image. Mirroring should not be strictly observed, in the end, small deviations will add volume and dynamism to the appearance of the application.
- Depending on the chosen direction, prepare the material and tools with which you will decorate the wall.
Advice ! The overly intricate shape of the butterflies will create difficulties when cutting. If there are time constraints, it is better to focus on simple figures.

Possessing basic art skills, you can make a stencil for future butterfly blanks yourself on plain paper or using available drawing editing programs. In the absence of talent, ready-made butterfly patterns on the wall, designed for cutting, will come to the rescue.

paper moths
The most affordable way to decorate is to decorate the wall with paper butterflies. To make the moths monophonic or to combine two colors depends solely on the imagination of the novice designer. In the absence of the necessary shades, acrylic paint and white paper will solve the problem. Butterflies on the wall, made from bright sheets of glossy magazines, look interesting. The variety of shades is difficult to create on your own, and bright prints will decorate the wall in a whimsical way at no additional cost. A pre-composed palette will allow you to make smooth transitions in the composition.

Having picked up your favorite sketches of various sizes, they are determined with the required number of butterflies. After that, the images are printed and stencils are made. A simple shape is most convenient to attach to cardboard and cut out the inside. The drawing of complex structures is applied to a dense sheet and carefully cut out with a clerical knife. To speed up the process of preparing the figures, it is enough to fold several sheets of paper and cut them out at the same time.
Cardboard option
Making cardboard butterflies on the wall is more difficult. However, the material allows more variation in the design of the shape. To achieve the desired rounding, it is enough to slightly moisten the product and, having given the desired bend, fix it with a load. After drying, the butterfly will retain the desired shape.
Another interesting option on how to make butterflies out of paper on the wall is to make origami. This pastime is especially popular among children.

The idea of \u200b\u200bthe location of butterflies on the wall is initially drawn on paper. It is desirable to ensure compatibility with the wallpaper pattern and the general theme of the room. An extravagant look is a whirlwind of moths or a flock flying from one side of the wall to the other. To make a heart or a big butterfly out of small details - there are no limits to fantasy. The sketch is transferred to the wall with a crayon or pencil, carefully marking the lines along which the figures will be located.
Mounting methods
Butterflies cut out of paper or cardboard are mounted on the wall in several ways:
- PVA glue. If the task is not to maintain an attractive appearance of the wall after removing the decor, PVA glue or wallpaper solution is quite suitable. Fully glued butterflies will not create a natural effect. Volumetric applications look much more interesting. To do this, the wings of the moths are slightly bent and only the middle is fixed. When the air conditioner is running or in the summer breeze, the butterflies will come to life, fluttering from the air flow. Glue is applied to the base in small doses so as not to spoil the surface of the wall outside the template.
- To fix light moths, pieces of foam are used. Initially, the material is glued to the product, then to the wall.
- Double-sided foam tape, cut into small squares, is attached to the butterflies, after removing the protective film. Having done all the details, proceed to the design of the wall.
- If there is a prospect of removing butterflies from the wall without subsequent repair, it is better to make a pin mount. This is acceptable only for wallpaper, the option of plastered walls will not allow the proposed method to be applied. Having picked up hairpins decorated with beads or pebbles, they are bent with pliers at an angle of 90 °. Having fixed the upper part on the body of the butterfly with glue, the end is carefully wound behind the wallpaper. If necessary, the decor can be easily dismantled without leaving marks on the wall.
Remark ! When fixing cardboard products, take into account their large mass, unlike paper counterparts.
Decorating with a stencil
Butterflies made using a stencil will give originality to the design of the walls. Having picked up and printed out the sketches, the drawing is applied to a thick film or laminated with strips of adhesive tape, circled with an indelible marker and cut out with a sharp clerical knife. Several blanks will facilitate the work process, it is advisable to make one copy for each color. Luminous paints will add extravagance to the picture. At night, with directional light, the spectacle looks breathtaking. Further work includes the following steps:
- Butterfly stencils are attached to the wall with spray adhesive or construction tape.
- A sponge cut into several parts and equipped with a handle will allow you to make a suitable brush. The purchase of ready-made tools will shorten the preparatory period.
- Ordinary paints are applied regardless of the time of day, it is better to work with phosphor material in subdued light. Remove excess dye from the sponge, making sure that the hit on the stencil is minimal.
- To emphasize the image glowing on the wall will allow a blue outline made with a regular brush along the edges of the wings. After drying, the stencil is removed.
Tip! So that ordinary paints do not stretch, they are first drawn along the contour with a blade or a sharp knife.
In addition to paints, surface decoration with butterflies is made out with putty. To do this, after fixing the template on the wall, the building material is applied using a palette knife. At the end of the process, the stencil is removed and washed with water from the remnants of the putty. After the mortar dries on the wall, you can make an extraordinary coloring of butterflies.

Vinyl and plastic
The times when every house had an impressive collection of vinyl records are in the past. Butterflies on the wall made of vinyl are capable of recalling the past and usefully using a stale rarity. The template you like is applied to the plate, outlined with white chalk or a bar of soap. To make the material pliable, it is placed on a baking sheet lined with baking foil in the oven. The desired condition is achieved in a few minutes, curving edges will tell about it. Without wasting time, start cutting out butterflies from softened vinyl with sharp scissors. If you do not have time to do it before the moment of hardening, the procedure for placing in the oven will have to be repeated, so do not rush to turn it off. To make the edges of the butterflies less sharp, their processing with sandpaper will allow.
Advice ! While the vinyl is warm, make the products voluminous, whimsical curves will add personality to the decor on the wall.
Double-sided tape will help fix the butterflies on the wall. Pieces cut along the length of the moth's abdomen are initially glued to the wall, then the figures are fixed directly on them. Silicone glue is another way to securely fix the decor on the wall.
It is enough just to make a butterfly out of plastic, decorating the wall of a country house in the future. To work, you will need the middle part of the bottle and decor materials. Having picked up the stencil you like, the drawing is transferred to the plastic with an indelible marker and cut out. The butterfly is decorated with varnishes of bright colors, with sparkles, if available, you can use acrylic or those left after the repair. It will be interesting for little needlewomen to make a butterfly on the wall, decorated with rhinestones and beads. Don't forget the wire tendrils.

Fabric and metal design
On walls with liquid wallpaper or decorated with draperies, butterflies made of fabric look appropriate. This creates an atmosphere of special warmth and home comfort. Cut and processed butterflies are attached to the wall with glue. Thin fabrics will allow you to make a three-dimensional image on the wall. For this, the carved moth is soaked in a soapy or glue solution and dried in a specific shape.

Butterflies on the wall, made from tin cans, look radically opposite. To work with the material will require a lot of effort and accuracy. Golden spray paint can give the blanks an attractive look. Monotony is better to subsequently dilute with an additional pattern. The extravagant design on the wall will harmoniously fit into the interior designed for brutal men.

Regardless of which wall design option you choose, the decor will definitely give the room a personality, emphasize the refined taste and awareness of design art.