Wooden composter blueprint. We make a composter with our own hands using Finnish technology
The problem of waste recycling is becoming more and more relevant in the modern world. According to statistics, most of them are organic. Despite the scale of the problem, everyone is able to contribute to its solution and, at the same time, get real benefits. Any owner of a summer residence can turn waste into excellent fertilizer and with a minimum cost. An excellent option would be to make a composter with your own hands using Finnish technology. Let's look at all the subtleties of this case in more detail.
A garden composter is a design that will not take much effort to make, but it is imperative to follow the manufacturing technology and adhere to the scheme. There are several very important points for the proper organization of the process, including the obligatory access of oxygen to organic matter, maintaining humidity at a level of about 55% and the presence of organic substances containing nitrogen, because it is critically necessary for bacteria that process waste. The content of the material itself stored in the container can be very diverse and include food waste, leaves, grass, manure and others.
The box itself should have a volume of 1-3 m with the same height, width and length. In fact, the capacity is a cube. The entire structure must be removed at least 12 meters from buildings and 8 meters from water sources. It is also very important that it is located in a place where it cannot be flooded during rain.
Necessary materials
The best solution in this matter will be a tree. Of course, slate is sometimes used, but it cannot provide suitable quality and reliability, so we will focus on the first option. Among the possible options for the scheme of a garden composter for a summer residence, a three-section box is perfect. The list of everything you need to get started can be presented as follows: 
- Sturdy base board. It should be dense enough to support the weight of the compost.
- Wooden boards with dimensions of 10 * 3 * 100 cm in the amount of 45 pieces (it is better to take 50 pieces in reserve in case of damage) and 10 * 3 * 300 cm - 25 units. This is enough to do everything without fear of a lack of material.
- A beam in the amount of 8 pieces, having the following characteristics: width - 5 cm, thickness - 5 cm, length - 100 cm.
- Antiseptic for wood. In this case, you should make a choice according to such parameters as quality and environmental friendliness, which is critical for giving.
- To properly fasten the structure, you will need 12 overhead window hinges and screws.
- Oil paint. A garden composter, like any other object, must fit beautifully into the exterior.
Video "How to make compost with your own hands"
In this form, you can see how to make compost with your own hands and how it looks in the finished state.
Features of Finnish technology
In this case, the process of "ripening" is different from that in a conventional pit. There are several important points that must be taken into account. First, filling the compartments must start from the first. During the extraction of the compost mass, it is filled from the neighboring one, respectively, the cycle becomes continuous. Secondly, all the material in the first compartment should be stirred regularly for even "ripening".

For those who are going to use weeds as one of the ingredients (and they, unfortunately, are not uncommon in the country), we will clarify that it is better to place them in the middle, because the high temperature during decomposition will not allow their seeds to remain able to germinate.
Finally, don't forget to water well during hot, dry weather to maintain the right moisture level. If you meet all the necessary conditions, you can count not only on a place for the proper disposal of organic waste, but also on receiving fertilizer, which will significantly increase the yield in the garden.
How to equip a three-section box
Now that we have selected all the necessary materials and got acquainted with the features of Finnish technology, let's figure out what needs to be done to assemble the structure itself. It is required to carry out the following steps step by step:
- Treat wooden boards with an antiseptic, following the instructions in the instructions.
- Next, proceed to the assembly of the side walls. For all four we use screws as fasteners.
- The walls made in the previous step must be sheathed with boards, while two of them are close, and the rest - with a gap of 10 mm.
- Fasten those boards that are prepared for the back side. In this case, you need to leave a 10 mm gap.
- The next step is to make the bottom. In the process of fastening, you will also need to leave a gap of up to 10 mm.
- After, we sheathe in front of the board and leave 20 cm below, where the doors will be placed.
- We mount the roof. This must be done taking into account the fact that on one side there will be several hatches for introducing organic waste.
- At the finish, we fix the lower doors and hatches, which completes the process of assembling a garden composter.

If you are a summer resident or a gardener, you have your own plot on which you grow various types of plants, then you are concerned about the question of how to get a rich harvest.
Of course, there is only one answer - fertilizing the soil to increase fertility. Fertilizer can be bought, or you can cook yourself. In this article, we will look at how to make a garden composter with your own hands.
What is a composter for?
Any gardener who cares about soil fertility in his area can prepare high-quality humus or organic fertilizer. To obtain such fertilizer or compost, you will need a composter.
Thus, a composter is a container for preparing compost, which allows increasing soil fertility and crop yields.
Of course, the composter will need to lay the material. What can act as ingredients for making compost? Common organic waste: green grass, grass clippings, straw, manure, kitchen waste, paper, twigs and roots.
You might be interested in an article about
How to make a garden shredder with your own hands, read
Device types
Garden composters are very popular and in demand. There are types of composters that you can buy and make yourself.

plastic composter
In total there are 4 main types:
- compost pit;
- wooden box;
- Plastic container;
- thermocomposter.
You can purchase a plastic container and a thermal composter in specialized stores for gardeners.
A plastic container is a small container with holes for ventilation or oxygen to enter. These composters are lightweight, comfortable, fit well into the landscape of your site.
A thermocomposter is something like a thermos. It retains heat well and its advantage is that the chemical processes in such a composter take place all year round. And even in severe frosts, the process does not stop in such a container.
If we talk about such types of composters as a compost pit and a wooden box, they are made independently and located on your garden plot.
Manufacturing instructions
If you have some free time and the desire to make a composter with your own hands, you will not have much difficulty in this. With your own hands, without much effort, you can construct two types of composters: a wooden box and a compost pit. Now specifically about each.
Wooden box. To make this type of composter you will need:

Wooden compost box
- wooden bars (preferably 10x10 for greater stability);
- boards;
- nails or screws;
- awnings;
- impregnation for wood against mold and rot;
- sand;
- cement.
After you have purchased all the necessary building material, you can proceed to:
- Drainage system device. A small depression is made, cement mortar is poured along the perimeter, and the center of the pit is covered with rubble, sand, branches and straw.
- Installation of a wooden box. The height of the box should be no more than 120-150 cm, width 1.5 meters, length at your discretion, but not less than the width. Such dimensions are the most optimal for maintaining the microclimate inside the composter. In this case, the boards must be knocked down with a gap between them of several centimeters, for subsequent ventilation of the laid raw materials.
- Cover construction. The cover is necessary to prevent rain water from entering the composter, which can slow down the composting process and reduce the quality of the finished product. The lid should be at an angle, for a stack of water, therefore, when constructing a wooden box, the rear bars should be 20-30 cm higher than the front ones.
- Wood processing. The compost bin needs to be treated with an impregnating liquid for a longer period of its operation. As a result, you will have a ready-made composter, in which you can lay the ingredients for making compost.

compost pit
- With wooden base. A depression is dug in the ground for 1 meter, a width of 1.5 and a length of 2 or more meters. The bottom is covered with large branches, tree bark and straw. In the future, they will act as a drainage system, removing excess moisture and supplying the necessary oxygen. Then four pillars are dug around the perimeter, on which boards are stuffed.
There should also be gaps of up to 5 centimeters between the boards. The gaps between the boards are made not only for oxygen access, but also for the entry of worms involved in the processing of organic raw materials.
- With concrete base. The same hole is dug, the formwork is knocked down, after which it is poured with a strong cement mortar. To improve the composting process, you will need to bring worms into such a composter yourself. The advantage of such a composter is that its service life exceeds the service life of other types of home-made composters.
Take into account: the process of composting raw materials until complete decay will take about two years.
Experienced gardeners advise making a long garden composter, consisting of three compartments:
- In the first, you will be laying new raw materials for compost.
- The second will contain last year's raw materials, which are at the stage of decay.
- In the third - ready compost.
Thus, every year you can use compost to fertilize the soil of your site.
Watch the video, which describes how to properly use a DIY garden composter:
Compost box. How to make a compost box with your own hands: drawings, photos, videos, options for making a composter.
This homemade product will be of interest primarily to summer residents and owners of garden plots, because we will talk about fertilizers for the soil, in particular compost.
Compost is a product of the decomposition of organic matter under the influence of microorganisms, in fact, compost is the best organic fertilizer.
To get high-quality compost, when building a compost box with your own hands, you need to follow simple rules:
The main condition for the maturation of compost is the flow of oxygen into the compost heap, oxygen is necessary for the vital activity of microorganisms, therefore, when making a compost box, it is necessary to provide side ventilation holes in the structure.
Another advantage of using a box is that precipitation will not wash fertilizers into the soil, all valuable substances will remain in the box, and you will get really good compost. Therefore, it is desirable to equip the box with a lid.
Compost matures faster at the bottom of the compost heap, so you need to think about access to the bottom layer in the box, equip the box with a door or removable boards.
For compost maturation, the best place to place the compost bin is in a shady area at the edge of a vegetable garden or orchard.
Drawings of a box for compost.
Consider a few blueprints for making a wooden compost box.
One piece compost bin.
Multi-section compost bin.
You can build a box from old boards, timber, you can use boards from wooden pallets, you can use any wood that is on the farm.
The composter can be made 2 - 3 x sections, while fertilizer ripens in one section, ready-made compost can be used in the other.
Making a compost bin.
Consider, for example, the manufacture of the simplest composter. The design of the box consists of supporting pillars that are dug into the ground, the optimal height of the ground part of the pillars is 1.2 m. The pillars can be made from a bar 100 x 100 mm or logs.
But the lower part of the supports must be treated with an antiseptic, or used engine oil, so that the wood does not quickly rot. Alternatively, you can use the old-fashioned way, part of the pillars that will be in the ground can be charred at the stake, charred wood is more resistant to decay.
We attach the side walls to the supports, stuff the boards with nails or fasten them with self-tapping screws, it is advisable to leave a small gap of 1–2 cm between the boards for ventilation.
It is desirable to make the front wall of the box openable, this will greatly simplify the unloading of compost, it is enough to open the front door and you can collect compost with a shovel without much effort. Instead of a door, you can make removable boards, you need to nail the guide rails to the support posts and insert them into the grooves of the board.
For the composter, it is desirable to make a lid, we attach the lid to the box with canopies, we make a handle. Since wood is susceptible to decay, the box must be treated with a safe anti-fungal impregnation and preferably painted.
The do-it-yourself compost box is ready, the final stage is laying the compost. A layer (hay, grass, leaves) is laid on the bottom of the box, then tops and vegetable waste can be laid.
DIY compost bin options.

Perhaps, of all European nations, the Finns are the most reverent about the problem of waste recycling. And biomass is no exception - with a competent approach, you can get compost from them. This is a high quality organic fertilizer, which is not inferior in its properties to the humus known to us.
Finnish composters are complex devices equipped with air supply systems, humidification and sensors. The cost of such devices for processing green masses can reach 100,000 rubles, which is beyond the reach of almost all Russian summer residents. However, knowing the technology for obtaining compost, you can design something similar yourself. I’ll tell you how to make a composter using Finnish technology with your own hands and save tens of thousands of rubles.
A little about compost
Knowing how the most valuable fertilizer is obtained from organic matter, you can avoid mistakes when designing a garden composter. Therefore, dear readers, be patient and read this section.
Science knows two ways to obtain compost: aerobic and anaerobic. In the first case, biomass is processed by bacteria that require oxygen for their vital activity. In the second case, the decomposition of organic matter occurs due to the vital activity of anaerobic bacteria, which feel great even without oxygen. For the construction and use of the composter at home, it is better to use the aerobic method.
If you make a composter according to Finnish technology correctly, the temperature inside the biomass will reach 70 0 C. At this value, part of the pathogenic microflora dies, as well as almost all weed seeds. At the exit, by the end of the summer season, you will get high-quality compost of a dark brown color and with the smell of soil.
Requirements for the installation and device of the composter
Many summer residents, when choosing a place to install a composter, do not know what distance should be between it and a residential building. Meanwhile, if you look at SNiP 30-02-97, all questions disappear.
- From the residential building - 8 meters.
- From the cellar - 7 meters.
- From wells and open reservoirs - 8 meters.
It is believed that compliance with these conditions will prevent contamination of water with bacteria, and the owner of the farmstead from the unpleasant odor that appears during the decomposition of biomass.
As for the dimensions of the composter itself, it must provide the following biomass decomposition parameters:
- temperature in the center of the composter - 70-80 0 С;
- humidity - 55%;
- air access.
Calculations by experienced gardeners have shown that such parameters can be achieved only if the volume of processed biomass is 1 m 3. With a larger volume, it is almost impossible to control the temperature, and with smaller volumes, it is almost impossible to maintain the desired humidity.
If the volume of processed organics should be 1 m 3, then the size of the composter should be 1x1x1 m.
Which composter to choose?
If you study the schemes of do-it-yourself composters that more or less allow you to provide Finnish technology, you can distinguish three types:
- 1 section;
- 2 sections;
- 3 sections.
In my opinion, a three-section composter is more practical. You can start filling the first bin, then the second and third. Over time, the biomass in the first compartment will turn into compost, you can choose it from below, and fill the vacated space with the prepared mass from the second bunker.
The most suitable material, in my opinion, is wood. It is easy to process and affordable. With proper processing of wood, such a composter will last a long time and will not disfigure your site.
Necessary materials for composter
If you decide to make a composter using Finnish technology, consisting of three sections, you will need directly boards, beams, hinges for attaching hatches. If you are a fan of experiments, then you can try to equip the sensors.
So, we decided not to waste time on trifles and build the “coolest” composter in order to bring compost preparation as close as possible to Finnish technology. What is needed for this?
- Beam 50x50x1000 - 8 pcs., 50x50x3000 - 4 pcs. From it we will assemble the frame.
- Edged board 100x20x1000 - 50 pcs.
- Edged board 100x20x3000 - 25 pcs.
- Material for the manufacture of the bottom (of your choice).
- Antiseptic "Neomid 430 eco" for the treatment of wood from decay.
- Overhead window hinges - 12 pcs.
- Screws and paint.
Finnish composters are equipped with thermometers and humidity sensors. At home, the moisture content of the compost can be checked by hand (the lump should not crumble), but it is difficult to check the temperature.
If you plan to professionally prepare compost in order to provide yourself with valuable fertilizer and sell the surplus, pay attention to the W-651 moisture meter temperature sensor. With it, you can measure the temperature and humidity inside the bunker. True, it costs about 6500 rubles.
Composter scheme for 3 sections
I do not pretend to be a first-class draftsman, therefore I cannot show a quality drawing. And yet I tried to make a schematic drawing for you, so that it would be clearer to you what I am talking about. Don't scold too much.

When assembling the frame, two types of beam connection are used. You can use your own options, as long as the connections are reinforced with dowels.
Ideally, it should be placed on each joint, and not just on the corner - it prevents the frame from losing its shape from drying out and takes on mechanical loads. The composter will last longer.
Composter assembly sequence
First, treat all wooden elements with an antiseptic, following the instructions. Try to process the entire surface of the boards and timber, especially from the ends. This measure will protect the material from decay, and therefore extend the life of the composter.

I give the further sequence of actions in the form of instructions.
- Assemble the frame as shown in the picture above. It's easier to start with the top and bottom of the composter frame, then screw on the rest of the battens.
- Sheathe the frame around the perimeter with boards (outside). Leave a gap of 10-20 mm between the boards, through which air will flow into the composter.
- From the front of the composter, make a hole for the entire width of the box (see picture), then there will be hatches for extracting compost.
- Make internal partitions, the boards should be screwed close to each other.
- Assemble and secure the bottom. Slots are not only acceptable, but also desirable - excess water will leave through them.
- Make 3 hatches. Slots are acceptable, the main thing is to protect the biomass from direct sunlight.
- Screw the lower and upper hatches onto the window hinges.
The composter, practically according to Finnish technology, is ready. You just have to paint it in the desired color and you can start loading biomass.

User manual
In one of the following articles, I will tell you in detail how to make compost, and now I will give a brief instruction. It will help you get an excellent quality organic fertilizer.
- Try not to plant weeds with seeds. Some of the seeds will die, and the other will spread throughout the garden.
- Start filling the outer compartment, then the middle one, then the next one. So you can make, in fact, a compost conveyor.
- Monitor the temperature and humidity, add water if necessary and mix the organics.
- Periodically add green tops, they will enrich the compost with nitrogen.
- Never cover the device with a film "to speed up the processes."
As you can see, making your own composter using Finnish technology is not so difficult. I agree that in terms of design and functionality, it is significantly inferior to factory plastic models. However, such a simple device will allow you to save tens of thousands of rubles and get the most valuable fertilizer for your garden.
If you use structures of a different type or have questions - write in the comments. And do not forget to share the article with your friends on social networks. Still, I tried for you and such gratitude will be pleasant to me.
Do-it-yourself composter using Finnish technology
Composters for summer cottages are easy to make with your own hands. It can be a compost pit, a box, a device made of slate or wooden pallets, a rotating plastic barrel.
The content of the article:
The composter allows you to get natural organic fertilizer. Decayed residues turn into a dark loose substance, which is very nutritious for plants. There are various types of composters. It all depends on the availability of materials, on how quickly you need to turn organic residues into fertilizer.
Composter for giving - what it can be

The easiest option is a compost pit. Decide on the size, estimating approximately how much during the summer season you can put plant debris here.

- Dig a hole, it is better if it is rectangular in shape, this is easier to sheathe. Stepping back from the bottom 20 cm, reinforce the side walls of the compost pit with suitable materials. It can be hardboard, slate, old iron, boards. The bottom of the excavation is not covered with such materials so that microorganisms, earthworms have access here.
- If the soil is clay, you can not sheathe the sides of the pit. For drainage, pour down branches, large plant debris, such as stems from large flowers, from Jerusalem artichoke, sunflower. On top of them you will pour plant residues, if they are large, then they must first be crushed.
- To make the compost ripen faster, sometimes water it with a special preparation that speeds up this process. Experts recommend adding a small amount of fertilizer from time to time. Water the compost periodically to keep it from drying out.
- Cover it with black plastic wrap from above, then the process of decay will go faster and an unpleasant odor will not spread.
The compost pit has a disadvantage. The flow of oxygen is difficult here, in order to eliminate this, insert a pipe with holes made in it in advance. You can make 2-4 of these.
If you don’t want to work on arranging a pit, digging it, then you can put the compost directly into a pile.
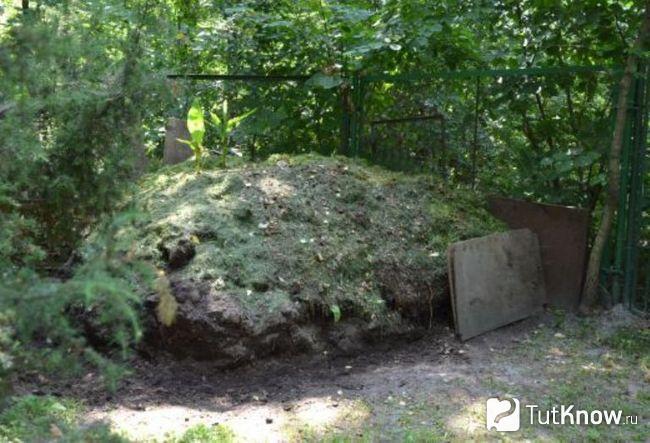
It will need to be watered periodically so that it does not dry out. The big disadvantage of such a mini warehouse is the smell. Therefore, it is better to build sidewalls of stone, slate, boards or iron in advance, and cover with a film on top.

The following year, such compost usually does not ripen yet, but is an excellent soil for the growth of pumpkin crops. Plant zucchini or pumpkins here, and you will be surprised at the abundance of the harvest.

At the beginning of autumn, this matured substance can be used as an organic additive when planting strawberries, bulbous flowers, and seedlings. Or you can leave this compost until next spring, then add it to the holes and beds when planting.
Pumpkins love to grow in a warm garden. You can make a composter and her at the same time. Dig a rectangular recess according to the size of the beds, sheathe its inner sides with slate so that it rises above the ground. To fix the slate, drive metal rods into the soil, connect them to the base of wooden blocks.

You will be putting organic remains here all summer, periodically pouring them with a small amount of earth. She can be postponed in advance when you dig a trench. By the spring of next year, you will have a beautiful warm bed, which will be enough to loosen and you can plant pumpkin crops here. Cucumbers will grow well.
How to make a compost bin with your own hands?
See how a slate-lined compost pit is made. This must be reinforced with metal poles.

From this material, you can make a box, reinforcing it with metal or wooden poles from the outside.

Pallet composter

This is one of the simplest options for its construction. Since there is a distance between the boards of pallets, oxygen will freely penetrate here, aging will go faster. It is necessary to take into account the presence of an unpleasant smell of decay. Therefore, it is better to make such a device away from home and recreation areas. And the general requirements for choosing a site for a composter are 10 m from residential buildings, and 20 m from a water supply source.
To make a pallet composter, you will need:
- 4 pallets;
- self-tapping screws;
- screwdriver
It is better not to put the compost bin under the scorching rays of the sun so that its contents do not dry out. Install it in the shade or partial shade.
Stand two pallets vertically at a 90 degree angle to each other and connect them with screws or nails.

Trim the top corners first, then the bottom corners.

In the same way, connect two more pallets, you will get a quadrangle in which you can put compost.
If you have wooden pallets but don't want to use them like this, then make your compost bin a different way. First you need to disassemble the pallets using a nail puller.

You will have boards that will later need to be arranged as it is done in the next photo.

As you can see, it will be necessary to make grooves in the boards in order to assemble them according to the principle of the designer. The following markup will help you with this.

The two posts will be angled and will need to be notched based on the last photo. The remaining grooves need to be made, as in the first of the three photos, and the front wall will be slightly inclined, so the notches must be made in the corners.
Set aside a flat area for the drawer, set the 4 bottom boards of the base level using a level.

After that, install 2 vertical racks in front, start assembling the box.

Such a compost box is quite mobile, you can rearrange it to any point in the site. Pour compost here, periodically loosen it to provide air access and speed up the maturation of the substance.

In order to be able to remove the finished fertilizer without spending much effort, provide an opening or rising bottom door even when installing the compost bin. Then you can open access to the bottom content, which will be ready faster than the top.

Three-section composter
You can make a compost bin for giving, consisting of 3 sections. This design is very convenient because while the contents of the first rot, you will have time to fill the remaining sections. Then remove the already prepared compost and you will have a place to fill the next one.

If you don't want to make the back wall, then you can turn the fence wall into it, as in this case.
Then it will be necessary to attach wooden bars to the racks, and the wooden bar must also be placed on the other side. These four posts will support the front wall.

Stuff planks between parallel wooden posts to make three sections of the compost bin.

Two small side walls will be completely closed, and the front one will not be completely closed. You will soon find out why. Make an opening lid that becomes a roof at the same time. Make it not whole, but consisting of 3 parts. Attach a handle to each to open the drawer when needed.
You also need to make small opening doors on the front panel. This facilitates the laying and extraction of already prepared compost.
Paint the crate and you have a composter that looks great on the yard.
If you want to do it as soon as possible, then you can go back to ideas with pallets. We need 3 pieces, fasten them together with wire, and two side walls should have an emphasis. In this case, on the one hand it is supported by a fence, and on the other by a porch.

Composter in 10 minutes
If you have such a small space, then you can also build a compost bin, but it is better to place it away from the front area, and near the outbuilding, as there is a rotting smell.
Usually, the complete maturation of compost in such devices occurs in 1–2 years. To speed up this process, you can make a composter out of a plastic barrel. Then valuable organic fertilizer will be ready in 1-2 months.
How to make a composter from a plastic barrel?

To make such a waste recycling device, take:
- plastic barrel;
- big nails;
- latches;
- window hinges;
- galvanized pipe;
- durable boards;
- self-tapping screws;
- bolts with washers.

Take a pipe, the length of which is slightly greater than the height of the barrel and thread it through the resulting hole.

Cut a rectangular hole in the container, which will become a door. To do this, attach hinges on one side, and two latches on the sides and bottom, with which you will close the door. To make it easy to open it, make a handle out of a cord.

Now make a lot of holes on the surface of the barrel with a drill to ensure air flow. Insert large nails into some of them. Then, when you spin the barrel, they will help the contents mix better.

From the boards, build a pedestal for your structure. To do this, place two boards crosswise and connect them in the center. Make another similar blank, fasten the resulting crosses at the bottom with two strong thick boards.

Then you need to put the barrel so that there is a metal axis on the wooden crosses.
You can attach a handle to make it easier to rotate the barrel. This should be done once every few days.
Fill the container with organic residues, twist periodically, and the compost will be ready in a short time.

Look at other options for such devices.

As you can see, you can fix the container vertically by threading a metal pipe through the large sidewalls.
And if you want two composters at once, then place them one above the other, fix them on metal bars, the lower ends of which are cemented into the soil.

You can fix a metal pipe on wooden goats like this. It is convenient to rearrange such a mobile barrel from place to place when there is no internal content in it.

And if you want to move the container with ease, then you can install it on a board to which roller wheels are attached.

If you do not have a barrel, but have a trash can that is no longer needed, then you can make a composter out of it. The tank must be fixed on wooden boards, fixed on them with a metal pin or a pipe made of this material.

Here's how to make a DIY composter using various ideas. If you want another one, then watch the next master class.
By the way, for such a device, you can use a large-capacity drum taken from a broken washing machine.
The next composter in the country is also quite simple to make, over time it can turn into a vertical bed.