Facing the base of the pile foundation. How to make a basement on a pile foundation - options How to ennoble screw piles under a house
Screw piles for creating a strong, high-quality and durable foundation are becoming increasingly popular. However, after the construction of the building is completed, many happy owners of a new house are at a loss as to how to properly and beautifully finish such a basement.
This article, illustrated with a photo, provides detailed instructions on how to finish the basement of a house on stilts with your own hands. Guided by the recommendations of experienced and professional builders, masters of their craft, you can create a really beautiful and unusual cladding.
A variety of materials for finishing the base of the building
The modern construction market is filled with a variety of building materials that can be successfully used to solve the problem.
If you have a pile foundation, the basement can be finished with the following industrial products:
- siding;
- sheet slate;
- asbestos-cement slabs;
- clapboard;
- corrugated board;
- other various finishing panels.
Also quite common is the use of decorative bricks.
It should be noted that finishing panels are in great demand and popularity among builders who know well how to finish the basement of a stilt house.
This is due to the following factors:
- the diversity of the structure of such products;
- their ease;
- ease of installation, which even an inexperienced person can do.

Today we will consider two options for facing works - hinged panels and decorative bricks. Which method to choose is up to you - it all depends on your personal preferences and attitude to a particular material.
Creating a hinged plinth
He will note that finishing the basement of a house on screw piles can be successfully performed with any finishing panels mentioned above. Fortunately, their price is relatively low, and therefore the final estimate of the work will be acceptable.
The main advantages of hinged trim
A variety of options for finishing the basement of a house on screw piles with hinged panels has a number of undeniable advantages.
- Economy- according to experts, the arrangement of a hinged basement requires three times less financial costs than the creation of a familiar strip base for a house.
- Convenience and ease of installation- for example, if the size of your house is 6 by 8 meters, then two people will cope with the task in ten hours.
- Optimum moisture protection- fresh air freely enters the underground space, and therefore in winter and autumn, when the humidity level rises, mold does not form under the house.
- The highest aesthetics- a variety of materials allows you to create a surprisingly accurate imitation:
- wood, etc.

Stages of work on finishing hinged panels
So, if the question of how to finish the basement of a house on screw piles has already been resolved for you, and you have chosen finishing panels, let's look at the sequence of work.
First you need to create a crate:
- guides are welded or fastened to the piles by means of self-tapping screws - either wooden or from a metal profile;
- if you decide to choose a tree, then in this case it is worth using a board pre-impregnated with an antiseptic, which will prevent it from rotting and damage by bugs;
- if the choice was made in favor of a metal profile, then a profiled pipe with dimensions of 40 by 20 by 2 is best suited.
After the crate is fixed around the entire perimeter of the house, you can begin to hang the panels.
Advice. Before proceeding with hanging the plates, the part of the soil with which they will come into contact should be sprinkled with sand to a depth of forty centimeters, but more is possible.
When installing, bring the corners and individual parts as accurately as possible, which will serve as a guarantee of durability and aesthetics of the finish.

If the soil is too heaving, then in this case it is recommended to leave a small distance between the soil and the panels - this will avoid damage to the finish. To prevent small animals from entering under the house, the holes should be closed with a fine mesh.
Cladding with brick
This method is more time-consuming and costly, because in addition to using decorative bricks, you need to fill in a shallow strip foundation around the entire perimeter of the house, on which laying will be carried out.
The main advantages of brick finishing
Naturally, this type of finish also has certain advantages, which are worth mentioning.
- High level of strength - such a base is maximally protected from mechanical damage.
- Protection against penetration into the underground cold.
- Possibility of creating a basement.
- A high level of aesthetics is natural if you have chosen a beautiful, stylish decorative brick.
Disadvantages of brick finishing
However, there are certain disadvantages, which also cannot be ignored:
- the impossibility of creating such a finish on heaving soil;
- the impossibility of creating such a finish in houses built on sites with a strong elevation difference;
- rather high cost compared to a hinged plinth.
Stages of work on finishing with decorative bricks
At the first stage, it is necessary to pour a shallow foundation between the piles. After the mortar dries and gains strength, you can lay the bricks, providing holes for vents.

Advice. Vents must also be created in the basement from hinged panels.
They are necessary for good ventilation of the subfloor.
To prevent rodents from penetrating into them, other living creatures, including domestic cats, the vents are closed with a fine mesh.
If you did the laying not with decorative, but with ordinary bricks, then in this case it is worth providing for additional finishing, which will increase aesthetics. To do this, you can use ordinary plaster.

In conclusion
Screw piles are a great way to reduce the cost of building a house, but not to lower its performance. (See also the article.) And using one of the above plinth lining methods, make the structure incredibly beautiful and attractive.
In the presented video in this article you will find additional information on this topic.
Economical and reliable foundations made of screw piles attract the attention of developers. The minimum duration of installation and simple technology make it possible to use them in the construction of frame and log buildings, outbuildings and baths.
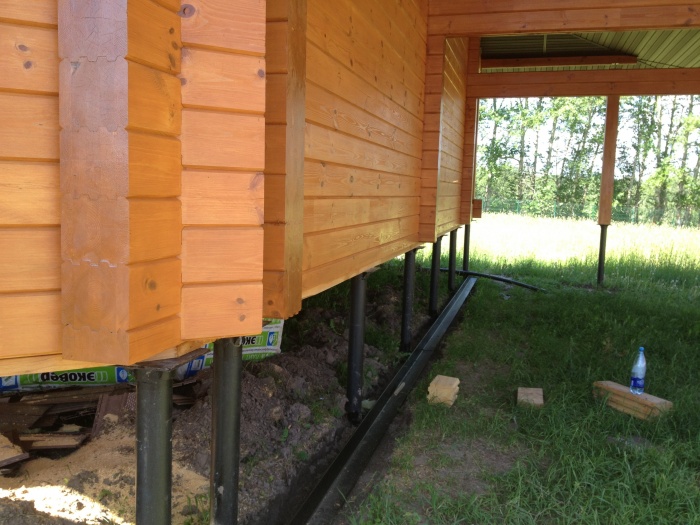
An important problem that worries the owners is the finishing of the pile foundation. The carrier frame, lying on the heads of the racks, rises high above the ground surface.
An open underground space should be covered with an aesthetically pleasing and durable finish. We will talk about how to do this work correctly and efficiently, what materials are better to use in this article.
There are two options for the external cladding of the basement of the foundation of screw piles:
- Hinged screen;
- Strip foundation (shallow).
According to statistics, hinged sheathing technology is more often used. Its essence lies in the fact that after their installation, wooden or metal guides (crate) are welded or fixed on screw piles on screw piles. After that, sheet material is attached to them (flat slate, corrugated board, vinyl siding, thermal panels).

The work is completed by surface finishing and installation of shaped elements (sills, junctions, drips).
The advantages of a hinged plinth include:
- Low costs (expenses are 2-3 times lower than when pouring a strip foundation);
- Simple and short installation (2 people in 10 hours can complete the cladding on a house measuring 6x8 meters);
- Good ventilation and protection of the underground space from moisture;
- Aesthetics (modern finishing materials reliably imitate expensive types of finishes made from natural wood and stone).
A strip foundation (shallow) for facing a pile grillage is made using heavy materials: brick or stone. The complexity of such work is higher than when installing a hinged screen.
Preparatory operations and stages of arrangement:
- A trench is being dug along the perimeter of the building (depth 20-30 cm, width 15-20 cm);
- A frame of reinforcement with a cross section of 12 mm is placed in the recess and it is poured with concrete;
- After giving the foundation time to gain strength (1-2 weeks), a brick wall half a brick thick is erected on it or a natural rubble stone is laid;
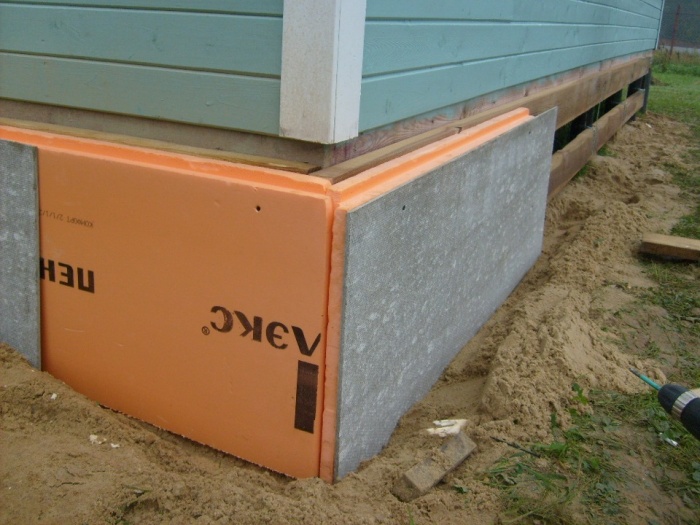
- From the inside, the brick plinth of the foundation of screw piles is sheathed with insulation (polystyrene, mineral wool);
- Outside, if necessary, it is trimmed with decorative plaster.
To increase the service life and increase the rigidity of the base, some builders make the concrete "tape" wider and raise it 20-25 cm above ground level. In this case, the monolithic foundation covers the bottom of the piles - the most vulnerable place for metal corrosion.

This version of the foundation for brick cladding reliably protects the piles from corrosion and increases the strength of the base.
Another option for sheathing the foundation of screw piles can be called intermediate. It does not require pouring concrete to support the masonry and does not require the installation of rails to which the hinged screen is attached.

Brick cladding of the plinth using a steel angle
In this case, a steel corner is welded to the piles at a distance of 5-7 cm from the ground. The size of its shelf is 100 or 120 mm. The stiffness of the profile is quite enough to support the masonry half a brick thick. The gap between the corner and the ground serves to ventilate the underground space.
To insulate or not to insulate?
The recommendations of experts on sealing the basement of the foundation of screw piles contain an indication of the need for its insulation. Let's try to clarify this issue so that developers can make the right decision. Since it is impossible to leave the underground without ventilation, the insulation of the basement does not solve its task to the end.

The second consideration against sheathing with insulation is that the cold under the house comes not only through the vents, but also from the ground. Therefore, having spent money on thermal insulation of the basement, we do not solve the main task - protecting the floor from the cold.
The most rational option is high-quality insulation of the space between the lower sheathing of the supporting frame and the top layer of the floor finish. It is implemented quite simply: by laying mineral wool or ecowool in the cells between the beams.
Hanging plinth. Installation steps
Before starting work, you need to decide what you want to sheathe the base in the pile foundation. As we have said, the choice here is quite wide. Of the materials offered on the market (corrugated board, siding, flat slate, thermal panels), basement siding is the most popular.

These are plastic panels, on the surface of which the texture of brickwork, wood or natural stone is applied. Working with them is easy and simple. The most expensive operation - finishing the basement siding is not needed. Its service life is at least 30 years. It is also important that PVC plastic does not rot and does not require updating by tinting.
Fitted with plastic cladding, shaped elements are sold (external and internal corners, docking, starting and finishing strips).
Do-it-yourself installation of a plastic screen can be done by any beginner.
We describe the main stages of this work:
- Before the sheathing of the pile foundation begins, a part of the soil is removed along the outer contour of the building (the depth of the excavation is 20-30 cm and the width is 50-60 cm). Roofing material is laid at the bottom and covered with sand from above. This is done in order to protect the metal of screw piles from rain and snow moisture. For quick drainage of water, a drainage pipe is laid in a sand cushion;
- The finishing process includes the installation of a crate (framework) to which the siding will be attached. The crate consists of two or three horizontal rows of wooden bars or a profile pipe 40x20 mm. The frame is fixed to the piles through steel corners (brackets) welded to their surface. The size of the corners is selected so that the lining protrudes 3-4 cm beyond the surface of the grillage;
- The corner elements of the siding, the starting profile are attached to the installed frame and the installation of the panels begins, moving from the corner from left to right. A gap of 3-5 cm is left between the sheathing and the surface of the blind area. It performs two tasks: ventilation of the underground and compensation for frost heaving of the soil;
- The sheathing is fixed with self-tapping screws, screwing them into the crate through oval holes made in plastic. To exclude thermal deformation of the panels, self-tapping screws 1-2 mm to their surface. This allows plastic to expand and contract without warping under the influence of ambient temperature;
- Having finished the sheathing, ebbs made of sheet steel coated with a polymer film are attached to the supporting frame of the foundation. They cover the junction of the panels with the crate.

Scheme of installation of basement siding on a screw foundation
When using cement-bonded particle boards (DSP) with a thickness of 16 mm or flat slate for sheathing the plinth, the installation of the crate can be abandoned. The rigidity of these materials is quite high. Such lining will not lead to severe frosts and summer heat.
It should be noted that, having saved on the crate, you will have to spend money on finishing. Leaving nondescript gray slate or DSP without a decorative layer is not the best option. To ennoble these materials, you will have to hire a plasterer.
Considering the materials for finishing the pile foundation, let's pay attention to the polyurethane foam thermal panels. Unlike PVC siding, they combine three functions at once: screen, finish and insulation.

Professional flooring can be attributed to the category of budget cladding. The technology of its installation does not fundamentally differ from the installation of basement siding, DSP slabs and thermal panels on the crate. The profiled sheet of brand C (wall) is best suited for work. It is light and has a small wave height.

In addition to the material of a single color, today you can purchase corrugated board with a pattern that imitates masonry. The low price and durability make this plating option quite popular. It goes well with walls made of profiled timber, rounded logs and a facade sheathed with plastic panels.
A pile-screw foundation is much cheaper than the simplest strip foundation, it is built much faster, and at any time of the year and does not depend on the topography of the site. Its only significant drawback is the unattractive empty space between the ground and the first floor.
To eliminate this shortcoming, resort to various methods of finishing.
Ways
Screw pile - a metal pipe with threads at one end and a flat head at the other, somewhat reminiscent of a huge nail. Piles can reach a length of 2.5 m, have blades at the end, and not threads or threads throughout the body. To prevent corrosion, the products are covered with ship primer - black.
The empty space under the building not only looks unaesthetic, but also poses a threat to the structure. Evaporation of wet soil, snow and rain getting under the building, grass sprouting - all this contributes little to the preservation of the building, and small animals - from lizards to cats, willingly use this space.
But here is how the basement of the foundation is insulated from the outside, and how to do the work with your own hands, you can see
On the video, finishing the basement of the pile screw foundation:
Finishing allows you to solve the listed problems. The general principle of cladding is very simple and cost-free.
- First of all, the crate is mounted. It is allowed to use a wooden beam, previously impregnated with an antiseptic and a metal profile. The latter option is much more durable, since the tree will not withstand constant contact with wet ground. But how it happens is described in more detail in this article.
- The dimensions of the frame are determined by the dimensions of the finishing sheets.
- Insulation is attached to the frame, if necessary, and then the selected finishing material is mounted.
But how the foundation is insulated from the outside with foam, and what you should pay attention to during work, it is indicated
Brick, basement siding, and even simple plaster are used as cladding.
brick finish
This is the most expensive method, and it also requires certain knowledge and skills. If they exist and the costs do not frighten the owner of the building, then this option is easy to implement. It has a lot of advantages:
- brick retains heat much better than finishing materials, so that freezing of the building does not threaten in the most severe frosts; But how to apply insulation under siding for a brick house, you can see
- in this case, you can safely do without insulation;
- facing brick is elegant and attractive in itself, no additional finishing is needed here;
- no finishing material can compete with brickwork for the duration of operation; can be read in the article at the link.
- brick reinforces the pile structure and serves as an additional support.
The disadvantages include the cost of such a solution and the duration of installation: masonry takes time.
basement siding

This option successfully imitates brick and masonry, but at the same time it differs in much less weight and costs much less.
Socle siding is a vinyl panel of increased strength and rigidity. It also features a more reliable docking method and high resistance to wind loads.
Their advantages are:
- ease of installation - finishing can be done in one day, and on your own;
- relatively affordable cost;
- an excellent choice of colors and textures, you can choose the best option for any type of building;
- strength and good durability: plastic does not rot, does not corrode, is resistant to ultraviolet radiation and is designed for 50-60 years of service;
- the plinth can be washed with plain water or detergents.
The only drawback can be called that in terms of durability, the plinth panels are still inferior to brick.
Decking
This is a metal profiled sheet with a zinc coating that protects the steel from corrosion. It is painted in a variety of colors, has a thickness of 9.5 to 0.7 mm and is more than affordable.
Material advantages:

Product disadvantages:
- corrugated board is afraid of damage: a deep scratch damages the polymer coating and the zinc layer. As a result, moisture can get to the steel and in this area the metal begins to rust;
- leaf shape varies within very small limits;
- paint loses intensity and luster over time;
- in fairness, such a cladding is only suitable for buildings finished with plastic or metal lamellas.
But what a canopy of corrugated board adjacent to the house looks like, and how it can be done, you can read and see the video in this
On the video, finishing the base of the pile screw foundation with corrugated board:
Decorative plaster
This option can only be implemented together with basement insulation. Its essence boils down to attaching heat insulator plates made of dense material to the frame and applying a plaster layer on them.
Plates are pre-primed. As a plaster mixture, it is better to use silicone or fiberglass, since they are the most resistant to moisture. But how facade plaster is applied on foam plastic, you can see
How to insulate the basement of a pile foundation
The disadvantage of the pile foundation is a rather cold floor. And if in the southern regions this is not a big problem, then in the middle latitudes the plinth has to be insulated.
There are many methods of warming. The choice is determined by the height of the pile columns, their location, the material of the piles and the topography of the site.
There are 2 fundamentally different approaches:
- insulation around the perimeter - a frame is built along the base, and a heater is fixed to it. Then the finish must follow:
- if this option is not possible, due to the characteristics of the soil, for example, they insulate the outer side of the floor.
But how to use it, and by what parameters it can be selected, is indicated in the article by reference.
On the video insulation of the basement of the pile foundation:
Full insulation scheme
Regardless of which material is chosen for thermal insulation, the general sequence of actions is almost the same.
- The grillage and piles are waterproofed - this is a necessary measure to prevent the spread of corrosion in cases where the metal structural elements begin to rust and the wooden ones rot.
- They build a crate for insulation and finishing panels - it is preferable to use a metal profile, as it is much more durable.
- Fasten the insulating material to the frame.
- If possible, provide additional work on internal insulation using soil or expanded clay.
- Mount decorative trim on the plinth.
But how to apply the facade insulation penoplex, this will help to understand
On the video process of complete insulation:
Thermal insulation materials
Not every material is suitable for basement insulation. Proximity to the ground implies very high resistance to moisture, mechanical strength and at the same time excellent thermal insulation properties.
Preference is given to synthetic materials. Firstly, they do not attract rodents, and secondly, they are highly moisture resistant and not susceptible to mold. Minvata is excluded unambiguously. Basalt can be used, but is very inconvenient during installation.
- The first place among the proposed options is occupied by polystyrene foam and extruded polystyrene foam:
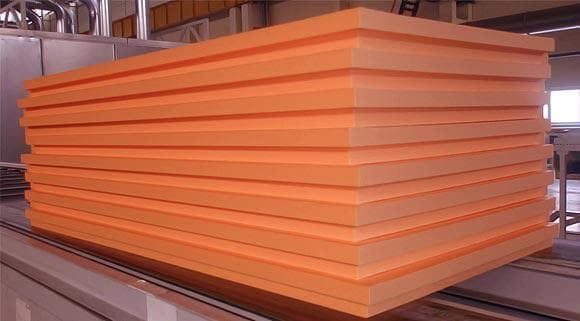
Penoizol has similar characteristics. But unlike polystyrene foam and polystyrene, it allows steam to pass through without passing moisture.

The disadvantage is the same - a rather high price. You also need to take into account the large weight of the product.
Brickwork simultaneously serves as both a heat insulator and a decorative finish for the basement. Despite the high cost, this option is often the most profitable.
Finishing and insulating the basement of a pile-screw foundation is not so difficult. Different materials are used for this, which allows you to choose the best option for each case.
Pile foundation is a fairly common phenomenon in our country with its unstable type of soil over a large area. It is easy to install and does not require large construction costs.
But the appearance of the finished foundation with a house on it is not very decorative. This does not affect the quality of operation, but from an aesthetic point of view, it is better to close the piles. This can be done in various ways and using different materials, as the construction market offers a huge range of finishing materials. This article will present the main types of finishing the base of the pile foundation, as well as the technology for installing finishing materials.
Features of a house on a pile-screw foundation
A structure based on piles can be erected much faster than a similar one on a concrete foundation, since the piles do not need time to solidify and gain strength. Screw piles can be threaded along the entire length or only at the end, but this does not change their function - transferring the load of the structure to denser soil. There are also piles with blades at the end. They have one advantage over the other two types - the ability to compact the soil around them.
The advantages of a house on a pile-screw foundation are:
- Ease of installation
- Possibility to equip the base on any soil
- Low cost relative to other types of foundations
- Possibility to build a house even on a very relief plot
- Ability to work in winter
- No damage due to ground movements
But, finishing the base of the pile-screw foundation is mandatory, which will be discussed further.
A variety of plinth finishes for pile foundations
It doesn’t matter what material the basement of the house on a pile foundation will be made of, you need to take care in advance to build the crate. The best material for the crate will be a profile pipe, which will not only simplify the installation of the finishing material, but also connect all the piles with each other.
Important! If the crate is mounted wooden, then it must be impregnated with special solutions and covered with several layers of primer mixture.
Depending on the height of the base and the selected material, you need to calculate the number of horizontal beams on the crate. Their minimum number is three, but if the base is higher than 1 meter, then additional ones may need to be installed.

basement siding
This modern material is currently the most popular for finishing the basement of not only a pile house, but also structures on other types of foundations. The advantages of this material are:
Facing brick
This method is one of the most difficult to erect and one of the most expensive for a screw foundation. In addition, it is impossible to do masonry without skills with your own hands, so you will also have to pay a professional builder who will carry out the installation.
Advice! In order for the masonry to be the most reliable, it must be connected to the pile foundation. To do this, several metal pins are installed on each pile, which are immured into it during the laying process.

The advantages of this finish are:
- Brick prevents freezing of the house.
- Facing type brick does not need to be repaired or restored after a few years.
- Brickwork helps to strengthen the pile structure of the house.
- This plinth is ready for long-term operation.
But there are also a few disadvantages that I would also like to explain:
- High cost of material and installation work.
- Installation of brickwork takes too long.
- There is no way to choose exactly the color and texture that you need. The range is limited.
flat slate
At the moment, this is not the most popular way to finish the foundation, besides, slate is dangerous to human health, as it contains a large amount of asbestos in its composition. This material has few advantages:
- Self-assembly is possible due to the simplicity of the technology.
- Long operation.
- Resistant to decay and environmental influences.
The main disadvantages of this material are:
- The brittleness of the material, which often leads to its destruction.
- The cost is higher than alternative more modern finishes.
- Limited choice.
- The difficulty of fixing on a pile foundation.
Decking
This roofing material is now used everywhere and has truly become universal. Work on its installation on the base of the pile foundation can be done independently in a relatively short period of time using a minimum set of tools.
Advantages of using corrugated board for plinth finishing:
- No additional load on the foundation due to the light weight of the sheets.
- Variety of colors.
- Relatively low cost.
- No additional processing required.

Decking, despite all the advantages, has a number of disadvantages that sometimes stop from using it:
- Instability to mechanical damage, which can lead to deterioration of the outer layer and corrosion.
- In those places where the corrugated board is in contact with the soil, its rapid decay is possible.
- During the service life, the appearance of the material is lost - it burns out and ceases to shine.
Installation of a suspended foundation
The hinged foundation is just the very finish that closes the air space between the house and the soil. It is necessary in order to limit the exit of heat from the house through the floor, to exclude the presence of various animals under the house, to dampen changes in atmospheric pressure, humidity and temperature, thereby creating the right microclimate under the house, which has a positive effect on the condition of the piles.
Mounting technology
The first step in creating a suspended foundation is the creation of a crate. As mentioned earlier, it must be made of metal or wood. In the case of using metal guides, they are welded to the piles in pre-designated places, and wooden ones are screwed onto self-tapping screws.
After the crate is ready, you can hang the panels. To do this, use any sheet material from the list that was presented earlier or some other, depending on the desire of the owner of the house.
Important! Before you close the basement of the house, you need to fill with sand the place where the material is in contact with the soil, with a layer of 4 to 7 cm.
During the installation process, when it comes to the corner, you need to mount the panels in such a way that the corner is straight and even. This process is called corner flattening.
After the material is mounted around the entire perimeter, you can proceed to the finishing, or rather, to the fastening of additional elements, such as corners, droppers and other additional accessories. These elements will give the base a finished look and accuracy.
Conclusion
A house on screw piles is one of those buildings that, after construction work, require additional steps to finish the basement. Of course, it is not necessary to do this, but the exterior will become more presentable after finishing. In addition to the appearance, finishing the basement will give a lot of positive effects. It is possible to install the finishing material on the base yourself, unless it is brickwork. And a huge range of materials will help you choose the one that suits you in terms of quality characteristics, appearance and cost.
Very often, the plinth on screw piles in the open is perceived as a hut on chicken legs and, although this does not affect the quality of the building at all, it is best to close it with some decorative finishing elements. In such cases, there are many options - no less than for the walls themselves, because the construction market is currently very rich in building materials.
Below we will talk about some of the options for such finishes, and also, as an addition, watch the thematic video in this article.
Pile-screw foundation with a high grillage
- A pile-screw foundation with a high grillage is mounted, as a rule, on unstable and moisture-saturated soils. The average pile length is 2.5 m, so that the penetration will be about 2 m anyway - in such cases, even the seasonal mobility of dispersed heaving soil is not terrible - this depth is quite enough for immobility.
- Also, such foundations, using screw piles, are built on slopes where the plane differences are too large at different points of the base area. Perhaps, in such situations, the sheathing of the basement of a house on screw piles is most relevant, and here it is more convenient to use light finishing materials, for example, basement siding.
Note. Not only the plinth of the screw foundation needs such a finish - any plinth that is devoid of decorative cladding makes the appearance of the building unfinished.
Finishing work

So, our task is to close the base for screw piles with our own hands, and for this you can use many materials. Nevertheless, the essence of the arrangement is very similar to one another, since the principle still does not change.

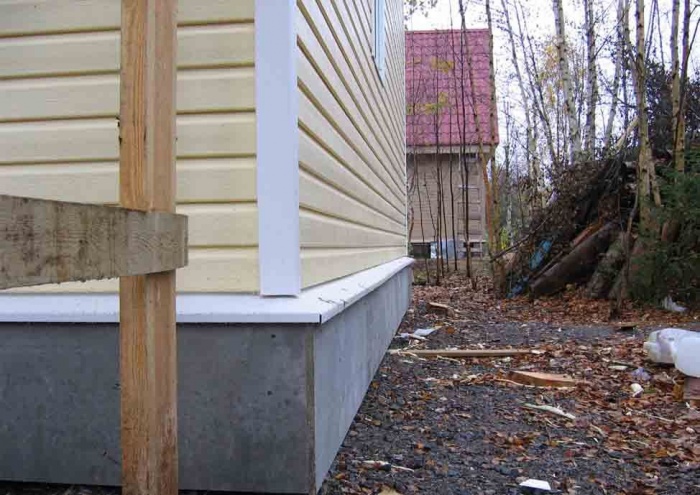
One of the options is when the basement on screw piles is sealed using a low grillage. That is, when installing such a foundation along its perimeter, a trench up to 30 cm deep is excavated and a tape is poured, where the upper part protrudes 10-20 cm above the ground level. So you get a pedestal for laying bricks, which, in turn, will serve as the basis for tiles or plaster.
Here you will get, as it were, two foundations in one - screw and tape, but such a combination will not only allow you to easily close the piles, but also increase the strength of the foundation. In addition, concrete is poured with a light reinforcing cage - as a result, the tape will not crack and will also serve as part of the decoration of the lower part of the house.

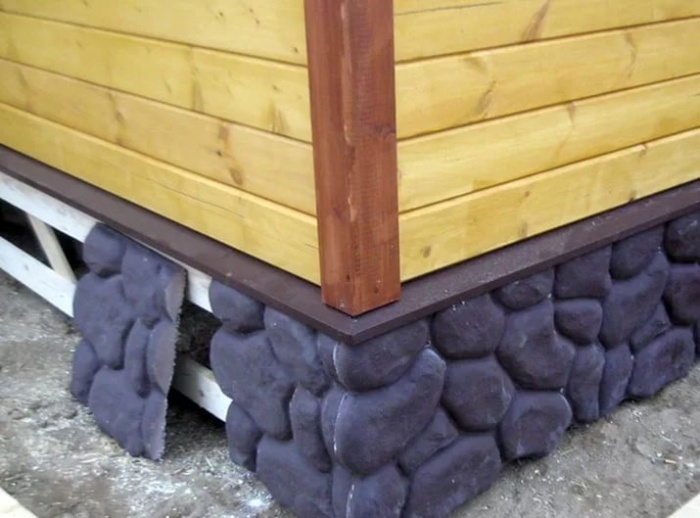
You see another option in the photo above - this is the installation of crates on piles under any sheet material. In this case, these are stone panels, but you can mount composite or siding on them with the same success. Here you see two wooden profiles, but there may be more - everything will depend on the finishing material itself.
The crate here does not have to be installed from wood - more often it is made of metal, and for this they can use a metal profile of 20 × 40 mm or even a CD, which is used for mounting drywall.
Fixation can be done directly on piles, but it is convenient for timber and metal, where the first is screwed and the second is welded. For CD, it is best to weld ears (metal plates) onto the piles, on which brackets can be fixed.

Corner 120 × 120 mm serves as a base for bricks
There is another way to close the void under the building, and its price will be much less than the arrangement of the strip foundation. A corner of 120 × 120 mm is welded to the piles, which will serve as the basis for the front brick, where the width of the bed is just 120 mm. The corner is welded strictly according to the level, and if the site goes at an angle, then in the upper part it is better to go deep into the ground so that there is no void.

Before laying decorative bricks, the corner should be primed to reduce the possibility of rusting to a minimum. The construction of the plinth is carried out as ordinary masonry with a spoon dressing and with a seam of at least 5 mm.
After you raise the entire perimeter, you need to put ebbs on top, which can be decorative, that is, from a brick set, or make them yourself and galvanized sheet, but the first option will look much better.

Insulation of the screw base with extruded polystyrene foam