How to lay laminate with your own hands - detailed instructions. How to start laying laminate flooring: the right laying technique How to lay laminate flooring at home
Laminate has gained immense popularity for its practicality, aesthetics and simplicity. Floor installation technology with such a coating quite simple: underlay flooring and neat laying of laminate tiles - and an attractive "parquet" is ready. The question is how to lay a laminate with your own hands - it is rather a problem of choosing a material, the range of which is huge, both in terms of colors and technical characteristics, and in terms of quality.
Features of the choice of material
Laminate flooring structurally involves 2 main layers - the substrate and the laminate
Laminate flooring is structurally 2 main layers - underlay and laminate. The choice of material for these elements is determined by the type of room. Any living space is conditionally divided into several zones: a living room, a bedroom, a working area (kitchen, office), a relaxation area (bath, toilet, balcony) and a walk-through area (entrance hall, corridor).
Choice of laminate
Laminate is a multilayer fiberboard-based tile with protective and decorative layers of paper and polymers; and the top layer is made of polymer resin, providing protection against abrasion and mechanical stress. Material varies according to the following main parameters: the degree of resistance to abrasion and mechanical stress; thickness; temperature regime; moisture resistance; connection method when laying.
These characteristics are part of the product labeling and are fundamental when choosing a tile.
Selection by strength
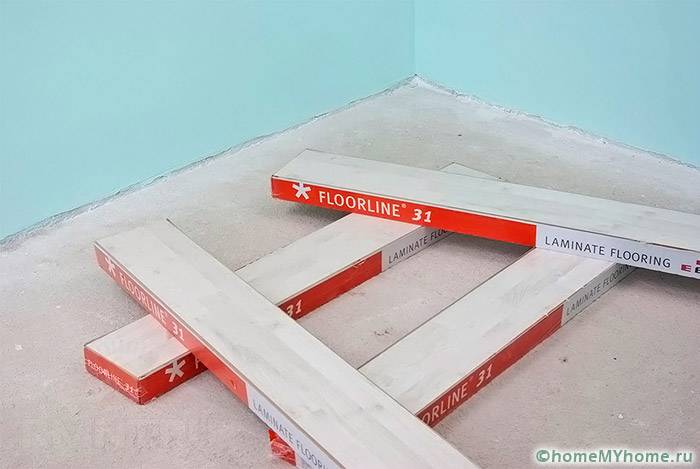
Laminate subdivided according to strength(abrasion, shock loads) into 6 main classes 21-23 and 31-33. Recently, the material of category 21-23 is practically not produced, and classes 31-33 are preferred.
The strength of the laminate increases with the increase in the figure, but it should be borne in mind that its price is also growing.
The floor in the kitchen is subject to significant stress, therefore, the use of class 23 or 33 slabs is desirable. In this area, cost savings can lead to rapid wear and damage to the coating. A similar approach should be used when choosing coverage for the corridor and hallway. The smallest loads can be assumed in the bedroom or pantry - it makes no sense to buy a laminate with a class higher than 21 or 31. In children's and living rooms, the planned loads must be taken into account, but usually class 22 or 32 is enough (read also the article about linoleum installation).
Choice by thickness
The laminate board is sold in thicknesses of 6-8, 10 and 12 mm. Increasing the thickness of the coating increases its strength, heat-insulating and sound-proofing characteristics, but at the same time the price of the material increases significantly. To the advantage thicker tiles the simplification of their installation during floor installation should also be attributed. Based on this alternative, in residential premises it is recommended to use plates of medium thickness - 7 and 8 mm.
Connection method

The most simple are plates for adhesive mounting.
Standard laminate boards have 3 main ways to connect them when laying: adhesive, Click-lock and Lock-lock. The most simple are plates for adhesive mounting. They have the following advantages: do not require perfect and low cost. In addition, the adhesive ensures the tightness of the joints and eliminates the effect of squeaking when walking on the floor. The main disadvantages are the non-separability of the structure, which excludes the repair of a separate section; increase in the complexity of laying and the duration of work due to the drying period.
Lock joints are made directly at the ends of the slabs and do not require adhesive bonding, which increases the laying performance. The lock-lock system (thorn-groove) is simpler and somewhat cheaper than the second type, but the tiles at the junction can diverge under load, which causes gaps. The Click lock is a more complex connection (latch) and ensures secure fixation of the tiles to each other, but has the main drawback - it requires perfect preparation of the subfloor; and also such a tile is the most expensive.
What is the asking price?
The laminate is realized in wide assortment and the most various color for every taste. Some brands can be recommended: domestic manufacturers - Kronospan, Kronostar, Sinteros; foreign manufacturers - Classen (Germany), Praktik (China), QuickSter (Belgium), Kronotex (Germany), Alloc (Belgium), Egger, Meister (Germany), Pergo (Sweden), Maxwood (Germany). Prices mainly depend on the strength class and thickness of the board. For example, the recommended Kronospan brand 7 mm thick laminate has the following cost: class 31 - 313-319 rubles / m², class 32 - 347 rubles / m², class 33 - 700 rubles / m². The change in cost by tile thickness can be shown at average prices: 6-7 mm - 300-500 rubles / m² (depending on the strength class), 8 mm - 500-800 rubles / m², 9-10 mm - 800-1000 rubles / m², 12 mm - 1000-1500 rubles / m².
Substrate selection
Substrate for laminate flooring plays the role thermal insulation, sound insulation, waterproofing, shock-absorbing element. Most often, it is made of polyethylene foam, polystyrene foam and cork.
- Polyethylene foam. The simplest and cheapest substrate is made from rolled polyethylene foam. Most often, such material will not have to bear additional costs, as it is applied to the laminate as an application. The main advantages are good thermal insulation and waterproofing. Disadvantage - low durability, insufficient depreciation properties; during operation, it quickly loses its shape and begins to crumble. In terms of cost, polyethylene foam films are much more economical than other substrates. So, a film with an area of 1 m² with a thickness of 5 mm will cost, on average, 26 rubles, a thickness of 10 mm - 60 rubles.
- Cork film. The cork film underlay has excellent sound and heat insulation, high damping characteristics, is durable, and evens out subfloor irregularities well. Disadvantages - low moisture resistance, which limits the use in the bathroom; and high price. The cheapest films cost 350 rubles / m² without a base (2 mm thick) and 750 rubles / m² with a base; and films of the famous companies Granorte, Wicanders - more than 1020 rubles / m².
- Styrofoam. Expanded polystyrene film with a layer of foil is the most common substrate option. In terms of price, it occupies an intermediate position between previous materials, but it has high durability and good waterproofing properties, while it also has the positive properties of other substrates. The main disadvantage is the lower resistance to bursting compared to cork film. The average cost of a film (type PPT), depending on the thickness, ranges from 130 (2 mm) to 400 (10 mm) rubles / m².
How to lay laminate flooring
Installation includes next steps: marking the area, laying the substrate, laying the laminate and finishing activities.

Required Tool
To lay a laminate, you will need the following tool:
- electric jigsaw or hacksaw for cutting laminate;
- scissors for cutting the substrate;
- brush for applying glue;
- clamp or vise for fixing tiles when cutting;
- mallet for fitting plates;
- tape measure and metal ruler for marking;
- level to control horizontality.
Budgeting
The manufacture of flooring should begin with the calculation of the required amount of materials and the preparation of a cost estimate. First of all, you need to calculate amount of laminate, which is estimated by area. The consumption of laminate tiles, on average, is equal to the area of the floor of the room with the addition of waste of about 7%. The substrate should be selected with the width of the roll, a multiple of the width of the room - then its overrun will not exceed 5% of the area of the room.
For example, it is necessary to lay the floor in a 4x6 m room, i.e. 24 m². Choose for the substrate polystyrene foam at a price of 320 rubles / m². Film consumption - 24x1.05 = 25.2 m². Cost - 320x25.2 = 8064 rubles. Laminate - class 32 with a thickness of 7 mm at a price of 347 rubles / m². Laminate consumption - 24x1.07 \u003d 25.7 m². Cost - 347x25.7 \u003d 8918 rubles. Thus, the total costs will be about 17 thousand rubles. The average time that will have to be spent on cutting and installing the coating is about 8 hours. If you still want to invite a craftsman to carry out work, then you need to prepare an additional 250 rubles per 1 m² of coating (average cost of work); those. to the room taken as an example, savings will be at least 6 thousand rubles
Video instruction
Greetings, my dear readers.
In this article, we will learn − how to install laminate flooring in an apartment.
Laminate is a type of flooring, the basis of which is high-strength fibreboard, covered with a special wear-resistant film.
Laminate appeared on the market relatively recently, but due to its performance characteristics it has become one of the leaders in flooring, having won its place from ceramic tiles, carpet and linoleum.
Installation of the laminate can be done by hand, without resorting to the help of craftsmen. To do this work as efficiently as possible, follow the instructions that I will provide you. Required tool

For the correct and quick laying of the laminate, we need a tool:
- construction tape measure
- building level
- building corner
- jigsaw or hacksaw with fine teeth
- pencil
- hammer
- electric drills and a pen drill - will be required to form holes for pipes
As you can see from the list, no specific tools are required. You can also purchase a laminate laying kit from a hardware store.
Such a set is inexpensive - the price ranges from 250 to 1000 rubles. It all depends on the manufacturer and a cheap Chinese version is quite suitable for a one-time installation :)

Set completeness:
- Metal bracket - necessary for installing laminate adjacent to the walls. Thanks to rubber pads, the bracket can be used as a "tamping" beam for joining panels.
- tamping bar - used for docking. It has several grooves, which greatly simplifies the installation of lamellas.
- expansion wedges - are necessary to create a technological gap between the wall and the laminate. They have a size of 8 to 12 mm.
In fact, you can get by with your own set of tools, but if you still decide to buy, you will greatly simplify your work :)
Laminate classes - which one to choose?

Correctly laying the laminate - video
Even an experienced builder, not to mention those who will have to buy a laminate for the first time, can see eye to eye from a huge assortment.
So which laminate should you choose?
The laminate board is divided into service classes, which will tell us about the service life of the product, depending on the loads that affect them.
Each board must pass 18 tests (European standard EN-13329), thanks to which one or another class is assigned.
This norm divides the laminate into two large categories:
- commercial use laminate
- for home use
Commercial laminate is designed for service in commercial premises (sorry for the taphtalogy). Due to the increased wear-resistant characteristics, the service life of the panels can be 10 years or more. And if you use such a board at home, then the terms increase significantly.
- 31 class - designed for floors in commercial premises with a low load. Service life - no more than 3 years. If you use it at home, then the period increases to 10 years. At the moment - this is one of the most popular laminates in Russia.
- Class 32 is commercial premises with an average load. The average service life is not more than 5 years. At home, such a floor can last from 12 to 15 years. It can be used well in the kitchen. The best choice in my opinion. Price-quality ratio.
- Grade 33 is a very intense load. Such a laminate is used in public places - bus stations, dance clubs. The service life is more than 15 years, and when used at home, some manufacturers give a lifetime warranty.
Laminate boards for home use cannot boast of such qualities. 5 - 6 years of operation for them is the optimal result. The fact is that they are made of fiberboard or MDF, which significantly reduces their characteristics. Their main advantage is low price.
This laminate is divided into 21, 22, 23 classes. Service life from 2 to 6 years, respectively.
Foundation preparation
So, friends.
The rules for laying laminate on a wooden floor are practically no different from the rules for laying on a concrete floor. The most important point before installation is surface preparation.

Laminate does not tolerate bumps, dirt, warps.
If the rough floors in the apartment are made of concrete, then it is necessary to check their level. Additional leveling with screed or self-leveling floors may be required. Before arranging the screed. If the concrete is even, then it is necessary to caulk all the cracks.
If the installation will be carried out on wooden floors, then we also check their level. The surface must be leveled, either with a planer or scraper. If there are very strong differences, it is better to dismantle the old floors and pour the floors into the level, and if this is not possible, then you can sew plywood or OSB.
After the base is ready, it must be dedusted.
Read more about surface preparation for laminate flooring.
Installation of the insulating layer and substrate
Any floors tend to absorb moisture, and laminate is a wood flooring that does not tolerate its harmful effects.

To prevent this process, it is necessary to separate the floors from the laminate with a special vapor barrier film 200 microns thick.
Most of the film is sold in rolls, and to achieve even better insulation, the film is hermetically glued. A layer is laid between the laminate and the film - the “substrate”. To find out which substrate to use - read this.
For the "substrate" you can use:

- wood pulp
- Cork
- foil styrofoam
- foam polyethylene
Thanks to the “substrate” layer, small differences in the floors are eliminated, and the heat and noise insulation of the floor covering is also increased. In rare cases, old linoleum is used instead of the substrate.
Panel connection methods

- Glue method - at the moment it is practically not used. The point is to pre-treat the lock joints of the lamellas with glue.

- click - locks - the shared (receiving) side of the laminate lock is made with a special lock. Force is required to join the panels.

- lock - locks - special latches are used for connection.
Calculation of the amount of laminate
- First, we find out the area of \u200b\u200bthe room by multiplying its length by its width.
- We find out the area of the laminate using the same formula, and since almost all laminate boards have a length of 1 meter, it is enough to measure the width of the board.
- We divide the area of the room by the area of \u200b\u200bthe laminate - we get the number of boards!
Example:
Room – 16 m²
Laminate - length 1 m, width 0.2 m. Area = 0.2 m²
The required number of boards is 16: 0.2 = 80 boards.
Step-by-step instructions - how to lay a laminate with your own hands
To begin with, consider the locking method of laying.

1. First of all, we spread the "substrate". We glue the joints with tape.

2. We start installation from the first row.
First you need to saw off the protruding "comb" on the board. When laying the panel, we form an expansion joint using wedges. The thickness of the seam should be from 8 to 12 mm.
IT'S IMPORTANT TO KNOW:
A clearance gap is required. It provides a uniform narrowing or expansion of the coating with changes in humidity or temperature in the room.
At the end of the row you have to face the cutting of the last board. Laminate cutting is carried out using a construction corner and a jigsaw.
3. Installation of the second row
If the trimmed part is half the panel or most of it, then we start it at the beginning of the next row. Installation is carried out in a checkerboard pattern. Thanks to this, a uniform load on the seams is achieved. The same principle applies to brickwork.
4. Installation of each panel is carried out as follows:
- put the board to the groove at a slight angle
- gently insert into groove
- if necessary, knock out the panels for a better connection
5. The last row is mounted using a metal bracket, or using improvised means. Don't forget to create a gap.
6. At the end of the work, we remove the spacer wedges and mount the skirting boards.
IT'S IMPORTANT TO KNOW:
In no case should you hit the laminate directly with a hammer - damage the top layer. Use a "tamped" bar or a piece of laminate.
Castle method of laying laminate - video
Adhesive laying laminate

Pretty popular mounting method. Due to its features, it has a number of advantages over the castle:
- when the glue dries, a greater strength of the flooring is achieved than just a groove-to-groove connection.
- durability - subject to all operating parameters, the adhesive joint will outlive the lock much longer
- reliability - thanks to the glue, it is unlikely that moisture or dirt will get into the joints
But there are also disadvantages:
- this installation method is not applicable if the installation is carried out on underfloor heating.
- the use of PVA glue is also unacceptable - you will have to buy special glue for lamellas
- the inability to use the floors immediately - you need to wait for the glue to dry completely
- reuse of panels after dismantling is not possible
Glue laying laminate - video
So, let's move on to the installation:
1. Preparing the base, laying the "substrate", maintaining the expansion joint - everything is identical. The only difference is in the method of installation.
3. We get rid of the protruding groove on all panels of the first row.
4. Attach the first panel to the wall, insert the wedges, forming a gap.
5. Apply glue to the protruding end of the groove edge of the next panel.
6. We connect the boards, and immediately remove the remaining glue, preventing solidification.
7. If necessary, knock out the panels.
8. We repeat all operations.
9. At the end of the work, we remove the spacer wedges and mount the skirting boards.
Laying laminate around pipes and near doors
If pipes get in your way while laying, then do not be afraid.

- First you need to cut the laminate, taking into account the entire required length.
- Then we transfer to measure the distance from the wall to the center of the pipe and mark the center line on the board
- We measure the distance from the edge of the board also to the center of the pipe and mark the perpendicular, thereby obtaining the center of the pipe
- we measure the diameter of the pipe, add 8 mm to it for the expansion joint and use a compass to mark the place of the cut
- we make a hole with a pen drill and cut a laminate board along the center line for its subsequent connection
- the joints of the lamellas are smeared with glue and connected
Laying laminate under the door frame is divided into three ways:

1. In the first case, the laminate is mounted first, and then 🙂
2. If the doors have already been installed, then with a fine-toothed hacksaw, you will have to file the vertical racks of the door to the height of the lamellas so that they can be launched under the box.
3. The third method involves flush cutting with a door frame. But I do not advise you to use it, because without the proper skills you are unlikely to be able to cut smoothly.
How to lay out a laminate

- The first way is perpendicular to the window. Thanks to the perpendicular sunlight, the joints of the laminate become barely visible.
- The second way is parallel to the window. This layout is appropriate in rooms with a small area and will help visually expand it.
- Diagonal layout. The panels are placed at an angle of 45° to the walls. In my opinion - the most beautiful layout of the laminate. There is a drawback - this is a significantly higher consumption of panels.
Laminate Care

In order for laminate floors to last as long as possible, they need not only competent installation, but also proper care.
The most important thing for laminate flooring is keeping it dry. If water gets on the floor, immediately remove it with a soft cloth.
One of the weak points of a laminate board is its locks. If it is operated in rooms with high humidity, then a special sealant must be used during installation. It does not stick the panels, but perfectly protects them from moisture.
When caring for laminate, do not use aggressive detergents, and do not use parquet care products. Such tools may well destroy the upper wear-resistant layer.
Laminate is also afraid of products with a high content of glycerin, which destroys their edge, getting into the joints.
Conclusion
Well, that's all, friends!
In this article, we learned how how to properly install laminate flooring.
I hope the information will be useful to you and help you avoid serious mistakes! Good luck to all!
We will send the material to you by e-mail
The housing issue remains relevant for many. Home repair and the problems associated with it worry everyone who decides to carry out construction work on their own. Today we will discuss some of the subtleties of laying laminate flooring, answer the question “how to lay laminate flooring correctly”, show you how to avoid the most common mistakes and reveal little professional secrets.
Coating comes in different types and colors.
Laminate board is a very popular and common flooring material today. The collective name "laminate" (derived from the Latin "layered") combines the types of fiberboard used for finishing floors.
Today, the industry produces a wide variety of flooring. The right choice of material will allow you to forget about the floors for a long time and not worry about their condition. Let us briefly dwell on the layered structure of the floor in order to competently choose the most suitable material for us. The laminate has several layers, the top is a protective film that simultaneously carries a decorative function.
In addition, this film has different wear resistance. It is this characteristic that parquet is divided into classes. And, when we mentioned the right choice, it was the wear of the coating that was meant. Surely, every person who has begun repairs wants to do the job efficiently and for a long time. To do this, you need to use high-quality material, and not Chinese fakes. A good material should have certain characteristics corresponding to its class.

Floor classification is carried out in accordance with the European standard EN13329. He distinguishes two groups of use:
- home - code 2;
but. wear class 1
b. wear class 2
in. wear class 3
wear class 4
- commercial - code 3.
but. wear class 1 up to 4th
This is reflected in the coding of the material, the 1st digit is the area of application, and the 2nd is the abrasion class. Thus, a board marked 21 or 22 is perfect for residential apartments, and class 33-34 is needed for public spaces. It is important to know this so that freshly laid floors do not turn into a worn board in six months.
Useful advice! Before laying, it is not recommended to unpack the material for about 2-3 days, let the material rest at room temperature and humidity. Packs should not be opened, let them be in their original packaging. This will give good adaptation to local conditions.

Which one is better is hard to say. It depends on the conditions in which the coating is laid: humidity, subfloor (concrete or board), floor horizontalness, etc. It is considered optimal to listen to the recommendations of the seller of the original floor material, because a substrate with a specific set of properties is selected for a specific laminated board. It is important that the substrate perform the main functions:
- bactericidal;
- mold resistance;
- inedible for insects.

Related article:
When laying the underlay, it is important that its seams do not coincide with the seams of the board. It is better to lay the substrate sheet material in a checkerboard pattern, and fix it with masking tape. The substrate in the roll must be rolled out with an overlap on the walls, and the joints of the canvas must also be fastened with adhesive tape.
Important! Overlapped seams will create an uneven surface that will damage the finish.
In order not to make mistakes, watch the do-it-yourself laminate installation video below.
How to lay a laminate with your own hands: video process
How to lay a laminate with your own hands straight flooring
You can start laying laminated panels from any corner of the room, and preferably continue from the window to the door. First you need to calculate the required number of boards, for this you need to calculate the size of the extreme slats at opposite ends of the room, with a slat width of at least 50 mm. Start laying with a gap between the wall and the first plank of 10 mm, so that the indent does not “leave”, it is necessary to install a spacer. Below is a handy laminate calculator, which will allow you to calculate the required amount of this material for different laying methods:
Installation of laminate flooring does not require special knowledge, and therefore everyone can do it. A well-thought-out system of locks, ease of cutting and laying lamellas makes it possible to independently make a comfortable floor in an apartment in a few hours. In order to install the laminate with your own hands without difficulty, you first need to study the technology of each process and the sequence of stages.
Laminate flooring has different strength, water resistance, color and texture, differs in installation method and price. In order for new floors to serve for a long time and with high quality, special attention should be paid to the choice of laminate. Coating class 21, 22 and 23 is intended for residential premises, 31 and 32 for commercial. The higher the grade, the stronger the material. The optimal thickness for laminate is 7-9 mm. Thicker lamellas have the same service life, but are more expensive.

The level of moisture resistance and sound absorption must be indicated on the packaging by the manufacturer. An important factor is the method of joining the panels: it can be glued and locking. The first option makes it possible to reliably seal the joints with waterproof glue, moreover, such panels are cheaper. Laminate with a locking method of fastening is more expensive, but has its own advantages. It is very easy to lay, if necessary, you can easily replace any of the slats.

In addition to the laminate, you will need to purchase a substrate. It protects the coating from damage in contact with the subfloor, muffles sounds, retains heat. Foamed polyethylene and natural cork are considered the most popular materials for the substrate.

The polyethylene substrate has a low cost, is not afraid of moisture, but wears out too quickly. The cork substrate is durable, strong, has high heat-insulating properties, but is completely unsuitable for rooms with high humidity.


Preparation of the concrete base
You can mount the laminate on a concrete and wooden base. So that the coating does not creak and does not deform, the subfloor must be perfectly flat. The allowable height difference is 2 mm per square meter.

In preparation you will need:
- cement-sand mixture;
- building level;
- rule;
- primer;
- waterproofing film;
- Scotch.
To begin with, the base is cleaned of dust and its integrity is checked. If the surface is too uneven, covered with cracks, it is recommended to make a new screed, as the alignment of individual defects will take a long time. If there are no large cracks and deep potholes, the existing irregularities are sealed with cement mortar, and the protruding areas are cleaned off. Be sure to check the horizontal level of the subfloor using a level or rule.

A clean, even base is primed and then covered with a plastic film or a special membrane for waterproofing. The film is overlapped, reinforcing the seams with adhesive tape. It is very important that there are no wrinkles or other thickenings on the film, which, after laying the coating, will lead to punching of the substrate.
Wooden base preparation
When laying the coating on a wooden floor, the base must also be properly prepared. It is impossible to carry out installation if the floor boards have dried out or loosened, there are gaps, rotten areas.
For preparation you will need:
- moisture resistant plywood 15 mm;
- antiseptic primer;
- screws or nails;
- hammer;
- screwdriver;
- level.
Torn boards are nailed to the joists, boards with mold stains or chipped places are replaced with new ones. The cracks are sealed with a sealant, the base is checked by a level or a rule, and carefully primed with an antiseptic composition. Waterproof plywood is laid on top and fixed to the base with nails or self-tapping screws. If the height differences are more than 2 mm per square meter, the surface is leveled by placing wooden blocks of different thicknesses under the plywood.

Laying panels with glue
This installation method cannot be used if a "warm floor" system is installed. Also, you can not use PVA glue, which dissolves with water and cannot provide the coating with proper tightness. Before installing the coating on the floor, the laminate should be kept in a room at a temperature of 18-20 degrees for at least 2 days. The rough base is covered with a cork or polyethylene substrate, laying the material end-to-end and gluing the seams with tape. If the panels have their own soundproofing substrate, it is not necessary to lay polyethylene foam on the base.

Step 1. Mounting the first row

According to the instructions on the package, the glue is diluted and allowed to brew. The first lamella is turned with a groove towards the wall, then glue is applied along the entire length of the recess, capturing a short cut of the lamella. Apply to the floor, insert spacer wedges between the panel and the wall surface and press. They take the second board, glue the upper edge of the end groove with glue and connect the tongues. Excess glue is wiped off immediately, preventing drying. If necessary, the panels are lightly knocked out with a wooden block with a hammer. The extreme lamella in the row is cut with an electric jigsaw to the desired length.
Step 2. Mounting the second row

The next row is always laid with the joints offset by a certain distance. Most often this is half the length of the panel. Starting the installation of the second row, the first panel is cut in half with an electric jigsaw, the side cut is covered with glue and applied to the lamella of the first row. The next fragment is first connected to the first row, slightly shifting it along the length, then it is moved to the adjacent panel and the ends are fixed with tongues. The rest of the boards are laid in the same way. After the first three rows, work is suspended for 1.5-2 hours so that the glue sets well.
Step 3. Laying around the heating pipes

If heating or sewer pipes are installed in the floor, you need to attach a piece of paper to them and trace the fit contours with a pencil. According to the template made, cutouts are made in the panels, after which the sections are smeared with glue and pressed to the surface. Spacer wedges should be inserted between the pipes and the laminate. The extreme row of panels is mounted with a crowbar, carefully prying off the edges of the boards. At the end, the wedges are taken out, and the gaps around the perimeter of the room are closed with skirting boards.
Installation of panels in a locking way
When laying panels in a locking manner, the material must also lie in the room for at least 2 days. At this time, the floor is covered with a cork or polyethylene substrate, the adjacent strips of which are laid end-to-end. To prevent the insulation from moving during the installation of the laminate, as well as to seal the coating, the seams are glued with adhesive tape. The sealant should go onto the walls around the entire perimeter by 2-3 cm.
During the installation process you will need:

Step 1. Mounting the first row
Mount the panels start from the corner, placing them perpendicular to the window. Spacer pegs are attached between both walls and the panel so that there is a gap of 1 cm. The second board is applied to the end of the first, holding it at a slight slope, and the grooves are carefully connected. At the end of the row, if necessary, the panel is cut off and the missing fragment is fixed.

Step 2. Mounting the second row
A new row of laminate is laid with offset joints. If a segment of at least 30 cm long remains from the previous row, laying starts from it, but if the fragment is too short, a new board should be cut. The panels of the second row are laid out along the first and connected to each other at the ends, and then the resulting block is attached to the first row with a continuous strip and snapped into place. Where the locks are not closed tightly, a bar is applied to the board and lightly corrected with a hammer. In places where the walls bend and around pipelines, holes are cut out in the lamellas according to the template.


Many people prefer to lay the laminate not parallel to the walls, but diagonally, under the parquet, using panels of different shades. Diagonal laying will require an increase in material consumption by about 7%, a little more for parquet, since many boards will have to be cut in a pattern.


To lay out the panels diagonally, from the corner you need to measure the same distance on both walls and put marks with a pencil. Then, with the help of carnations, a thick fishing line is pulled between the marks and fixed. This will help to more accurately determine the location of the lamellae. The first strip is cut from both sides at an angle of 45 degrees and inserted between the walls so that there is a gap of about 1 cm. Spacer wedges are fixed in the gaps.

The second row should consist of two fragments that join exactly in the middle of the first board. For these fragments, only one edge is cut at an angle, making sure that there is a gap at the wall all the time. For convenience, you can fill the central part of the floor, and then cut the lamellas and lay the side sections. After filling the entire area, the wedges are removed, the excess sealant is cut off with a sharp knife, and the skirting boards are installed.

The option of laying under parquet looks original: fragments of panels 30 cm long are laid out in the form of a braid or herringbone, alternating vertical and horizontal pieces. If you use a laminate of two shades and shift the joints not by half the length, but by 30 cm in each row, you will get beautiful zigzags. You can lay out large and small squares, mounting alternately rows of vertical and horizontal fragments.
To hide inaccurate cuts around pipelines or joints of adjacent coatings of different thicknesses, special decorative contours and thresholds are used to match the color of the laminate. At curved joints, it is convenient to use flexible thresholds that easily take the desired shape and have a decorative look.
Video - Do-it-yourself laminate flooring
- Mounting speed
(5) - Simplicity
(4.5) - Tool use
(5)
General
User Reviews
0 (0 votes)The question of how to lay a laminate has recently gained wide popularity. This material has proven itself as a floor covering. The do-it-yourself laminate laying technology is quite simple, which allows you to mount a modern floor in an apartment quickly and at the lowest cost. The modern market offers a wide range of building materials that can satisfy even the most demanding customers.
Quick installation is one of the advantages of laminate.
Product Features
Do-it-yourself laminate laying is based on laying standard laminate boards on a substrate that acts as a shock-absorbing element. The laminate consists of 4 layers. The top coating (overlay) is a transparent plastic that protects against scratches and abrasion. The next layer of furniture paper performs a decorating function and provides the desired color and texture (quality tiles are difficult to distinguish from natural wood). The basis of the material is a fiberboard board impregnated with a non-combustible reinforcing compound. The bottom layer with a thickness of 0.2-0.8 mm with waterproofing properties is made of paper impregnated with resins and paraffin. Such a multi-layer construction provides the main advantages of the laminate: decorative, strength, durability, water resistance, heat-insulating and noise-insulating properties.
To connect the tiles to each other, special connecting elements are made at the ends and side sections. At the ends there is a Lock-lock according to the tenon-groove system, which allows joining the slabs during laying. A Click-latch is made along the side face to fix the elements in the longitudinal direction. Such a connecting system allows you to connect all the elements into a single system without the possibility of displacement relative to each other.

Laminate underlay is sold in rolls.
The substrate is a rolled material 2-10 mm thick made of polyethylene foam, expanded polystyrene, cork, etc. Usually, a polystyrene foam film is attached to the laminate, which has sufficient cushioning ability and heat resistance.
If you want to increase the waterproofing and to create a vapor barrier, a polystyrene foam film with a foil layer is used. When laying underfloor heating, you can use a more expensive cork substrate.
The principle of installation of the coating
Before starting work, you need to decide how to lay the laminate with your own hands. There are different methods for laying laminate, for laying laminate tiles with your own hands, you can use 3 schemes shown in Fig. 2. (Fig. 2. Laminate laying patterns)
Laminate laying methods differ in the arrangement of tiles relative to the source of natural light (windows): parallel to the light flux, perpendicular to it and at different angles (diagonal option). Most often, a scheme is used that provides for the parallel placement of elements relative to the sun's rays. With such laying, the longitudinal joints of the tiles between the rows are practically invisible, which provides the illusion of a solid surface.
If the tiles are placed parallel to the light flux, then shadows inevitably appear in the places of the gaps, which emphasizes the structure of the flooring. This method is used if you want to obtain a visual effect of expanding a narrow room. The diagonal method is the most complex and leads to unnecessary waste of material.

Method of laying laminate along the light beam.
However, this technique creates a kind of coating pattern and visually increases the entire floor area. Thus, the methods of laying the laminate are selected taking into account the size of the room, the location of the windows, and the design solution.
The problem of laying laminate flooring is independently solved in several stages. The initial stage involves taking measurements, drawing up a general coating pattern and calculating the required amount of material. Then preparatory work is carried out, the substrate is laid, and only after that it is possible to lay the laminate.
How to install laminate flooring yourself? To ensure the reliability of the connection of elements and exclude the appearance of defects, the following nuances arise:
- An expansion gap must be left around the entire perimeter of the floor at the junction with the wall. The laminate board is sensitive to temperature changes, and to dampen thermal expansion, the following condition should be taken into account: 1 m² of laminate can expand in all directions by 1.5 mm. Given this condition, the compensation gap at the wall should be about 10-18 cm, depending on the area of the room.
- To ensure a reliable connection of tiles to each other, the minimum possible dimensions of inserts (cut tiles) are recommended. The length of the element should not be less than 20 cm. When cutting in the longitudinal direction, it should be taken into account that the minimum allowable width is 5 cm.
- When calculating the required amount of material, it is necessary to take into account the inevitable losses when cutting and fitting elements. The recommended margin of laminate is 6-8% for longitudinal or transverse laying, and up to 20% for diagonal variant.
Methods for laying laminate on your own must be chosen taking into account certain practical recommendations.
Required Tool

A grinder is well suited for cutting laminate.
To install a laminate flooring yourself, you will need the following tool:
- Bulgarian;
- electric jigsaw or saw for laminate;
- electric drill;
- wood saw;
- putty knife;
- mallet;
- hammer;
- scissors;
- furniture stapler;
- paint brush;
- roulette;
- protractor;
- metal ruler;
- construction level.
Preparatory work
The preparatory stage includes the preparation of the floor for the manufacture of flooring and the correct preparation of the material for laying. The subfloor must be carefully prepared for coating. Its surface must be smooth, without defects, height differences and slopes. If there are logs, a flooring of boards, plywood or chipboard is laid on top of them without gaps. On top of the concrete floor, be sure to apply a cement screed with an external leveling layer. The allowable height difference is 1 mm for every 1 m of the floor. Immediately before laying the flooring, the base is cleaned of debris and dirt. It is recommended to use a vacuum cleaner to remove even fine dust. It should be borne in mind that dust in the interlock of laminate boards is a future source of creaking.

Before laying the laminate is kept indoors for two days.
Material preparation consists in adapting the laminate to room conditions. Laminate tiles cannot be laid directly on the floor. The exposure time of the material in room conditions should be at least 2 days.
Only after such an exposure, the plates are released from packaging and sorted. The optimal conditions for adaptation are humidity in the range of 50-65%, temperature 18 ° -20 °. Panels are stored horizontally.
Substrate laying
After completion of the preparatory stage, the substrate is laid. If the flooring is done on a concrete screed, then before laying the substrate, a layer of polyethylene film with a thickness of 0.1-0.2 mm is spread as a waterproofing. If there is a wooden subfloor or chipboard coating, it is not necessary to use a plastic film. Film strips are joined with overlapping at a gap of 15-20 cm.
A substrate is laid over the film layer. Economical options are often used - rolled polyethylene foam or expanded polystyrene with a thickness of at least 2-3 cm. The strips are laid end-to-end, without a gap, and the joint area is fastened with adhesive tape. When laying the cushion, it is recommended to maintain a direction perpendicular to the direction of the bottom polyethylene film. When laying the substrate on a wooden draft floor, it is advisable to fasten it to the base using a furniture stapler.
Surface laminate flooring

Laying the laminate starts from the corner.
The most common scheme for laying laminate panels yourself is to place them parallel to the side walls. The laying of the slabs begins with a corner element at the wall with a window. First of all, a strip is formed along the entire wall with an end joint. To ensure strict parallelism with respect to the wall and ensure the compensation gap, wedge inserts of strictly the same width are used. Sawing panels, if necessary, is done with an electric jigsaw or a special saw for laminate.
End joining of the panels is carried out by leading the element at an angle of approximately 20 ° and inserting its spike into the groove of the previous plate. Then the second panel is lowered and lightly tapped with a mallet to seal the joint. In the same way, all elements of the first strip are connected.
The second band is formed in the same way. Unlike the starter strip, it starts with a laminate panel shortened by half. This is necessary to ensure the staggered linking of the strips - the end joint of one strip falls into the middle of the panel on the next strip. After the formation of the second row along the entire length, this strip is brought to the initial row and docked with it in the longitudinal direction. The connection starts from the wall with the window, by uniform articulation and compaction with a mallet. When properly docked, a characteristic click is heard.
When combining rows, their parallelism is strictly controlled.
Laying in specific areas
The most specific areas for flooring installation are radiators, pipes and doors. In the case when it is difficult to snap the panels under the battery, a part of the ridge is cut off, and the plate is fixed with glue. To lay the laminate around the pipe, holes are drilled on the slab with a diameter larger than the pipe diameter, a section of the laminate is cut parallel to the end of the panel, and the tile is installed in its place. After that, the sawn off piece is inserted back and glued. All gaps are masked with sealant or plastic lining.
The preparation of the doorway begins with sawing the jambs to the thickness of the coating with the substrate. On panels intended for decking next to the jamb, the actual configuration is drawn. It should be noted that the expansion gap must be provided, but this indentation is closed by a box, i.e. the board is brought almost close under the jamb beam.
The door leaf is also shortened, but taking into account the height of the plastic or aluminum transition profile to mask the seam. At the end of the laminate flooring, a plinth is installed, which is attached to the wall, and not to the floor.
The installation technology of laminate flooring is not particularly difficult, it is quite possible to do it yourself. It is important to take into account all the nuances of the work, to show accuracy and patience. Laminate is a modern flooring material that, if properly installed, will last reliably for many years.