Vases for flowers outdoor large do it yourself. Decorating a vase with your own hands: photo ideas
Vases made of glass or ceramics, painted and decorated with your own hands, can be a great gift, wedding decoration or decor item for your home. Hand painting on glass / ceramics, depending on the desired pattern and technique, can be either complex, requiring skills, or very simple, accessible to beginners.
Master class number 1: Stylish geometry for beginners
To create such a laconic and stylish decor for a vase with your own hands, you do not need to be able to draw - even and neat stripes, zigzags and intersecting lines can be created using masking tape.
You will need: spray paint, acrylic or stained glass paint for glass and ceramics, a brush (a synthetic brush is suitable for acrylic paints, a natural brush is suitable for stained glass), masking tape (better of different widths), as well as nail polish remover or alcohol to degrease the surface, cotton pads and sticks.
Drawing technique:
- Degrease a ceramic or glass vase with a cotton pad and any degreaser;
- As soon as the surface dries, we glue the vase with adhesive tape according to the stencil principle, for example, as shown in these photos (scroll to the right).

Tip: A very beautiful effect can be achieved by pasting the vase with narrow tape as shown below.

- We put the vase on the newspaper and begin to carefully paint over the unglued areas and the bottom, going over the adhesive tape so that the edges of the pattern on the vase are clear. This master class uses spray paint, but you can use acrylic or stained glass paints, and also add contours to the drawing.
- Now it remains to wait for the paint to dry completely. Drying time for all paints is different, so you need to focus on the manufacturer's instructions. Spray paints dry very quickly and do not require baking, but acrylic and stained glass paints can usually be baked by placing the vase in the oven for 15 minutes at 150 degrees, or allowed to dry naturally for 2-4 hours.
For your inspiration, we have selected the most beautiful ideas for decorating vases with your own hands using adhesive tape. Take a look at the photo below - this simple decor can decorate even the most elegant wedding.

Floor vases are very large, and therefore hand-painting on them is a long and laborious task, but using adhesive tape as a stencil, you can decorate them as quickly as possible.

Be careful when choosing paint colors. Unusual shades, such as gold, silver, copper, pastel, as well as white and black, will immediately turn an ordinary glass or ceramic vase into a designer decor item.


Master class number 2: Dot painting of a vase
For those who are not looking for easy ways and want to decorate a vase with a more complex pattern, we suggest mastering the dot painting technique, which is also called pique or point-to-point.

You will need: alcohol or acetone, cotton pads and sticks for degreasing and correcting the pattern, and for drawing, prepare high-quality contour paints, for example, from Marabu or Decola. You can also use acrylic paints and a small synthetic brush, cotton swab or toothpick.
Drawing technique:
- First you need to degrease the vase and wait for it to dry.
- Dot painters can apply a design to a vase without the help of sketches, masterfully improvising in the process of creation. But it is better for novice decorators to first outline the outlines of the desired pattern.

- You can transfer the picture to an opaque vase using a soft, simple pencil: print or draw a picture in a suitable size, cut it out, and put it on another sheet of paper “face down”, and then carefully paint over the wrong side of the leaf with a picture with a pencil. Your task is to generously cover the entire area of \u200b\u200bthe picture with a lead. Now you should attach and fix with adhesive tape a piece of paper painted inside out to the vase, and then draw the outlines of the picture with the same pencil (preferably blunt) as shown in the photo on the right. Thus, a barely noticeable sketch will remain on the surface, which will make your work easier;
- To paint a glass vase, just print or draw an auxiliary sketch by hand, and then glue it on the back.
Tip: when choosing a pattern for a transparent vase, remember that the patterns or images on its walls will intersect with each other. Therefore, it is better to place the main drawing on one side of the vase, and apply a background, that is, an unobtrusive painting, to the rest of it.
- Before you start painting vases, practice putting dots of the same size on paper, maintaining an equal interval, which should be such that the dots are distinguishable, but at the same time form a single unbroken line.

Test all contours - they should not be liquid and thick. Also prepare a needle to clean the tip of the tube and a cotton swab to correct a failed drawing.

If applying a bitmap directly from the tube seems difficult to you or you don’t have contour paints, it doesn’t matter, use acrylic paints. Dots of different sizes can be set using improvised means - an eraser on a pencil, toothpicks, needles, a cotton swab, a small brush, and even its blunt end, as shown in the photo.


- When the drawing is finished, put the vase in the oven to bake according to the manufacturer's recommendations. As a rule, paints dry completely in 24-72 hours naturally or by baking in the oven for 30 minutes at a temperature of 170 degrees (if you used baked contours). Of course, large floor vases that do not fit in the oven should be dried naturally.
Ideas for decorating a ceramic vase can be gleaned from the following selection of photos.

And here are examples of spot painting on glass.


Master class number 3: Stained glass painting of a glass vase
Contours can be drawn not only in dot technique - in combination with stained glass paints, hand-painted vases can imitate stained glass.

You will need: degreaser, cotton pads and sticks, contours, stained glass paints, a natural brush, as well as an auxiliary sketch, printed or hand-drawn (if necessary).
Tip: stained glass paints come in different bases. For painting a vase, paints on alcohol or water are suitable. Also keep in mind that non-baking paints need to be fixed with a special varnish for stained glass painting. This option is more suitable for decorating a large floor vase that does not fit in the oven, otherwise it is better to buy baked paints.
Drawing technique:
- Degrease the glass;
- Secure the sketch from the inside of the vase;
- Starting from the back of the drawing, draw closed contours, adjusting the lines if necessary. Then let the contours dry for about 2 hours. A hair dryer or baking in the oven for 15 minutes (150 degrees) will help speed up the process;
- Now you need to fill the contours with paint, spreading it evenly with a brush. Stained glass paints are fluid and liquid - you need to get used to them. The main principles are that the stained glass paint must be in contact with the contour, and “non-painting” must also not be left. (Rate the content! Already voted: 25 average rating: 4,80 out of 5)
Everyone knows that a bouquet of flowers in a beautiful vase is a wonderful decoration of the table or the space of the house as a whole. But, unfortunately, it is not always possible to buy a vase that suits your interior. At the same time, it is not difficult to find a very simple inexpensive glass container or even a bottle and decorate it as you like.
The process is creative and exciting, because modern decorative and finishing materials make it possible to make a masterpiece out of any most nondescript vessel. Special paints, glass contours, and decoupage napkins come to the aid of craftswomen. Needlewomen do not limit themselves to special materials, but use the most unexpected things for decoration, such as plaster bandages, cereals, pasta, jute twine, dry fruits and skeletonized leaves.
 More interesting tutorials More interesting tutorials |
So the craftswoman Ann got excited about the idea of somehow unusually decorating a vase, this is what she writes on her blog: “I drove this idea in my head for a long time, some time passed and I still decided to do it. three-dimensional image on a vase, jar, box or even canvas. I didn’t like the options associated with cutting foam shapes and gluing them to the base, I also didn’t like the option of buying voluminous stickers. All this, in my opinion, required a lot of effort or investment, I knew that there was an easier way. And here is what I came up with…”
So to decorate a vase you will need:
- suitable glass vessel,
- glue gun,
- drawing for transfer to a vase,
- tissue paper or thin cloth,
- alcoholic liquid
- acrylic paint,
- acrylic lacquer.
Step 1. To implement her idea, the author found this container at a sale that cost her fifty cents. Take your glass vase and treat it with alcohol. 
Step 2. Find a pattern or ornament that fits your vase. The craftswoman used the pattern on her favorite cap as a template. 
Step 3. Transfer the pattern to the paper and fold the paper to make sure it is symmetrical and find the center of the pattern as shown in the photo. Attach the picture in the right place.

Step 4. Fill the pattern with hot glue. If in the process of work you accidentally went beyond the boundaries of the pattern, it's okay to clean up the hot glue with a knife when it cools down. 
Step 5. Take tissue paper, remember it and tear it into squares no more than 6 * 6 cm. You can also use a thin fabric for these purposes. 
Step 6. Lay scraps of fabric or scraps of paper on the vase and glue them with PVA glue. Do this very carefully, try not to rip the paper. Paste the entire vase over, smoothing out the extra wrinkles with your fingers. Dry the resulting relief.
Step 7. To smooth the relief and give it integrity, cover the vessel with PVA glue one more time.

Step 7. After this layer of glue has dried, use a foam sponge to tint the vase with light acrylic paint. At this stage, the craftswoman is interested in whether you see the laughing face of a guy with a small mustache on the vase? Lush eyebrows, mustache twisted? A beard on your chin? She wants you to see this laughing Frenchman, she will be very pleased if you have the same rich imagination as hers. 
Step 8 After the light paint layer is dry, use a soft brush and paint in a contrasting color. Make sure your brush is practically dry before applying paint. It's better to put too little paint on the brush than too much. But even if it happens that you applied too much dark paint, do not be discouraged, let the paint dry and paint over the dark spot with the light paint that was used earlier.
Step 9. After the paint has dried, cover the entire surface with acrylic varnish. Ann really likes the result, she thinks it turned out very rustic. As the father of the craftswoman, an engineer by profession, says: “If you can’t make it look perfect, emphasize its imperfection.”

Decorating glass vases with your own hands
The next master class, already in video format from Natasha Fokhtina. In it, she will talk about how to make such pretty vases from glass bottles. 
To decorate them, the craftswoman used the decoupage technique. 
This vase was made from a jar using a glue gun, metallic paint and decorative glass pebbles. 
But this beauty was obtained with the help of acrylic paints, semolina and contour and on glass.

Watch the video tutorial, choose the right containers and create with inspiration!
Translation Korshunova Oksana specifically for the site:
Any housewife dreams of an unusual and compact decor element that would fit well into the interior. It can be a handmade vase, because every girl has flowers at home with the approach of spring holidays. Who would have thought that something really beautiful could be created from the simplest glass jar or a transparent vessel. Such a unique little thing will not only delight you, but also attract the attention of guests.
This version of creating a vase is not suitable for beginners; a firm and experienced hand is needed here. But as they say, experience comes with the process, so for those who want to create something quite unusual, the ideal option would be to choose the dot painting method.

For this you will need:
- Acetone.
- Cotton discs.
- Outline paints.
- Thread or toothpicks.
- Degreaser.
For skilled craftsmen, creating a masterpiece in this way is not difficult, but if you are just mastering the technique, then you better print out a sketch and practice on plain paper to apply dots of the same size and density. After that, you can start decorating:
geometric vases
A vase made in this way will certainly not leave anyone indifferent. To make it, you only need a degreaser, adhesive tape, multi-colored spray paint, a brush, cotton pads and a transparent vase:
- Use a degreaser and a cotton pad to treat the surface.
- Wait until it dries and tape it in the order you like.
- Now spray paint the surface without touching the tape.
- Wait until everything is dry and remove it.
 Such a vase will look much more interesting than a simple one, and will add a bright accent to your interior.
You can also use tape of a small width, so the decoration of the vase with your own hands will be more detailed.
The pattern is especially attractive when you cover the vase not completely, but only its lower part. To do this, you need to take a regular plastic bag and secure it with tape as shown in the photo.
For a vase in such an unusual style, gold or silver sequins are an excellent choice. The main thing in creating this decor element is to choose the right tones and shades so that it attracts attention and complements the interior. To solve this problem, you should choose golden and copper colors, as well as black or white.
Full coverage
If you do not want to spend a lot of time creating a picture, then the best way out is to simply paint the vase in one tone. To do this, you will need acrylic or any other spray paint. The peculiarity of acrylic paint is that you can choose any color that you like.
Don't forget glitter.
You can also partially cover the vase by covering the top with a plastic bag.
There is another solution for covering a vase in one tone, if you don’t want to buy specialized paint. You can cover it with regular foil. To do this, you will also need glue and a brush. Getting Started:
- Cut the foil into small pieces to make it easy to glue.
- Apply glue to the transparent vase and fix the vase decoration material.
Paste it step by step. You can partially cover the surface, which will also look very impressive.
If, in the approach of spring, you really want to please yourself with flowers, but the weather conditions do not allow you to find a couple of tulips, then you can create them yourself, using paints and a brush.
Such an element of decor will not only delight you and your loved ones, but will also make an excellent gift on the eve of March 8th.
For this you will need:

Now for the step by step instructions. To begin with, you need to rinse the vase well with soap and wipe it dry, and then walk with acetone or another degreaser so that the paint adheres well. After the surface is prepared, you can begin to create an image. Take a tube and carefully squeezing out the paint, start drawing the outline of your future colors. Even if you do not know how to draw, the main thing is not to be afraid and bring the lines to the end. After the contour of the flowers is ready, you can start coloring. Apply the paint carefully and in small portions, as it is quite liquid and can spread quickly. The next steps are:

Ready! Just let the paint dry.
Such, at first glance, a vase that is difficult to perform, absolutely anyone can make it if desired.
Cereal vase
Decorating a vase with your own hands seems like a complicated and time-consuming process, but is it? Of course, if you want to create a painting or decorate with a dot method, then some experience is needed here. But the semolina decor is so simple to perform that even a child can handle it.
You will need:

First you need to wipe the surface with a degreaser. Just moisten a swab and walk well along the walls of the future vase. So, now you can start:

 By the way, vases made from coffee beans are no less attractive. They are made in almost the same way, only hot glue is used, and the grains are attached one after another.
If you prefer working with cereals, then there are many options for decorating in this way. For example, corn and buckwheat, as well as millet porridge.
Thus, you will get an exclusive and cute vase that can be used both as a gift and as a decoration for your home.
Original woodwork
Not everyone can create a wooden vase decor with their own hands. The master class consists of several steps. First, you need to choose the material. In this example, a log of cherries is used as the base. It can be purchased at special warehouses or cut yourself. After dry and store appropriately. Secondly, do not forget to keep the proportions, the diameter of the log should be twenty centimeters.
After all the manipulations, you can proceed:

After all the manipulations, you can lightly sand the letters with sandpaper.
We use twine
Jute twine is a fiber from the stems of the plant. It can be used both independently and as part of yarn. It is usually used in plumbing or gift wrapping, and various miniature interior items are also made.
How to make a vase decor with your own hands using twine - many needlewomen ask these questions.
To create you will need:
- Jute twine.
- Balloon.
- Wire.
- Scissors.
- PVA glue.
So, you can get started. First you need to inflate a balloon of a size that matches the depth of the vase. Next, wrap it with fiber. Unlike craft toys with a thread and a ball, in which you first need to get the thread wet and then wrap it around, here you need to do the opposite. First fix the twine, and then apply glue, since this is a natural fiber, it will absorb it very quickly. Now we do this:


Agree, it is nice to receive flowers as a gift, and it is no less pleasant to buy them yourself in order to add freshness and bright colors. In this case, you will never do without a vase. Take your time and make it yourself. Such cute decor elements will give your home coziness and warmth. The main condition for creating the above crafts is time, patience and work.
Attention, only TODAY!
You can create a beautiful decor without large investments and hand-made skills. There are many ways to decorate: from gluing rhinestones, bows and ribbons to painting the glass surface. Consider the main ways how you can decorate a flower vase with your own hands.
Product forms
Vases of the traditional form are no longer relevant. The shape and size of the product can be changed with homemade decor. Round, cone-shaped, flat - all these types of vases can decorate the interior, become the missing highlight. The shape of the product depends on the imagination of the master and the chosen material. Most often, round or square shapes are used for blanks.
Round vases are clear and concise. They are most often modeled with plastic bottles, papier-mâché, primed and decorated. To make the vase look like a finished decorative element, painted dry branches are inserted into it. Square products are complemented by fashionable details and used in an interior designed in a minimalist style. The vase is coated with a primer or paint, and then decorated.

You can, of course, buy a finished vase in the store. But even the most expensive thing cannot be compared with a unique piece of decor made by oneself.
Vase decor
stickers
The easiest way to decorate a plain vase with your own hands is to stick a stencil, sticker or paper cut inside with any filler. They will look especially impressive on transparent vases. Additionally, you can paint the surface with metallic acrylic paints.
Advice! You can also stick a strip of rhinestones in the form of a ribbon on a glass vase. This decor can be found in sewing stores.

Filling a vase
Material for decor can be made with your own hands from cereals. Barley, rice, buckwheat, millet can be used as a filler. Each of them gives its own texture. The result will be even more interesting if you mix different cereals on paper, cover with paint and let dry.

You can decorate such a flower vase not only from the outside, but also from the inside, for example, using the same cereal. To do this, you need to install a glass or other container in a vase, and fill the space between the walls with colored cereals.
Coloring
For such a decor, you need to take a vase and an original bottle. Next, you should cut the surface of the container, apply a pattern on it with paints and blot the surface with a sponge to give it a relief texture. When the paint dries, you need to outline the location of the future drawing with a pencil. Next, with a pen or a toothpick, apply dots of the same size to the drawing.
Clothes decor
You can decorate a vase or a glass with your own hands with ordinary socks or golfs. It is necessary to cut off the part of the sock above the heel. Next, put the glass on cardboard or fabric, circle its bottom with a pencil and cut it out along the outlined outline. A similar figure must be cut out of the remnants of the sock. Sew the cut piece and sock together. Lay the fabric on the bottom of the container, and place the cardboard on top.

Important! For this method of decoration, it is better to choose a small container.
Paper decor
A paper application made using quilling technology can be placed on a glass or vase. You can prepare a simpler paper decoration with your own hands. To do this, you need parchment, glue and a container for decoration. It is necessary to cut strips from paper and twist them into cords. Next, stick even strips on the vase. When the container dries, you need to glue paper bundles and decorate it with rhinestones or sprinkle with colorless varnish.

You can find other uses for newspaper tubes. Glue the cardboard to the bottom, and then wrap the base around the base with bundles, forming the body of the vase. The shape of the product depends on the slope of the tubes. The finished product should be varnished or diluted with PVA to fix the bundles, and then paint the vase in any color.
Decorating with chopsticks
The next time you walk, collect several branches of the same thickness. Then clean the material. Make all branches the same length, paint each with acrylic paint and let dry. When the material is ready, you can start decorating the glass vase with your own hands. Having placed the branches around the perimeter of the circle, you need to fasten the product with ribbons, threads with buttons or other materials.

Other decor options
For decoration, you can also use napkins, tree bark, dry branches, fragments of an old lattice. All these elements will be appreciated by lovers of eco-decor.
Papier mache. The base of the vase is covered with a mixture of marked paper and PVA glue, which gives it an unusual shape and creates a durable product. After the mixture dries, you can continue to decorate the relief with improvised materials, you can clean the surface with sandpaper, or leave nothing to do at all. Anyway With the help of papier-mâché, you can create a unique piece of art.

Leg-split is a thin thread twisted from fibers. With this item, you can decorate many things, including a flower vase with your own hands. It is enough to glue the twine to the bottom of the container with glue and then wind it up along the product.

Gypsum. This material requires the skills of the master. Gypsum in the form of putty is applied to the vase. While the material dries, it is given a relief base with a knife or palette knife.
Twine. Any containers (glass, plastic, porcelain) are wrapped with palm fiber. It is better to fasten the twine with construction glue.

Glass decoration
Ribbon decoration
Materials:
- satin ribbons;
- lace;
- beads;
- artificial flowers;
- feathers;
- paint for glass;
- glue.

The easiest way to decorate a glass with your own hands is with white and pink ribbons. To do this, you need to fold the strips in one row, wrap the glass with them, cut off the edges and strengthen the decor with glue. Glue a ribbon bow in the same place.
Advice! Tape can also be wrapped around the stem of the glass.
In this case, it is better to use thin tapes, and cut the already pasted strips. The ends of the fabric must be treated with fire so that they do not crumble.

Lace decoration
The lace contains an uncomplicated pattern. This material looks great on glass. In addition to the main decor, the glass can be decorated with rhinestones and flat beads.
Advice! I often use this decor for wedding glasses.

Loose decoration
This option is more suitable for people who work well with a brush. You can decorate the glass with swirls, dot patterns, hearts, bows, etc. For beginners, it is better to use stencils for scattering. Or offer lace and repeat its design on the glass.
Advice! For decoration, you can use simple paint or gouache.

Decoupage and decoration of a vase for a gift (2 videos)
Floor vases have been a great home decoration for many centuries. In the days of ancient civilizations, large vases already existed. They were used not only for flowers, but also for storing bulk materials. Now there is no problem in choosing beautiful floor vases. But it is better if this piece of furniture is made by the caring hands of the owners of the house. In addition, it will help save the family budget.
History of floor vases
In ancient Greece, vases were used to store various liquids and bulk substances. A mandatory item in the Middle Ages was a tall floor vase in the homes of aristocrats. She symbolized wealth and prosperity. Since then, little has changed. Now this item can be seen in hotels, and in country houses, and in beauty salons. They always look stylish and create a sophisticated atmosphere in the room.
Ideally, a tall floor vase should be between 40 cm and 1.5 meters in size. But there are also very high specimens - up to the ceiling.
What can you make a floor vase from?
There are many creative materials. Anything that looks like a tall vase can be used to end up as a work of art. These are various plastic bottles and bottles, large glass vessels, cardboard packaging in the form of tubes, pipes made of plastic and metal.

Auxiliary materials will serve as ropes, paper, salt dough, stones and even pasta. A tall floor vase can be obtained using the papier-mâché method. From newspaper tubes you can make a very pretty braid.
Plastic floor vases
From plastic bottles are obtained floor. Plastic tall structures are light in weight. Therefore, for stability they are weighted. To create, you need several plastic bottles with a volume of two liters.

First you need to cut off the upper and lower parts of the bottles and insert them into each other. The bottom of the future vase does not need to be cut. Then you need to stick toilet paper or paper kitchen towels on the structure in several layers. In this case, use The last layer should be with an ornament created using paper soaked in glue. All this is fixed with spray paint. A vase in bronze, gold and copper colors will look very impressive. In order for a high floor vase to stand on the floor and not fall, decorative stones can be poured inside.
glass vases
To create such a vase, you can buy a ready-made transparent vase or take a large glass bottle. You can decorate it with a thick rope. To fix it to the glass surface, it is convenient to use a glue gun.
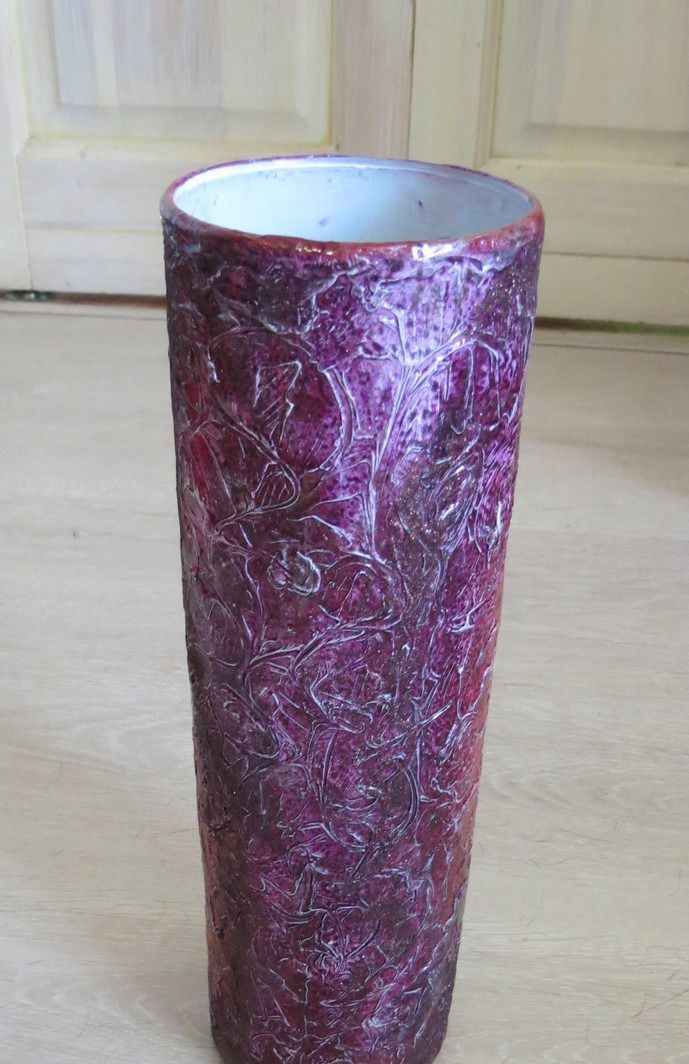
To apply a decorative pattern, you can use a transparent sealant. To begin with, the glass surface must be thoroughly cleaned with acetone. Now you can apply the pattern. It can be anything, for example, repeating the texture of the bark of a tree. The workpiece must be left to dry for 24 hours. Then you can start painting the vase. You can use two or three colors. Depending on the pattern and ideas of the author. It is better to take acrylic for uniform spraying. Floor vases, tall, do-it-yourself decorated under a tree, look great with

In order to create a pattern on a cylindrical glass vase, you can use rubber bands. They need to be pulled onto a vase in a chaotic manner, and then sprayed with paint. Get a stylish striped pattern.
Floor, high, glass vases can simply be decorated with various objects (coins, buttons, ribbons, cereals). In needlework stores, you can buy stained glass paints and create your own work of art from a simple glass bottle.
Vase from glass jars
Original floor vases for flowers, tall and not very tall, can be obtained by taking two three-liter jars (preferably with a wide neck). They need to be glued together with bottoms. Glue for this purpose is suitable for any glass. To make the vase more stable, the bottom jar needs to be filled with resin. Close the neck at the bottom jar with a disk or any round object (for stability). After the glued cans dry, they need to be puttied and painted. Or you can use the papier-mâché method and then apply a decorative pattern. To create a marine-style vase, ropes, shells and small pebbles are used. The decoupage technique from napkins gives room for imagination in decorating a floor vase.
Vase from a cardboard packaging cylinder
A cylinder made of thick cardboard, on which linoleum is wound. You can ask for it at hardware stores. Then you can give any shape to the product using papier-mâché or plaster mixture. For stability, glue a circle of plywood to the bottom. Decorate - in any known way: cloth, rope, eggshells, nutshells. Beautifully these vases look three in one composition. To do this, they can be glued to one wooden base. The height of the vases should be different.
Pipe vase
Craftswomen learned how to make floor vases, high with their own hands from a plumbing or plumbing pipe. You can buy it at a hardware or specialty store. After it can be pasted over with newspaper sheets or thin paper. After drying, a universal primer is applied. An interesting solution for decorating such a vase would be pasting it with natural tree bark. In order to disinfect the collected material and get rid of the bugs, you need to carry out a series of actions. The bark must be boiled and left in this water for about a day. After that, it must be dried well for 2 days. You can glue the bark with any glue that is suitable for wood and plastic. The bottom of the pipe is filled with gypsum mortar or resin. From above, the surface of the bark is covered. Several layers are needed.

The result is tall decorative floor vases that will look perfect in any room design. Especially when it comes to fashionable ecological style.
Floor vase made of newspaper tubes
Perfect for country style. If it is difficult to get a vine or rattan, then newspaper tubes are perfect for weaving. First you need to familiarize yourself with the technique for creating these rods. So, you will need a stack of newspapers, PVA glue and a pot or pan lid. To make flagella, it is enough to twist a sheet of newspaper from one corner to another. If you are new to weaving, then the bottom is best made from cardboard. But you can also weave it. Next, bend the twigs up and begin to weave the leg of the vase. After you need to make sure that the vase expands. For this, a lid of a larger diameter than the vase leg itself comes into play. We insert it into the middle of weaving and continue to weave another 12-15 rows. To narrow the vase to the neck, you need to use an elastic band. The rim of the vase can expand again. At the end, we braid the remaining rods so that we get a pigtail along the edge of the vase. Trim off any excess tubes. Everything, the vase is almost ready. It remains only to cover it with paint or stain, and then apply varnish.

Such inexpensive and unbreakable vases are suitable for those who have small children and animals at home.
Square vase from the box
To create a square vase, a regular cardboard box of a suitable shape is suitable. If there is none, then you can adjust the shape of the box at hand with a stapler or glue.
Many people can’t even believe that such high floor vases with their own hands are obtained from a simple cardboard. The master class below will help needlewomen create a miracle.
For work you will need:
- decoupage napkins;
- decoupage glue or PVA diluted with water;
- cardboard box;
- paper;
- scissors;
- and paints;
- aerosol and water-based paints;
- PVA glue.
In order for all layers to lie firmly on the box, you need to lubricate it with a primer. After drying, you can start gluing pieces of torn paper with PVA. A few layers are enough. After drying, you need to apply a layer of water-based paint. We dry it again, and only after that it is possible to apply a layer of the main paint, of the same color as the future vase will be. To give the surface a relief, crumple the napkin and glue it to the surface. Now we cover this relief with paint (already of a different shade). Using stencils, you can apply patterns to a vase.
DIY wooden floor vases
A floor, decorative, high do-it-yourself vase can be made from wooden blocks. It will be square in shape. Height and width depend on the preferences of the master.
You will need:
- four planks of an elongated, rectangular shape;
- one wooden square (this is the bottom of the vase);
- PVA glue;
- screws;
- mastic for filling seams;
- acrylic paint;
- decorative elements.
Fold and fasten all parts of the future vase with glue and self-tapping screws. Seal seams and cracks with mastic. Leave to dry for a day. After that, you need to remove the remaining mastic with a loop machine and sand the surface. You can decorate a vase in any way. The best thing on such a vase is a drawing or ornament applied using stencils and paints.
How to choose the right floor vase for the room?
To choose the right floor vase, you need to consider the following factors:

For a small room, flat-shaped vases and not very large ones are suitable. For large rooms, tall and wide vases of various shapes are suitable. If the interior contains carpets and curtains with ornaments, then it is better to choose vases with a smooth and shiny surface. Vases with large texture, notches and patterns will look good in a calm and discreet room setting.
You can place vases near a window, between chairs, in a niche, against a wall or in a corner. So that a bright vase is not lost, it does not need to be placed close to furniture.
Before decorating a room with ethnic items, you should study all the ornaments and patterns. Do the hieroglyphs mean something not quite decent.
If you need a floor vase only for flowers, then it is better to give preference to a white or transparent vase. Bright colors and finishes will detract from the beauty of the bouquet.
It is considered fashionable to place together vases of the same style, but different in color or texture.
The main condition is that the floor vase should please the eye and be liked by the owners of the house.