Shelves for shoes - ideas for a narrow and wide hallway. We make a shoe rack for the hallway with our own hands How to make a shelf for shoes with our own hands
How to save money and make an original stand for shoes with your own hands - find out here!Ideas, useful tips, instructions for making.
- 1 We make a stylish stand for shoes with our own hands
- 2 Varieties and purpose of homemade shelves for the hallway
- 3 Materials and tools for making shelves
- 4 How to make a shelf with your own hands
- 5 Wooden shoe rack
- 5.1 What do you need?
- 5.2 Assembly of the structure
- 5.3 Practical chipboard shoe rack
- 5.4 Beautiful laminate shoe rack
- 6 From profile
- 6.1 Step by step instructions
- 6.2 Simple shoe rack made of boxes
- 6.3 Corner shoe rack
- 6.4 Structural connection
- 6.5 Decorative elements
- 6.6 Making a carousel shelf
- 6.7 How to do
- 7 Interesting ideas
- 8 Photo gallery
A beautiful shoe rack can become not only a place to store shoes, but also a full-fledged element of the interior of the hallway. The choice of options in stores is extensive, but the cost is often too high. To make a capacious and compact shoe rack that fits perfectly into the look of the corridor, you need to make a little effort and imagination. Consider options for making shoe racks from available materials with your own hands.

Varieties and purpose of homemade shelves for the hallway
Before installation, it is necessary to make a measurement of the space where it is planned to put a shelf for shoes. For a small hallway, a narrow (20-30 cm) and high shelf would be ideal; in a more spacious room, a closed cabinet with a width of 60-90 cm will look good.
Should the shelf be closed? If you want to make the hallway look more aesthetically pleasing, this is a good option. Do not forget to regularly air a closed shoebox, otherwise unpleasant odors cannot be avoided. Also, this problem can be solved by installing a lamp inside for drying and disinfecting shoes.

The advantages of homemade shoe racks are obvious:
- you can use eco-materials;
- the cost of a homemade shoe rack is several times less than in a store;
- you can make a shelf for the hallway of a non-standard layout.
The design of the shoe rack directly depends on its purpose and the number of residents. Here are some popular and practical options:
|
Shoe rack design |
Description |
|
classical |
Shoe shelves of this type are popular because of the simple and convenient installation. May have a conventional rectangular or asymmetric design. |
|
suspended |
The shelf is attached to the wall with rails, belts or cables. Conveniently folds if necessary (for example, if you need to carry furniture into a narrow corridor). |
|
corner |
Fastening is carried out on adjacent walls. Great space saver. |
|
floor |
Support in this design falls on the floor. Suitable for spacious hallways, but can also be compact if the sections are distributed not in width, but in height. |
|
Closed |
This option looks more aesthetically pleasing. Doors can be made of plywood, frosted glass. |
|
Cassette |
Shoes will be stored vertically here, on the door there are 2 or more cassette-type drawers that slide out when opened. Well suited for a small corridor (width 20-25 cm). |
There are many options for making shelves. The interior can be decorated with shelves made of metal, in particular aluminum, processed clay shelves, dense oak, glossy plastic look very nice. The material of manufacture can be any, as well as the configuration of the elements. According to the type of installation, shelves for shoes can be conditionally divided into several types.
Materials and tools for making shelves
The service life and ease of use depend on the material chosen for the manufacture of the shoe rack. For example, making a shelf out of a cardboard box is easier than a lung, but it will not last long either. But, as a temporary option, it will work fine.  When choosing wood as a material, it is worth taking care of the final processing of wood with varnish or paint so that an attractive appearance is preserved for a long time. A universal set of tools, due to the nature of installation and material, does not exist. But you will definitely need the following tools:
- electric drill;
- glue;
- simple pencil;
- sandpaper;
- fastening accessories;
- screwdriver;
- wood saw;
You will also need varnish or paint, the color of which is selected for the overall interior of the hallway.
How to make a shelf with your own hands
Before starting work, it is worth drawing an approximate layout of the future product, where you also need to specify the dimensions. After that, they start marking on the material, where they indicate the location of the fasteners (if any), the required length and width. Here are some helpful tips:
- When creating a simple shoe rack, you can do without the use of metal fittings - all elements are fastened with self-tapping screws.
- Doors are easy to install if you use awnings.
- The processing of materials with varnish or painting should be carried out before assembly. If you do this after, the layer will be uneven, and the procedure itself will be problematic. The process of assembling a shelf for shoes depends not only on the design, but also on the complexity of processing the material, the features of working with it.

wooden shoe rack
First of all, a shoe rack should have small dimensions, but at the same time contain a sufficient number of pairs of shoes. This is its essential feature. There are many materials from which this structure can be built, but the main one is wood. Unlike chipboard and MDF, it will not stick or swell when exposed to moisture. To do this, the tree should be varnished or painted.

What will be needed?
The basic set for manufacturing: wood, glue, screws, glazing beads, varnish or paint. Of the tools you will need: saw, screwdriver or screwdriver, hammer, sandpaper, drill. Glazing beads, self-tapping screws, drill are selected in accordance with the size of the structure. Self-tapping screws need to choose small, but able to firmly gain a foothold in the structure. It must be remembered that the tree can crack or split if the size of the screws is not chosen correctly.

Construction assembly
In depth, 35 centimeters will be enough. This distance is enough to accommodate almost any shoe. This will be the length of the sides of the structure. You need to saw off 6 elements of 35 cm each. You can determine who in the family has the largest shoe size and measure the distance along it, leaving 1 cm in stock. Then you need to distribute 4 bars on one of the elements and wash down to the depth of the bars. It is necessary to arrange the bars evenly.
Each shelf should allow you to place 3 pairs of shoes, so its length must be determined from the calculation of the 3 largest pairs of shoes in the family. 4 blanks of this length will go to each shelf. To connect the elements, it is necessary to cut out recesses. These places must be fastened with screws. For a more aesthetic look, you can drill holes and use glazing beads and glue that will withstand shoes without any problems. This operation is similar for each shelf. After that, sand the tops of the sidewalls with sandpaper.
Any height can be made, but a reasonable limit is not higher than 80 cm. High shoes should fit in one of the compartments of the structure. The distance between the shelves (between the floor and the first shelf) should be 30 cm. All connections are made in the same way.

Practical shoe rack made of chipboard
To make a simple shelf for shoes from chipboard, you need to take two sheets of canvas (dimensions are determined based on the space in the hallway). You will need a sheet of fiberboard for the back wall. The assembly algorithm is simple:
- We attach the bottom and the shelves themselves to the two side walls. A drill is used for screeds (drill 8 mm), a drill with a diameter of 5 mm is used at the end.
- The folding element is fixed with medium-sized screws;
- The upper part is mounted on self-tapping screws 4 * 30;
- Shelves are mounted inside;
- Fix the back wall of the product.
- This is a budget and uncomplicated option, which can be used for any layout of the hallway.

Beautiful laminate shoe rack
If after the repair of the apartment there is an unused laminate, you can make a stylish and compact shelf out of it, which will organically fit into any design. For manufacturing, you will need laminate sheets, the number of which depends on the tiering and slotted metal pipes. They can be made with a grinder for metal. If desired, the structure can be made of any height; for safety, the edges of the tubes are sealed with plugs.
 From profile
An interesting option are shelves for shoes made of profile and tempered glass (or wood). For manufacturing you will need the following tools:
- glass cutter;
- jigsaw;
- Bulgarian;
- level;
- electric drill for metal;
- screwdriver
You can use a regular color profile or galvanized, the second option will be more reliable, as it is resistant to moisture.

Step-by-step instruction
- The profile is fixed to the wall with one self-tapping screw;
- With the help of the level, the horizontal markup is checked;
- Screw in the remaining screws;
- The frame is assembled;
- Already cut shelves are attached to the frame.
- This option will look good in Hi-Teck design.
 Simple shoe rack made from boxes
The presented design is able to withstand a lot of weight, despite the fact that cardboard is a fairly flexible material. For its manufacture, it is desirable to use boxes from household appliances. Depending on the height and width, take the required number of boxes. The structure is attached with glue, adhesive tape, a stapler or in another way. The finished shelf can be decorated as fantasy tells. There is one drawback - such a shelf is suitable only for summer shoes.
 Corner shoe rack
The most suitable material for creating a corner wooden shelf for shoes is larch. It tolerates moisture well and is easy to use.
To begin with, we determine the size and design of the shelf, draw a diagram and calculate the required amount of material.
To create a corner shelf, the following materials and tools are needed:
- two boards up to 2 m long (the ends of the boards can be rounded or cut in a wave);
- shelves cut from the same board (while the shelves can be cut into different sizes and shapes);
- jigsaw for sawing;
- planer and sandpaper for leveling;
- corners and self-tapping screws for connecting parts;
- level to check the accuracy of the design;
- antiseptic;
- varnish or paint.
Boards must be sanded and treated with an antiseptic, varnished or painted. Varnish is chosen if you want to emphasize the naturalness and structure of wood, paint - if you prefer saturated colors and when deciding to use special design techniques with a play of color.
 Construction connection
To create lightness of construction, the two main boards are not attached to each other: they are set at an angle and connected using shelves. First, the lower shelf is attached, then the upper one, the structure is installed vertically and its evenness and stability are checked. Then the rest of the shelves are installed.
The space between the shelves must be sufficient, otherwise there will be a feeling of tightness and congestion.

decorative elements
For additional decoration of the shelf, you can use thin decorative slats, sawn out on your own. Or purchase a decorative wooden lattice-partition, and after sawing it, decorate the shelf by adding carved limiters.
The use of decoupage or aging techniques in painting will also bring a fresh touch to the interior of the hallway. Bright colors can be relevant to complement the interior.

Making a carousel shelf
The carousel shelf takes up little space and at the same time is able to accommodate many pairs of shoes. For its manufacture you will need: fiberboard, metal pins and self-tapping screws.

How to do
Workpieces are cut from fiberboard in the form of circles and quadrangles. With the help of a compass and a rail, markings are made for the pins.
Disks for stands are fixed with disks of smaller diameter, which are placed at the desired height.
The bottom is prepared, on which quadrangular blanks are attached, attached with a corner. The bottom circle is conditionally divided into 3-4 parts (a place for 3-4 pairs of shoes on the "floor").

Interesting ideas
For the manufacture of a shoe shelf, you can connect your imagination and then the most unexpected solutions come to mind. Here are a few ideas that will be interesting not only for self-use, but also as a gift for loved ones.

On the video: do-it-yourself shoe rack from an old closet
When you have to make your way through the hallway like an icebreaker through the ice of the Arctic, stumbling over shoes left here and there, it's time to think about a shelf. This simple piece of furniture will make it easier to put things in order, save the household from searching for a pair in a pile of shoes dumped on the floor, and ennoble the appearance of the hallway. Buying a finished product is not a cheap pleasure, and what the trade offers does not always meet our needs. There is a way out - to make a shelf with your own hands.
Types of shelves for shoes and the material of their manufacture
The choice of material depends on the skills of work, the interior of the hallway or the place where it is planned to place the shelf, as well as financial capabilities. For the manufacture of this piece of furniture is suitable:
- wood (bars, slats, plywood, chipboard);
- metal;
- plastic;
- PVC pipes;
- cardboard;
- the cloth;
- improvised materials.
Table - advantages, disadvantages and features of the use of different materials for shoe shelves
| Shelf material | Advantages | disadvantages | Application features |
| Wood | Environmental friendliness, noble texture, plasticity of forms. | High cost, complexity of processing and ability to absorb moisture. | Due to moisture sensitivity, dry, clean shoes can be stored in a wooden shelf and only indoors. Atmospheric precipitation and temperature changes will lead to its deformation. To protect against moisture, wood is primed with special compounds. |
| Plywood | Cheaper alternative to solid wood, easier to process. | Heavier than wood, absorbs moisture. | When working with the material does not require special skills. |
| Chipboard | Furniture panels made of chipboard have a protective coating against moisture and temperature changes. Low price and variety of colors, does not require grinding and painting. | If the protective film is damaged, it quickly collapses due to the loose structure. | Suitable for inexpensive furniture, inferior to wood and plywood in terms of durability. |
| Metal | Strength and durability. | The material is heavy, subject to corrosion, requires special skills and tools for work. | Metal forging creates real works of art that can decorate any interior. Metal shelves will fit into the hallway of both a city apartment and a country house, and after special processing they can be placed on the street. It is easy to make a product from metal pipes by fastening them with fittings. It is even easier to make shelves from metal pipes and gratings by combining them with a wooden or other frame. |
| Plastic | Low cost material, easy to clean, not afraid of moisture. | It does not breathe, moisture does not evaporate, so the shelves can only be made open. | Budget plastic shelves are on sale, they are made by pressing. It is almost impossible to make such furniture with your own hands, but everyone can make simple shelves from the remnants of plastic panels. |
| PVC pipes | Original and cheap material, not afraid of moisture and temperature changes. | It is unlikely that he is able to keep company with an expensive interior. | Even a teenager can make a shelf from PVC pipes. |
The simplest and most creative options: shelves made of cardboard, fabric, scrap materials
If you want to quickly build an original piece of furniture, without having special skills or the ability to buy expensive materials, you can independently make simple models from available materials - fabric, cardboard, improvised items.
- The cardboard version will last quite a long time and will cost mere pennies, because the material will be an ordinary packaging box. Lightweight and durable cardboard withstands heavy loads. It is so easy to make a shelf out of it that it can be called not furniture making, but needlework. For this you will need:
- stationery knife;
- stapler;
- glue or tape.
Furniture decorated with film or wallpaper is difficult to distinguish from those made from traditional materials. But cardboard also has a drawback: if it gets wet, it will get wet. Therefore, it is better to dry wet shoes first, and protect the base with a moisture-proof film or hang the product on the wall so that the shoe rack does not suffer when wet cleaning the floor.
- For slippers, ballet shoes and children's shoes, you can sew fabric pockets. To do this, you only need small pieces of material and sewing supplies. Placed vertically on top of each other, they do not take up much space in the hallway. This design is suspended on one nail and, if necessary, can be moved to another location. Pockets are also sold ready-made, but hand-made ones will cost much less.
Unusual, comfortable and simple shelves can be made from any available materials. Fits almost anything:
- old furniture;
- the laminate remaining after the repair;
- drywall;
- plastic or wooden boxes;
- pallets;
- plastic bottles;
- shoe or cardboard boxes;
- a piece of tin;
- grate left over from an old refrigerator.
What material to choose
When choosing a material for a shelf, you need to consider where the product will be installed - in a residential area, on the veranda of a private house or cottage, in the open air.
For home and garden - squared wood, plywood, chipboard
Any material is suitable for the room. In choosing, you should rely only on its safety and your taste. You should not make a cardboard shelf if there are animals in the house: the teeth and claws of pets will not withstand this material.
Outdoor shelves - metal and plastic
For storing outdoor shoes, it is better to use a moisture-resistant material or treated with a protective compound. Here it is important to consider that the shelf will be affected by humidity, sun and temperature changes. It is desirable that the material is not too light, otherwise the shelf may be blown away by the wind. The best option is metal treated with an anti-corrosion compound. Chipboard should not be used, such a product on the street will quickly become unusable. Plastic is not afraid of moisture, it is quite suitable for the street, if the shelf is well fixed.
Advice! If you plan to use a wooden shelf for the outdoors, treat it twice with a moisture barrier before painting, paying special attention to the ends.
Types of shelves for the hallway
The choice depends on the size of the room, its interior, the functional purpose of the shelf.
- Closed. Used for long-term storage of shoes. Represent a cabinet or cabinet with doors. They can be placed not only in the hallway, but also in the rooms.
- Open. Placed in the hallway, suitable for daily storage of casual shoes. The advantage of open shelves in free air circulation: shoes dry faster, the smell disappears.
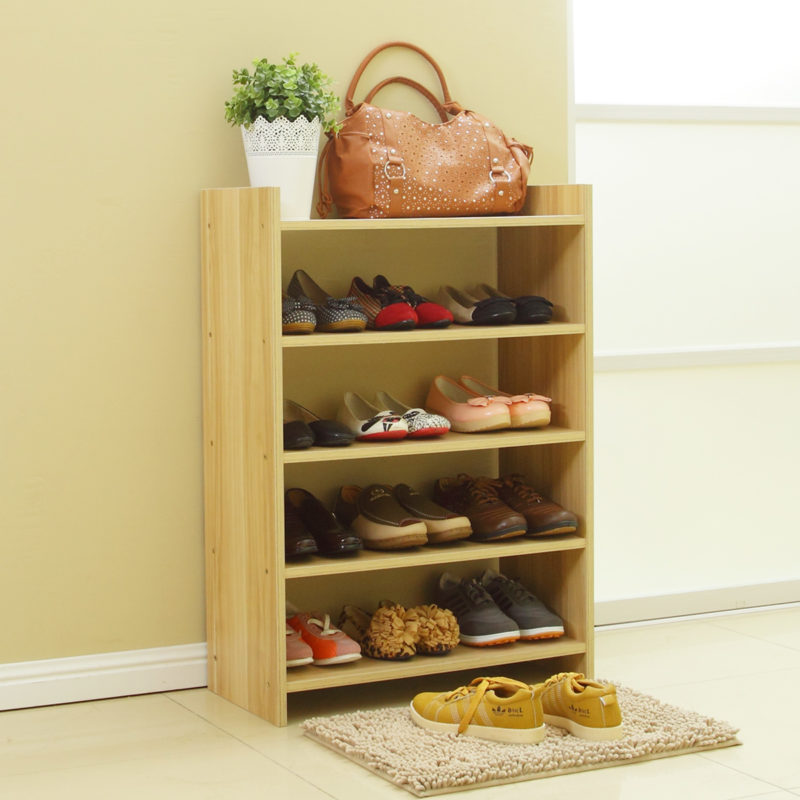
- Floor. Suitable for spacious rooms, as they occupy quite a lot of usable space. To increase functionality, they can be made with a seat. There are open and closed.
- Wall. Save space, make cleaning easier. For a small hallway, the best option is a narrow vertical design, it takes up little space and visually increases the height of the room.
Options for do-it-yourself shoe racks in the hallway in the photo
We make shoe racks with our own hands: drawings, step-by-step photos, diagrams
Having decided on the material and model of the shelf, you can begin to manufacture it. One of the simplest and most inexpensive options is a cardboard shelf.
Narrow wall construction made of cardboard
It can be made in the form of separate pockets, interconnected and hung on the wall. For this you will need:
- carton boxes;
- scissors;
- pencil, ruler;
- glue;
- paint, wallpaper or decorative film;
- cord.
Having prepared everything you need, let's get to work.
- From cardboard cut out a rectangle measuring 65x60 cm.
- On the short side we measure 25 cm and draw a line.
- We divide the long side into 3 parts: 20 cm, 25 cm, 20 cm. We draw lines.
- In the central part, we got a square 25x25 cm and a rectangle 25x35 cm. Cut off the side parts of the rectangle along the marked lines. There will be a T-shaped blank.
- On the remaining “wings”, we measure 11 cm from the square along the top line and draw diagonals connecting the marked points and the corners of the letter T.
- We bend the cardboard along straight and diagonal lines, for convenience using a metal ruler.
- We assemble the structure. The rectangle will serve as the back wall of the pocket, the triangles adjacent to the square will be the side ones, we wind the remaining parts behind the back wall.
- Elements are fastened with glue or tape. Finished pockets are pasted over with wallpaper, decorative film, covered with paint, decorated with cords.
- Having made the required number of pockets, we glue them together vertically and mount them on the wall.
How to make a cardboard shelf - video
Shoe rack made from cardboard boxes
Advice! If you plan to paint the shelf, tape the ends of all parts with masking tape. So the product will acquire a complete look and moisture will not get inside the walls.
How to assemble a rack - video
PVC pipe construction
It takes a little time and a minimum of tools to make such a shoe:
- PVC pipes with a diameter of 20–25 cm;
- paint, paper or film for pasting;
- glue;
- hacksaw.
Operating procedure:
- Cut the pipe into segments 25-30 cm long, process the edges to smoothness and decorate the segments to your liking.
- Fasten the finished parts together in the form of honeycombs or as your fantasy tells you.
- Fix the structure to the wall or place it on the floor.
- Additionally, pipes can be fastened with a cord or tape.
- As a result, you will get this design.
Pallet construction
For a dacha or a garden plot, a shelf of used pallets would be appropriate. Its production will not take much time and effort.
- Sand the pallet with sandpaper by hand or with a grinder.
- Treat it with a moisture protectant, such as a Neogard wood water repellent.
- Lean the design against the wall and use it.
- Also, the pallet treated with a water repellent can be painted. After the paint has dried, the impromptu shelf can be used.
- If you gravitate towards the traditional style, saw the pallet lengthwise into two or three pieces. Lay the resulting parts on top of each other, dividing them with bars of the required thickness, and fasten them with self-tapping screws. You will get a rack with two or three shelves.
simple wooden shelf
You can quickly make a shelf from wooden bars and slats. To do this, it is first desirable to draw up a drawing or diagram of the future design, then cut the material according to the calculated dimensions and connect all the parts using self-tapping screws.
Shoe rack made of wooden slats
The simplest version of a wooden shoe rack is a shelf made of slats. If there were no bars at hand, you can get by with slats alone. For work you will need:
- wooden slats;
- hacksaw;
- wood screws;
- screwdriver;
- sandpaper;
- wood varnish.
Operating procedure:
- Measure the place where you plan to install the shelf and make a drawing.
- Saw the slats according to the dimensions obtained. For a three-tier shelf, you should have four posts, six cross supports, and nine shelf rails. You can change the width of the shelf by screwing a different number of rails.
- On the racks, mark the attachment points for the transverse supports, drill holes for the screws with a drill. This is necessary so that no cracks form during assembly.
- Treat the details with sandpaper.
- Assemble the side posts by screwing the cross rails to the posts with self-tapping screws. You will get two "ladders".
- Screw the rails of the shelves starting from the bottom.
- Coat the product with varnish, let dry.
Having shown imagination and spending a little time, you can make a stylish and inexpensive shoe rack from what is at hand, but has not yet been used. Imagine, create, and your house will acquire originality and individuality.
Entering a house or apartment, we first take off our shoes and outerwear in the cold season. The placement of outerwear is never a problem, but the situation is different with shoes. Especially this problem concerns large families, as well as owners of extensive shoe collections.
An ordinary person wears at least two pairs of shoes per season, and if there are three or more people in a family, then at least 6 pairs of shoes, or even more, are obtained. But do not forget about out-of-season shoes, which are also worth storing somewhere. The problem of storing shoes is most often faced by owners of small apartments and small hallways. The solution to this type of issue is the installation of shoe racks, and if your budget is small, then you should make a shoe rack with your own hands. Making a shelf with your own hands will not only save your budget, but also give your hallway individuality and exclusivity. Before choosing a shelf for shoes, you need to calculate how many pairs you will have in it. The number of pairs of shoes directly depends on the number of members of your family. The main types of shelves for shoes include Bona, Slim, Coupe, Curbstone, as well as Shoe cabinet - shoe cabinet. The slip is a kind of showcase with doors and air holes, it is practical to use and has a lot of space for storing shoes. Shelves of the Slim type are made directly from wood, it is advisable to put dry and clean shoes in them so as not to contaminate the lower shelves, this is not very practical and causes some discomfort. A shoe rack of the Coupe type is very practical, often such shelves are made individually for the width and length of the hallway, so they fit perfectly into any interior. The Coupe shelf is usually high, but not deep and always with sliding doors (otherwise it will not be a compartment), due to the depth of the cabinet, the shelves in it are tilted (which allows you to put high-heeled shoes on them). Shoe shelf Cabinet - often has a compact and small size (only seasonal shoes fit in it), often in such a cabinet there are hinged doors, as well as 2 or 3 horizontal shelves, a soft ottoman can be located at the top. Shoe rack Shoe rack is the latest invention for storing shoes, it can not only store, but also dry shoes, it can be installed not only in hallways, but also on balconies or pantries, it looks like a closet. A shoe shelf can be made from any materials at hand, with a strong desire, it will turn out no worse than many expensive shelves sold in stores. From the most budgetary option, one can single out a shelf made of cardboard boxes that are in every home. For such a shelf, you will need one large or several smaller boxes. Such a shelf will be relevant in the case of a very small hallway, because it will take up a minimum of space. We make blanks, for this, using a pencil and a ruler, we mark rectangles 30 cm long and wide along the entire side of the box. After we cut out the future shelves with a special knife or scissors. After we take our workpiece and fold it into three equal parts, after which the side parts should be folded into a triangle. You should get a pocket, so we add all the blanks. After that, we adjust the prepared pockets on each other, leaving a groove for shoes between each, then carefully fix everything with adhesive tape. For reliability, all pockets can be fixed with staples. The resulting design is recommended to be fixed on a closet or wall in the hallway. Also, such shoe pockets can be painted in different colors, or in one desired color, which will give your hallway bright and unusual colors. The next type of shelf for shoes that you can make yourself will be a carousel shelf. Such a shelf can be placed in any standard cabinet that you have in your home. The carousel for shoes will be made of four rotating shelves, always round. Wooden pins will be inserted into the round shelf in a vertical position. The shelves themselves will be mounted on a metal rod. To make such a shelf, you will need tools that almost every owner of the house has at hand. We need a wardrobe of standard sizes, with a depth and width of 60 cm, and a height of about 190 cm, for shelves we need 4 disks with a diameter of not more than 55 cm, as well as 9 disks with a diameter of about 10-12 cm. To hold the shoes there will be you need round pins (022): 18 pieces 35 cm long (1), 24 holders 30 cm each (2), 16 pieces 25 cm each (3), as well as 32 holders 20 cm each (4). To support the shelves, you will need a metal pipe with a diameter of approximately 40 mm, as well as a height of the entire cabinet. On one round shelf, we should fit 9 adults and 12 children's shoes. It all depends on your desire and imagination, because it is up to you to decide how many holders you need to install on one shoe shelf. For greater efficiency, shelves can be made with a different number of holders, for example, 12 pairs of shoes can be placed on 2 shelves (for children's shoes or small in size), and 9 pairs of shoes on 2 others (for large shoes). Such a shelf can be painted in any color, or opened with varnish. The surface of the support pieces is best left unpainted, this will give your shelf a slight glide.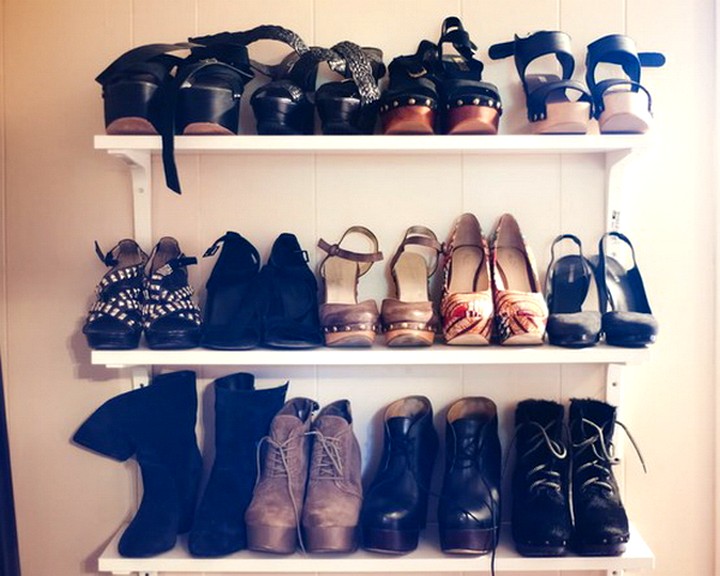
DIY shoe rack
Even a small amount of untidy shoes in the hallway creates a feeling of untidiness and disorder. But what if the family is large and there are a lot of shoes? What if the corridor is too narrow? In such a situation, capacious and light-weight shelves for shoes will save. With their help, you can compactly place all sandals, shoes, boots and boots, saving space in the lobby. We offer to organize free space in the hallway and make a roomy shoe rack. Moreover, a do-it-yourself shoe rack is a great opportunity to show off your knowledge and carpentry skills, because its design is extremely simple.
Another positive point in favor of making your own shoe stand is the availability of materials from which you can make it. In addition, if you use the available tools and materials for its manufacture, you can significantly save the family budget.
Wood is the most common and affordable material for creating any homemade furniture, this also applies to shoe racks. There are options for making shelves from chipboard or MDF, from boards or furniture panels. You can get a budget shelf if you make it out of plywood with your own hands. Opt for quality birch plywood.
In addition to suitable material, you will need a standard set for carpentry tools:
- hacksaw or jigsaw;
- sandpaper or grinder;
- drill;
- screws and metal corners for fastening the structure or furniture ties;
- special protective equipment for the processing of wooden products.
The first thing you need to think about is the drawings and diagrams of the shelf or rack you like. You can draw them yourself or find suitable ones on the Internet and fit them to your size.

So, to create a shelf for shoes made of wood, everything is prepared, you can get to work.
How to save money and make an original stand for shoes with your own hands - find out here!Ideas, useful tips, instructions for making.
We make a stylish stand for shoes with our own hands
A beautiful shoe rack can become not only a place to store shoes, but also a full-fledged element of the interior of the hallway. The choice of options in stores is extensive, but the cost is often too high. To make a capacious and compact shoe rack that fits perfectly into the look of the corridor, you need to make a little effort and imagination. Consider options for making shoe racks from available materials with your own hands.

Varieties and purpose of homemade shelves for the hallway
Before installation, it is necessary to make a measurement of the space where it is planned to put a shelf for shoes. For a small hallway, a narrow (20-30 cm) and high shelf would be ideal; in a more spacious room, a closed cabinet with a width of 60-90 cm will look good.
Should the shelf be closed? If you want to make the hallway look more aesthetically pleasing, this is a good option. Do not forget to regularly air a closed shoebox, otherwise unpleasant odors cannot be avoided. Also, this problem can be solved by installing a lamp inside for drying and disinfecting shoes.

The advantages of homemade shoe racks are obvious:
- you can use eco-materials;
- the cost of a homemade shoe rack is several times less than in a store;
- you can make a shelf for the hallway of a non-standard layout.
The design of the shoe rack directly depends on its purpose and the number of residents. Here are some popular and practical options:
| Shoe rack design | Description |
| classical | Shoe shelves of this type are popular because of the simple and convenient installation. May have a conventional rectangular or asymmetric design. |
| suspended | The shelf is attached to the wall with rails, belts or cables. Conveniently folds if necessary (for example, if you need to carry furniture into a narrow corridor). |
| corner | Fastening is carried out on adjacent walls. Great space saver. |
| floor | Support in this design falls on the floor. Suitable for spacious hallways, but can also be compact if the sections are distributed not in width, but in height. |
| Closed | This option looks more aesthetically pleasing. Doors can be made of plywood, frosted glass. |
| Cassette | Shoes will be stored vertically here, on the door there are 2 or more cassette-type drawers that slide out when opened. Well suited for a small corridor (width 20-25 cm). |
There are many options for making shelves. The interior can be decorated with shelves made of metal, in particular aluminum, processed clay shelves, dense oak, glossy plastic look very nice. The material of manufacture can be any, as well as the configuration of the elements. According to the type of installation, shelves for shoes can be conditionally divided into several types.
Materials and tools for making shelves
The service life and ease of use depend on the material chosen for the manufacture of the shoe rack. For example, making a shelf out of a cardboard box is easier than a lung, but it will not last long either. But, as a temporary option, it will work fine.  When choosing wood as a material, it is worth taking care of the final processing of wood with varnish or paint so that an attractive appearance is preserved for a long time. A universal set of tools, due to the nature of installation and material, does not exist. But you will definitely need the following tools:
- electric drill;
- glue;
- simple pencil;
- sandpaper;
- fastening accessories;
- screwdriver;
- wood saw;
You will also need varnish or paint, the color of which is selected for the overall interior of the hallway.
How to make a shelf with your own hands
Before starting work, it is worth drawing an approximate layout of the future product, where you also need to specify the dimensions. After that, they start marking on the material, where they indicate the location of the fasteners (if any), the required length and width. Here are some helpful tips:
- When creating a simple shoe rack, you can do without the use of metal fittings - all elements are fastened with self-tapping screws.
- Doors are easy to install if you use awnings.
- The processing of materials with varnish or painting should be carried out before assembly. If you do this after, the layer will be uneven, and the procedure itself will be problematic. The process of assembling a shelf for shoes depends not only on the design, but also on the complexity of processing the material, the features of working with it.

wooden shoe rack
First of all, a shoe rack should have small dimensions, but at the same time contain a sufficient number of pairs of shoes. This is its essential feature. There are many materials from which this structure can be built, but the main one is wood. Unlike chipboard and MDF, it will not stick or swell when exposed to moisture. To do this, the tree should be varnished or painted.
What will be needed?
The basic set for manufacturing: wood, glue, screws, glazing beads, varnish or paint. Of the tools you will need: saw, screwdriver or screwdriver, hammer, sandpaper, drill. Glazing beads, self-tapping screws, drill are selected in accordance with the size of the structure. Self-tapping screws need to choose small, but able to firmly gain a foothold in the structure. It must be remembered that the tree can crack or split if the size of the screws is not chosen correctly.

Construction assembly
In depth, 35 centimeters will be enough. This distance is enough to accommodate almost any shoe. This will be the length of the sides of the structure. You need to saw off 6 elements of 35 cm each. You can determine who in the family has the largest shoe size and measure the distance along it, leaving 1 cm in stock. Then you need to distribute 4 bars on one of the elements and wash down to the depth of the bars. It is necessary to arrange the bars evenly.
Each shelf should allow you to place 3 pairs of shoes, so its length must be determined from the calculation of the 3 largest pairs of shoes in the family. 4 blanks of this length will go to each shelf. To connect the elements, it is necessary to cut out recesses. These places must be fastened with screws. For a more aesthetic look, you can drill holes and use glazing beads and glue that will withstand shoes without any problems. This operation is similar for each shelf. After that, sand the tops of the sidewalls with sandpaper.
Any height can be made, but a reasonable limit is not higher than 80 cm. High shoes should fit in one of the compartments of the structure. The distance between the shelves (between the floor and the first shelf) should be 30 cm. All connections are made in the same way.

Practical shoe rack made of chipboard
To make a simple shelf for shoes from chipboard, you need to take two sheets of canvas (dimensions are determined based on the space in the hallway). You will need a sheet of fiberboard for the back wall. The assembly algorithm is simple:
- We attach the bottom and the shelves themselves to the two side walls. A drill is used for screeds (drill 8 mm), a drill with a diameter of 5 mm is used at the end.
- The folding element is fixed with medium-sized screws;
- The upper part is mounted on self-tapping screws 4 * 30;
- Shelves are mounted inside;
- Fix the back wall of the product.
- This is a budget and uncomplicated option, which can be used for any layout of the hallway.

Beautiful laminate shoe rack
If after the repair of the apartment there is an unused laminate, you can make a stylish and compact shelf out of it, which will organically fit into any design. For manufacturing, you will need laminate sheets, the number of which depends on the tiering and slotted metal pipes. They can be made with a grinder for metal. If desired, the structure can be made of any height; for safety, the edges of the tubes are sealed with plugs.
 From profile
An interesting option are shelves for shoes made of profile and tempered glass (or wood). For manufacturing you will need the following tools:
- glass cutter;
- jigsaw;
- Bulgarian;
- level;
- electric drill for metal;
- screwdriver
You can use a regular color profile or galvanized, the second option will be more reliable, as it is resistant to moisture.

Step-by-step instruction
- The profile is fixed to the wall with one self-tapping screw;
- With the help of the level, the horizontal markup is checked;
- Screw in the remaining screws;
- The frame is assembled;
- Already cut shelves are attached to the frame.
- This option will look good in Hi-Teck design.
 Simple shoe rack made from boxes
The presented design is able to withstand a lot of weight, despite the fact that cardboard is a fairly flexible material. For its manufacture, it is desirable to use boxes from household appliances. Depending on the height and width, take the required number of boxes. The structure is attached with glue, adhesive tape, a stapler or in another way. The finished shelf can be decorated as fantasy tells. There is one drawback - such a shelf is suitable only for summer shoes.
 Corner shoe rack
The most suitable material for creating a corner wooden shelf for shoes is larch. It tolerates moisture well and is easy to use.
To begin with, we determine the size and design of the shelf, draw a diagram and calculate the required amount of material.
To create a corner shelf, the following materials and tools are needed:
- two boards up to 2 m long (the ends of the boards can be rounded or cut in a wave);
- shelves cut from the same board (while the shelves can be cut into different sizes and shapes);
- jigsaw for sawing;
- planer and sandpaper for leveling;
- corners and self-tapping screws for connecting parts;
- level to check the accuracy of the design;
- antiseptic;
- varnish or paint.
Boards must be sanded and treated with an antiseptic, varnished or painted. Varnish is chosen if you want to emphasize the naturalness and structure of wood, paint - if you prefer saturated colors and when deciding to use special design techniques with a play of color.
 Construction connection
To create lightness of construction, the two main boards are not attached to each other: they are set at an angle and connected using shelves. First, the lower shelf is attached, then the upper one, the structure is installed vertically and its evenness and stability are checked. Then the rest of the shelves are installed.
The space between the shelves must be sufficient, otherwise there will be a feeling of tightness and congestion.

decorative elements
For additional decoration of the shelf, you can use thin decorative slats, sawn out on your own. Or purchase a decorative wooden lattice-partition, and after sawing it, decorate the shelf by adding carved limiters.
The use of decoupage or aging techniques in painting will also bring a fresh touch to the interior of the hallway. Bright colors can be relevant to complement the interior.
How to do
Workpieces are cut from fiberboard in the form of circles and quadrangles. With the help of a compass and a rail, markings are made for the pins.
Disks for stands are fixed with disks of smaller diameter, which are placed at the desired height.
The bottom is prepared, on which quadrangular blanks are attached, attached with a corner. The bottom circle is conditionally divided into 3-4 parts (a place for 3-4 pairs of shoes on the "floor").

For the manufacture of a shoe shelf, you can connect your imagination and then the most unexpected solutions come to mind. Here are a few ideas that will be interesting not only for self-use, but also as a gift for loved ones.

On the video: do-it-yourself shoe rack from an old closet
Photo gallery
The photo gallery presents the original solutions of the shoe shelf.