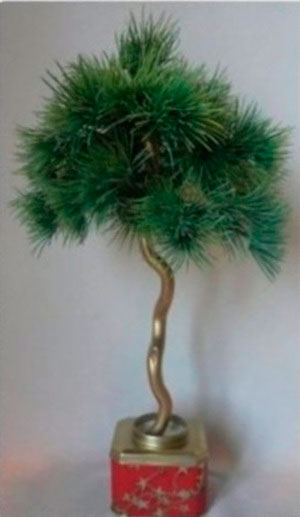
New Year's topiary photo. Do-it-yourself topiary tree - a piece of the New Year's holiday on your desktop How to make a New Year's tree
Topiaries are becoming increasingly popular in interior design. These are small artificial trees made from various decorative materials. Paper, fabric, candies, ribbons, artificial flowers can be used in the decor of topiary - everything that the author’s imagination suggests.
New Year's topiary is a great idea for those who love crafts and new ideas. Topiary can be both a complement to the traditional Christmas tree in room decor, and a fashionable alternative for those who want something new. Small bright trees will enliven the interior and enhance the feeling of celebration. The article will be devoted to master classes on creating such New Year's mini-trees with your own hands.
A tree made with your own hands using a similar technique consists of four elements: a base, a trunk, a crown and a stand.
- The basis of the topiary is a ball. It can be polystyrene foam, polyurethane foam, a cardboard figure, wire or made of papier-mâché. You can simply crumple the paper into a tight ball and wrap it with tape.
- To create a trunk you will need strong wire that will support the weight of the base. The wire is decorated with rope, ribbon, and can be covered with plastic, plaster or clay. You can also use a beautiful tree branch coated with varnish as a trunk. If the topiary is small, then the trunk can be made from Chinese sticks or wooden skewers.
- The crown is the most interesting detail of a decorative tree. Ribbons, beads, paper flowers, coffee beans and seashells are used to decorate it. But since we are creating a New Year’s topiary, we will need the appropriate materials: Christmas tree decorations, balls, tinsel, pine cones, fir branches, artificial snow, candies.
- The stand for the composition can also be different. This could be a flower pot, a bucket, a flat stone or a wooden beam. If the weight of the tree is large, then the stand should be massive and heavy.

Crown of New Year's topiary
The first master class will be devoted to creating a crown from Christmas tree decorations with your own hands. For this you need:
- Christmas balls of similar size and color,
- tinsel,
- fir cones that can be covered with gold or artificial snow,
- small twigs with berries (you can take artificial ones),
- satin gold ribbons,
- toothpicks for fastening.
Let's take a foam ball as a base. To make the crown of a New Year's tree, you need to attach each Christmas tree decoration and other decorative elements to the base with a toothpick and glue, without losing the shape of the ball. The gaps between the large balls are filled with small parts, and to prevent the composition from falling apart, you can glue the parts together. Then all that remains is to decorate the crown of the impromptu Christmas tree with ribbons and tinsel, and you can spray some artificial snow. 
New Year's topiary using natural materials It is created in the same way, but the decoration is fir cones. It is desirable that they are also the same size, and the space between them can be filled with small pine branches, strings of beads or tinsel. Very small plain Christmas tree balls will look good in combination with large pine cones. For a greater aesthetic effect, the cones can be plated with gold or silver. 
Topiary Christmas tree can also be a good decoration for the New Year's interior. To create such a tree with your own hands you will need spruce branches, cones, beads and artificial snow. It is better to take as a basis not a ball, but a cone, on which the branches will be attached so that the tree looks like a real Christmas tree.
The Christmas tree-shaped crown can be decorated with fabric, sisal or felt will do. The fabric is attached to the base, then decorated with toys, threads, tinsel and other beauty. Your DIY Christmas tree is ready!

New Year's topiary tree can also be made from artificial coniferous branches, which are divided into small branches. The base is also taken - a ball or cone, to which the fluffy parts are attached. Then all that remains is to decorate the Christmas tree with toys, beads and small candies.

Embroidered Christmas trees look unusual. To make them, you can sew two pieces of fabric together in the shape of Christmas trees, stuff them with cotton wool to add volume, and embroider them with threads. You can embroider pine needles and attach the toys separately.
The master class on creating New Year's topiaries from candies is very simple. The base in the shape of a ball or cone should be wrapped in green tinsel and various candies should be attached using toothpicks, which will look like bright toys decorating a green Christmas tree.
You can use a combination of Christmas balls and candies, pine cones and candies, fir branches and candies. Any composition will look elegant and festive, and most importantly – appetizing.
Trunk for New Year's topiary
The New Year's Christmas tree master class continues with ideas about what you can use to make a trunk for a festive mini-tree with your own hands.
- If the tree is small, you can take several wooden skewers or Chinese sticks, fasten them together and decorate them with thick rope or satin ribbon of a suitable color.
- You can build a wire trunk, if necessary, connecting several parts if the wire is thin. Such a trunk is decorated in a similar way. Wire is convenient because it can be used to create not only straight, but also curved trunks: such trees look more elegant.
- An ordinary wooden stick found in the forest will also work as a trunk. You can pre-clean it and varnish it, give it the desired color with paints or decorate it with ribbons. The length and thickness of the stick can be selected depending on the overall size of the topiary.

Base for topiary
There are many options:
- Foam plastic of any shape. This base is suitable for small, light compositions.
- A cardboard stand filled with various fixing and decorating materials: pine needles, tinsel, cones, etc.
- A flower pot that can be decorated in various ways. Suitable for larger topiaries.
- Glass, mug, vase, jug, any vessel suitable in size for the composition.
- A small wicker basket.
- Stone or wooden block. But it is quite difficult to attach the barrel to such a base.

To fix the trunk in a pot or glass, you can use alabaster or cement mortar. This will also give the entire composition stability.
Topiary decor
A lot has already been said about decorating topiaries in our master class. As you can see, DIY decoration can be no less impressive than that of professional designers.
There are many ideas for decorating New Year's topiaries.
- Decoration with Christmas balls. You can select balls by size, or you can use contrast by alternating large and small balls. Elements can be in the same color scheme, but 2 or more colors can be used. The combination of shiny and matte balls looks good.
- Tinsel . It can imitate spruce needles or serve as decoration along with other toys. The great advantage of tinsel in design is the variety of its colors and shapes.
- Natural materials : spruce branches and cones, acorns, small berries, leaves. Decorating models with coffee beans is not only beautiful, but also fragrant, and in combination with tinsel or pine needles, a wonderful New Year tree can be created. Tangerines and small lemons are used in topiary decoration; in combination with pine needles they create an excellent New Year's theme.
- Edible elements : candies with beautiful candy wrappers, cookies in the form of various figures, etc. Such trees are not only beautiful, but also appetizing.
- Textile . It can be felt, satin, lace, delicate organza, flowing silk - it all depends on what image the designer creates.
- Ribbons and graceful bows - a win-win option in decorating topiaries for the New Year.
- Knitted elements . They can be knitted or crocheted. These are, for example, snowflakes, snowman figures, Christmas tree decorations. It is quite difficult to knit such small figures, but this decor looks very beautiful and cozy.

Several ideas for creating New Year's topiaries
Master class on creating a fragrant coffee tree
Coffee beans are glued onto a cone base, which is best painted brown. The grains are glued in any order, on any side. The main thing is that the entire space is covered. Next, the crown is varnished, then the coffee beans will shine. For decoration, you can take lace and make small flowers out of it, the center of which is decorated with a bright red bead.
Several of these flowers are glued to the crown of the topiary. You can stick several red and white beads and bows between the coffee beans.

To secure the composition, you need to decorate the cup with lace and fill it with alabaster mortar, fixing the barrel.
Creative master class on making topiary from sweets with your own hands
The cone base is decorated with ribbon. A bell is attached to the top of the cone with a wire, and the wire is also wrapped with tape. Candies are glued to the lower edge of the cone attached to the barrel. It is advisable that the rope and candies harmonize in color. The space between the candies is filled with tinsel and small silver-plated cones; you can also use small Christmas tree balls.

The New Year holidays are getting closer, and for those who like to spend their evenings with handicrafts, the most fertile time is coming - after all, now is the time to start making gifts for family and friends, as well as holiday decorations for your home.
You most likely already know what a topiary is - a small decorative tree that can be made in any style you like. And on New Year and Christmas, the most relevant tree is, of course, the Christmas tree. And creating topiary in this direction opens up truly unlimited scope for imagination. Everything is possible here - from a classic green Christmas tree to a ball decorated with ribbons and tinsel. The main thing is that it is bright, festive and tasteful!
Wherever our imagination takes us, the principle of creating these trees remains unchanged. Any topiary consists of the following elements:
- stand
- trunk
- warp
- crown
The main criterion in choosing a stand is that it must be stable. It can be anything - a mug, a flower pot, a shell, a cut of wood. For a New Year's topiary, it is best to decorate the stand with bright fabric and sparkles; it is fashionable to cover the base of the trunk with tinsel or small gift boxes. If some kind of container is used as a stand (which is the most convenient option, because it gives more opportunities to secure and beautifully hide the base of the trunk), then foam plastic or a floral oasis will be a good material for filling it.
The trunk must be flexible and wide enough so that it can be given the desired shape, but at the same time it looks harmonious. If you wrap it with a ribbon that sparkles mysteriously, it will be an appropriate touch for New Year's decor.
The base, as a rule, is a foam ball onto which the crown elements are fixed, most often with the help of toothpicks. First, the largest elements of the crown are distributed, and then the space between them is filled with smaller parts. For strength, everything is not only attached to the crown, but also glued together.
Little secret: In order not to make a mistake with the size and not make the crown too large, it is better to take a smaller base ball, and adjust the crown with the length of toothpicks.
A few New Year's ideas for inspiration
Soft Christmas tree
The easiest way to make a New Year's topiary that looks like a soft toy is to cut out two parts in the shape of the desired Christmas tree from felt or any other fabric suitable in style, sew them together and stuff them with cotton wool. Having secured it to the trunk, you can start decorating our Christmas tree. You can wrap it with beads, attach snowflakes, small balls, lace - in general, just like a real Christmas tree, only tiny!
Another option for creating a soft and fluffy-looking Christmas tree is to wind fluffy threads on a cone base.
And if you make legs as a stand, it will turn out very funny.
From the cones

Products made from natural materials always look cute and remind you of childhood, when you had to bring a craft to kindergarten or school. But if you have artistic taste, imagination and a can of spray paint, you can create quite stylish things from pine cones
From tangerines
What creates a New Year's atmosphere in your home? Of course, the smell of tangerines and Christmas trees! A bright orange ball will attract attention and surprise guests.
candy ball
New Year is a time when everyone expects gifts and sweets, regardless of age. And if we receive and give gifts on New Year’s Eve, then no one will stop us from surrounding ourselves with sweets during all the holidays!
Three nuts for Cinderella
Walnuts have long been used as holiday decorations, they were wrapped in foil, and candles were inserted into the shells. They also look very interesting in the topiary version.
A very popular material for creating this kind of souvenir is coffee beans. And if you experiment with attributes and shape, such a topiary can fit into any holiday.
Christmas balls
In pursuit of originality, let's not forget about the classics. The main decoration of a real Christmas tree is the balls, and if you take them as a basis, you will get a completely new decoration for your home.
You can come up with endless types of New Year's topiary. Use different materials and their combinations, artificial snow, tinsel, sparkles, light bulbs - it all depends on your inspiration!
And in order to better understand the intricacies of creating a New Year's topiary, we offer you these videos
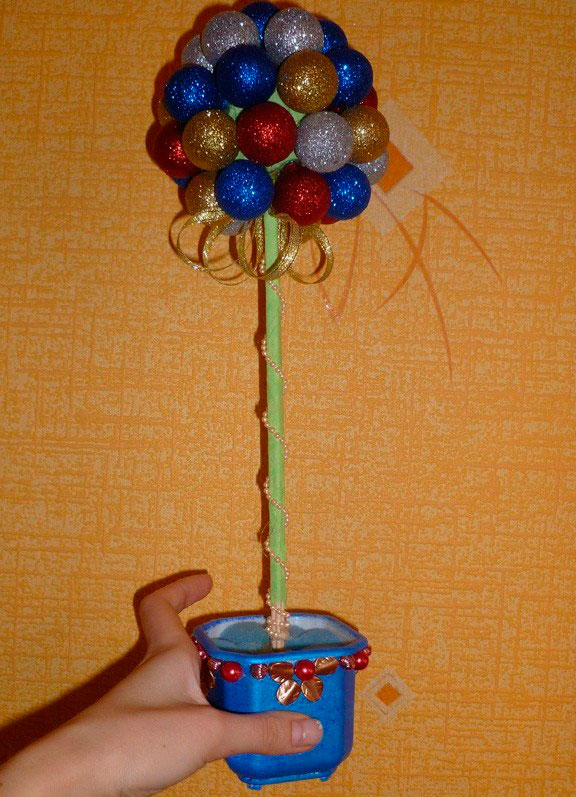
The latest gift trend is the tree of happiness. This is a winner for most holidays. New Year is no exception, when such a gift is more than appropriate.
Tools and materials Time: 3 hours Difficulty: 4/10
- flower pot;
- alabaster or plaster;
- stick or unnecessary pencil;
- ball for base;
- decorative details for decoration;
- glue gun

The tree of happiness is also called topiary, so our New Year's tree of happiness can still be considered a New Year's topiary.
You will need:
- massive flower pot;
- foam;
- small Christmas tree decorations;
- large and small beads;
- double-sided tape;
- glue gun;
- sweets, preferably round;
- cling film;
- crepe paper;
- newspaper;
- shiny mesh;
- toothpicks;
- kebab skewers;
- primer base, varnish and acrylic paint.
How to make a New Year's topiary:
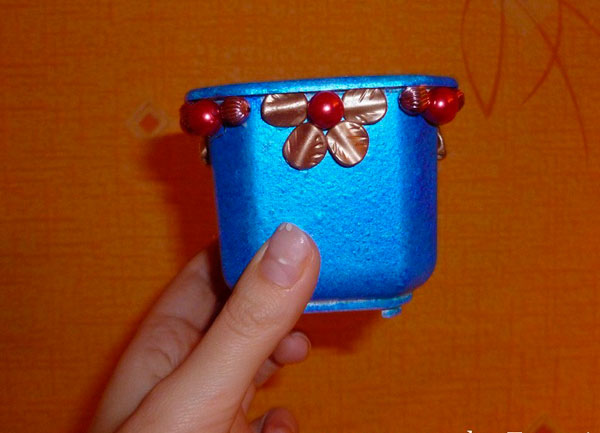
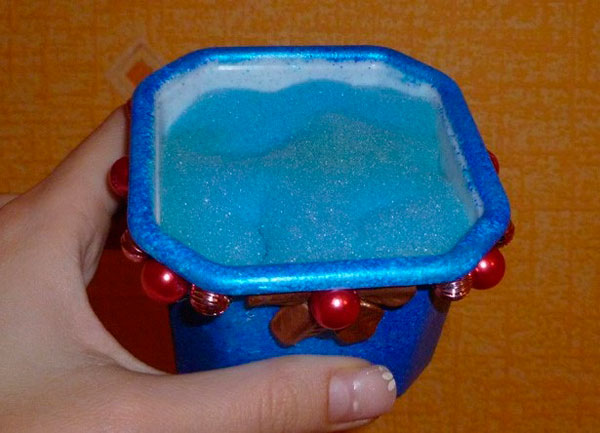
Apply primer to the flower pot, and after it has completely dried, apply paint. Then dry and varnish. That's it, our pot is ready.

We lay out an ornament from beads and fix it with a glue gun.

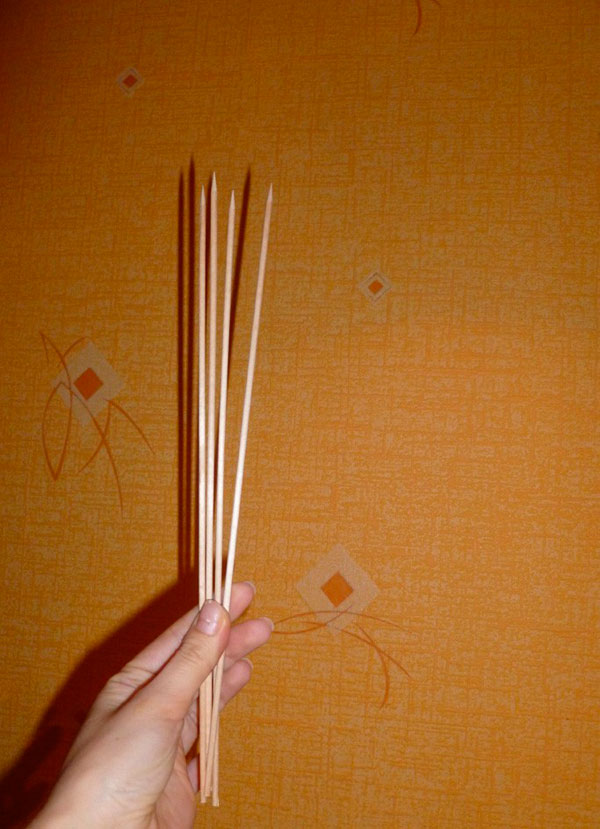
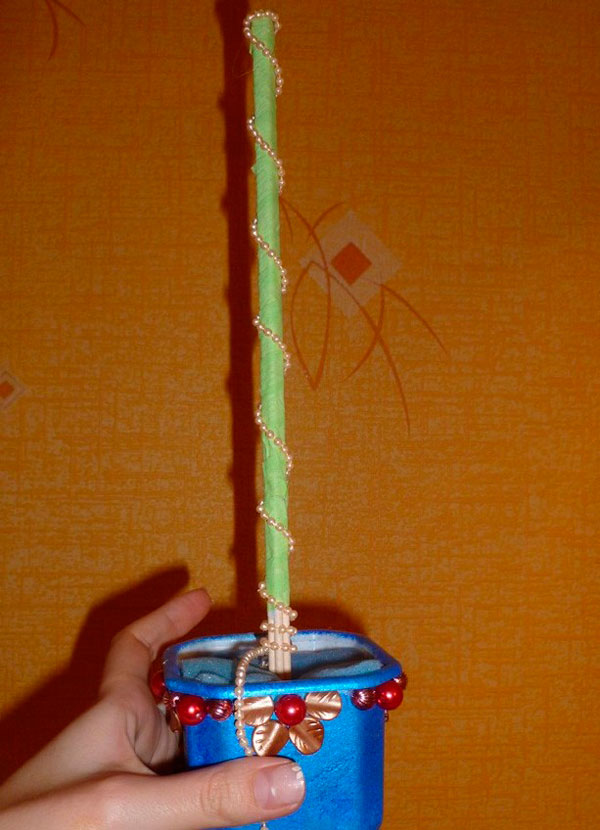
We take 5-6 skewers, wrapped with double-sided tape, and on top with green paper for the barrel.

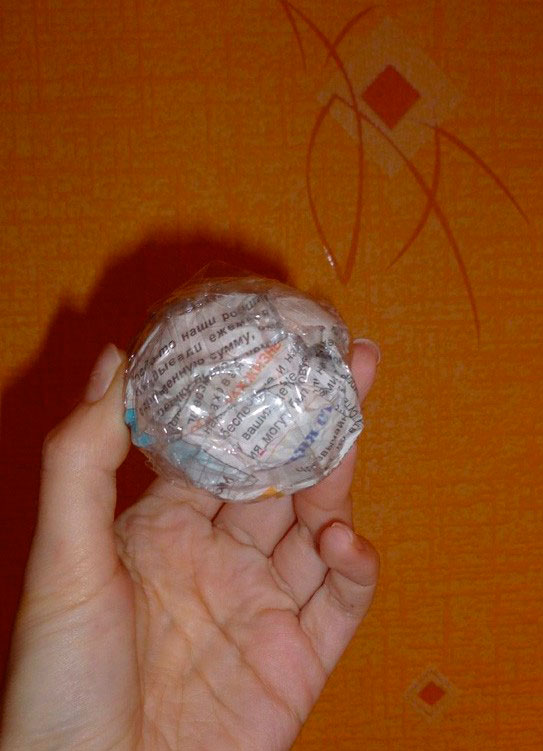
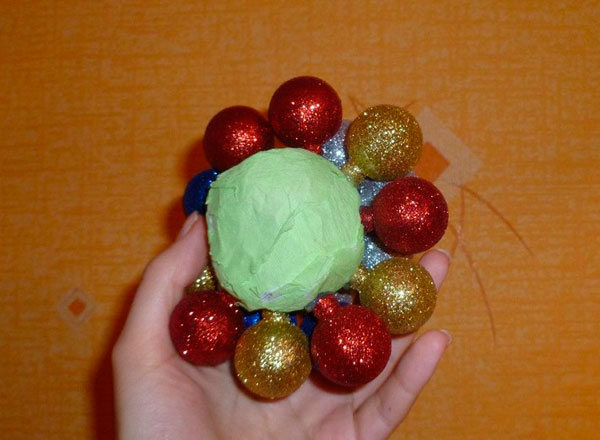
We make the base - a ball from newspaper, you can take a ready-made ball, for example, plastic or foam. Then you need to cover it with tape and wrap it well with paper.


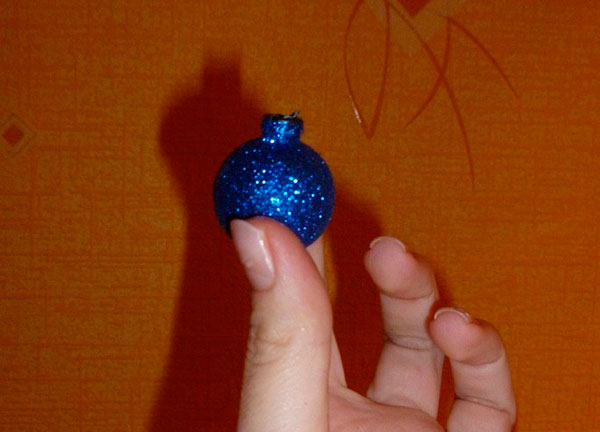
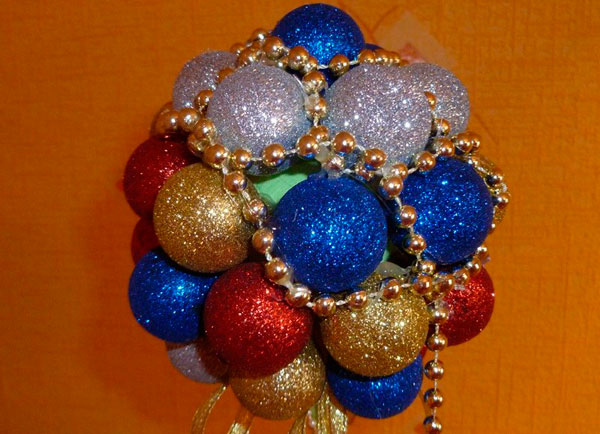
Carefully cut off the tops of the Christmas tree decorations, attach the decorations using a glue gun, evenly distributing them over the surface of the ball.


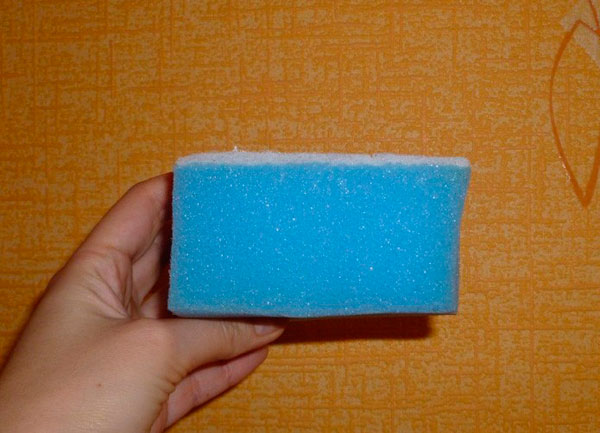
Fill the pot with foam rubber.
We put the barrel in foam rubber. We secure the thread with beads along the entire length of the barrel with a glue gun.
We place a ball with toys on the barrel and carefully fix it with glue. We decorate the junction of the ball and the barrel with ribbons.
We fill all the gaps that remain on the ball with large beads, fixing them with glue.
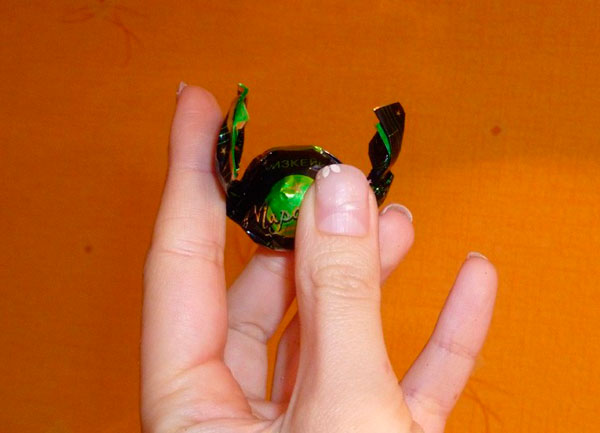
Now you need to decorate the foam rubber. For this purpose, take candies, insert toothpicks into them and wrap them with cling film, securing it with tape.

We cut out squares from the mesh and attach them with tape to the blanks, which we insert into the foam rubber.


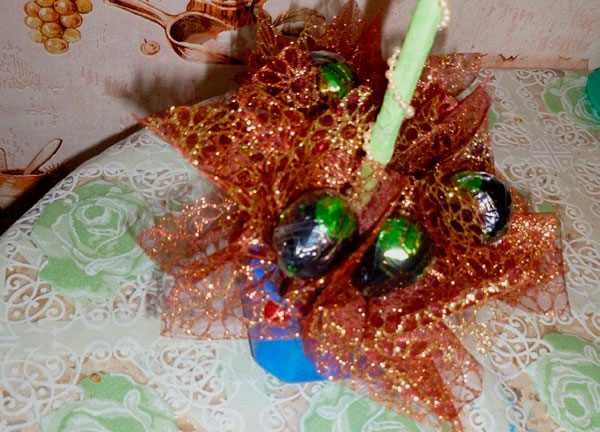
Our New Year's tree of happiness is ready!

Christmas tree topiary
Tools and materials:
- stick for the trunk;
- screwdriver or drill;
- beautiful tin box;
- spruce branches;
- glue gun;
- gypsum;
- PVA glue;
- gold paint;
- beads.
How to make a tree of happiness
We paint the stick gold. Once it's dry, we make holes. The distances between them should be 1 cm.

We attach small spruce branches with glue to the trunk, inserting them into the holes.


We put the tree in a box. After this you need to plaster it thoroughly.
Leave to dry for 2-3 days. After this, we cover the plaster with PVA glue, and make one layer of beads on top. After it dries, make another layer of glue and add another layer of beads.

We decorate the green branches with gold cones and, of course, multi-colored balls. That's it, our Christmas tree topiary is ready!

Mandarin tree
Materials:
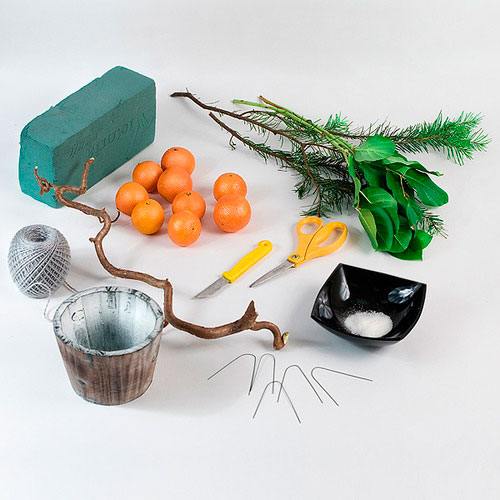
- tangerines;
- laurel and spruce branches;
- stick for the trunk;
- white beads;
- wire;
- threads;
- pot;
- sponge for flowers.
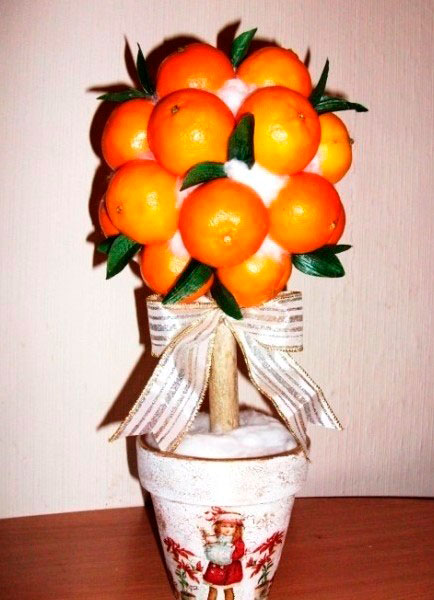
How to make a tangerine tree
Make a ball from a sponge and fill the pot with it.

Cut the wire into 10 cm pieces. We wrap the tangerines with thread.

Spruce branches are generously greased with glue and sprinkled with white beads.

We place the bottom of the stick in the pot, and place a sponge ball on top. We stick a wire with tangerines into it. And between them are laurel leaves, folded in half. We decorate the bottom with spruce branches.

In principle, the tangerine tree is ready.

Alternatively, instead of laurel leaves, you can take multi-colored rain, cotton wool or serpentine.

May the process of making Christmas trees bring you pleasure, and the fruits of your labor bring you happiness in the New Year!
You can also see how a New Year's tree of happiness is made in the bonus video.
New Year's topiary “First Snow” is made from dried chestnuts, walnut shells, acorns with caps, sisal and rattan balls. An elegant tree of happiness was planted in a restored flower pot for the New Year. The trunk of a curved branch is reinforced with plaster. In a snowy clearing, a small composition has been assembled from padding polyester: cinnamon sticks, sisal balls, an acorn, smooth berries.

Large used foam ball with a diameter of 15 cm, you can also make the frame yourself.
The total height of the New Year's topiary is 42 cm, pot - 10 cm, crown diameter with decor - 20 cm. To make a topiary of this size you need 5-6 hours.
Materials for creating the New Year's topiary “First Snow”


- Gypsum or alabaster for pouring.
- Thermal gun, 5 silicone sticks, 20 cm, d=11.2 mm.
- Scissors, brushes.
- Paint - acrylic white and bronze.
- Crushed stone - to the bottom of the pot.
- Any pot - 500 ml.
- Ice cream sticks (curly or straight) - 20 pcs.
- Polystyrene foam ball, d=15 cm, fabric for wrapping the ball.
- Trunk branch, length 30 cm, plasticine.
- Dried chestnuts.
- Walnuts - whole and halved.
- Acorns with and without caps.
- A bunch of acorns.
- Peach pits.
- Chocolate-colored sisal into balls.
- Italian pasta, dark
- Satin ribbons: chocolate 2 pcs., bronze 1 pc. - 10 cm each.
- Organza white - 20 cm.
- Narrow white satin ribbon (to wrap around cinnamon sticks) - 10 cm.
- Half beads - 10 pcs.
- 1 bunch of white and 2 bunches of burgundy berries - 20 berries per bunch.
- Rattan balls, d=3 cm - 4 pcs.
Video master class - do-it-yourself topiary for the New Year
A convenient and simple master class in excellent FullHD 1080p quality on how to make a New Year’s topiary “First Snow” from natural material with rattan and sisal balls. Watch, get inspired, generate new ideas and share them with friends!
How to make a New Year's topiary - MK in 1 picture

Did you like the format of the master class in 1 picture? Watch everything from Alena Tikhonova!
Step-by-step master class with photos - DIY New Year's topiary
Restoration of a pot
Stage 1. Gluing ice cream sticks. Any container is suitable for restoration - the main thing is that it is free of cracks and chips. Glue a plastic cover or similar product to the bottom: close the drainage holes so that the plaster does not spill out when pouring. We cover the pot with ice cream sticks: if the height does not match, we cut the sticks.


Stage 2. Painting the pots. Using white acrylic or gouache with PVA glue, paint the entire pot for the New Year's topiary in 2 layers. In this case, be sure to paint the second layer with a soft brush to cover the pot evenly, without smears.
An alternative to liquid paint is acrylic in a spray can for whitewashing a pot to look like a tree of happiness for the New Year.


Bronzing of the barrel and decor
Stage 3. Painting the decor. Using acrylic paint - antique bronze or medium gold - we paint dried chestnuts, walnut halves, acorns and caps.
Heavily dried (wrinkled) chestnuts can be partially painted, even sponging is allowed: the result is a very interesting texture!
Stage 4. Painting the barrel. We bronze the trunk of the New Year's tree of happiness in the same color as the decor. We paint all elements evenly, in 1 layer.


Formation and decoration of the crown of the New Year's tree of happiness
Stage 5. Preparing the ball. The foam ball melts from hot silicone, especially with heavy decor. Wrapping with fabric, twine or knitting threads will solve this problem.
Instead of a commercial foam ball, you can use alternative solutions. Find out how to make it yourself almost free and very easy!
Stage 6. Crown decor. The secret of the color of the New Year's topiary is a variety of decor made from natural materials in combination with artificial elements. Over the entire surface of the ball, in a heap, without gaps, we glue the decor, alternating painted and unpainted elements:
- Chestnuts, walnuts, acorns.
- Single and paired caps of acorns.
- Rattan balls.
- Sisal balls. Step-by-step instructions on how to do it.
- Cut cinnamon sticks.
- Peach pits.
- Star anise.
- Foam berries of white and burgundy color (viburnum).
- Italian pasta is dark brown.
First, we glue the large decor, then use small elements to close all the gaps on the crown of the New Year’s topiary craft.


We recommend treating the crown of natural material with any hairspray to avoid insect damage. It is important to do this before gluing snowflakes and garlands with beads so that the plastic elements do not become deformed.
Stage 7. New Year's decor. We wrap the finished crown in different directions with a garland - beads on a fishing line, and fix the large beads with glue. We glue plastic snowflakes over the surface, covering bald spots, if any remain on the New Year's tree of happiness.


Flowerpot decor
Stage 8. Satin bow. You can use a ready-made brown polka dot bow or make your own triple bow from satin ribbons, as shown in the video. We glue white organza loops crosswise under the bow, and a snowflake and a bead on top.


Stage 9. Decorating the pots. Glue plastic snowflakes and half beads on each side, except for the one where the satin ribbon bow flaunts.


Pouring and filling the flowerpot of the tree of happiness
Stage 10. Filling with plaster. The New Year's topiary “First Snow” turned out to be heavy: for stability, we put a layer of crushed stone on the bottom of the pot. We attach the trunk to plasticine and fill it with plaster (alabaster) to 2/3 of the volume of the pot. We dilute the solution thick, the gypsum/water ratio is 2:1.
After pouring, the tree of happiness must be fixed in the desired position and left until completely dry - 18-24 hours.

Last stage 11. Filling the pot. We cover the gypsum surface in 2 layers with padding polyester and carefully glue it. This is a snow-covered clearing where we will form a composition at the base of the New Year's topiary. We use all the elements that were used to decorate the crown: chestnut, a ball of sisal and rattan, an acorn, a nut, 2 tied cinnamon sticks, a star anise. We randomly scatter several viburnum berries in the clearing.


Photo - presentation of the New Year's tree of happiness “First Snow”


The secrets of making 20 types of topirias are revealed with step-by-step instructions and video lessons.
The history of the origins of the art of topiary stretches back to ancient times and involved the curly cutting of green plants. Intricate tree figures could be observed in the gardens of the Roman nobility, whose original shape was given by court slave gardeners.
A modern topiary is a miniature copy of trees and bushes, and it depends only on the imagination of a skilled florist what shape of crown he will give to his own tree. Topiary is a tree of happiness that has regained its popularity in modern European floristry.
DIY topiary for a wedding
You can make topiary for a wedding with your own hands. To get started, check out the ideas for wedding topiary shapes in our gallery. 

Aren't the ideas simply charming? Can you imagine the faces of the newlyweds if you present them with a “wedding tree of happiness” as a gift? Or maybe your family is planning a celebration, and you will be able to make beautiful decorations for the wedding table yourself, surprising you not only with your original idea, but also with your craftsmanship.
For example, we offer you an interesting wedding decor in the form of topiary, on which you will not have to spend a lot of money and effort. Please prepare the following materials:
- Original pot for a flowerpot
- Twig for the trunk
- Hot melt adhesive
- Stipler
- Beads
- Beads
- Cotton pads
- Green crepe paper
So let's get to work.
- Our wedding tree will consist of roses, which we will make from ordinary cotton pads at the rate of one pad - one rose
- Fold the two sides of the disk towards the center so that we get a wide edge on one side and a sharp edge on the other, and fasten it in the center with a stapler
- Now carefully unfold the wide edge outward, and the first white rose bud is born in your hands
- Do the same with other disks - the number of roses depends on how wide your ball is


- Let's start preparing the crown for the wedding tree of happiness. To create it, you can use polystyrene foam, crumpled newspapers into a ball.
- The main thing is that the material for the base is not heavy. Wrap the ball on top with a white sheet of paper and secure it with glue to the prepared twig, which in your case will serve as the trunk
- Glue the ball to the base of the barrel with hot glue
- The next step is gluing the roses. They need to be glued thickly, pressed tightly against each other so that the base is not even visible


- At this stage of the work, you need to take crepe paper and cut out small squares from it that will serve as small leaves. Glue them with PVA glue

- Finally, place white beads on the bouquet in a chaotic pattern using hot glue.
- It's time to decorate the pot
- A beautiful small vessel or yogurt jar is perfect for this purpose.
- Pour dry plaster into a container and fill it with water until it reaches the consistency of thick sour cream.
- Carefully, in the center, insert the tree of happiness and let it dry well. Ideally, you should leave it overnight.


- The next day we will start decorating the tree trunk. We put white beads on a thread and secure the beads under the tree crown. Wrap a spiral around the trunk and secure the beads at the base of the tree with glue. Cover with a layer of small beads
- Depending on what kind of tree pot you have chosen, you can come up with decorations for the wedding theme; white organza is ideal
- Tie it with a bow and your wedding topiary is ready


Topiary on a glass master class
If we’re going to make a surprise for the wedding, then let’s do it in its entirety - add glasses for the bride and groom along with the beautiful wedding topiary. But the glasses will not be simple, but super interesting.
After all, you will make the topiary on the glasses with your own hands. This means that you will pour your whole soul and love into them, while wishing the bride and groom many happy and cheerful years in strong love.
Video: Master class DIY wedding glasses
Topiary for March 8
- The holiday of March 8 is considered women's holiday. At the same time, a joyful mood is observed in everyone, regardless of gender and age. A holiday in itself brings joy and in order to enhance it, it is customary to give interesting gifts
- At all times, men gave women flowers - be it a beautifully decorated bouquet or flowers in pots. But if you want to pleasantly surprise your woman, you can use the idea of topiary
- Moreover, there are many options for holiday topiaries, and you can always choose the one that will touch the heart of your loved one


Rose napkin topiary step by step instructions
So, let's get to work - we will create roses.
- In order to create this magnificent beauty, we will prepare napkins of a certain color
- In our free time from work, we’ll start turning them into rosebuds. Cut each napkin into 4 parts
- Take one part of the napkin and fold it as shown in the photo. That is, not in half, one third
- We do the same with the rest of the parts. For a rosebud you will need 2 napkins. And again, you can adjust the size of the buds yourself

- Now we form the bud by twisting. We shape each petal with our fingers, giving the bud a beautiful shape. This is what you should get as a result.

- We glue the finished rose buds from napkins tightly to the ball.


- For topiary for Valentine's Day, you can use white and red napkins for roses, and decorate the structure with hearts and Cupid's arrow
- For example, you can take note of this option for making roses


- For Women's Day on March 8, buds of any color are suitable. The main thing is to do it from the heart and with love, and decorate the topiary itself with decorative elements that will correspond to the holiday

 Topiary for the New Year
Topiary for the New Year should symbolize the solemnity of the event. We have already talked about what topiary is and what are the basic principles of its manufacture.
But what is topiary for the New Year? You guessed it - it’s customary to make wishes on New Year’s Eve. And if you decide to make a New Year’s tree of happiness with your own hands, then you will have every opportunity to securely secure your wish with durable glue.

 Before you start making it, you need to decide on its shape. New Year's topiary can have a traditionally round shape, but you can also give it a curly shape, such as a Christmas tree shape.
We will consider the option of topiary made from Christmas balls. You will need to prepare:
- Christmas tree balls in silver or golden color (you can combine the colors of the balls)
- Foam for base
- stick
- Potty
- Polystyrene foam for ball
- New Year's design elements - pine cones, decorative berries and fruits
- If you have chosen a pot for the New Year's theme, then you can leave it as it is now. In another case, the pot must initially be decorated with satin fabric and secured to the base of the pot with double-sided tape
- Immediately place foam inside the pot, which will serve as a reliable support for your topiary. Secure the trunk in the middle of the oasis - it can be an ordinary stick wrapped in satin ribbon or a cardboard base made from cling foil or film
- At this stage, attach the foam to the upper part of the trunk of the tree of happiness, having previously made it into a ball shape. The moment has come when we will form the crown of the tree with our own hands. In our case, these are New Year's toys-balls. Place each individual ball on toothpicks and glue them at the base. Now insert the toothpicks with balls tightly into the crown ball.
- If you use large balls, then the spaces between them can be filled with small balls and decorated with beads and tinsel
- To ensure that your design holds up well, we recommend gluing the balls together at the end of the work.

 Don't be afraid to use your imagination, add or change elements at your discretion. The main rule is that they match each other in color!
DIY Christmas topiary
Soon after the New Year celebration comes the Christmas holiday. Naturally, you can use your New Year’s topiary for Christmas. But! You all know very well that Christmas is always associated with the colors red, white and green. Therefore, if you decide to make another Topiary, then use the decorations in these exact shades.
Topiary made of fresh and juicy strawberries in the form of a Christmas tree. You can use this delicious strawberry decor not only for Christmas, but also for any holiday, formal buffet or banquet.
To make a Christmas tree of happiness in the form of a Christmas tree, you will need to prepare:
- Foam cone
- Cling film or foil
- Stand in the form of a vase or pot
- Fresh mint, basil or lettuce leaves
- Chocolate
- Strawberries – 2 kg
- Powdered sugar
- Cannon,
- Toothpicks
- Bows for decoration
So, let's begin the exciting process.
- First, securely attach the foam cone to the base using hot glue. Now wrap the cone-trunk of the future fruit tree with cling film or foil
- Carefully sort the strawberries and select only healthy rafts with pointed ends, approximately the same size
Lay out on the table all the necessary elements for work:
- Toothpicks
- Chocolate
- Blackberries
- Strawberries without green leaves
- Floral pins
- Start working from the bottom, carefully in a circle. In this case, it is not the cone that needs to be rotated, but the base. Dip each strawberry upside down into melted chocolate, place it on a toothpick and attach it to the cone.
- Close the gaps between the strawberries with mint or basil leaves using floral pins. Try to attach leaves at a distance of 7-8 cm from each other
- You can also insert blackberries in between the strawberries, which will give your tree an even more original look.
- Decorate the top of your Christmas topiary with carom, or you can cut out a Christmas star from a mango or pineapple. If you don’t have either one or the other, then you can also decorate the top with an original bow
- Before serving, sprinkle the strawberries with powdered sugar, which will give your tree a more festive look with a snowy effect.


Topiary made from banknotes
A gift in the form of a topiary made from banknotes – a real money tree – will cause a lot of delight and pleasant emotions for the birthday boy!!!
To make such a great gift, you will need:
- Hot melt glue, PVA glue
- Newspapers and threads
- Wooden skewers
- Napkin
- Leg-split
- Paper bills
- Coins
- Sackcloth
- Gold acrylic paint
- Golden lace
- First let's decorate the pot
- You can take a sour cream container, or buy an original flower pot shape especially for this occasion.
- Paint the top of the pot with gold acrylic paint and set it aside to let the paint dry thoroughly.
- If necessary, you can apply another coat of paint.
- Grease the rest of the pot with PVA glue and wrap it tightly with twine, securing the tip with hot glue.
How to make a topiary ball from newspaper
- Crumple the newspapers into a ball approximately 10cm in diameter.
- Wrap it with regular sewing thread
- Now tear the colored napkin and coat the ball with a thin layer of glue
- Stick 1-2 layers of napkins to the ball so that the threads are not visible
- Let the glue dry well
- Using a knife, make a hole in the ball for the future trunk
- Take 10-15 skewers and tie them together with threads at both ends. Pour a little glue into the hole of the ball and immediately insert the skewers with sharp ends. Lubricate the trunk with glue and wrap it tightly with twine. Secure the end of the twine securely with glue
- Dilute the plaster with water until it becomes thick sour cream and pour it into the pot. Insert the finished barrel with the ball into the center and hold it in this position for a while so that the plaster sets well. Otherwise your trunk may become askew
- After 30 minutes, you can start decorating the crown of the money tree.
- While the plaster dries, prepare the blanks. To do this you will need souvenir bills and a gold ribbon.
- Fold the bill like an accordion, tie it in the middle with gold thread, and glue the edges together to form a disk. For your ball you will need approximately 18-20 discs
- Glue the discs onto the ball, starting from the bottom. Your ball is ready
- Now you can make various fans, scrolls, airplanes, etc. from banknotes. Glue them in the places where you like best - the main thing is that your tree turns out lush and interesting
- All that remains is to decorate the stand. For this you can use green moss or sisal. Place a small burlap bag under the tree, putting coins in it and tying it with gold thread on top
- Your money tree is a topiary of banknotes, ready. Enjoy its beauty and sophisticated look


Pearl topiary
A pearl topiary will be a wonderful decoration for the interior of your room or wedding table. There are many options for making it and all of them are simply amazing. See for yourself.

Candy topiary
Remember, we recently discussed with you the option of making topiary for Christmas. For this we used fresh strawberries. And now a new proposal is to make topiary from candies.
Such an unusual attribute is perfect for any celebration, but above all, for a children's party, which will make it unusual and original. It will delight you not only with its design, but also with its internal content.


Video: Master class Bouquet of sweets
Video: Candy topiary for Valentine's Day
Fruit topiary
For fruit lovers, it is not difficult to make topiary to suit their taste. It will not only decorate the interior of their home, but will also remind them of a wonderful and warm summer all year round. I will tell you how to make a bright decorative topiary from fruits. By the way, you can make any fruit tree using this technique.
So, let's start making topiary from fruits.
We will need:
- Flowerpots
- Wires
- Styrofoam ball
- Decorative leaves and apples
- Brown acrylic paint
- Hot glue
- Ribbon or chain
- Wooden skewers – 4 pcs.
- Any decorative element - butterfly, bird, etc.
Let's start by using thick wire to form the trunk and branch of a fruit tree. We fasten them with thin wire.

Fill the plaster with water until the consistency of thick sour cream is formed. Pour the mixture into the flowerpot and place the trunk of our future tree in the center.


Topiary made from knitting threads
If you knit, then, undoubtedly, after each of your creations you have extra threads. Diversify your creative abilities, thereby surprising your loved ones with a new hobby - topiary made from knitting threads.
The technology for making topiary in this case remains the same, but the appearance will differ in many ways. To create an original topiary, you can use multi-colored balls of thread or crochet original flowers from them, which will decorate the top of your tree of happiness.


 Here is an example of what flowers you can knit yourself. Naturally, you shouldn’t follow an example, because, as if you are a needlewoman, you can come up with new creations on your own. These can be flowers, cones, fruits, vegetables, and even various figures of moths, birds, etc.


Topiary with photographs inside
There is no doubt that a gift in the form of a tree of happiness with a photo inside will not go unnoticed and will evoke a lot of positive emotions in the hero of the occasion.
It’s not difficult to make, you just need to choose the right photo and come up with the shape of the tree crown. This topiary looks original for Valentine's Day.
You can choose a heart shape and put your photo in the middle. Intrigued? Naturally. Then nothing can stop you from making such an original proposal with your own hands.

 Topiary from improvised means
Such a popular interior decoration as topiary, it turns out, can be made from the most ordinary available materials. You can use coffee beans, pasta, and even ordinary colored paper as decoration. By the way, the latest version is ideal for those mothers who want to teach their child to art. Your child will take great pleasure in making it.
To make it you will need the following materials:
- Colored paper
- Wooden stick
- Baby puree jar
- Masking tape
- PVA glue
- Figured hole punch in the shape of a flower
If you don’t have such a hole punch in your house, then you can involve your child in the process of cutting out flowers.
So, crumple up a ball from newspapers and wrap it with masking tape. Lubricate the end of a wooden stick with PVA glue or Moment and immediately insert it into the ball, after making a hole in it with scissors.  Using a flower hole punch, we cut out flowers from multi-colored paper - you will need about 100 pieces, depending on the size of the ball and the flowers themselves.
 Finally, let's decorate our topiary with a beautiful bow.
Felt topiary, photo
Material such as felt looks very beautiful on the tree of happiness - topiary. The result is not only a somewhat unusual tree, but also an appetizing one. Some of its types strongly resemble the large Chupa Chups candy that children love to enjoy.
You can also involve children in this process, because this material is easy to work with. But as a result you can get the most beautiful creations. A little flight of children's imagination and a gift for the birthday of classmates, ready.


Topiary for beginners with satin ribbons
Who among us in childhood did not try to make roses from satin ribbons? Probably everyone. But none of us could even imagine that several of these roses would help create an amazingly beautiful topiary.
So, satin ribbons, a little design tricks and topiary can really decorate any celebration, become a great gift for a birthday or Valentine's Day, serve as a decoration on a wedding table, etc. Are you inspired? Then let's get started.
Naturally, to create a topiary from satin ribbons, first of all you need to stock up on satin ribbons - choose their color to your liking, depending on the nature of the holiday. 
- Just don’t forget to secure each of them with hot glue from the bottom. Now let's start making topiary. We will usually need a pot, a stick, and a ball
- We do exactly the same as in previous cases. We assemble a structure from a ball and the trunk of the future tree of happiness and begin to carefully and tightly place the prepared roses on the ball, fixing them with a drop of hot glue
- The ball is ready, all that remains is to add a few design touches and... Here is the result. Beautiful, isn't it? With such a gift you can immediately go to your beloved girl


Flying topiary
And for dessert, we suggest you make a slightly unusual topiary - a flying one. It sounds unusual, but it looks interesting. I have no doubt that you are simply intrigued by this idea and are in a hurry to find out how you can make such an original topiary with your own hands.
Does it look like a figure in zero gravity? You have a lot of questions now – I’m sure of that. But, you can really do this yourself, and don’t hesitate.
 To make a “Floating Cup of Coffee” you will need to prepare:
- Pliers,
- glue gun,
- Cup,
- Saucer,
- Arabica coffee,
- Aluminum fork.
You may be surprised to see the name aluminum fork in the component materials. Aluminum because it is easier to bend - we need to bend it with the letter “zyu”, that is, in the shape of a future waterfall.

- So, the fork was bent. Now we need to securely glue it with hot glue on one side to the saucer and the other to the cup. To be secure, secure the top with tape.
- Now we need polyethylene foam, which can be found in dish packaging. Cut it to the width of the future waterfall and glue it to the fork
- We select large coffee beans and begin to paste them onto the tape on both sides. Make sure there is no empty space left. Coffee beans can be glued in several layers


- Let the glue dry well and you can start decorating. Coffee beans can be coated with a layer of varnish. But in this case, the coffee will not release its aroma. So it's up to you. Decorate the cup with a beautiful bow, put cinnamon sticks on the saucer - in short, let your imagination run wild
- You already have the basis, and the decoration is in your hands. So you have already learned how to make beautiful topiaries with your own hands
Craft, offer your ideas and delight people close to you with new works of your creativity.
Video: Ribbon Topiary