I can't set up mobile internet. Proper internet setup on android
A modern Android smartphone is hard to imagine without access to the Internet. In this article, we will talk about how to turn on the Internet on an Android smartphone using mobile communications and Wi-Fi.
In order to enable mobile Internet on Android, you need to follow a few simple steps. First, you need to turn on the Mobile Data feature. To do this, open the Android settings and go to the "Data transfer" section.
In this section, you need to find the "Mobile data" function and turn it on. Also in this section there is a function "Traffic saving". It is better to turn it off, otherwise it may block Internet access for some applications in the background.

After that, you need to return to the main settings screen and go to advanced Internet settings. To do this, open the "More" section.


To enable the Internet, here you need to select the type of network: 2G, 3G or. Now, the 3G network works with almost all operators and in all countries. But, if your mobile operator supports 4G LTE, then it is better to choose this type of network. Because 4G LTE provides the fastest internet access speed. Also in the subsection "Mobile networks" there is a function "Internet roaming". If you want to enable Internet while roaming, then this function must also be activated.

In most cases, the above steps are enough to enable the Internet on an Android smartphone. But, if the Internet still does not work for you, then most likely you do not have access points (APN) configured. In order to configure them, you need to open the settings and go to the "More - Mobile networks - Access points (APN)" section.

Here you can select one of the Internet access points and change its settings. You can also add an access point here. There is a plus button for this. If you do not know what settings to specify, contact the technical support of your Internet provider.
How to connect to the Internet on Android via Wi-Fi
If you want to connect to the Internet on Android using a Wi-Fi connection, then everything is much simpler than when using mobile Internet. All you have to do is open your Android settings and go to the "Wi-Fi" section.


After that, a window will appear asking for a password. Enter the password for Wi-Fi and click on the "Connect" button.

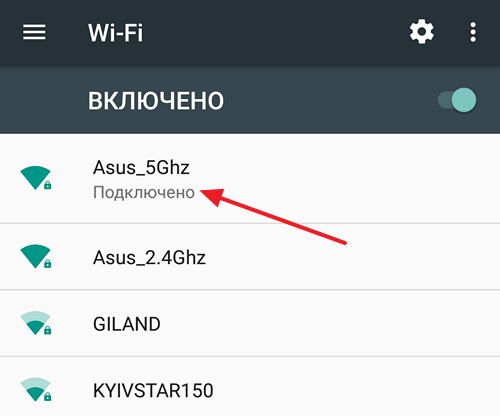
After entering the Android password, the smartphone will connect to the Internet via a wireless Wi-Fi network. At the same time, next to the selected Wi-Fi network, the inscription: “Connected” will appear.
If, after connecting to the Wi-Fi network, the Internet did not work, then most likely the problem is the lack of access to the Internet on the router or Wi-Fi access point.
Modern devices based on the Android operating system cannot fully work without an Internet connection. Therefore, novice users of mobile gadgets are often interested in how to connect the Internet on Android. If you are also interested in this question, then this material should help you.
Internet connection on Android via Wi-Fi wireless network
The easiest and most affordable way to connect to the Internet on an Android smartphone or tablet is a Wi-Fi wireless network. To do this, you need to open the Android settings and. Turning on Wi-Fi is done using a small switch, which is located to the right of the Wi-Fi settings section.
After the Wi-Fi switch is set to the “On” position, you need to open the Wi-Fi section. Here you will see a list of all available Wi-Fi networks. Networks protected with a password will be marked with a padlock icon. If the network is not secure, it will be marked with a simple Wi-Fi icon. Select the Wi-Fi network you need and click on its name.

After that, your Android device will try to connect to the Internet using this Wi-Fi network. If the network is not password protected, the connection will be made automatically. If the Wi-Fi network is protected, then you will see a window for entering a password. Enter the password in this window and click on the "Connect" button.

After that, your Android device will connect to the Wi-Fi wireless network.
Internet connection on Android using 3G
The second most popular way to connect to the Internet is 3G technology. , or more simply, mobile Internet, is an Internet connection through a mobile operator. Such a connection is available wherever there is a mobile connection, but often such Internet is paid separately and is much slower than Internet via Wi-Fi. Although there are always exceptions.
In order to connect to the Internet using 3G, you need to open the Android settings and go to the "More" or "More" section.


And open "3G Service".

In this section of settings, you need to enable 3G mode. In some cases, after turning on 3G, you still need to select one of the mobile operators from the list. 

The last step is to set up APN access points. To do this, we return to the "Mobile communications" section and open the "Access points (APN)" subsection.

APN settings depend on your mobile operator. Therefore, to obtain the correct settings, contact the technical support of your mobile operator.
I don’t know what kind of Internet does not work for you: mobile, 3g, Yota, MTS, Beeline, Tele2, Megafon, Kyivstar, Life or some other.
Also, I can’t determine what version of android you have: 7.0, 6.0, 5.1, 5.0, just like on which device the Internet stopped working - on the phone, on the Samsung Galaxy a3, asus, lenovo, sony xperia, zte, lg or on samsung tablet, oysters or irbis and so on.
I only know that you now have grief and joy - grief the Internet does not work in your android and joy - you still have access to the network to find solutions on what to do to fix the connection.
There are many reasons why, when the Internet is paid for, it does not work or works poorly, or rather slowly among users of smartphones, phones and tablets with Android OS.
Of course, I will focus only on the basic lack of Internet connection in the phone via a SIM card (SIM card) and Wi-Fi (wifi) with the android system.
The fact that the quality of coverage has a great impact on the speed and performance of the Internet, I think it is clear to everyone.
NOTE: if the Internet was and disappeared, then I recommend that you first reset the network settings. How - (this is not a hard reset and all your files will remain intact)
The most common reasons why the Internet stopped working on Android
The most common causes, at the same time, are the simplest, but in order to fix them, basic knowledge of the settings of a phone, smartphone or tablet will still be required. Here are 6 main reasons:
- The first is that if mobile Internet or 3G does not work, you can simply be out of coverage. What to do? Go to a place where the network will be available.
- The second is a zero or even negative balance in your account. What to do? Refill SIM card.
- Third - the "Data transfer" service is not connected. What to do? Contact the operator to connect.
- Fourth - the access point is incorrectly configured. What to do? The access point setting varies by provider. Contact him for setup data.
- Fifth - mobile Internet is disabled. What to do? Open "Settings" and select "Wireless networks", "More", or "Advanced" (depending on the version of android). Then "Mobile network" or "Mobile networks". In this section, check the box next to "Data transfer is enabled."
- Sixth - the android did not automatically register on the network. What to do? Restart your device manually
Does not work on android mobile internet or 3G through a bad APN
Let's start with the most common problem - APNs. For the Internet to work, the APN must be correctly configured in the phone.
For different operators (Yota, Mts, Beeline, Tele2, Megafon, Kyivstar, Life), these parameters are completely different.
The easiest way is to ask an ISP employee to set up an APN, but not everyone is ready to do this.
I don't know if this is mandatory, but it would be good for the worker to help the client.
Moreover, this is not a complex operation. However, if you are far away from the operator, you can call him or look at the settings on his website.
After updating in a smartphone or tablet, the android Internet stopped working - how to fix it
The very first thing you should always do if the Internet in your smartphone, tablet or Android phone is lost or stopped working is to turn it off and remove the battery for a few minutes.
The method seems naive - you can believe me or not, but several times it fixed my mobile Internet.
A more effective and at the same time not very desirable option is a factory reset. It is better to use it when nothing else helps. Who does not know.

The next reason why the Internet may not work is a virus that blocks your access to the network, or you yourself installed some malware.
In this case, a reset will also help. Just before that, be sure to check the SIM card in another phone.
You should also remember that the mobile Internet may not work if the smartphone fell to the floor or was hit against the wall - the times of the unbreakable Nokia 3310 have already passed and modern phones should be treated gently and respectfully.
Wifi not working on android
It happens that the phone cannot connect to a Wi-Fi network or it connects to Wi-Fi, but the Internet does not work. If you only have one network, this may be related to your router settings.
In the case of a home network, check the encryption settings in the router (if your smartphone does not detect the network, you can temporarily disable encryption).
Changing the 802.11 router settings might also help, configure the router from "a" to "b/g".
Unfortunately, not all routers interact correctly with specific phone models.
If your smartphone is not connected to any network, you can delete all saved WiFi networks. Click on the network and hold until the menu appears.

In general, the Internet on your smartphone should work with any modern router (which is currently on the market for sale).
To be honest, the last time I had a problem with the D-Link 524 router, but it is no longer produced.
It didn't work with any android device, at least not with stock settings.
Then the decision to create an open Wi-Fi network and setting up MAC address filtering helped me.
At the moment I'm using a "FRITZ 7490" router, which works great with any android device.
I dare say that the correct configuration of the router will allow an unhindered connection to the Internet.
Cases in which it is not compatible with smartphones or tablets are already rare and are often caused by a lack of knowledge about these devices.
Internet not working on android - airplane mode is on
Most Android users, especially beginners, do not understand that one simple action can turn off the Internet on your smartphone.
Therefore, make sure that the settings allow data transfer. Make sure you don't accidentally turn on Airplane Mode.

This mode is most often found on a wireless network and should always be disabled, unless of course you are really on an airplane, although now it seems that the Internet has already been allowed or is thinking of being allowed on airplanes.
The Internet on the phone is still not working - how to fix it
There is another way that can be taken into account if nothing else fixes the network.
It involves removing the battery from the phone while it is on. Then, when the battery is pulled out, hold the power (off) button for 30 seconds and release.
Insert the battery and turn on the phone. If this does not work, then there is nothing left but to reset the smartphone to factory settings.
That's probably all. Of course, the reasons are far from all, but in order not to waste your time, at the beginning of the recording I mentioned that I would only touch on the basic reasons.
To whom it was not possible to fix your Internet, write in the comments - we will solve the problem together. Good luck.
Probably, even 10 years ago we could not have thought that the Internet would become an integral part of our lives. But today, having bought ourselves a new one, the first thing we do is copy a notebook and figure out how to set up a network on Android. And if suddenly something does not work, we immediately begin to panic. For some, setting up the World Wide Web is easy, but there are those who need advice.
There are several ways to set up mobile Internet
There are easy ways to set up mobile and wireless access for Android gadgets, as well as use the worldwide network via a USB cable in the "Computer - Android" format and vice versa.
When you first use a SIM card in a new or re-flashed phone, in most cases the setup is automatic, but if this did not happen for any reason and access does not work, then you need to configure the gadget yourself. The easiest way is to order automatic settings from your network operator. From SMS from the operator, they are saved with one click, and the Internet will be connected in a few seconds.
If this option does not suit you, then you can set up Android manually, after asking the network operator to send them to you in a text message.
Setting up the network manually will not take you more than 5 minutes, you will not need anything other than a gadget, even a USB cable. For manual configuration, go through the "Menu" of the Android smartphone to "Settings" and in the "Wireless / Wireless networks" item, click "More". In the drop-down menu, select the item of interest to us "Mobile networks". Next, click "Access Points (APN)", after which a list of existing access points of mobile operators whose SIM cards were used in your gadget will appear on the screen. Next, choose from the list the desired mobile operator whose network services you will use. After that, just check the correctness of the existing settings with those sent to you by the operator. You may find a bug due to which the global web does not work.

If your phone does not have a list with access points, then press the "Menu" key and select "Create APN". After that, fill in the fields manually according to the data from the SMS with the settings. Be extremely careful, as the Internet does not work if at least one digit is entered incorrectly.
Setting up Wi-Fi on Android
Now that we figured it out, let's get down to setting up Wi-Fi, because it doesn't always make sense to pay for mobile traffic, especially when you are at home or near a free access point.
Usually, connecting to a Wi-Fi network occurs automatically as soon as you activate such a function in your device. However, sometimes there are connection problems. Why is this happening? It happens that the web does not work if you are in the coverage area of several access points at once, then the phone or tablet may get confused and not connect to any of them. But in this case, there is no need to panic, you just need to help the phone set up Wi-Fi.
So, you just need to select the desired access point, your home router or public network. But how to do that? Go through the “Menu” of the phone to “Settings”, and in the “Wireless / Wireless Networks” item, click on Wi-Fi and simply activate it with one swipe of your finger by selecting the “On” button. After that, a list of available wireless networks will immediately appear. But if the network is password-protected, then a padlock will be displayed next to its name and Wi-Fi icon.
Select the network you need by name and click on it. Next, enter your password and click Connect.

If Wi-Fi is on but there is no internet
Connection to a network without a lock is carried out in the same way, but you do not need to enter a password. However, here, too, difficulties can arise. You may have already wondered: “Why is the Wi-Fi connected, but?”. The reasons are different, for example, the connection may be hidden in the parameters of your router or the DHCP function is turned off, in which case you will have to configure the network manually. How to do it? Activate Wi-Fi according to the above scheme. Next, select "Add Network". But in different versions of Android, this menu can be located in different places: under the list of available Wi-Fi networks or at the top of the screen in the form of three dots near the magnifying glass icon.
After you have selected “Add a network” on your Android, enter its name, then specify the type of security and do not forget, it must match the one specified in the router settings. Now save the settings, restart your phone or tablet and use the wifi, it's already working.
But if the DHCP function is disabled on your router, then when you add a new connection, check the box "Show advanced options". Next, you will need to register the DNS server, IP address, IP parameters and other data. In order for some settings to become available, in the line "IP Settings" you need to select the value "Static". This Android setup will take you about 10 minutes. If Wi-Fi does not work, restart the router and gadget.

To specify the IP address, gateway and DNS server addresses yourself, you need to check the box "Advanced"
How to use your smartphone as a modem for your PC using USB
Now consider another important point: if you don’t have the Internet at home or you are on the road, then it would be useful to know how to transfer the Internet from a computer to Android via USB and set up your phone as a modem.
To use mobile Internet through a PC, you first need to configure it. To do this, activate this function in your laptop. Open "Network Connections" and check the box next to "Allow other network users to connect to the Internet from this computer". Now download Android Debug Bridge (Android Debug Bridge) to your computer and unzip the files. It is one of the most user-friendly android control software.
After that, enable USB debugging mode on your phone. Enter through the "Menu" in the "Settings", find the item "Developer Options" and check the box next to "USB Debugging".

Enable "USB Debugging" on your phone
Now connect your phone or other mobile device to your PC using a USB cable. Next, open the folder with the unzipped Android Debug Bridge program and find the AndroidTool.exe file, run it. A window will appear on the computer screen in which you need to click Refresh, and from the drop-down list called Select DNS to use, select DNS and click Connect. A black window with a scrolling line and the text Connection Done will immediately appear on the screen, which means that the Internet is already connected.
Please note that some gadgets then ask you to grant permissions for the user. In this case, just click "Allow" in response to the message that appears on the smartphone screen. Your phone is now connected as a modem. Important: Do not unplug or loosen the USB cable while using the network and setting it up. Why can't this be done? Due to poor connection, the Internet often fails or does not work at all.
How to use USB Internet PC on your smartphone
And finally, let's look at how to connect the Internet on Android via a computer via USB. There is nothing complicated in this, the already familiar Android Debug Bridge (Android Debug Bridge) will help us set up the network. Through it, it is very easy not only to distribute, but also to receive the Internet.
But do not rush to launch the application, first on your PC in the Internet connection settings, in the "Access" tab, allow all users to connect to the Internet on your computer.

Open Internet Sharing on your computer
Now take the USB, with it you need to connect the phone to the PC, but do not forget that when you do this, you must turn off Wi-Fi connections and data transfer. Next, follow the instructions described in the previous paragraph, only select the DNS server that your computer uses from the list. Then, in the program, click the Show Android Interface button, the application will offer to install USB Tunnel on your phone or other used gadget, approve this proposal, and after installation, give the program superuser rights. Now click the Connect button in the USB Tunnel program on the PC. That's all, you have the Internet connected and working.
As you can see, it’s not at all difficult to connect a network on Android, you don’t need to be a big computer expert to set up your smartphone, tablet and PC on your own. All you need is some patience, gadget, PC and USB. So set up the Internet faster and read other useful tips about Android on our website.
The setup process may vary depending on the features of the services provided. Generally, there are two types of tuning: automatic and manual. Let us consider in more detail the instructions for connecting the Internet for most popular mobile operators.
Automatic settings
The easiest way to access the internet on Android through a mobile operator - order the automatic configuration service. It is free and does not depend on the operator and on the connected tariff. All the user needs to do is send a request and receive the settings in response. Automatic ordering of special settings will determine the model of the device used and send all the settings as an SMS message.
If, after receiving automatic configuration, the smartphone cannot access the Internet, make sure that:
- You have connected the required tariff;
- There is money on the mobile account;
- The sent settings have been set;
- The phone has been rebooted.
Some Android device models may not support the auto-configuration feature for operators MTS, Life, Beeline and others, so you need to create and connect an access point yourself.
Notice! Most users get automatic settings after the first connection of the SIM card. Check your incoming SMS messages to make sure that the parameters ready for installation have arrived.
To order add-ons from the operator, you need to go to the official website of the company and fill in the required fields, then send a message to smartphone or you can use short numbers:
- MTS - http://www.mts.ua/ru/online-services/settings#settings-auto . To order MTS 3g, also use this site, but remember that you first need to connect a suitable tariff plan so that in the future all money for using high-speed Internet will not be debited from your mobile account;

- Life - dial and execute the command *123*6# or send a standard message with the text INTERNET to number 123;
- Beeline dial the command *110*181# and wait for the settings;
- Megafon - send an SMS with a unit to the short number 5049;
Manual connection setup of the MTS operator
MTS is a major mobile operator that provides its services in Russia, Belarus and Ukraine. If your Android device for some reason cannot load the automatic operator settings, you need to manually configure the network settings.
To do this, follow the instructions below:
- Go to the main menu on android;
- Open the settings window and select the "Wireless Network" tab in it;

- Connect the mobile internet function. To do this, check the selected area (Figure 2). Please note that if you do not activate this option, further settings will not allow you to connect to the network;

- Now select the mobile networks window. In the proposed list, find the profile "MTS Internet". If there is no such list item, you must create it yourself. To do this, click on the item "create an APN access point";
- To create an access point manually, you need to enter the following parameters. Name (Name) - MTS, Login and password - mts, access point address APN - internet.mts.ru. The remaining parameters must be left as standard, as shown in the figure below;
Some smartphone models in the authentication type area may contain the value "not specified" by default. In order for the connection to the network to be stable, you must set the value to "No".
To manually configure the Internet for Beeline and Megafon, you need to create a similar access point, you can find out its address by contacting the operator.
Manual setup of the Life operator connection
Life is one of the largest mobile operators in Ukraine.
To set up and connect your Android smartphone to the Internet manually, follow the instructions:
- Go to the main menu of your smartphone;

- Then turn on the settings window and select Connections. Depending on the version of the operating system, this menu item may be called "Mobile communications", "Mobile network" or "Connections". Go to this window and select the "Other networks" option, as shown in the figure below;

- Next, click on Mobile networks;

- Check the checkbox to enable mobile data and then open the hotspot window;

- Press the key to create a new hotspot;
- Then scroll down the window and find two items: to configure the type of access point and the type of verification of its authentication;

- In the authentication window, set the value to PAP;

- In the window for changing the type of access point, write the default value in the text and click on the confirmation button;
- Now the newly created one will be displayed in the access point menu. Select her;
- Reboot your phone. After turning it back on, check if the data transfer mode is enabled in the network settings. Now you can start using the Internet.
Connecting 3G connection
If you want to use 3G Internet connection, you need to configure it on your smartphone. However, first you need to choose the MTS 3g tariff or from other companies, which is focused on high traffic consumption. Otherwise, the charge for using the Internet may be several times higher than the cost of regular 2G.
The first thing you need to do to connect 3g MTS or Life 3g is to get automatic settings or create an access point yourself.
- Click on the network mode selection panel;
- Check box GSM/WCDMA$
- Close settings and restart your phone. Now a high-speed connection will appear on your smartphone that is connected to 3g MTS or 3g Life.

Some versions of Android have a different menu, in order to connect 3g MTS, you need to disable the “use only 2G” networks item in the settings, as shown in the figure below:

Internet access
To access the Internet you need a browser. Before turning it on, make sure that the data transfer mode from the SIM card you need is enabled in the settings. Go to the menu of your device and find the standard browser there. You can also download a third-party browser from the official app store.
After installing the desired browser, turn it on and go to any of the sites. If there is no connection to the Internet, you need to create an access point again or call the operator back. Perhaps your smartphone or tablet model has a special mobile Internet settings system.
Thematic video: