Can you install laminate flooring yourself? How to lay laminate flooring correctly - along or across: tips for choosing the direction, where to start laying from and the step-by-step installation process
We will send the material to you by e-mail
The housing issue remains relevant for many. Home repair and the problems associated with it worry everyone who decides to carry out construction work on their own. Today we will discuss some of the subtleties of laying laminate flooring, answer the question “how to lay laminate flooring correctly”, show you how to avoid the most common mistakes and reveal little professional secrets.
Coating comes in different types and colors.
Laminate board is a very popular and common flooring material today. The collective name "laminate" (derived from the Latin "layered") combines the types of fiberboard used for finishing floors.
Today, the industry produces a wide variety of flooring. The right choice of material will allow you to forget about the floors for a long time and not worry about their condition. Let us briefly dwell on the layered structure of the floor in order to competently choose the most suitable material for us. The laminate has several layers, the top is a protective film that simultaneously carries a decorative function.
In addition, this film has different wear resistance. It is this characteristic that parquet is divided into classes. And, when we mentioned the right choice, it was the wear of the coating that was meant. Surely, every person who has begun repairs wants to do the job efficiently and for a long time. To do this, you need to use high-quality material, and not Chinese fakes. A good material should have certain characteristics corresponding to its class.

Floor classification is carried out in accordance with the European standard EN13329. He distinguishes two groups of use:
- home - code 2;
a. wear class 1
b. wear class 2
in. wear class 3
wear class 4
- commercial - code 3.
a. wear class 1 up to 4th
This is reflected in the coding of the material, the 1st digit is the area of application, and the 2nd is the abrasion class. Thus, a board marked 21 or 22 is perfect for residential apartments, and class 33-34 is needed for public spaces. It is important to know this so that freshly laid floors do not turn into a worn board in six months.
Helpful advice! Before laying, it is not recommended to unpack the material for about 2-3 days, let the material rest at room temperature and humidity. Packs should not be opened, let them be in their original packaging. This will give good adaptation to local conditions.

Which one is better is hard to say. It depends on the conditions in which the coating is laid: humidity, subfloor (concrete or board), floor horizontalness, etc. It is considered optimal to listen to the recommendations of the seller of the original floor material, because a substrate with a specific set of properties is selected for a specific laminated board. It is important that the substrate perform the main functions:
- bactericidal;
- mold resistance;
- inedible for insects.

Related article:
When laying the underlay, it is important that its seams do not coincide with the seams of the board. It is better to lay the substrate sheet material in a checkerboard pattern, and fix it with masking tape. The substrate in the roll must be rolled out with an overlap on the walls, and the joints of the canvas must also be fastened with adhesive tape.
Important! Overlapped seams will create an uneven surface that will damage the coating.
In order not to make mistakes, watch the do-it-yourself laminate installation video below.
How to lay a laminate with your own hands: video process
How to lay a laminate with your own hands straight flooring
You can start laying laminated panels from any corner of the room, and preferably continue from the window to the door. First you need to calculate the required number of boards, for this you need to calculate the size of the extreme slats at opposite ends of the room, with a slat width of at least 50 mm. Start laying with a gap between the wall and the first plank of 10 mm, so that the indent does not “leave”, it is necessary to install a spacer. Below is a handy laminate calculator, which will allow you to calculate the required amount of this material for different laying methods:
In this two-part review, we'll show you how you can install laminate flooring alone. The instructions for the laminate indicate the installation method, but it is almost always designed for two people, since the row in this case has a length of 4–5 m and will fall apart when laid by one person. We will show you an easy way, using which you can lay the laminate alone. In the second part of the review, we will discuss some of the details of this process.
Part 1

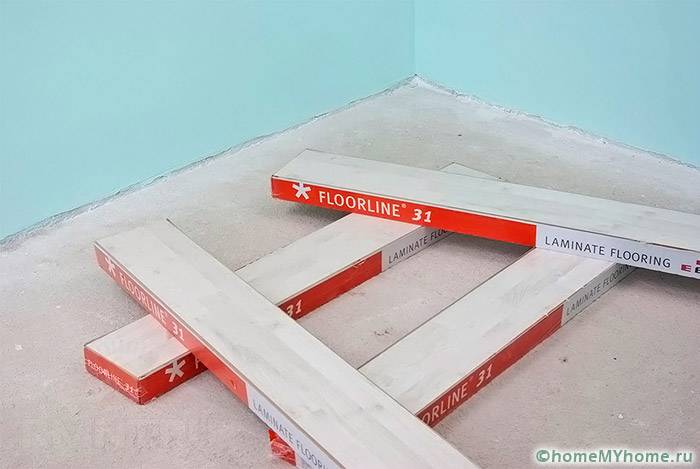
Here is our room of about 17 m² in which we will lay the laminate. The laminate is ordinary, inexpensive, class 33, has standard dimensions, its thickness is 8 mm. For installation you will need the following tools:

This set consists of a corner, a pencil, a tape measure, a clerical knife and a tool for sawing laminate - a jigsaw or saw. If there is neither one nor the other, you can use a hacksaw. The first thing to do in this case is to check the floor for large dips and bumps. The floor must be more or less even, otherwise the laminate in such places may burn through and the lock will disperse. After we have done this, we spread the substrate.

We do not line the entire substrate, we first roll out one row, lay the laminate to the edge, then roll out the next row.

Laying is done from left to right, that is, we lay out several boards, starting from the left side. We lay the first row and see what the rest is.

It is undesirable that the remainder is less than 30 cm. If the last piece is too small, then we cut the first one and make sure that such short pieces are not obtained anywhere. The laminate board has two different sides. We lay the laminate with a wide lock on ourselves:

Here is the other side of the board:

We begin to collect the first row. To our left is the first board, we raise the second, connect it, make sure that the joint matches in width, then we fasten it:


We do the same with the next board. This results in a line like this:

We retreat 8–10 mm:

Cut off this part, from which we will make several linings:

We do markup. To do this, we put the laminate sheet with a wide lock towards us, then turn it over, rest against the wall and mark about 8 mm less:


We take a square and make a mark:

We always mark and saw from the wrong side, because in this case, when sawing with a jigsaw or a circular saw, chips are obtained on the wrong side, and not on the front side. When the board falls into place, the cut will be on the far right side of us, on the left we will connect the joint.

We sawed this part, made linings from scraps. We put them on the joints:


Here we put the lining at the beginning and at the end. Then we join the extreme board.

Our laminate is even, it has no chamfer. If the laminate has chamfers - and they may even differ in color - then you need to lay it in accordance with the pattern, that is, shift the boards by half or a third, as you like. In our case, the joints are not visible, so we can neglect this.

We begin to lay out the second row. The length of the wall turned out to be such that an offset of half the board was obtained. This is rare, more often cuts are 40-50 cm long, and when such a cut remains, we start the next row with it. Here we started with a whole board, but since there is no trimming, we will start the second row with half the board.

Paste our cut:

Take the whole board, paste:

The joints look like this:

Raise the board and fasten the far edge:

Then we fasten the left edge. Everything - the laminate is connected. Here is a transverse joint, here is a longitudinal one - nothing fell out anywhere:

This is how it looks like:


Then the same on the other side.

There is such garbage on the laminate, it must be removed:

Finishing up the second row. Insert the last piece in the same way:


We put the lining, raise the board a little:

We have two rows of laminate flooring installed. We begin to lay the next row. We put the lining and put the following board:

Up close, the process looks like this:

Raise the board, insert, snap.

One movement - and that's it, the laminate is in place. Now we need to shake it, here and at the beginning:

We continue installation.

Sometimes the laminate is slightly curved, and you can’t fasten it with your hands. After we inserted this edge, the laminate protrudes a little.


In this case, we take a piece of laminate, insert it with a lock into this lock:

The cutting width must be made 20 centimeters so as not to break the edge. We insert the cut and feed it with a hammer, after which it falls into place. First, we do the edge in this way, then the middle, and in this way the board must be pierced several times along the entire length.

All this can be done alone, and in this way you can collect rows of any length, even up to 6-8 meters. You don't have to put them all in.
Part 2
In the first part of this review, we started talking about how you can lay a laminate alone and managed to lay three rows of laminate. In the second part we will continue our story. Here we will touch on some of the nuances of this process: we will talk about how to lay the laminate in the corners of the doorway and under the radiator, what needs to be done in cases where the lock is tight, and we will also demonstrate the advantages of this technology to all those who doubt it.
Laying rows of laminate

So, we continue to lay the laminate. Let's move on to the next row. In this case, the edge of the board is inserted, and there is a small gap in the middle:


To avoid this gap here, a piece of laminate must be shaken by hand:

You don't need to put in a lot of effort. Everything, the laminate is buttoned up.

Laying down the next piece.


If the board turned out to be raised, it can be drowned by shaking it with your hands:


The laminate is recessed, there are no gaps, the locks are fastened. If you find it difficult to drive in pieces of laminate with your hand, you can do this: guide a piece of laminate and knock it out with a rubber mallet.
In our case, this is not required - the laminate comes in easily.

We usually make the substrate end-to-end and glue it with adhesive tape. In this case, you don’t need to do this - the substrate is branded, here you need to get this film and cover the next row with it:

What to do with tight locks
What should be done if the lock is tight? Usually tight locks are on a thicker laminate with a thickness of 10–12 mm.

It is difficult to insert such a board by hand. To do this, we use a piece of laminate, the lock of which is joined to this edge of the board:

The length of the piece must be at least 20 cm so as not to break the edge. This is how we insert it and nail it in:

Laminate flooring in the corner of a doorway
I would like to draw attention to the following point. Here is the doorway:

The instructions for laying the laminate indicate: make a gap 10 mm wide from the wall:

So, in the corner we will also have a gap 10 mm wide:

But we never do this and we don’t advise you, because the door trim usually does not have a thickness of 10 mm, it can be 8 mm, it can be 6 mm, and if it is semicircular, then its edge generally has a thickness of 2 mm. If you make a gap of 10 mm, and you have a cashout, you get a gap here:

We always round this corner on the laminate a little, because if you cut it with a corner, you get a hole. We make a gap of 3, maximum 4 mm from the area where the cashing will be located:

The reliability of this technology

Also, nothing has been cut or sawn here, this is a laminate from the package:

Paste and snap this part:

Then we disassemble and check the locks:

Nothing broke anywhere.
What to do if the battery interferes
Now let's talk about what to do in cases where the battery interferes. Here the laminate may not fasten:

In this case, you need to push the bar in a lateral movement, as shown in the following figure:

This must be done very carefully so as not to break the lock. So the bar slides in and snaps into place.

How to insert the last row

For this operation, you can use a nail puller. They press the laminate in cases where the lock is tight and the planks are difficult to join.


Lay the last bar like this:

In order not to spoil the wallpaper, you can put something under the nail puller. We move the bar into place.

This is what the finished room looks like:

Now, using this technology, you can lay the laminate alone. Good luck!
All rights to the video belong to: Roman Zaitsev
Laminate is one of the most popular floor coverings for laying in an apartment. It is difficult to lay it yourself at home, but it is quite possible. Putting it yourself is quite realistic, and the result will be an environmentally friendly, aesthetic, practical, durable floor. Naturally, not everyone can turn to construction teams that professionally arrange floors. How to properly and quickly lay with your own hands will be described below.
There are several technologies for laying out a laminate board. Each of them has positive aspects during operation and its own nuances when mounted on a floor surface.
The most requested methods:
- Traditional;
- Diagonal;
- Herringbone.

Herringbone layout is very complex and requires special skills and labor, so it is usually preferred to lay a laminate floor in a traditional way or diagonally. Laying diagonally makes it possible to visually increase the footage of the room, but this method will require a large number of panels, since a lot of building material will be trimmed. In the traditional way, the boards are laid parallel to the wall away from the window. This scheme makes it possible to visually hide the joints.
It is forbidden to lay the laminate across the window - then the lighting, falling at an angle to the docking points, will focus on them.
With the diagonal method, the lamellas are laid at an angle of 45ᵒ with respect to the wall. In this case, the light from the window will not affect the visual perception in any way - the docking points will be invisible. If we talk about the types of board connections, then glue and lock connections are popular among craftsmen. The advantages of a lock connection are ease of assembly, speed of installation. In this case, the laminate has grooves and tenons that fit into each other, creating a lock. There are 2 types of laminate board locks used in practice: “click” and “lock”. The advantages of the adhesive assembly method are that it makes the floors more moisture resistant, since the risk of water penetration into the grooves and the gap is eliminated. In this case, it becomes more difficult to assemble the floor, but this is advantageous in a number of rooms, especially in the kitchen space, where the likelihood of water spillage is quite high.
Laminate layout: material calculation
Before laying the laminate, it is necessary to calculate how much it will be required for the room. It is necessary to lay out so that you do not have to buy additional boards. To do this, first of all, you need to measure the area of \u200b\u200bthe room, taking into account each ledge. It is necessary to take into account the expansion joints, understanding that there should not be a tightly fitting laminate board on each side of the vertical surface (at a distance of 1.5 cm from it). Further calculation will require knowledge of the dimensions of the laminate. The area of \u200b\u200bthe room must be divided by the area of \u200b\u200bthe lamella, and the number of paintings that need to be bought will come out.
It is important to note that the resulting numbers should always be rounded up.

The required number of panels depends on the installation technology that is selected. There are usually 8 boards in a pack. So, we divide the number of canvases required by the number of panels in the package, we get the number of packages that will be required. This calculation is correct if the home master wants to assemble the floor in the traditional way.
In this case, you can get a surface as a result:
- Flat;
- durable;
- Durable.
If the master wants to make the floor on his own and prefers a diagonal installation method, then the calculated amount of the necessary material must be boldly increased by 20%. It is best to purchase a laminate board for any chosen method with a margin, since during operation there is a risk of damaging the lamellae. A consultant from a specialized store will help you choose.
Laminate Laying Scheme: Tools and Materials
A person who is going to lay a laminate should take care to prepare the necessary tools so as not to be distracted from work, and to lay the board himself without missteps.
You should prepare:
- Electric jigsaw for cutting boards;
- Wedges that will keep the expansion joint between the vertical surfaces and the laminate board;
- Clamp for mounting end parts;
- Construction roulette;
- Scissors;
- Simple pencil;
- Scotch;
- mallet;
- Wood block.

Naturally, a laminate board and substrate (thermal and vapor barrier), as well as a water-repellent sealant, must be purchased. It should be noted that if we put the material on such a coating as linoleum available in the room, then it is not necessary to arrange the substrate, linoleum perfectly copes with this role.
Sealant is needed in order to properly join the panels.
You can choose a tool and finishing material on your own or by contacting professionals. If you turn to a professional, then you can not settle the conflict in a dispute between households, an experienced craftsman will select the exact amount of material, tell you how to lay out the panels correctly.
Preparation and how to lay the laminate
Before starting the repair, you need to let the building material mature in the room at room temperature, this is always written in the instructions. The rules state that the material should be stored at a temperature of at least 18 ᵒС and a relative humidity of not more than 70%. Installation work assumes that it lies on a flat base.
Before installing the plates, you need to level the base, and if necessary, then additionally:
- Putty potholes;
- Carry out grinding of irregularities and bulges;
- Stitch the seams.
If there is a wooden floor, it is leveled with a grinder. Laminate is placed on tiles and linoleum without special preparation of the coating, but only when the tile is without chips and there are no cuts on the linoleum.

Leveling options include the use of a self-leveling screed or screed.
If the coating is damaged, it will be mandatory to remove it and prepare the surface. The concrete base is primed to eliminate dust. Before installation, using the building level, the horizontalness of the surface is checked.
Smooth laminate on the floor: how to properly lay the substrate
On the base, which is prepared, the substrate should be laid out. It's easy to do it yourself. The size of the substrate should be the same as the size of the floor surface (we lay it everywhere and under the battery). Lay the material without overlap, end-to-end, it is not necessary to deviate from the corner. If the material is in sheets, then it is laid with an offset, as they lay bricks in the walls. The docking points are fastened with adhesive tape so that it does not move out. It is necessary to cover the entire floor carefully and then you can proceed with the installation of the boards.
Substrate:
- Required for final leveling of the floor for the installation of plates;
- Acts as a heat insulator;
- Serves as soundproofing.

If the master preferred an adhesive joint, then a sealant should be applied before laying on the locks. If the lamella has “lock” locks, then each panel is connected separately, and the joint is made with the adjacent board and the row of boards on top.
If the connection is “click”, then the plates are primarily fastened at the ends, and then row by row.
Incorrect laying can cause displacement to occur. The packages come with an explanation of the work, it is recommended to study it. The online calculator program will help you calculate how much material you need for installation.
The traditional way: how to lay a laminate yourself
This method is the easiest and it is possible to perform it yourself without problems. The step-by-step instructions for installing a laminate board say that laying should start from the wall and perpendicular to the window.
Installation according to traditional technology is carried out as follows:
- The first row must be assembled tightly to the wall, without forgetting about the compensation gap of 1.5 cm. In order for the gap to remain unchanged, wedges made of wood are used. In this case, the tiles are laid so that the grooves are located towards a vertical surface.
- Next, it is necessary to lay the panels in the first row - the second board is attached to the first arranged lamella from the end side. Immediately use a level to level the slats so that they are perfectly straight. Boards should be placed in a straight line, strictly perpendicular to the window opening, to the opposite wall. We don't change sides.
- The last board fits perfectly into the size of the wall, and it needs to be cut, so initially you need to measure the distance to the vertical surface from the already arranged canvas along the floor, taking into account the gap. Then you need to apply the markup, and cut off the excess with a jigsaw.
- The second row is also mounted. The beginning of installation can be carried out from an already cut piece of slab to save building materials. The spikes are arranged in grooves and snap into place.
- After mounting the row, the boards are arranged closely to each other - for this you should use a mallet and a bar. The bar is attached to the board, and they knock on it with a wooden hammer - then the lock closes tightly, and the gaps between the plates will not be visible. So row after row is laid out. The latter may not stand up entirely, then you should cut off the excess and finish the installation.

The traditional method is not difficult, but laying it out with a pattern, or, for example, writing a word or phrase, is difficult. Also, if checkerboard masonry is used, problems may arise. If there is no experience, as the school of life shows, it is better to start with a simple one, drawing requires perseverance and experience.
Laying diagonally: how to assemble laminate
Diagonal technology is easy to perform. The first board is arranged from the far corner of the room. For the orientation of the panels and their correct marking, you will need a square with sides of 45ᵒ. Having cut the board, it is necessary to put wedges 1.5 cm in size to the walls, and place the lamella in the corner.
Nuances:
- The first row includes 1 board.
- The second row already consists of 2 boards.
- It is important that the ends of the elements fall on the central part of the first board.
Having measured the length of the panels, it is necessary to cut again the corners at 45ᵒ - they will be adjacent to the vertical surface. Rows are connected to each other. In order for the floor to look aesthetically pleasing, it is important that there is a distance of 200-400 mm between the ends of the panels of adjacent rows. So row after row is arranged, not forgetting to strengthen the rows of material with a mallet in order to make the gaps less noticeable and eliminate the gaps.

When mounted diagonally, laminate boards are laid at an angle of 30-45°.
Installation of a laminate board is not difficult, it is quite possible to do it yourself, following the instructions, the whole process will take no more than 1 day. The deck board is difficult to install, requires the use of glue, so it is better to start with a simple laminate.
In which direction is it better to lay the laminate
Where and in what direction to lay the laminate? The direction of installation of the laminate of a private house should be oriented to the source of daylight or artificial light in a room where there is no window (corridor room, hallway or storage room). This is due to the fact that natural or artificial light, falling on the floor surface, laid out perpendicularly, illuminates the joints of the panels, and the floor does not look aesthetically pleasing.
All joints of the boards will be viewed, so the answer to the question of how to properly lay the laminate, along or across, will be this - the lamellas should be arranged parallel to the light source in the room. We can make an unambiguous conclusion - the installation of the laminate along or across depends on where the light source is located, so that the joints between the boards are not conspicuous, and the finish coat looks stylish and beautiful. If the boards are very dark, they can be lightened using special formulations.
Proper laying of laminate with your own hands: step by step instructions (video)
So, as it became clear from the article, laying a laminate board is quite realistic, the main thing is to follow the instructions and take your time, then everything will definitely work out.
In this article, we will tell you in detail how to lay laminate flooring with detailed photo instructions. Having seen the laying process with your own eyes, you can easily complete this work.
Preparing the foundation
So let's start, first of all, check how even the base is (if the base is not even, then voids form under the laminate, and when you press it, it will bend and creak, and eventually break through).
If there is an old wooden floor or concrete is simply poured, then the first step is to make sure that its surface is even. To do this, we use the usual building level. Permissible differences (pits) of 1-3 mm. over a length of 2 meters.
The wooden floor is easy to fix by making a dry screed -1 cement 3 sand, mix (WITHOUT WATER), pour a thin layer on the wooden floor and level with the rule.

On top of the stele, we glue and twist the YUSB plywood.

Or tamp with a special rammer for a semi-dry screed (for this, when preparing the mortar, you will need to add 10-20% of water and knead in a concrete mixer to obtain a wet cement-sand mortar.

If your concrete floor is simply flooded, then you need to set up beacons and make a finishing screed.

Substrate for laminate
We lay the substrate on the finished base (usually foamed polyethylene or cork is used). After laying, we glue them with adhesive tape so that when installing the laminate, the substrate does not move apart.

Starting to install laminate
On top of the prepared base, the first row of panels should be laid (starting from the corner). We take a piece of laminate and cut into squares 5x5 cm, they will serve as spacers, since it is impossible to put a laminate butt against the wall.

How to properly connect the laminate video:
Docking of panels is carried out end to end, while the gap in relation to the wall should be controlled.
Be sure to remember that laying laminate over a wooden floor is done at an angle of 90 ° to the boards!
When laying the next row, it is necessary to ensure that the end seams between the panels in the second row and the end seams in the first row do not match, so that the laminate locks do not break during operation.

To perform the steps described above, you can use the panel fragment left over from trimming the first row. If its length is more than 20 cm, then use to start a new row.
However, if you want to make the offset as accurate and aesthetic as possible, then you will have to trim the new board by approximately one third (this principle is called "offset by a third of the board").
The assembly of the second row is carried out in the same way as the first.

When joining the rows, it may be necessary to knock out the locks with a hammer and a special safety bar (any wooden block or a piece of laminate, insert the lamellas into the lock and knock them out).
When the second row is completed, by analogy, assemble the entire coating, while simultaneously monitoring the correct installation and observing the gaps from the laminate panels to the walls (5-10mm).
The last row of panels, most likely, will have to be sawn along the laminate panel, the photo shows how to mark the last row of laminate panels, put the laminate on the penultimate ripple and mark as shown below.

Try to perform these steps with care, however, you should not give too much importance to this, since the cut line will be hidden by the plinth.
After laying the flooring, remove the wedges that separated the laminate from the wall and install the skirting boards.
How to lay laminate flooring on wood floor video
The wooden floor under the laminate can be leveled with plywood. How this is done is shown in the video below.
That's all! If you use the useful recommendations given in this material, then when asked “how to lay a laminate on a wooden floor?” you will feel confident, and will not fall into a stupor.
Video: How to lay a laminate correctly: mistakes and basic rules
In addition, after you have read the above, you are quite capable of laying laminate on a wooden floor on your own!
Installation of finishing laminated coatings often raises questions even among experienced craftsmen. What are the criteria for choosing flooring material? Is a bevel really necessary? Where to start laying - from the window or along the length of the wall? The answers to these and other styling questions can be found below.
When laminated parquet appeared on the Russian market, well-known European manufacturers such as Berry, HDM, Tarkett and others first of all began to order special brochures in huge quantities. They provided complete information on the product: production features, selection criteria, plus the best options for different rooms, styling tricks, etc. And now in each pack you can find an insert (as in the photo below) with a completely understandable, but, unfortunately, shortened instruction for installing the floor material.

Installation instructions on package insert.
The first thing you need to pay attention to when choosing a laminate is the wear resistance class of the coating. Namely - the strength of the upper layer, overlay. A good laminate is not the thickest and most expensive, but one that meets the operating conditions. On sale today following classes:
twenties- This is mainly laminated parquet produced by Chinese factories.
- 21 class 6-8 mm - rooms with a low level of load (bedrooms);
- Grade 22 6-8 mm - rooms with low traffic (guest rooms);
- Grade 23 7-8 mm - places of frequent visits (halls, halls, kitchens).
thirties- a product of European, Russian, less often Chinese production. The same group includes the so-called waterproof laminate, which can be installed in bathrooms, laundries, etc.

forties– coatings of European and Russian production.
- Class 41 - 8-12 mm - is assigned to coatings with better characteristics than class 33. Purpose - trade and office, medical and sanatorium, educational institutions;
- 42 class 10-12 mm - special purpose premises, such as bowling alleys, dance classes and halls, libraries, etc .;
- 43 class 10-12 mm - production facilities with difficult operating conditions.
Thus, coatings with a load parameter of 31-32 are enough for a house, no more. For small offices, shops, schools and kindergartens, products of grades 33-34 are suitable. But in organizations and at facilities with high traffic in street shoes, it is better to lay a laminate of 34, 41-42 classes.

Laminate 8 mm for home use.
The next parameter to pay attention to is thickness laminated floor. On sale there are products of European, Russian and Chinese production with a cross section of 6 to 14 mm. The most common products are 8 mm. This is the optimal value for home and office use.
Lamellas 6-7 mm belong to the economy class. Despite the assurances of some unscrupulous manufacturers and sellers, even one millimeter significantly affects the resistance of the bars to loads. In addition, such a coating requires a mirror-smooth, perfectly flat and very durable floor, because laminate locks are very weak. It is impossible to obtain such a foundation without significant costs. Judge for yourself:
- Rough screed at least 5-6 cm and drying for 28 days;
- Grinding (removal of a weak top layer) and hardening;
- Finishing thin-layer alignment with a cross section of up to 2 cm and final grinding.
That is, in order to mount the laminate yourself costing up to 450 rubles / m², you will need to invest at least 1200 rubles per square meter in the base.
In commercial, industrial and commercial premises, the most optimal thickness is 10-12 mm. The density of the carrier plate is increased compared to 8 mm to 850-1100 kg / m³, the locks are very strong, so the laid coating will withstand significant loads and last the declared 10-15 years.

Types of laminate locks.
Equally important is the type of locking connection. The validity of the choice for a particular room depends on this. Let's explain in more detail. They produce a coating with 3 types of locks:
- Snap or Click - the most common connection for Russian and Chinese products. Successfully combines strength and ease of installation. Laying laminate with your own hands with this type of hitch is a pleasure.
- Tongue-and-groove or Lock - rare. Based on it, a mixed, peculiar click-lock has been developed. We consider this the most successful decision of European engineers, since a laminated coating with such a connection allows you to assemble planks in three ways: vertical attachment, horizontal shift and at an angle (classically). It is convenient when assembling in hard-to-reach places and in rooms with complex geometry.
- Volumetric 3D, 4D or 5D. A very original solution, the essence of which is as follows: a special insert made of hard plastic or metal is integrated into the end part of the plate, which, when assembled, forms a tight connection that is resistant to geometric changes. This is an excellent solution for regions with high levels of humidity or significant seasonal climatic differences.
For residential premises, a laminate laid using click locks will honestly serve the period declared by the manufacturer (subject to the purchase of high-quality products, and not a cheap analogue). Planks with a volumetric or mix lock are best used in private homes, commercial, office or public premises.
For many buyers, it is important to know whether to purchase a laminate with or without a chamfer.

After all, there are a lot of articles, including from manufacturers on their websites, that micro-grooving around the perimeter of each plank:
- improves consumer and operational properties of the coating;
- hides the flaws of the base;
- fixes installation errors.
Forced to disappoint. A chamfer is just a decorative element that gives the assembled floor volume and visual depth. It has no other useful features.
Layout Secrets
Installation of long floor coverings is carried out in several ways:
- Diagonally - the rows are shifted relative to each other by the width of the board. It looks good visually, but, according to experts, it is only suitable for coatings of short length, less than 1 meter, since the mutual binding of the lock joints is not very strong and durable. It is rather a method of laying ceramic tiles and porcelain stoneware, made in a solid board design.
- "Brick wall" - the rows are shifted by exactly half the length of the lamella. This is a good solution for floor tiles or panel parquet, but not very good for laminate flooring - transverse joints will stand out too brightly against the general background, catch the eye.
- Deck laying - each next row is shifted by 1/3 of the length of the board. Manufacturers recommend this installation method as the most reliable and ensuring the correct strapping of the locks. Visually assembled floor looks very organic.

Having chosen the laying format, think about the layout option regarding the direction of the light flux. The range of well-known manufacturers such as Haro, Kaindl, BerryAlloc, Egger and others is characterized by great diversity. That is, straps of different sizes, from shortened to very long. Therefore, choosing a coating for your layout is not so difficult.
Laminate installation is carried out:
In the direction of the light, from the window - this option allows you to visually smooth out the transverse seams, creating the so-called endless board effect. The best solution for smooth or slightly textured surfaces in 1-, 2- and 3-strip applications. Particularly emphasizes the large windows in the room. Experts recommend this layout option when assembling the same type of laminate throughout the apartment.

Laying in the direction of the light.
Towards most intense movements- will reduce the abrasion of the coating at the joints, significantly increasing its service life. This is a rational solution for those who cannot decide on the layout.

Laying in the direction of travel.
across the world or perpendicular to the window - a convenient way to emphasize the long wall on which the openings are located. The seams, of course, stand out at the same time, but the structure of the floor, its texture and depth will be especially clearly visible. Great idea for revealing a chamfer or 3D floor pattern;

Laying across the world.
Diagonally, at an angle from 45º to 60º relative to the walls - this is more of a design technique to emphasize the features of the floor, give the room special properties or level its shortcomings (too elongated room, curved walls, etc.). At the same time, the consumption of floor material (trimming) is not the standard 5-7%, but 12-20%.

Diagonal fit.
Another factor that affects the durability of laminate flooring is the surface area. Laid continuously, in a single sheet, looks beautiful, but impractical. The floor needs compensation gaps to prevent seasonal swelling of the planks and damage to the locks. The maximum dimensions recommended by manufacturers are 25-100 m². The exact value is indicated in the instructions.
The right decision is to divide the canvas between rooms using decorative profiles: metal or PVC thresholds, wooden joints, cork moldings, etc.
In order not to make a mistake with the choice, draw your room on paper to scale and form a layout drawing. So you can identify all the pros, cons, plan the installation correctly.
Tools and materials
For work you will need:

Step-by-step instruction
Start by looking at packs. The purchased floor must be from the same batch or at least one year of manufacture. Otherwise, there is a risk of a discrepancy between the pattern, tone and even the shape of the castle.
Check that before laying the temperature and humidity conditions correspond to the correct parameters:

Installation is carried out in the following order:
Foundation preparation
Surfaces are subject to stringent requirements. It must be flat (differences of no more than 2 mm for every 2 meters of the floor), clean (without traces of oil, bitumen, old paintwork), dry, primed and durable (at least 150 MPa). The check is carried out with a control rail 2-3 m long or a level, as well as a moisture meter. Strength can be determined by scratching the concrete with a nail. The loose base must be strengthened, and even better - completely removed and re-formed.
Substrate flooring
For a laminate with a thickness of 8 mm or more, it is allowed to use old linoleum as a substrate layer. But provided that the coating is dense, thin and there are no voids, pits and other defects under it.

In all other cases, strips of a waterproofing film with an overlap of 15-20 cm are first laid on the screed. The joints are fixed with adhesive tape. Then the rolls or slabs of the substrate are laid end-to-end.
Laminate assembly
Laying starts from the longest wall, from the far corner towards the doorway. The first lamella is installed, spacer wedges are inserted at intervals of 40-60 cm. The first row is assembled: the narrow end of the plank is attached to the initial one and snaps into place at an angle. And so on until the end.
The next strip begins with a cut board, the length of which should not be less than 30 cm. The slats are attached at an angle and snap into place. To bypass pipes or columns, a segment is cut out in the plank, taking into account the temperature gap of 6-10 mm. Then the cut element is installed in place, if necessary, the joints are glued. The surface is decorated with special overlays or plastic moldings.
When installing the last row, all lamellas are sawn to the desired width, but not less than 5 cm, installed in the opening and attracted to the main canvas with the help of a pad. The finished floor is decorated with skirting boards and thresholds.
Advice! If you need repairmen, there is a very convenient service for their selection. Just send in the form below a detailed description of the work that needs to be done and you will receive offers with prices from construction teams and firms by e-mail. You can see reviews of each of them and photos with examples of work. It's FREE and there's no obligation.