Layout of the room with your own hands from paper. Paper craft: house
What could be more interesting and exciting than making some crafts to decorate your home with your own hands? After all, what you can think of and do yourself, you can not buy in any store!
Such products serve not only as decorative elements in any apartment, creating a cozy atmosphere and mood, but also are the reason for the most exciting pastime during their creation. After all, children so love to cut and glue toys from multi-colored paper - houses, animals, rockets and ships! Adults often help them in this entertaining business and *a paper house for children* will be a universal decor for a children's room or a subject for games. At the same time, a fairly simple and very original craft - a paper house with your own hands, which you can easily make with your child, will serve as a bright decoration for the holiday and bring many pleasant moments when creating it.

It can be a snow-covered hut with a Christmas tree for the New Year or a mystical castle with ghosts and bats for a fun Halloween, a multi-colored house for dolls with bows and ruffles or an impregnable fortress for knights, or maybe a rural house with a fence and flowers, comfortably perched on the windowsill of your kitchens. After all, creating * a paper house with your own hands * you are completely immersed in the world of fantasy and become the creator of the most unthinkable ideas! Well, * how to make a paper house * so that it is unusual, bright and pleasing to the eye, we will tell you in our article.
How to make a paper house
Materials and tools:
- scheme
- cardboard (white and color)
- colored paper
- gift paper
- paints
- scissors
- pencil
Decorative elements:
- ribbons
- beads
- artificial flowers
- cones
- berries
- twigs
- moss, etc.
1. First, let's choose a scheme for the future house
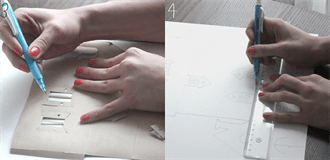
The template you like can be printed on a printer or simply gently, without pressure, transferred through the monitor screen onto thin paper, after enlarging the image to the desired size. The template obtained in this way is cut out, superimposed on cardboard for the future house and completely outlined with a pencil. After the diagram is drawn, it should be carefully cut out and prepared for gluing. To do this, you need to draw the blunt side of the scissors along the fold line of the walls so that the cardboard can be easily bent and cut out doors and windows. If you have never made a paper house before, then we advise you not to be smart with complex schemes and small details, but to choose an easier option. Your paper house scheme to which is simple and understandable has every chance to turn out beautiful and original the first time. Some types of schemes for paper houses are presented below. Click to enlarge:


2. Cut out doors and windows
Doors can be opened if the opening is not completely cut or fully arched. It is the same with windows: the shutters in them can open or the window will be, according to the plan, without shutters. The finished window made of colored cardboard can also be glued separately to the wall of the house without cutting an opening. Everything here will depend on the scheme that you have chosen or made amendments to the design of the house at your own discretion. After all the necessary details are cut out, you can glue the house, giving it a square shape.

3. We make a roof
The roof is glued separately. It is cut out of white or colored cardboard, folded in half and attached to the walls of the house. You can decorate it beforehand: draw a tile or make it from separate strips of colored paper, cover it with velvet paper. If a pipe is provided in the scheme, then it is also cut out, folded at the bend and glued to the roof. Smoke can be attached to the pipe. To do this, a wavy smoke is drawn on cardboard, cut out and glued at the base to the inside of the pipe.

4. We make a stand
The finished house can be glued to any stand made of cardboard, wood or plastic, pre-cut to the size of the house and decorated with a fence made of strips of colored cardboard, green paper grass, dry flowers, berries, leaves, moss. You can attach a twig to the stand with plasticine, and hang beads on it and glue flowers. It will turn out a very elegant version of the summer house.


5. Decorate the house
We bring the house, already ready and fixed on the stand, to the final. To do this, we decorate and decorate the walls, windows, roof and base of the house. If this is a New Year's option, then the roof with a chimney can be strewn with snow - with foam crumbs, having previously smeared the places with glue, cover with cotton wool, paint with white paint, depict snowflakes, make snow-covered windows. Decorate the house itself with colored tinsel and beads, attach a paper silhouette of a snowman and a Christmas tree next to it. You can use ready-made pictures for decoration or cut out figures from gift paper.


The Halloween house is made of dark cardboard, with the addition of silhouettes of ghosts and bats. Windows can be made from bright yellow or orange paper, creating the effect of light in the house. Nearby, on a stand, you can glue trees and a cardboard fence, put a black cat on the fence. You can be sure that your child with great interest and enthusiasm will help you cut out creepy characters of a fun holiday from paper!
Despite the fact that most of the computer programs that run in 3D modeling allow you to quite realistically imagine the appearance of your future home, the layout of paper houses is still relevant. After all, not all of these programs own. And ordering such a computer model for an experienced engineer or designer is expensive. In this case, mastering simple techniques for modeling paper and cardboard houses is much faster.
And if you have children from 2 to 10 years old, then this work for them can turn into a fascinating activity. Moreover, the training and developmental effect of this type of activity is difficult to overestimate. Here and accuracy, and motor skills, and skills in working with tools and, of course, the development of spatial thinking.
Simple layouts of paper houses and reamers for gluing
Making a house layout with your own hands is not difficult. The simplest paper house layouts are easiest to make from the so-called. developments, when all their elements are interconnected by fold lines and represent a single element in the form of a diagram.

Also, the scan, in addition to walls, floors and roofs, has additional bends for gluing. On the Internet you can find links to such scans. It is enough to print them on a printer or, having measured the aspect ratio, draw them on sheets of paper or cardboard and get a scan scheme for modeling.


You can transfer the resulting scan onto colored paper.

Using a needle or an awl, you can transfer the key points of various elements to it: windows, doors, attachment points for additional architectural elements, and so on. You need to cut them out immediately with a clerical knife, placing a piece of thick cardboard or plywood under the scanned sheet.

Overhead elements are made separately: window frames, shutters, doors, etc., which you will stick on the finished layout last.

An even bend along the lines is easiest to do by attaching a ruler with a sharp edge to it. By repeating this procedure in all places of the bend, you will get a scan ready for gluing.

You can also make a scan by making each structural element separately, and connecting them to each other at the fold points from the inside with adhesive tape. This method is especially interesting when you are making a model of a house from thick and hard cardboard.
You can glue the layout using fast-setting adhesives such as PVA, stationery silicate, glue stick, etc. You can also make it using double-sided tape, sold in hardware stores.

Here is a video to help:
We make a sweep for the layout of the house with our own hands
The process of self-manufacturing reamers is no less exciting than working with their finished samples. To do this, you will need almost any program for working with graphic images installed on your computer. CorelDraw or similar, which processes vector images, is best. In it, with an increase or decrease in the size of the image, both the line thicknesses and the loaded textures change in the same ratio. This allows you to get more realistic images. And the library of textures built into its shell itself is impressive. At the same time, by filling the scan element with a texture, you can get the finished appearance of the main elements of the layout.

The whole process, including filling parts of the scan with the selected texture, applying visual effects and architectural elements, and inserting images from the symbol library, takes from 10 minutes to half an hour if the house is not very complicated. Print a scan on a color printer and start layout.

For testing, you can use this one, made by us, by copying the image to a computer and enlarging it to the desired size.
Making complex paper layouts
The process of manufacturing complex multi-component house models does not differ much from that described above. It's just that similar sweeps are also performed for individual elements of composite layouts. A group photo of the assembly of such a layout shows its individual elements and the assembly order.

Having mastered the simple technique of making simple paper houses, you can create entire paper towns with landscape design elements, plants, car models and small architectural forms.

The easiest way to make layouts of buildings from paper of a round shape is to apply the formula for determining the circumference (2πr) to their calculation, adding a strip for gluing to it.
You can also add realism to your layout by making a simple illumination of the house from the inside.

To do this, you can mark the places for connecting the LEDs and the battery on the scan, and then install them in the process of gluing the layout.

Such a house can also serve as a night lamp, but in this case it is better to use a switching power supply that is connected to the mains.

A mobile phone charger will do. You can also use an inexpensive Christmas tree garland:
Simple layouts of houses without a sweep
These are, first of all, houses assembled with their own hands from paper cylinders. The same layouts are great for various small architectural forms on prefabricated landscape layouts.

But also using this technique, you can create a realistic model that imitates a log house so dear to the heart of any Russian.
To do this, you need to take longer pieces of paper for the manufacture of tubes, so that after folding its coils resemble the annual rings of a tree cut.

And the adjunction of the crowns can be modeled by crushing the ends of the tubes with a solid round object of a suitable diameter.

It is easy to assemble a paper frame from such elements. And bring out the intermediate crowns along the facades, and for a sample, you can take a photograph of any real log house.
It is better to make roof coverings of house models separately, in the form of paper slate sheets, tile flakes or honeycombs of bituminous tiles.
Dear readers, if you still have questions, ask them using the form below. We will be glad to communicate with you;)
We continue the Cottage section and offer you an article. We will not offer you to learn how to use computer programs for 3D modeling, especially since it will still turn out to be a painted cottage. We offer you two simple ways, using only the skills gained at school, to make a beautiful, realistic and useful cottage layout in all respects.
A realistic do-it-yourself cottage layout, as we have said, is a very thing. But the question may arise: “What is the use of a real layout of a cottage, and even made by yourself?” The answer is very simple: in this way you balance your ideas and the real world.
So, there are ideas, thoughts, imagination, what the future cottage means for you:
- how many rooms will there be
- how it will be convenient there, well,
- what mats in interior design will be used,
- how warm it will be there (by the way, about heat - we recommend that you study the article Heating at home - for residents!; a very good article in all respects)
- what will be there
- what bathroom paint will be used,
- what will be the design of the living room
- etc.
All points are united by a common feature - all this is in the mind.
On the other hand, there is the real world in general, and the embodiment of ideas in material in particular. Of course, the full embodiment of the house is real. However, it is much more useful when a realistic mock-up of the cottage is pre-created. So, perhaps you know that in any major construction, a model of the future house is ALWAYS made. What for? Precisely in order to coordinate ideas with real-life (at least in the layout) things:
- walls with real thickness,
- ceilings at the right height
- partitions at nodal points,
- real floor height, taking into account the "warm floor" system
- etc.
What is the practical result of balancing mass and importance by creating a realistic model of a cottage with your own hands?
Well, at least the layout of the cottage will save you from a lot of mistakes and clarify a huge amount of data.
A simple example: there is a beautiful picture of a cottage, color and three-dimensional. However, the construction of a cottage model according to this picture showed the complete futility of such a plan. Why? Because the slope of the roof falls just above the entrance. And in winter, everyone who enters and leaves will receive a charge of rain and snow right by the collar. And given that roof snow tends to fall, homeowners will spend MANY hours just shoveling snow off the roof in front of the front door.
Whereas a simple realistic layout of a cottage with your own hands allows you to avoid a huge number of such errors. The question may arise: why do it yourself? Why not leave it to the experts? Because to live in this house is not for specialists, but for you. And specialists, when making a layout, cannot read all your thoughts and desires about real comfort. Therefore, as a result, you will get a really cozy and harmonious house - only not for yourself, but for those who made the layout.
By the way, a layout is a useful thing, even if the house is built. With it, you can visually see and plan the redevelopment of rooms, the completion of the premises, the placement of the garden and other vegetation. Not to mention the mere aesthetic contemplation of your own home from a bird's eye view. Therefore, we suggest you use two simple ways to create a realistic layout and anticipate problems in advance.
The first option is a realistic styrofoam cottage model.
To create a realistic model of a foam cottage, you need:
- a simple, even foam ceiling tile (more about it in the article “Ceiling tiles: how to glue it optimally?”);
- mock-up (stationery) knife
- scissors
- PVA glue
- a little time.
Why foam ceiling tiles? Because this material came at the right time. Firstly, it has a thickness of 0.5 cm, which is almost proportional to the thickness of a real wall, and secondly, the foam of the ceiling tile is very easy and fast to process - it can be cut into even pieces with an ordinary mock-up stationery knife. PVA glue can be used as glue. Or the “Dragon” glue left over from the repair.
To make a model of a house, you need to know exactly what you are doing. That is, you need to have a drawing of the house, a sketch or plan with basic dimensions. In principle, a rough sketch of the architect is sufficient.

In practice, a scale of 1 m = 2 cm is used. This proportion is easy to calculate, and the dimensions of the layout are good - the layout of the house is not large and not small, the thickness of the walls is almost proportional. And then a lot of routine work - marking the foam, cutting out the foundation, walls, roof, gluing the pieces together.
The layout of the house is best done collapsible so that you can see the internal arrangement of rooms, stairs and furniture. For this reason, you should not glue the second floor, but rather make it removable. All elements (if possible) are made proportional - both length and width, height, angle of inclination, relative location.

The layout can be used to visually assess the propagation of light during daylight hours. You just need to know in which direction to the north the house will stand.
A few words about the layout of the cottage using cardboard
To model a realistic cottage layout using cardboard, you need thick cardboard from cardboard boxes. Best of all, the boxes in which the air conditioner, refrigerator and other large household appliances were wrapped. The thickness of this cardboard is also suitable for proportional modeling, as is the foam.
Plus, an important positive point of cardboard is that it is cheaper than polystyrene foam for the ceiling. On the other hand, with cardboard there is a little more trouble. However, only not knowing what and how to do. So, to create a layout of a cottage with your own hands, you need:
- thick cardboard, good quality
- breadboard knife
- scissors
- PVA glue
- a little patience.
The procedure for working with cardboard is essentially no different from working with foam. Only one caveat: it is better to glue the walls across, and not along. That is, build them up in layers, and not immediately put them in full height. This will make the walls much stronger and, since they are cut to the width, much neater than the cardboard partitions that were immediately set up in height.

Both cardboard and styrofoam can be painted in “natural” colors for the home. This will help determine the colors in the interior (for example, using the article "Colors in the interior in the light of Goethe's Teachings on Color"). In addition, you can draw the location with color - pipes for heating, water supply, sewerage, ventilation, wiring, and so on. This will greatly facilitate the actual calculation of running meters of materials used. And at the same time will avoid unnecessary loops and intersections.
In the basement, you can approximately place a washing machine, a boiler, for water and other "basement" elements. The bathroom, living room, kitchen and other useful and vital premises are planned in the same way. That is, using the layout, you can, for example, determine the features of the layout of the premises. For example:
The room on the ground floor is quite spacious, so any redevelopment is possible - you can separate, for example, the kitchen with a partition, or hide the entrances to the bathroom and toilet from view. The sofa can be placed by the stairs, and the kitchen can be separated by a bar counter. The option without partitions or with sliding partitions is preferable if you are going to host parties and crowded gatherings - then you need a lot of space.
By the way, an important nuance: the layout of the cottage is best done taking into account the site, and not just the house itself. This will help you choose the best location for your house in relation to the surrounding landscape - high-voltage lines, tall trees, swamps with mosquitoes, etc. It will also allow you to plan the site so that later the problems listed above with trees, poles, mosquitoes, etc. do not arise.
Thus, a realistic do-it-yourself cottage layout is a good help in building or updating your own home.

According to http://maketdoma.narod.ru/rukami.htm
It would be a mistake to assume that only little girls make do-it-yourself paper house models. Of course, your princess will also be happy with such a gift, but they can also be useful in an architectural idea. Before starting construction, always make a small copy. In this case, PVC (polyvinyl chloride) is used, from which the finest details are cut out with a milling machine. Then they are combined with a solvent.
But you can repeat the masterpieces of architects without special equipment. Such a house can be not only a useful model, but also a home decoration. The most common material for this is paper, so the process will not cost you too much.
We buy materials

To work, you will need colored paper or cardboard. The latter is preferable for complex models, as it requires increased strength. For scanning it is better to take paper.
All windows, doors and other small parts will be cut with a knife. Make sure that it is sharp enough, it is better to buy at a hardware store.

You can connect the parts with both super-glue - it allows you to speed up the process - and PVA (but it is better to speed up its drying with a hair dryer). In addition, scissors, a pencil and a ruler will come in handy. For decoration, you can use paints.

Choosing a sweep

If this is your first experience in reproducing house models, it is better, of course, to take a ready-made scan. You can not only find them on the Internet, but also make them yourself. This is a very exciting process.
You can choose almost any program. It is desirable that it works with vector images. One of the most convenient in this regard is CorelDRAW. Buildings in it are very easy, you can change the thickness of the lines and load your own textures. But the built-in library also pleases with the proposed photos.

The first step is to draw an oblong rectangle. Now it needs to be divided into two pairs of identical walls located through one. You need to build a floor along the lower edges, it is attached to one of the edges to the general layout. We divide the roof into segments and also attach it. After that, you can add architectural elements and visual effects. And don't forget the straps.

Assembly steps

We print and cut out the scheme we previously received.
If you do not have a color printer or you have not used textures, you can transfer the blank to cardboard.
Using a needle and an awl, mark the places of windows, doors and decor elements. You need to cut everything at once, entirely. And preferably with a clerical knife - scissors will leave serifs. Lay down a sheet of plywood first.

Additionally, make shutters, doors, awnings and the like. We will glue them at the very end. Use a ruler to work through all the folds - it will be easier to assemble.

Video on the topic of the article
In our selection of video tutorials, you can learn how to create more complex houses and get a lot of interesting ideas:
Joint creativity is a great idea for a family weekend or a calm evening in bad weather. Children are always happy to respond to the offer to spend time with their parents, and in order to fill this period with joy and make it useful for development, you can start making crafts. The most affordable material for homemade products is paper. It is sure to be in every home where there is a child, and gives a huge scope for the development of fantasy and imagination.
Paper craft options
Paper is an excellent material for children's creativity: easy to use, convenient, safe even for small children. It offers a variety of applications. In addition to the fact that it is used for drawing with any tools (paints, pencils, crayons, milk, ink, sponge, plasticine), it is glued, torn, crumpled. Paper is produced in various colors, sizes, textures, density.
Figures can be cut out of paper in order to play scenes with them in the future. It will be interesting for girls game with paper dolls and clothes for them made from the same material. Boys will be happy to make applications from colored sheets with the help of mom or dad.
 Genuine interest in art origami- making paper figures by folding it in different directions according to the proposed schemes.
Another unusual technique papier mache, with which real sculptural images are created from soaked pieces of paper.
Having decided on the material of the craft, you should figure out what to make.
One of the easiest paper crafts is making a house. The house is an image that is understandable and close to children. A variety of building options: a hut, a castle, a school, a country house, a high-rise building, a palace - allow you to show your imagination and realize any creative plan of the child. In the future, the building can be actively used in role-playing games and dramatizations.
Ideas for making a paper house
As noted above, there are a great many options for manufacturing various designs. How to make a house out of paper depends on the desire and capabilities of the child. Very young children 2-3 years old will be able to participate in creating an application or coloring a finished sample. Older preschoolers can already be actively involved in the creation of crafts according to the drawings.
 Boys will be interested in the process of making a real knight's castle, and girls will be interested in a palace for a princess or a refuge for fairies.
They can be made from the same cut-out paper house templates, but decorated differently.
On the eve of the New Year, the construction of snow-covered forest huts, huts of elves or Santa Claus will arouse interest. They can be made small in size and used as Christmas decorations. A special charm to Christmas houses is given by the lights of Christmas tree garlands, attached from the inside or from the back of the facade.
colored paper application
Making applications from colored paper is suitable for young children who are just learning how to work with paper material and glue. It is also good to use this technique when preparing homemade postcards.
For a house made of colored paper using the applique technique, you will need very few materials:
- colored paper;
- White paper;
- cardboard;
- glue stick;
- felt-tip pens or paints;
- scissors.
 You can use ready-made schemes or create a picture according to your own design. The main idea is to create a drawing of a house from geometric shapes cut out of colored paper or hand-painted. It is enough to prepare a square and a triangle, stick them on the base - that's the simplest house. A pipe, windows, doors, a fence can be drawn or cut out additionally.
To make a castle or a beautiful tower, it is better to use ready-made templates that are widely presented on various sites dedicated to creativity, scrapbooking, and postcard making. The scheme is printed on white paper using a printer, cut out along the indicated lines, painted with paints or felt-tip pens and glued onto a postcard base or plain white cardboard. Decoration with rhinestones, beads, ribbons, sequins will give a unique and festive look to even the simplest picture.
Cardboard house according to the template
To make a three-dimensional model of the dwelling, you will need to draw a scan or use ready-made paper house templates for printing.
 The simplest scheme is shown below. It is enough to print this blank on a printer, decorate it as you wish and stick it on a thick sheet of cardboard. Next, you need to get a layout by carefully cutting along solid lines and not forgetting to leave space for glue. Having drawn scissors or a narrow stick along the fold lines, you need to assemble the product into a 3D model and glue with glue stick or PVA on the sides. The house is ready!
There are many drawings with detailed instructions for cutting and assembling on various sites dedicated to children's creativity. You can create a layout of the house with your own hands.
When using ready-made schemes, you should remember some points:
- Large items require large print sheets. If they are not there, you can make a diagram of several standard A4s by gluing them with tape or glue.
- Windows and doors must be cut to open like real ones. It is convenient to do this with a clerical knife or one side of scissors.
- It is more convenient to decorate and paint a house when it is not assembled yet. In addition, the idea of the finished product in the mind develops the spatial and creative thinking of the child.
- For the stability of the structure, use thick cardboard as the basis for the walls or prepare a substrate to which the structure will be attached.
 Interesting three-dimensional products are obtained if the walls are made not rectangular, but round, like in a palace. To do this, you need to fold the rectangle with the short sides to each other and glue them together. You get a cylinder that serves as a tower for the castle. For the roof, take a sheet, roll it into a cone and fasten it in this state. After that, it remains only to connect the two parts together with glue or tape.
If you prepare several cylinders, having painted them in advance, you will get a luxurious castle for a real princess. By cutting out tree figures and a blue circle from colored cardboard, you can create a park with a lake around the building.
Hut made of paper tubes
An unusual hut can be make from paper tubes using them as logs. For this you will need the following materials:
- small rectangular sheets of thin paper for making logs;
- glue;
- scissors;
- felt-tip pens or paints;
- a sheet of cardboard or colored paper for the roof.
 Need to prepare in advance identical paper rectangles, folding which, you get small tubes. When there are enough blanks, you can start creating "logs". For this, one rectangle-blank is taken, its edges are smeared with glue, and then connected. It is convenient to collect tubes by winding paper around a pencil.
The next step will be the construction of a log house. Two paper tubes are stacked opposite each other, two more tubes are placed on top of them perpendicular to the first, a square should be obtained when viewed from above. "Logs" are fastened with glue, then the second row and subsequent ones are laid in the same way. Construction is completed by attaching a gable roof to a finished log house. To do this, a dense sheet of cardboard is folded in half, end parts in the form of arrows are attached to the place of the fold, which fall inside the house along opposite sides.
After the product dries, windows and doors can be cut out in the walls with a sharp knife, or simply glued on the outside. Windows can be decorated with platbands, coloring the structure accordingly.
You can use more than just scissors and glue to get a picture of a house on paper. How much more exciting create an origami craft, following the instructions for folding the figurine:

In European countries, there is a tradition to decorate the window sills of living quarters for Christmas. One of the most popular installations is a cardboard silhouette of houses with luminous windows.
 To make such a decoration yourself, you will need to find your favorite template for building facades in the Scandinavian style. Designs with a large number of windows in multi-storey buildings look especially attractive.
Having chosen a suitable scheme, it remains only to carefully cut out the silhouettes along the contour, cut through all the windows and doors in them, install the craft on a cardboard stand facing the street, and hang an LED garland or place electric candles at the back. Garland lamps should be attached with adhesive tape to the back of each window. You can make drifts of cotton wool near the buildings, add glitter and the cardboard sheet will look like a magical Christmas city!
Girls will be delighted with a makeshift home for dolls or small collectible figurines.
You can make such a craft from a large sheet of thick cardboard according to the drawing or adapt a box for household appliances for this.
 The assembled model or finished box must be pasted over with colored or wrapping paper and painted. On the walls, you can draw not only windows, but also pieces of furniture, paintings, flowers and indoor plants.
In a design designed for games, you need to leave large openings on the side. A child's hand should easily pass through them to place furniture and dolls inside. You can not do the roof, leaving the walls. In this case, the house will be one-story.
Making a paper house is an interesting and creative activity that will be interesting for both an adult and a child. From this affordable material, various crafts are easily obtained that can be used in games or to decorate a room.
Attention, only TODAY!