Expanded clay floors. Do-it-yourself floor screed with expanded clay: step by step instructions with a photo
Installation of lighthouses photo
Expanded clay floor screed is one of the easiest floor leveling options. In any case, this task is not easy, even when using ready-made mixtures. The choice of type depends on the surface of the base and the characteristics of the room. When performing, it is imperative to adhere to precise technologies so that after some time the floor does not become unusable.
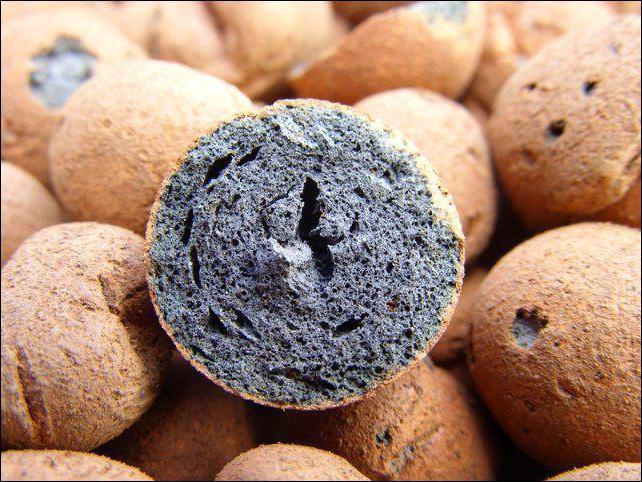
Expanded clay is an environmentally friendly material, very light and practical, as well as very durable, with a high level of heat and sound insulation. It is obtained by firing clay at high temperatures.
Especially often used in cases where it is necessary to significantly raise the level of the floor. Expanded clay screed is superior in strength to cement and sand screed, and it does not lose its ability to pass air and steam.
Expanded clay floor screed is very resistant to frost and extreme heat, so it is used in rooms with any conditions. It does not burn, does not rot, does not rust, and the lightness of expanded clay greatly simplifies the task of delivering it to an apartment or house. With its help, it is easy to even out even very sharp drops in the base, with which simple mixtures will not help or will simply be unprofitable.
Its implementation is quite accessible at home without professional training. Still, there are some things you need to know about it. For example, you can watch video materials that tell about the laying of expanded clay screed.
In what cases is a screed with expanded clay necessary?
The use of expanded clay base screed in many cases is simply necessary. There are options where other options don't fit.

For example, when the filled space is higher than 10-15 centimeters. In this case, it is impossible to use only cement mortar or special ready-made mixtures for the entire depth of the screed. Any floor slabs have a certain margin of safety, not designed for such additional loads.
When it is necessary to significantly reduce the weight of the concrete screed. For example, if the floors are wooden. In this case, not only a screed with expanded clay can be used, but also with foam and other materials that lighten the weight of structures.
In cases where it is necessary to save on cement or other heavy materials.
Let's look at how to pour the floor screed over the beacons. The first stage is the marking of the floor and the installation of beacons for the floor screed. It all starts with marking the base of the floor, if the expanded clay screed is simultaneously performed in several adjacent rooms, it is better to immediately set the beacons according to the level in all rooms.
To determine the top point of the existing base and level the height of the beacons, it is better to use a laser level. It is most convenient to work with him. In the absence of this tool, you can use the usual water level, but you will also need other devices in the form of ropes, etc.
They begin to expose beacons from the top point of the surface. The minimum height of the screed in these places will be 6 millimeters. At all other points, the thickness will be greater.
Lighthouses are fixed with cement mortar or alabaster (gypsum), which must be worked on very quickly.

Expanded clay is leveled before being poured with concrete
First way
We will tell, with expanded clay. Choose which one is most convenient for you. So, the first way.
After preparing the coating and installing beacons, dry fine-grained expanded clay is scattered throughout the base. It is leveled at a distance of about 20 - 25 millimeters from the surface of the screed. At the same time, an unequal expanded clay layer will be obtained in different places, but its surface should be even. Before making a floor screed, determine the evenness of expanded clay by level.
Then a layer of expanded clay, so that it grabs well, and you can walk on it, it is poured with cement "milk". A film is formed on the surface, which is necessary so that the moisture does not leave and the expanded clay “pillow” does not sag. Leave the surface to dry overnight.
How to make cement "milk"? Usually, proportions of water twice as large as in the manufacture of screed mortar are used. But you may have to add water or cement, based on the result. Often, for a floor screed with expanded clay, the proportions are adjusted at the place of application.
We proceed directly to the screed. Now you need much less cement or other mixture for pouring. Yes, and the screed layer will turn out to be small, therefore, not too heavy.
We knead the solution in small quantities, apply it to the prepared expanded clay base and level it.
After a couple of days, you can pull out the beacons and fill the remaining grooves with cement.
The second way to perform a screed with expanded clay
We will talk about the screed device with expanded clay in the second way. It is also made in two layers. But the work goes a little faster.
For the first layer, it is necessary to mix expanded clay with a solution. To do this, expanded clay is poured into the prepared container, filled with water, which will be enough for all expanded clay to be wet. Mixed with a mixer. Then cement with sand or a ready-made mixture from bags is added. Mixed again.
It is difficult to say exactly about the proportions of the floor screed solution: all expanded clay should become gray and wet. It turns out a homogeneous and thick mixture without lumps. It shouldn't be too dry. We level the finished solution with expanded clay to a level of 20-25 millimeters to the floor level. Before you make a floor screed using this method, you do not have to wait for the first layer to dry.

The peculiarity of this method is that immediately after pouring the first layer (a small strip of about 60-70 centimeters), the top layer can be laid on top. This is much more convenient: there is no need to wait for drying or walk on a liquid base.
When pouring the finish layer, do not reach a few centimeters to the edge of the bottom. Then we continue in the same order: a layer of the lower solution, a layer of the upper one, etc.
The leveling of the finish layer is done very carefully. You may have to return to some places more than once. It is important that no bubbles, pits, puddles, bumps, etc. remain.
- if wires pass, wrap them with polyethylene and secure with tape;
- before performing the screed, it may be necessary to waterproof the base. Use liquid mastic, thick plastic wrap or hydroisol;
- it is convenient to use metal profiles or slats as beacons;
- the finished screed must be left to dry for a month;
- regularly wet the surface with water so that cracks do not form;
- you can add a plasticizer to the finishing solution, which prevents the formation of cracks in concrete;
Look on this page: floor screed with expanded clay: video - instructions on how to perform all the work
At each stage of laying the floor screed, certain materials and tools will be needed. When preparing the subfloor, you will need:
- for concrete floors - perforator, broom, scoop, vacuum cleaner, concrete primer, cement, mixer, bucket, spatula;
- wooden subfloor - boards, self-tapping screws, screwdriver or screwdriver, parquet putty, planer;
- soil base - expanded clay, sand, shovel.
Beacons are installed in two stages:
- the screed line is determined;
- guides of beacons are mounted.
For the first stage you will need:
- hydraulic (laser) level;
- simple pencil;
- building cord or simple fishing line;
- rule;
- roulette.
For mortar beacons, cement (alabaster, Rotband), sand, spatula (trowel), bubble level, metal guides are needed. Beacons on self-tapping screws can be made using a perforator, self-tapping screws with dowels, guides, and a level.
Making a dry screed will require the purchase of waterproofing material (polyethylene film, roofing felt, bitumen, etc.), damper tape, expanded clay, drywall (GVL), self-tapping screws and PVA glue. You will also need: tape measure, construction knife, pencil, ruler, screwdriver.
The screed device with expanded clay concrete can be made using:
- concrete mixers;
- buckets;
- expanded clay brand M700;
- cement M400;
- river or quarry sand.
Expanded clay for dry floor screed is an excellent material that allows you to significantly simplify the process of leveling it with a minimum budget, time and amount of labor. You will learn how to make a floor screed with your own hands from our article.
Floor screed is in any case a laborious process that requires time and effort. However, the features of expanded clay make it possible to get the best result in a relatively short period of time.
Expanded clay itself is a durable, reliable, lightweight, easy-to-use and completely environmentally friendly material. It has excellent sound and heat insulation performance. The material is fired clay, which is compacted and hardened due to exposure to high temperature.
For you, it will be needed first of all in order to raise the floor level to the desired height, insulate it and significantly strengthen it. Floor screed with expanded clay is much more effective than a solution of sand and cement. Mainly due to the fact that it is able to pass the right amount of steam and air.
Among the main advantages are the following:
- resistance to high and low temperatures;
- the ability to use in any residential or commercial premises;
- expanded clay does not ignite, does not rot, weighs little;
- the ability to even out even strong irregularities that other mixtures cannot cope with;
- ease of screeding even without additional skills.
When do you need to fill the floor with expanded clay?
There are frequent cases when no alternative other than expanded clay simply fits:
- It is necessary to process an area exceeding 15 centimeters in height. Cement mortar in this case will cost much more, and its strength will be an order of magnitude lower.
- When it is impossible for the screed to greatly add weight to the building due to a weak foundation.
- The presence of wooden floors (together with expanded clay, it is also recommended to use foam plastic as a heat insulator with low weight).
- If you do not have a large budget for repairs and want to spend less on the materials used.
How does a do-it-yourself floor screed with expanded clay. Preparatory stage and miscalculation of materials
Tools:
- level;
- construction mixer;
- ruler;
- rope;
- rails and profiles;
- rule.
Materials:
- expanded clay;
- sand;
- cement;
- water.
Initially, you need to get rid of the old coating and bring the base to the desired state - remove construction debris, clean it of foreign objects.
- dismantle the old floor;
- vacuum or sweep small debris;
- clean and cement small holes in the floor.
As with most modern construction work, it all starts with the markup. Initially, decide to what height you will raise the floor, install beacons around the perimeter. The step between the beacons should be up to a meter. All rails must be set exactly on the level.
Important! If the screed will be carried out in all rooms, make sure that the level is the same.
First you need to determine the highest point of the floor. To do this, you can use a laser level (it is more convenient and faster to work with). If it is not there, you can replace it with ordinary water. But in this case, you will need to use a rope to mark the level with all the accuracy.
Set the beacons starting from the top point. At the highest point, the width of your screed in most cases will not exceed 5-6 millimeters, gradually increasing in the lower parts of the room. To fix the beacons, you can use gypsum or cement mortar. But the second implies the need to work quickly, until the solution has frozen and begun to harden.
It is not difficult to calculate the desired ratio of expanded clay to a standard cement mortar. The more this material is used, the better thermal insulation the screed will provide. But if you overdo it, then its strength will greatly deteriorate. In the calculation, it is necessary to take into account the thickness of the base, the strength of the foundation, and thermal insulation characteristics. The optimal ratio of expanded clay and mortar is 1:1.
Keep in mind that the density of the material of different fractions can vary between 250-600 kilograms per cubic meter.
The standard number of components per cubic meter of expanded clay concrete is as follows:
- cement - up to 300 kg;
- sand - 300 kg;
- expanded clay - one cube (weight may vary due to different density, so when buying, be guided by volume).
A more accurate calculation can be made using the following example:
As a standard, let's take a room with dimensions of 9 square meters and an average layer thickness of 60-65 mm. We make the calculation: 9 x 0.06 \u003d 0.54 cubic meters. m., which is exactly 540 liters. screed solution.
There are several ways to make a floor screed. We offer two simple and effective options:
Screed option No. 1
- After you take measurements and mark the level of the screed, you need to fill in fine expanded clay over the entire area. A small fraction at this stage is needed so that the expanded clay is better compacted. The layer should be no higher than 2.3 centimeters to the top point of the future screed. Using a level, make the expanded clay layer completely even and spread it over the surface.
- The resulting layer for better density can be filled with cement "milk".
To prepare it, you need to make a standard screed solution, but there should be twice as much water in it. By itself, the "milk" material will not hold together, but it forms a film on it, which will prevent the absorption of liquid by expanded clay. As a result, the consumption of the solution during pouring will decrease. For the formation and hardening of such a film, it will take a day. Finished at this stage. Now you just need to wait.
- At the end of the day, you can proceed directly to the finishing screed. Pour the required amount of expanded clay over the entire area and level again using a level. Now pour the finished solution onto the surface, level it with the rule and leave to dry for 2-3 days.
- When the screed is dry, remove the beacons, and seal the resulting holes with cement.
Screed option No. 2
In this case, expanded clay will also have to be laid in two layers, but the whole process is noticeably faster than in the first version.
- Prepare a screed solution. To make it suitable for use, you must first fill the expanded clay in a large container, pour water and mix with a construction mixer. Next, add cement and sand in the right amount to the container and also mix everything. There is no exact proportion in this case.
- Gradually add sand and cement to the solution until it becomes a homogeneous viscous mass without lumps.
- Pour the finished composition to a height of up to 2.5 cm from the floor. Please note that in this case, unlike the previous one, you do not have to wait a day, but you can immediately continue working.
- When you start finishing pouring, do not reach the edge of the bottom a few centimeters.
- Carefully align the top layer of the screed. There may still be bumps in some areas. They need to be found and eliminated in time. Avoid puddles, gouges, surface bubbles, etc.
- If there are wires and any communications under the screed, it is necessary to wrap them with plastic wrap and fix them in the desired position with adhesive tape or electrical tape.
- Under expanded clay, it is best to put a layer of waterproofing. For this purpose, mastic, plastic film or hydrosol can be used.
- Profiles and rails are the best options for beacons.
- It will take at least a month for the screed to dry completely at standard room temperature and humidity.
- In the process of drying, you need to regularly water the surface with a small amount of water to avoid the appearance of cracks.
- If a plasticizer is added to the solution, then the likelihood of cracks is significantly reduced.
- If you use expanded clay mainly to improve thermal insulation, its layer should be at least 10 cm.
- Use expanded clay of different fractions to get a denser screed.
- Expanded clay can be effectively used together with self-leveling floors. By themselves, they perfectly level the surface due to a fairly liquid consistency. If expanded clay is mixed with such a solution, higher strength and thermal insulation can be achieved.
- During the screed, work the building rule on yourself over the entire surface area.
- Reinforcing the surface of the screed is an optional but useful step that can significantly strengthen it.
As you can see, filling the floor with expanded clay with your own hands is a fairly simple method that allows you to get a good result for little money. Without expensive tools and materials.
During operation, depending on the intended purpose, a number of technical requirements are imposed on the floors of buildings and structures. These are strength, evenness, the maximum value of the specific load, the degree of thermal insulation, and so on.
General description of expanded clay concrete
An excellent option in terms of price, quality and speed of installation of the floor surface is the laying of a concrete screed, which provides perfect evenness and high wear resistance. However, this type of floor has a number of disadvantages - a high specific gravity per unit area and a low degree of thermal insulation over the entire depth of the surface. Expanded clay concrete screed, which is a lightweight concrete, retains the advantages of a conventional concrete screed, but is devoid of its disadvantages.
The method of obtaining expanded clay concrete for floor screed is simple and differs from the classic concrete mortar, consisting of cement, sand, water and crushed stone, only in that expanded clay is used instead of crushed stone. It has the form of gravel with a porous structure in the form of an oval of various fractions from 5 to 40 mm, it is produced industrially, by firing clay or its derivatives. Variability is determined by the type of construction work being carried out. The smallest is used for the production of expanded clay concrete screed and the production of blocks, the middle one is used for bulk insulation of the floor and ceilings, the large one is used for thermal insulation of outbuildings and heating mains.
Types and scope of expanded clay concrete
The classification of expanded clay concrete is quite extensive and depends on the requirements for the type of product produced, the density of the granules, the application and solidity. All these signs are standardized by the brand (for example, expanded clay concrete M100), which determines the class of its application and varies from 35 to 100 kg / cm²:
Claydite concrete grade | Application area |
arrangement of load-bearing structures, the construction of partitions indoors |
|
erection of load-bearing structures in the construction of residential and industrial buildings |
|
floor screed |
|
production of expanded clay concrete blocks |
|
And floor slabs |
|
installation of engineering structures with a large periodic load |
Taking into account the area of application, the density of expanded clay concrete is an important characteristic, which is determined by the ratio of mass to volume of the material and has limits from 700 to 1400 kg / cm². Often in buildings of old and not very old construction, for a number of reasons (foundation subsidence, unskilled installation), there are significant differences in the floor level of adjacent rooms, and sometimes even within the same room. Leveling to a single level with a conventional cement-sand screed can seriously increase the load on the supporting elements of the building, which is highly undesirable, especially when it comes to multi-storey buildings.
Due to the porosity of the screed, the density of heavy concrete is much less, which determines the unconditional priority of its use in such a situation. Increasing the percentage of cement in expanded clay concrete increases the strength of the structure, however, there is a significant increase (up to 1.5 times) in the weight of concrete. Accordingly, the maximum possible reduction of the cement component of the material allows to reduce its volumetric weight. In this regard, the grade of Portland cement used in its production must be at least 400.
Benefits of using expanded clay concrete
And it does not sink in water, and does not burn in fire. Low thermal conductivity determines the high heat resistance of expanded clay concrete, which means long-term resistance of the material to high temperatures. Even at temperatures above 1000 °C, expanded clay concrete retains its mechanical properties. The material shows itself very well when exposed to moisture. Unlike stones, which, having been soaked with water in frost, are destroyed, expanded clay concrete has high frost resistance, that is, the ability to freeze and thaw repeatedly without loss of strength.

Another important factor determining the priority choice of expanded clay as a filler for concrete is its environmental friendliness. It does not emit harmful substances either when exposed to an aggressive environment, or over time, or when completely destroyed. This explains its choice as a building material and insulation in residential premises.
Preparation of the base for pouring the floor with expanded clay concrete
If the screed is made over an existing even and dense coating, then this stage of work can be skipped. However, most often pouring is performed directly on the ground, in which case additional preparation of the base is required. The surface is leveled and carefully compacted, the pits are covered with sand, the protrusions are knocked down for uniform laying of the pillow. The pillow is a layer of sand about 2-3 cm and a layer of expanded clay or crushed stone 3-5 cm thick, or more, up to the level of the draft base. Next, a plastic film or roofing felt is laid to waterproof the future screed, a masonry mesh is mounted and beacons are installed.

Types and methods of using expanded clay screeds
Having dealt with the main properties and technical characteristics of expanded clay concrete, its pros and cons, let's try to understand how to properly fill the floor using this material. The choice of the type of expanded clay concrete screed depends on the type of base on which it is produced, and therefore floor screeds can be of three types. Let's consider each of them.
Dry screed
Expanded clay gravel is evenly and without being distributed over the previously prepared, cleaned and compacted base surface, not reaching 2 cm to the lower level of the lighthouse. in this case is determined by the required degree of thermal insulation. Next, the entire area is poured with cement milk, which is made by mixing cement with a large amount of water without adding sand. This procedure will fix the expanded clay and cover the gravel with a thin protective layer that prevents moisture from being drawn out of the finishing screed, which will give additional strength to the floor. After that, the usual thin screed is performed. The advantages of this method are the speed of installation, the disadvantages are low surface strength.

Wet screed
With this option, so much water is added to the solution so that light and porous expanded clay floats to the surface after pouring the screed. The hardening of concrete takes a little longer, all the filler is concentrated at the top of the screed. The advantages include self-leveling of the mixture. The disadvantages are long drying, the need for special preparation of the surface to be coated in order to avoid leaks, as well as the subsequent surface screed, if necessary, to obtain a smooth surface. In this way, attics and outbuildings are usually insulated.

Semi-dry screed
The most common type of expanded clay concrete pavement, which is identical to conventional concrete in terms of the manufacturing method. For the correct filling of the floor in this way, expanded clay concrete M100 is used. In its manufacture, expanded clay of the first fraction with a diameter of 5-10 mm is taken. The proportions of the mixture are as follows: 1 part of Portland cement grade 400 - 3 parts of sand - 4 parts of expanded clay. As for the amount of water, this parameter must be selected individually, depending on the moisture content of the sand. It is necessary to achieve a consistency in which the granules of the material would not float to the surface, which makes smoothing difficult, at the same time, the solution should not be too dry, as this complicates its installation and can lead to the formation of voids and cracks in the mass of the screed.
The solution is mixed in a concrete mixer or in a large container. The use of a mixer nozzle is extremely problematic due to small portions in one batch, and this makes laying long, the solution turns out to be of different consistency, and expanded clay is distributed unevenly in the mass of concrete. The sequence of mixing the ingredients in different sources is described in different ways, but in practice this is of no fundamental importance. The main thing is that the solution is uniform and the expanded clay granules are completely covered with a binder.

The solution is applied in an even layer over the entire surface to be covered, while it is necessary to observe the condition - the thickness of the expanded clay concrete floor screed must be at least 3 cm, usually it is 4-6 cm. its grouting a day after laying. The advantages of this coating method are obvious - the possibility of using it for any type of floor and ceiling. The disadvantage is the high labor intensity, pouring using beacons and the need for finishing grouting.
Often the floor surface has large differences, especially in newly commissioned properties. The steps between the floor slabs can reach a height of up to 10 cm. It is inefficient to level such floors with concrete mortar for two reasons:
- Unprofitable in economic terms - high consumption of material
- The screed turns out to be very massive and dooms the floor slabs to excessive load
To facilitate the entire structure, low-density ingredients are added to the screed, quite often expanded clay plays their role. This material, depending on the size of the granules, has a thermal conductivity coefficient from 0.07 to 0.16 W/m. Knowing how to properly screed on expanded clay, you can arrange a warm floor with good thermal insulation properties.
Experts recommend using expanded clay for leveling the floor with level differences of more than 5 cm. When using this material for screeding, it should be borne in mind that its granules have a low density and often float to the surface of the solution. It is difficult to determine by experience what layer a screed is poured onto expanded clay so that it evens out all the bumps and does not crack. It is more rational to listen to the advice of experts and make concrete a layer of 2-3 cm. At the same time, the technology for performing work on the installation of a flat floor is divided into stages:
- Drawing a single horizon line throughout the apartment.
- Light fraction flooring.
- Lighthouse installation.
- Leveling fill.
Let's consider each operation in more detail.
A flat floor throughout the apartment without differences between rooms looks beautiful. It is better to mount it at once in all rooms, and not separately - first one, then after a month or two, the next. To obtain the same floor level in the apartment, the zero horizon line is beaten off on all walls.
It is more convenient to mark with the help of a water building level. It will allow you to project a given mark on all walls with an accuracy of 1 mm. Markup using this tool is carried out as follows:
- Stepping back from the floor surface 1-1.5 m in any of the rooms, make a mark on the wall
- The first communicating vessel with divisions is fixed near the drawn risk, moving along the walls, the second horizontal level is marked after 50-60 cm
- According to the marks, the so-called “zero level” is drawn with a straight line
- Stepping back from the highest point of the floor 7 mm (2 mm for concrete + 5 for expanded clay), mark the risk of finishing pouring on the wall
- The screed mark is projected onto all walls and a continuous line is drawn, which will be orienting for the installation of beacons
After repulsing the horizontal, they begin to prepare the surface. The floor is cleaned of construction debris and dust, then sheets of waterproofing material are spread over the entire area with an overlap on the walls to the marked horizontal. As a protection against moisture, you can use a plastic film. The joints between the canvases are overlapped with an overlap of at least 10 cm and glued with moisture-resistant construction tape. Expanded clay is laid on top of the film.
Light layer installation
The material that facilitates the screed is usually classified depending on the size and shape of the fractions into the following groups:
- Rubble. Expanded clay grains of this type are 5-40 mm in size, mostly angular in shape. They are obtained by crushing large pieces of fired foamed clay.
- Expanded clay gravel. This material is a rounded brown granules. According to GOST, gravel is divided into fractions of 5-10, 10-20 and 20-40 mm in size. It is used as a heat-insulating material that facilitates the construction of the screed.
- Expanded clay sand. It is obtained by crushing fired clay granules to particles less than 5 mm in size. Sand is used to make light thin screeds.
Expanded clay is mounted in a screed in two ways - by pouring a dry fraction, followed by pouring "cement milk" or laying out a solution. The granules have a low density and, if not fixed, they will float through the top layer and form irregularities on the surface of the screed. The most reliable fixing of expanded clay in a single mass occurs when the solution is mixed.
To prepare the mixture, take 1 part of M-500 cement, 2 shares of building sand and 7 - expanded clay gravel. The finished solution is laid out on the floor, making the layer 2.5-3 cm below the drawn horizon line and leveled with the rule. As soon as the claydite concrete gains initial hardness, at which it is possible to walk on it, they begin to install the beacons.
Attaching guides

Construction beacons are used to control an even pouring layer. They are placed at a distance less than the length of the rule by 10-15 cm from each other. The initial guide is mounted, stepping back from the wall 25-35 cm. To fix the beacons, self-tapping screws are used, which are screwed into expanded clay concrete. The use of screws allows you to smoothly adjust the height of the bar.
Self-tapping screws are screwed in such a way that the top point of the beacon is flush with the marked horizon line. The screws are placed along the entire length of the plank with a distance of 35-55 cm. The even location of the guides relative to each other is controlled using a building level 2 m long.
An alternative option is a device under the beacons of pillows made of cement-sand mixture. With this method, the position of the slats is adjusted by sinking or pulling them out of the pillows. After fixing the beacons, all the remnants of the solution above the guides are carefully removed. Then they wait for the mixture to harden, check the reliability of the fastening of the strips and proceed to pouring.
Surface leveling
The final layer of concrete mix (1 share of M-500 cement for 4 parts of building sand) is poured between the beacons. When manually mixing the solution, dry fractions are first mixed to a uniform gray color and then water is added. When using a labor-saving concrete mixer, 1 part water, 1 cement, 4 parts sand are poured into the container and wait until mixed into a homogeneous mass. Experts recommend adding plasticizers to the composition, for example, PVA glue. These substances increase the adhesion of the mortar and prevent cracking of the concrete.
A less labor-intensive, but more expensive method is a screed device using ready-made dry mixes. In addition to plasticizers, their composition includes special components that provide the screed with a long service life. Such mixtures should be diluted strictly following the recommendations of the manufacturers.
The solution prepared by this or that method is laid out on expanded clay concrete and leveled using the rule, which is carried out longitudinally to the beacons in close contact with their upper surface. In order for the concrete to lie evenly, it is distributed by vibratory movements of small amplitude transversely to the guides. When pits occur, a mortar is taken from the front front with a trowel and placed in a defective place.
To make the screed monolithic, experts recommend arranging it in one day. If it is impossible to fill the floor at once in the entire apartment, it is leveled according to the rooms, insulating with a strip 3-4 mm thick, thereby providing a thermal expansion joint.
After 4-5 hours, the concrete will harden and the beacons can be removed, and the resulting voids can be sealed with mortar. So that the screed does not crack, it is recommended to spill it with water from a watering can 1-2 times a day for a week.
Expanded clay facilitates concrete and allows you to make a screed up to 15 cm thick. So if the floors are frightening with drops, you should not stumble over them. An effective way to eliminate such defects is a two-layer screed with expanded clay, the installation of which gives the room a completely different look.