How to tile your own oven. Furnace cladding with ceramic tiles
Tiled. If the heating device has lost its original appearance, then such a lining may well replace the old layer of plaster. If the stove was whitewashed or painted, then after a while its appearance had to be updated. But if you properly lay the tile, then it will be ready to serve for several decades.
Finishing is carried out not only to make the stove look attractive, but also to preserve the layer of plaster, which acts as a protective barrier that does not allow the seams between the bricks to open. Among other things, the tile has a high heat capacity, so when heated, it itself gives off heat to the room for a long time, preventing the stove from cooling down quickly.
Previously, tiles were laid only on the mortar, but today it is customary to use new methods that over time allow you to replace the facing material with a new one. However, before starting finishing work, it is necessary to carry out some measures that are no less important for the safe use of the furnace and the quality of the laying of materials.
Preparatory work
If you are faced with the question of how to overlay the oven with tiles, then you need to start the process with the preparation of tools, including:
- spatulas;
- tile cutter;
- pencil;
- metal ruler;
- building level;
- electric drill;
- glue container.
As for spatulas, you will need several varieties, among them:
- jagged;
- normal;
- angular;
- rubber.
The first will be needed for applying and distributing glue. It is recommended to purchase a tool with a tooth height of 6 mm. But a straight spatula, which is also needed, will be required to clean the surface. To decorate the corners, you should purchase an angle spatula, but you can close the seams between the tiles with a rubber tool.
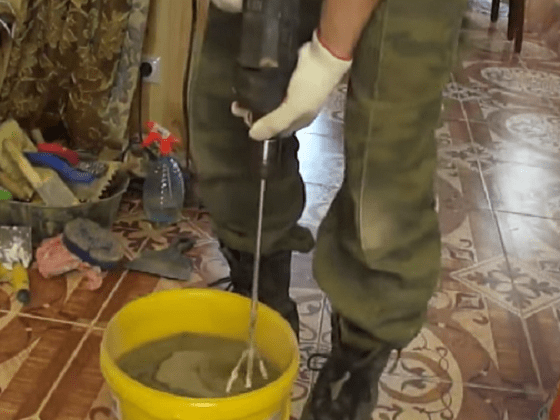
Among other things, you should take care of the presence of an electric drill, which will have a nozzle in the form of a mixer. So you can knead the glue. In addition to the building level, you should purchase or find a plumb line. For marking, you may need a pencil or marker. When performing installation, it is best to have at hand:
- metal scissors;
- a hammer;
- riveter.
For the manufacture of corners, you may need a rubber or wooden mallet. Perhaps you should take care of having a drill with a set of drill bits for metal.
Preparation of materials

Quite often, novice home craftsmen wonder how to tile. If you are also one of them, then you need to prepare the following materials:
- heat resistant glue;
- grout;
- primer;
- plinth.
As for the glue, it is necessary to choose the one that is intended for lining stoves and fireplaces. But if the tile will be installed dry, then you should prepare:
- sheet of galvanized steel;
- aluminum two-meter strips;
- steel corner.
As for the steel sheet, its thickness should be equal to the limit of 0.6 to 0.9 mm. Aluminum strips will have a width of 20 mm, they will be useful for the manufacture of the frame, where the guides will be installed.
Tile selection

The choice of tiles depends not only on the type of furnace, but also on the characteristics inherent in the material. Furnaces can be heating, heating and cooking, kitchen or made in the form of fireplaces. Each variety has a specific duration of the heating and cooling cycle.
Furnaces can also differ in heating temperature, so it is logical to assume that tiles should be selected taking into account these operating features. The cladding material must be resistant to high temperatures. In general, the stove can be overlaid with any tile, but not every variety of it is suitable for this purpose. For cladding, you can use heat-resistant (heat-resistant, refractory and heat-resistant) tiles. The coefficient of thermal expansion in this case will be equal to the limit from 7 to 8%.
If you are faced with the question of how to overlay the oven with tiles, then you must also take into account the strength of the material. Some varieties have a strength in the range of 300 N / m 2, which is much higher compared to concrete. Many consumers primarily pay attention to chemical inertness and environmental friendliness. When heated, the material should not emit harmful substances, so the chemical composition must be given increased attention.
Choosing a tile according to other characteristics

In order for the furnace lining to last for a long time, it is necessary to choose one that is resistant to scratches, wear and abrasion. Due to the fact that stove and stone tiles are installed for a long time, it is desirable that during this period they do not change their aesthetic qualities. In addition, the tile must be low-porous. The higher this figure, the lower the strength.
It is also necessary to take into account the moisture absorption coefficient, it should not exceed 3%. If the coefficient increases, then the porosity increases and the strength decreases. Tiles for stoves must also be fire resistant. It is good if the material has a certificate containing data on this.
The main types of tiles

Terracotta tiles are one of the types of material for facing heating equipment. The process of its production involves the use of a certain type of clay, as a result, it is possible to obtain a heat-resistant tile, which has proven itself as a facing material for fireplaces and stoves. Among the main features, high strength and the presence of terracotta color, which can be glazed or unglazed, should be highlighted.
Due to the fact that glazed terracotta tiles are more attractive, they are used most often. Due to the fact that the products have vapor permeability and a special structure, this finish is recommended for use when lining stoves in saunas and baths. Such a surface is easy to care for, it is heat-resistant, and during installation it shows excellent adhesion to any surfaces.
Tile "Majolica"

Another type of heat-resistant tile is "Majolica", which is a more advanced version of glazed terracotta tiles. Their characteristics are similar, the difference is only in appearance. Due to the fact that the Majolica pattern is applied in a thin layer, surface cracking is almost excluded. However, Majolica tiles are not recommended for use in or in the kitchen, as well as in rooms with high humidity, since the material has a porous structure.
Choice of clinker tiles

If you decide to use heat-resistant clinker tiles for stoves and fireplaces, then you need to take its choice seriously. Heat resistance is indicated by the letter "T". Before purchasing the material, you must make sure that it is fire resistant. But as for the preferred thickness, for a fireplace or stove, it should be 8 mm. Thinner cannot be used unless it is 6 mm, otherwise the material will experience constant heat and quickly break down.
For cladding, square-shaped tiles with a side of 120 mm are the best. If the dimensions are quite large, and the thickness remains the same, then the strength and rigidity of the masonry decreases. With an increase in thickness, problems arise with fastening, because the glue is not able to hold the impressive weight of the cladding. The color of the tile should vary slightly, unless you use special decorative techniques.
Before laying tiles on a brick oven, you must make sure that the products correspond to the exact dimensions. The point here is not even in the aesthetic side of the issue, but in the complexity of installation. After all, if the tiles will have different sizes, then it will not be possible to lay them tightly to each other, therefore, before purchasing the tile, it is necessary to check for compliance with the geometric parameters. To do this, two products are added together, which will allow you to check if there are gaps between the surfaces.
Preparatory work
Whatever method of finishing you choose, the surface of the furnace must first be prepared, for this you need to remove the old layer of plaster. In order to make these works easier to carry out, the walls are wetted several times with water. If the coating is clay, then it can be removed with a spatula. But if there is a cement-based mortar surface, you may have to act with a hammer and chisel. However, in the end, you should get a furnace wall completely freed from the old finish.
After you cope with the plaster, you need to walk on the surface with an iron brush or grinder, the latter of which must be supplemented with a special nozzle. The surface is sprayed with water from a spray gun, and the brick seams are cleaned, while it is necessary to go deep by 10 mm. This is required in order for the plaster to adhere to the wall.
If the masonry is new, then it should be dried well, and then cleaned of dust and mortar residues. As soon as these works are completed, the surface is primed, and the composition must fall to the full depth of the joints. Allow the substrate to dry before proceeding with laying stove tiles. The best preparation is to apply a primer in 2 layers. The walls are checked for their straightness, because in the end you should get a foundation without drops. The process is carried out using a plumb line and a building level.
If you notice differences, then the wall will have to be leveled. This can be done with a plaster mixture, which is intended for finishing the furnace. If the layer is thin, then it is applied with a wide spatula, leveling the solution. But if it is necessary to form a thick layer, the solution is applied by spraying, and then leveled by the rule.
Adhesive selection
Before you start lining, you need to pick up the glue. In order not to calculate the proportions, it is better to purchase a ready-made composition intended for finishing fireplaces and stoves. Some craftsmen prefer to use a cement-based mortar, adding salt or PVC to it. If you add a little salt, the substance will acquire the ability to accumulate moisture, preventing the clay, concrete and glue from drying out quickly.
Laying tiles
Laying tiles on the stove is carried out, starting from the bottom. At the first stage, it will be necessary to beat off the line of the first row. Marking is carried out using a colored cord. At first, the lining may slide down, so a perforated metal corner must be installed along the line. It is fixed with dowels, which must be removed from each other by a distance of 200 mm.
Before you start lining the Russian stove with ceramic tiles with your own hands, you need to install perforated corners on the corners of the heater, which will allow you to make a corner joint. After preparation, you can proceed to the preparation of glue. The solution is infused for 10 minutes, only after that you can proceed to the installation of the first row.
Using a notched trowel, an adhesive mass is applied to the wall, after which it is distributed over an area equal to 7 tiles. On the surface covered with glue, it is necessary to lay the cladding, and install crosses between the individual tiles. When laying Majolica tiles, a gap of 10 mm can be left between the individual elements. Instead of crosses, in this case, you can use chopped pieces of drywall.
Tiles must be pressed against the wall, checking their position with a building level. Adhesive protruding from the seams must be removed immediately. The seam space should remain empty, because later it should be filled with grout. It is necessary to lay the tiles as evenly as possible, but the position of the products can be corrected within another 15 minutes. After this time, the glue will set, and it will no longer be possible to move the lining.
After you have finished finishing the stove with tiles in the first four rows, you need to take a break for a couple of hours so that the glue sets well. After laying, you can complete, and then leave for a day or 36 hours. Before doing this, it is important to take care of cleaning the surface from adhesive residue. At this stage, it will not be difficult to wipe it off, but after it finally seizes, it will be very difficult to remove the stains.
Having laid the clinker tiles for stoves, you can proceed to grouting. For this, it is necessary to use heat-resistant compounds that can withstand about 200 ° C. The composition is selected by color, but you should not choose white, as with temperature changes it can acquire a dirty shade. Having closed the seams, you can proceed to wet cleaning. After some time, the mixture will be quite difficult to remove from the surface of the cladding and floor.
Conclusion
Now you know how to lay tiles on an old stove. To do this, it is necessary to thoroughly clean the walls of the heater, and then cover them with a primer. It is important to make sure that the base is as even as possible, otherwise it is leveled. As for the masonry mortar, the best option would be a heat-resistant ceramic tile adhesive, because you do not have to select the ingredients and proportions yourself. The manufacturer has already done all this for the master. Yes, and cement compositions have many disadvantages. For fire resistance, additives to the composition are required.
The stone stove takes on a finished look and looks really impressive only after performing a decorative surface finish. For a cottage or country house, you can leave the brickwork as it is, or whiten or paint it with a heat-resistant paint compound, but for a home stove, it is best to choose tiles for lining stoves and fireplaces. The matte or glazed surface of ceramic tiles is much more durable and practical in cleaning, it will hide minor defects and at the same time please the owners with a nice pattern.
Glue yourself or invite the master
Most tile masters love to scare their potential customers by colorfully describing how difficult it is to line a stove with ceramic tiles without practice and experience. In fact, there are many nuances in how to line the oven, but they are all known and do not present any particular difficulties if:
- Use high-quality tile materials and heat-resistant adhesive. It makes no sense to lay down on home-made compositions;
- Qualitatively prepare the walls of the furnace for lining, level the surface with plaster so that the height difference is no more than 10 mm;
- Accurately follow the technology and installation steps, without trying to improve or save money, for example, as in the video:
- Stock up on patience and time, as the lining of furnaces with ceramic tiles does not tolerate haste and a careless attitude to work.
Advice! If there is a fireplace stove in the summer cottage or country house, as a test and gain experience, you can tile the fireplace, as in the photo.

The body of a properly assembled fireplace does not get hotter than a conventional stove, so the risk of chipping ceramic tiles is relatively small. Such work will add confidence and at the same time will allow you to test the materials prepared for lining the home oven. A little practice will allow you to get used to laying ceramics and "fill your hand" in the simplest operations. Of course, the issue of facing with ceramic tiles concerns, first of all, old worn-out stoves, as well as new buildings, if ordinary red ceramic material was used in the masonry instead of expensive facing bricks.
How to choose the material for lining the furnace
Ceramic tiles for facing the furnace should easily withstand temperatures up to 400 ° C, not crack during cyclic heating, have the necessary strength and pleasant external data. For the first experience, you can use several options for ceramic tiles:

In the question of how to line the oven, it is best to use proven and most affordable ceramic materials. To line the oven with ceramic tiles, craftsmen buy material with a margin of 5%, for the first masonry experiments, the amount of lining can be safely increased to 10%.
Traditionally, the walls are lined with tiles and relief majolica. For the laying of this kind of cladding, a very good knowledge of the properties of furnace ceramics is required, therefore, if an artistic appearance of the furnace decoration is required, then it is better to resort to the services of a master. For example, to finish the stove with tiles, it is necessary to select the corner and shelf elements of ceramic tiles, correctly calculate the size and attachment points, photo.

Given the fact that tiles and majolica are not cut like tiles or clinker, the use of artistic ceramic tiles for cladding will require, first of all, work experience. Separate tricks on how to overlay the oven with ceramic tiles are shown in the video:
The technology of laying ceramic cladding on an adhesive base
To fix ceramic tiles on the surface of the furnace, a special tile adhesive is used, which has high heat resistance and the necessary coefficient of thermal expansion. Usually it is a mixture of refractory clay with fireclay powder, perlite and plasticizing additives that make the adhesive material plastic and slightly viscous. As one of the adhesive compositions proven by many years of practice, one can name Plitonit W of the SuperGlue brand, Neomid Supercontact and Scanmix Skanfixsuper.
Clay adhesives are used from home-grown solutions, at the rate of 1 measure of clay to 4 measures of sand and 1 water with the addition of PVA and asbestos fiber. When using lean clays, the amount of sand in the batch is reduced by 40-60%.
We carry out the lining of the furnace in several stages:
- Cleaning and leveling the surface of the masonry for laying;
- Marking and calculating the amount of material, laying tiles, measuring rows and choosing a tie line;
- Laying ceramic tiles in rows;
- Grouting joints between tiles with a compensating compound.
Advice! The most time-consuming operations, such as stripping, trimming and plastering walls, are performed at least a week before the start of laying. Within a week, as a rule, the eye manages to “snatch out” and see those wall defects that were not visible during the alignment process.
Removal and preparation of walls for cladding
Furnaces with perfectly even walls do not exist, moreover, in the process of use, the walls can play, expand, become covered with cracks and chips. Therefore, before lining the oven, it will be necessary to clean the walls from dirt and old mortar. If the brickwork "wags" on the plane no more than 10 mm, then the leveling plaster can be abandoned, this will only improve the adhesion of the tile adhesive to the ceramic surface of the tile.

In this case, it is necessary to deepen the tile joints and apply a notch to the brick. Cracks and chips are covered with masonry mortar. At least a day before the start of laying the cladding, the brick base under the ceramic tiles is reinforced with a heat-resistant primer.
If the oven walls are finished with good quality plaster, it is necessary to clean, level and strengthen the layer with a primer. The old and cracked plaster layer is knocked down to a brick, the furnace walls are cleaned and primed.
To strengthen the plaster mass under tiling, a reinforcing welded mesh 10x10 mm of annealed steel wire of 0.4-0.5 mm is stuffed onto the brick, it can be fastened with “bugs” or loops embedded in the seams. Next, install ruler-beacons and plaster. If the thickness of the laid material is more than 15 mm, the plaster is applied to the oven in two layers with the first one drying for a day, as in the video:
The plaster is prepared according to the standard proportion - for one part of cement, three parts of clay and a fifth of sand. To ensure good adhesion of the plaster without shrinkage, a polyvinyl acetate emulsion can be added to the mortar.
Laying ceramic tiles
Furnace tiling begins with the laying of ceramic material along the lower and middle tiers. This is done to adjust the size of the tile cut and the width of the seam. For hot single-pass stoves, the joint width between ceramic tiles is increased to 10 mm, for colder wood-burning furnaces, the joint is reduced to 8 mm.
To make the first row of cladding, you can stretch the fishing line or set the laser level, the tiles are laid out with a gap between the bottom edge and the floor surface of 7-9 mm. The walls should be warm, 30-35 ° C. To facilitate the process of laying under the first row, a guide bar is nailed to the oven wall, ideally aligned with the horizon.
The freshly prepared adhesive mass sets quickly enough in heat, so it is prepared in small portions, for one or two rows. Before laying, the reverse side of the tile is sprayed with water or moistened with a brush, after which a layer of adhesive solution 4-7 mm thick is applied with a notched trowel and laid on the wall.
The front corner of the furnace body is laid out first, and then the row is pulled along the front and towards the back wall. During the day, more than three rows of tiles are not laid out. The seams between the individual tiles are cleaned from the adhesive solution and left open.

The next row can only be laid after the previous one has been completely laid out on the wall. The result must be checked by the building level along the horizon. Within 8-10 minutes from the moment of laying, the tiles can be corrected with a wooden or rubber mallet. The upper edge of the laid tile must be perfectly even; for a lined stove, it is fundamentally important that the size of the seam be the same everywhere, otherwise the layer may crack and peel off when heated.
To achieve maximum strength of the cladding, the tiles are glued with a checkerboard dressing of rows, but such compositions do not always look beautiful, therefore, most often the oven is lined with straight rows.

Finishing operations
Before laying the tiles, it is necessary to remove the cast-iron parts of the door and frame from the firebox. If you put ceramics on top of cast iron, the heated metal will lift the layer of tiles. After the glue has completely dried, the cast iron is returned to its place and fixed to the brick surface with long self-tapping screws with an asbestos cord.

Three days after the completion of the tile sticker, the seams are finally cleaned of glue residues and the joints are jointed or grouted with a clay-based compensating compound. The grout mass is applied to the seams with a rubber spatula and gently pressed along the entire length of the seam. After a few hours, the edges are wiped with a flannel, after which the depth of the seam is leveled with a wet finger or a rubber grater, making it the same over the entire surface of the cladding. After final drying, all grouting material is carefully removed from the surface of the tile.

Conclusion
Furnace cladding with conventional ceramic materials takes 6-7 days on average. Do not try to do the job faster or warm the walls to dry the cladding. On the contrary, the room with the stove should be closed from drafts, and not used for at least a couple of weeks.
Many of us have stoves in country houses, apartments or summer cottages: bath or for the home, induction, brick or iron, gas or electric. Often the appearance of your brick heating structure does not fit into the interior of the room. To increase the attractiveness of the stove, it can be, or with a decorative artificial stone.
The tiles are the same ceramic tiles only made by hand. Due to this factor, it has high strength, heat resistance. On the market you can buy tiles of any kind.
In the case of ceramic tiles, everything is much simpler. She has a little lower heat resistance, however, it is sufficient for the daily operation of the unit. Laying it is easier because this material has a simpler shape and texture. In addition, ceramic much cheaper than tiles.
Furnace lining algorithm
 Do-it-yourself laying material begins with surface preparation heating structure. To do this, we need a brush for metal: with it we carefully remove the old plaster. We should get a flat, clean surface. Then you need a little polish the hull through a grinder, then we carefully coat the stove with a primer in several layers. When the mixture dries and absorbs, you can proceed to the base for the tile. In this case, to help us mesh for plaster will come. It must be properly attached to the body of the stove.
Only when we have done all the above steps, you can start laying the tiles. Better start from the bottom moving up. Apply with a spatula hot glue unit body. Then you need to attach the building material to the surface, strongly clamp it. It is better to constantly check the quality with a plumb line and a building level.
Can be done right away install tile crosses. This is necessary so that the rows are even and do not require correction later. Thus, you need to properly overlay the oven to the very top. When the work is finished, you need to wait about three days and start grouting using a rubber spatula and a special tool. On the front side, try to remove the grout residue immediately, without breaking seams. After the final drying, you will only have to polish the tiles.
Share:Tiling fireplaces and stoves- a special type of work that requires accuracy, endurance and experience from the master.
Decoration of stoves with tiles is carried out in several stages, each of which has its own characteristics.
This article will address the issue of choice of facing materials and technological highlights phased work.
Types of facing tiles
For the production of tiles used special solution, which is a mixture of clay, sand and mineral components.
After thorough mixing, such a composition is subjected to high temperature kiln firing. As a result of the work, a durable decorative material is obtained.
After the first firing, the product can be covered with glaze and again exposed to high temperatures. All ceramic tiles offered on the market can be divided into two types:
- glazed- covered with a glassy composition on top. The upper and lower parts of such tiles differ significantly from each other (the top of the tile may have a different color, ornament and other decorative effects);
- Unglazed tiles characterized by a uniform surface structure. It does not have a glossy layer and decorative patterns.
The type of tile also depends on the raw materials and technological processes used in its manufacture:
- Terracotta Ceramic Tile- this is an unglazed product that is used for finishing small rooms, saunas, home gardens. One of the main advantages of terracotta is heat resistance. This quality allows the material to be used for decorating strongly heated surfaces;
- Finishing fireplaces and stoves is most often carried out using tiled ceramic tiles. This is a special material, which is a kind of tile. Tiled thanks to its structure allows you to prevent the rapid cooling of the furnace and increase its energy capacity;

- Ceramic clinker tiles belongs to the oldest facing materials with reliability, heat resistance, strength and high density. Clinker tiles are often faced fireplaces, stoves, pools and interior rooms;
- Tile- one of the most popular finishing materials. A variety of shapes, sizes, shades and patterns makes tiles an indispensable material for wall cladding bathroom or kitchen;

- Ceramic tiles for cladding is a product of high strength, characterized by resistance to low temperatures and aggressive environments. Porcelain stoneware is successfully used by builders during internal facing works, in residential and industrial buildings. They also decorate the facades.

Tile properties
 Quality facing tiles should have the following important properties:
- chemical resistance;
- high degree of strength;
- wear resistance;
- hygiene;
- resistance to wet environments;
- frost resistance;
- resistance to temperature changes;
- high tensile strength.
Materials and tools
 For execution facing works we will need:
- Level to create markup;
- tile adhesive;
- tile cutter;
- Water container and soft sponge;
- grout;
- Plastic crosses to create uniform seams between tiles;
- Putty knife;
- rubber mallet(kiyanka).
Choice of tile adhesive
 When preparing the necessary materials for lining the stove (fireplace), special attention is paid to choice of glue.
Manufacturers now offer a large number adhesive mixtures among which are in great demand:
- Universal formulations, completely ready for use;
- Dry mixes requiring preliminary dilution with water before use;
- Paste adhesive solutions which can be used without prior preparation.
When choosing an adhesive solution for tiles, experts recommend considering the following factors:
- Tile type and size;
- What base tiles will be attached;
- Under what conditions will the tile be exploited.
You can find out the device and principle of operation of a heat pump in this article:
Furnace lining technology
Fireplaces or brick stoves- an essential attribute of a country house.
You can also meet these structures in the country, but caring for them is complicated due to their unsightly appearance. Now the owners of such structures are striving to fulfill oven tiling.
You can do this work yourself - the main thing is to do it right preparation and buy quality tiles.
Preparatory stage
 The preparatory stage for lining the furnace is to purchase good tiles. Among all types of this facing material for decorating the stove use such:
- majolica;
- terracotta;
- clinker.
Oven preparation to facing consists of the following steps:
- Wall surface the furnace device is thoroughly cleaned of dust, then the joints are grouted (the joints between the bricks are freed from accumulated debris) to a depth 10-12 mm. The cleaned furnace wall is abundantly wetted with water;
- The outer surface of the oven is covered metal mesh for plaster(it is fixed with self-tapping screws and dowels). In those places where the furnace heats up the most, the grid must be fixed especially carefully;
- applied over the mesh wall leveling mortar. It is made from 1 parts cement brand M400 (not lower), 3 parts clay and 0.2 parts sand. Laying this composition on the walls will allow you to level their surface and quickly tile with ceramic tiles. The thickness of the layer may vary depending on the degree of unevenness of the wall surfaces;
- When the oven walls are completely plastered, the stove is heated, and after it cools, they begin to lay the tiles.
Laying tiles
 Cladding works consist in following the sequence of steps:
- On the dried oven wall below is fixed wooden lath. The distance from it to the floor should be equal to the width of one tile. The position of the rail is controlled by building level;
- First laid on the rail second row of tiles from the floor, and work starts from the corner of the room. The laying of the first row is carried out at the very end of the facing work. This will avoid distortion of the tiles in the future;
- On the inside of each tile is applied with a flat trowel. adhesive solution and leveled with a notched trowel;
- Back side glued tile attached to the wall and strongly pressed by hand. In order for it to be well fixed, it is recommended to lightly tap on it with a rubber hammer (mallet);
- Residues of adhesive protruding beyond the edges of the tiles must be clean immediately with a damp cloth. If this is not done, the adhesive will dry out and it will be very difficult to remove it from the tiled surface;
- To make the seams even, special plastic crosses, which are then removed before grouting tile joints;
- The bottom row of tiles is laid last, after the separation rail has been removed. If necessary, the tiles are cut with a tile cutter;

- Later 4 days after laying the seams between the tiles are filled with a special grout. An auxiliary tool in this work will be a rubber spatula;
- When the grout is dry ( 1-2 days), tile surface wipe damp cloth and then dry.
The lined oven is completely ready for use.
Mantel
 The cladding of the fireplace also has its own peculiarities.
Its design belongs to the category of heat-resistant, so for its decoration it is necessary to select a material that is resistant to temperature fluctuations. This includes ceramic tiles.
The technology for facing the fireplace is no different from that used in decorating stoves.
The best material for facing such a design would be porcelain stoneware or terracotta ceramics. The thickness of the material must be at least 8 mm.
Very often in bath rooms are installed metal stoves, which can be trimmed with decorative bricks. Such decor will not only make the design more attractive, but will ensure even distribution of heat.
Technology of work on sauna stove cladding represented by the following steps:
- Created markup walls of the stove, taking into account the fact that the distance between the structure itself and the brickwork was 1.5 cm. If it is smaller, then the bath room will heat up faster, which will lead to an early breakdown of the stove;
- The floor must be protected from high temperatures sheet metal. It is placed under the oven;
- Masonry mortar is preferably prepared from a special heat-resistant mixture;
- Laying is recommended to be done in half a tile(each subsequent row shifts exactly by half), creating two holes on both sides through which air will flow.
Where can I order work on lining the furnace
 Furnace lining services provided in Russia by many construction companies. The cost of facing fireplaces and stoves will depend on several factors:
- Volume and complexity performance of work;
- Material quality;
- Need surface pretreatment;
- Tile type and glue quality.
The price for the whole job varies within 25-27 thousand rubles.
How to properly tile the oven with tiles with your own hands, see in this video.
In modern life, despite the wide variety of heating systems that “work” without distracting a person from his daily affairs, brick stoves and fireplaces, which adorned not only the houses of ordinary people, but also the palaces of aristocrats, return more and more confidently and take their place of honor, warming them with living warmth. Since ancient times, the hearth has symbolized the well-being of the family. These heating units were built soundly, for centuries, and decorated with various kinds of tiles. Now, tiles are used to finish brick ovens. In this article, we will learn what kind of tiles to lay over the stove so that it truly decorates it, and does not fall off at the slightest movement, we will consider the stages of lining the stoves.
- the absence of cracks, the special ceramic mixture from which stove plates are made allows to increase heat transfer;
- through the ceramic cladding, toxins and other combustion products of the furnace furnace cannot pass into the room;
- the structure lined with ceramic tiles looks aesthetically beautiful and does not “spoil” the interior of the room;
- it is much easier to clean smooth ceramic tiles from dust and dirt than rough plaster.
Naturally, for facing heating devices, it is necessary to buy a special heat-resistant tile, and as a connecting element, use a clay solution, which over time, under the stable influence of high temperature, becomes even stronger.
Types of heat-resistant ceramic tiles
Since the stove (fireplace) is an object that heats up to very high temperatures, the finishing material with which it is lined must have certain characteristics:
- resistance to high temperatures;
- strength;
- resistance to mechanical stress;
- the thickness of the tile should not be less than 6 mm;
- the structure should not be porous.
Not every ceramic tile corresponds to the characteristics listed above. There are few of them:
- terracotta;
- clinker tiles;
- tiles;
- majolica;
- porcelain tile.
Characteristics of facing tiles
Before tiling a brick oven, we recommend that you study the properties of each of the listed types of facing material.

Terracotta tiles are one of the earliest facing materials used by the ancient Greeks and Romans. It is a fired unglazed product made of clay of a certain grade, which has a highly porous structure. Terracotta was also used in the manufacture of tiles and as a decorative element. This material is characterized by high strength and rich bright red-brown color.
Tiles are a unique material specially created for lining stoves. The uniqueness of the tiles is that they are piece material and have come down to our days since the time of Babylon. This is a ceramic product made of clay of certain varieties, which differs from others in a box-like shape. This cladding material owes its shape to its increased thermal performance, and the very heat transferred to the room from a stove lined with tiles is considered the most beneficial for human health and environmentally friendly.
At its core, majolica is, more advanced, glazed terracotta. The technique of painting with tin-lead glaze came to us from Mallorca. Majolica products were hand-painted by talented artists, so they were always a luxury item, and they could only be found in wealthy houses.

Furnace tiling
To overlay the oven with ceramic tiles, you need to choose a quality product; on the wrong side there should be special notches that provide stronger adhesion to the mortar. Some manufacturers produce finishing tiles with a locking system that allows you to lay it without visible seams.
If you know how to properly tile the stove, then the lining of your heating unit will delight your eyes for a long time. First you need to clean the surface of the furnace and embroider the seams, remove dust and dirt, if the cladding is a stage in the repair of the old furnace, old plaster and paint are also removed. In order for the facing tile to sit firmly in its place, the oven is covered with a special metal wire mesh, which is attached to the masonry with large nails or self-tapping screws. Aluminum reinforcing strips are also used, which provide strength to the masonry.
After that, a layer of mortar and cement and clay is applied to the masonry covered with mesh. The grade of clay does not really matter, but the cement must be grade 400. Wait for the plaster to dry before you start laying the tiles.

Laying tiles starts from the bottom, the mortar is applied to the back of the tile and applied to the plaster, a little pressure is applied, and uniform tapping distributes the mortar over the entire surface of the tile. In order for the seams to have the same width, restrictive crosses are used. The evenness of the lined surface is checked with a rail.
After completion of the laying work, grouting is carried out three days later. You can use the stove in a day.
Tiling
If a person doubts and wonders if it is possible to overlay the stove with tiles? There are practically no doubts regarding the facing of the stove with tiles. Since tiles are an ideal material for lining stoves.
Facing the stove with tiles is akin to a work of art, and craftsmen who know how to do it always enjoy special respect. Unlike other facing materials, tiles are installed during the construction of the furnace. We do not recommend taking on the laying of tiles on your own, without mastering the techniques of this ancient craft.
Before facing the stove, the tiles must be sorted. Since these are piece products, therefore, tiles with a darker pattern are disassembled from tiles with patterns of a light shade. In addition, it is necessary to set aside tiles with defects or cracks. After all this procedure, the tiles are adjusted in size by grinding and trimming the edges of the sides. It is customary to equalize the tiles under one reference sample. Tiles are laid in such a way that the glazes of two adjacent tiles do not touch during laying. For better adhesion to the solution, the tiles are soaked in water before laying.
They begin to lay the stove with tiles: first the tiles are laid, and then the bricks of the stove body are attached to them.
If you do not know what needs to be done and how to fold a tiled stove, contact the experts, so you will not spoil expensive material and get a stove that will be a masterpiece of stove skill.