How to plant tomatoes on the balcony with seeds. Tomatoes on the balcony growing step by step
If you don’t have a dacha or a garden plot, but you really want to try growing something with your own hands, then in the summer you can use a balcony or loggia as a home greenhouse. If they are glazed and insulated, then plants can be grown from early spring to late autumn.
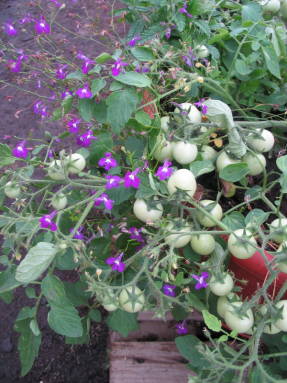
Tomato is perhaps one of the most unpretentious "balcony" crops. In addition, the plant is very fruitful and, at the same time, decorative. With skillful care, your own plantation will not only provide you with fragrant fruits straight from the garden, but will also please the eye with a scattering of “berries” that turn red among the bright greenery.
Sowing time for tomato for insulated balconies and loggias is the beginning of March, for open balconies - the end of March - the beginning of April.
Growing seedlings
Seedlings are best grown in separate pots or cassettes. When filling the earthen clod with roots, transshipment is carried out from a small container to a large one, deepening the seedlings almost to the cotyledon leaves. In this way, a good lobe of roots is formed.
The grown seedlings are transferred together with a clod of earth into larger pots or planted in boxes. One plant needs about three liters of soil. For tall plants, the required volume of soil is 5-7 liters. In pots and boxes, it is imperative to make drainage to remove excess moisture from the roots. A layer of expanded clay or small pebbles with a layer of 2-3 cm is laid on the bottom, the bottom should also have holes for draining water. Tomatoes do not like excessive moisture and do not tolerate stagnant air. Therefore, it is necessary to put boxes and pots for better ventilation of plantings for deliveries; hanging planters are also good. Drafts are not terrible for tomatoes.
Balcony accommodation

Tomato is a photophilous culture. Northern balconies are unsuitable for cultivation. Ideally suited southeast and south. On the southwestern balconies it is very hot in the summer heat, therefore, when growing tomatoes on them, it is necessary to shade the plants on hot days and be sure to ventilate.
As soon as weather conditions allow (for glazed balconies and loggias - in early to mid-April, for open balconies - in early May), tomatoes are put on the balcony. With a sharp decrease in temperature to minus, cover with a non-woven covering material. Caring for tomatoes on the balcony is the same as in the greenhouse.
The optimum temperature is +25+28°C during the daytime and +15...+16°C at night. Before flowering and fruiting, the temperature can be 2-3°C lower. Soil temperature should not be lower than +17...+20°С. Regulate the air temperature by ventilation, opening the doors and shutters of the balconies. Airing is mandatory 2-3 hours after watering, especially during the flowering period of plants. During flowering, air humidity should not exceed 65%.
Watering and fertilizing
Tomatoes tolerate direct sunlight well and suffer from a lack of light. Only in very hot weather should the plants be covered from direct sunlight. Tomatoes should be watered rarely, as the soil dries up (no more than 2 times a week), but plentifully, completely wetting the soil. It is better to water in the first half of the day with warm water (+20...+25°С). If the tomatoes are planted in boxes, you need to water the soil around the bush, and not under the bush. After watering, as soon as the soil dries out a little, it is loosened, which slows down the evaporation of moisture from the soil and provides air to the roots. Simultaneously with the loosening of the soil, the plants spud, which contributes to the formation of new roots. If the soil has settled, you can sprinkle a layer of fresh peat or nutrient mixture on top.
Feed the tomatoes with a solution of mineral fertilizers, if necessary (in case of poor growth), you can use organic matter, for example, mullein (1: 5) at the rate of 1 liter of solution per plant.
The first top dressing with complex mineral fertilizers (30 g per 10 liters of water) is carried out a week after planting the seedlings in a permanent place. The rest of the top dressing is done at intervals of 10-12 days, mainly during the fruiting period.
Good results are given by foliar top dressing, i.e. spraying the leaves with a nutrient solution. They contribute to better growth and development of plants and prevent shedding of flowers.
Bush formation
Low-growing tomatoes grown on the balcony are best formed into 2-3 stems, for which, in addition to the first stepson, the second stepson is also left. Tall tomatoes are formed into one stem, cutting off all stepchildren.
The stems of tomatoes are brittle, therefore, as the seedlings grow, the plants are tied to stakes or to a trellis. Recently, the so-called "ampel" tomato varieties have appeared that do not require a garter. In fact, "ampel tomatoes" are not new varieties, but an idea: If you leave 2, maximum - 3 shoots in the upper part of the cherry tomato stem, then they will hang very picturesquely from the pots. The main thing is not to take too powerful and standard tomatoes for this. The latter have a strong stem, consisting of short internodes, maintaining a vertical position for a long time.
During the entire growing period, it is necessary to remove the shoots that develop in the axils of the leaves. Without pinching, the plants turn out to be thickened, they are less illuminated and do not lay inflorescences. A good harvest from such bushes cannot be harvested. To avoid infection of plants with viral diseases, stepchildren are not cut off, but broken off with their fingers, trying not to damage the main shoot and leaves, leaving columns 2-3 cm high. This operation is best done in the morning, when stepchildren break off easily.
Diseased and yellowed leaves are also removed in a timely manner, as well as leaves covering the fruits of the lower brushes of the plant, when these brushes are fully formed.
Flowering and fruiting

Tomatoes are a self-pollinating culture, they do not need artificial pollination, but for better fruit set in cloudy and calm weather, you can slightly shake the flower brushes several times a day during the flowering period so that pollen from the upper flowers falls on the flowers located below. In order for pollen to germinate on the stigma of the pistil, immediately after pollination, it is necessary to water the soil or spray the flowers. During the flowering of the second and third brush, for better fruit set, the plants are sprayed with a solution of boric acid (1 g per 1 liter of water). To prevent falling flowers and improve the quality of fruits, flower brushes can be treated with growth stimulants.
After tying the bulk of the fruit, pinch the top of the main shoot. At the same time, all flower brushes are cut off, since the fruits on them will not have time to form.
To accelerate the formation and development of fruits, you can also use a technique called "tearing the roots." The plant is taken by the lower part of the stem and carefully pulled up, as if trying to pull it out of the soil in order to break off the small roots. Then the plant is watered and spud.
In healthy, strong plants, the upper leaves can be slightly twisted during the day, and straighten out at night - this is the norm. If the leaves of tomatoes are directed upwards at an acute angle and do not twist either day or night, flowers and ovaries fall off, then dry soil, high temperature, poor ventilation and low light of plants can serve as the cause.
With frequent watering and the introduction of a large amount of nitrogen and organic fertilizers into the soil, the plants “fatten” - powerful bushes grow with a thick stem and mighty stepchildren, however, as a rule, a very weak flower brush is formed with a small number of flowers. To straighten such plants, they are not watered for 7-10 days. In addition, to stun growth, it is necessary to make foliar top dressing with superphosphate (3 tablespoons per 10 liters of water). Plants are watered with this solution at the rate of 1 liter per plant.
Diseases and pests of tomatoes on the balcony
The most common fungal disease of tomatoes is late blight, a sign of which is the appearance of dark brown merging spots on leaves, stems and fruits. This dangerous disease can not only destroy the entire crop in a short time, but also spread to other indoor plants. Contributes to the rapid development of the disease, which usually spreads in July-August, heat and dampness. If by this time most of the fruits have already ripened, then at the first signs of late blight it is better to immediately destroy the diseased plants. In this case, unripe fruits should be dipped for 1.5-2 minutes in hot water (+60 ° C), then put to ripen in a dry, warm, dark place.
black leg seedlings are affected, its root neck darkens, thins out and rots. The plant withers and dies. The disease spreads with plant debris, soil lumps, and partly with seeds. Control measures are moderate watering of plants, not thickened sowing, to prevent the disease, Trichodermin is added to the soil before planting (preferably mixed with Ecogel).
Tomato root rot (anthracnose) is a very dangerous disease. Sick plants wither, their root neck rots. Cucumbers also suffer from the same disease. A thorough disinfection of the soil with a solution of copper sulfate is necessary, if possible, it is desirable to remove the infected topsoil and add fresh. Sick plants can be watered with a solution of "Barrier", sprinkled with the drug "Barrier". But it is still better to prevent this disease using a mixture of drugs Alirin or Gamair with Ecogel.
At the end of the growing season with the onset of cold rainy weather, tomatoes may be affected gray mold. Small, rounded spots appear on green or red fruits. Then they enlarge and become watery. The causative agent of gray rot can also develop on other ground organs (stems, leaves, flowers), they are also covered with gray mold. It is necessary to remove the affected fruits and plants; raise the temperature as much as possible. With the spread of this disease, the plants are destroyed, and the soil is thrown away after growing tomatoes.
Brown rot (phomosis) develops only on tomato fruits in conditions of high humidity and excess nitrogen. Phomosis appears in the form of a small brown spot (about 3-4 cm) around the stem. Although it is not large on the surface, the internal tissue of the fetus is also subject to rotting. Green and red fruits are affected. Affected fruits are destroyed .
Cracking of tomato fruit- physiological (not infectious) disease. The reason is a sharp fluctuation in soil moisture. With abundant watering, the walls of the cells of the skin of the fruit do not withstand increased pressure and are torn. Then the wounds dry up, the fruits turn red prematurely, not reaching their size. Control measures - moderate watering at intervals. Many modern hybrids are genetically resistant to fruit cracking.
With a lack of calcium in the soil and an excess of nitrogen in arid conditions, the likelihood of damage to tomatoes is high. top rot. Small watery or dry black spots with a rotten smell appear on still green fruits. To prevent this disease, regular watering and moderate application of nitrogen fertilizers are necessary. Infected plants are sprayed with a solution of calcium nitrate (1 tablespoon per 10 liters of water), the affected fruits are destroyed.
spider mite lives on the underside of leaves, sucking out cell sap and braiding the leaf with a thin cobweb. At the beginning of damage, light dots appear on the leaf, then discoloration of the leaf area (marbling) occurs and the leaves begin to dry out. Flowers and leaves fall off. Treatment of plants with Fitoverm (1 ml per 1 liter of water) is effective against ticks. You can fight the tick by spraying infusions of onion or garlic husks (200 g of husks per 1 liter of water).
whitefly- a small insect 1-1.5 mm long with a yellowish body and two pairs of mealy-white wings. Larvae are flat, oval, pale green in color. They stick to the leaves, sucking out the juice. The affected areas of the plant are colonized by sooty fungi. The leaves are covered with black bloom, dry out, and the plant dies. Control measures - processing with Confidor or Mospilan. Plants are sprayed in the morning or evening hours. During the season, it is recommended to carry out 2 treatments with an interval of 15-20 days.
A photo:LLC "SSF "TomAgroS" , Rita Brilliantova
The absence of your own dacha or garden is not a reason to give up the dream of growing organically clean vegetables on your own. And the owners of balconies, glazed loggias or open terraces have nothing to worry about at all - in the summer, vegetables grow well and ripen in their homes among flower arrangements. And the tomato is one of the most popular crops among balcony "gardeners", because it grows well, sings quickly and pleases with abundant harvests for a long time.
Before filling all the free space with seedling pots, it is important to remember: the success of successfully growing tomatoes on a balcony in an urban environment depends on the right variety. After all, not every plant will agree to grow indoors in a small area. But do not despair - breeders have bred many varieties that develop well and bear fruit on balconies.
 There are many varieties of tomatoes. When choosing, carefully read their characteristics.
 If you are a happy owner of a large balcony space and can afford to place large containers with earth, then you can stop your choice on large-fruited tomato varieties: Bull's Heart, Carlson, De Barao. The owners of more modest living space will have to look for their own among dwarf varieties. You can sow, for example, Yellow Pearl, Cascade Red, Verlioka, Red Banana, Ruby, White Pour, Canada News, Oak or Little Florida. Small cherry tomatoes performed well in a balcony environment.
Other varieties intended for growing on balconies are also popular: Max, Balcony Miracle, Gina, Belkoni Red, George Bush, Japanese indoor tomato, Bonsai Micro, Siberian early.
General characteristics of balcony tomatoes
Although the taste of balcony tomatoes does not differ from their garden "relatives", there are still some differences between the two types. To a greater extent - regarding the appearance of plants.
Features of dwarf varieties:
- Compact root system.
- The fruits are small, regular shape.
- Low plants (no more than half a meter tall).
- Doesn't need tying.
- The fruits ripen faster than in the garden.
- High yield (about 2 kg).
We grow seedlings correctly
 Properly grown seedlings - the key to a good harvest
 The process of growing tomatoes begins with the germination of seeds. Do this from the beginning of February and continue until April. With early sowing, the first fruits will be already in April, spring seeds will please the harvest in September. Also, having decided to make it small on the balcony, it is important to take into account the level of lighting, since tomatoes are light-loving plants. That is, the southern balcony will serve as the best place for a tomato plantation. On poorly lit loggias, the lack of sunlight is compensated by artificial lighting (fluorescent lamps).
There are several ways to germinate tomato seeds: directly into the ground and with pre-soaking.
Method number 1
 seed soaking
 - Cover the saucer with a piece of cloth, put the seeds on it, cover with a damp cloth on top.
- Place the saucer in a plastic bag.
- Put in a warm place (you can put a plate under the bottom of the plate on the battery).
- Periodically moisten the cloth with seeds.
- When white roots appear in the grains, plant them in the ground.
- Water with warm water, but do not overmoisten.
Method number 2
- Place the seeds for several days in the refrigerator - for hardening.
- Carefully place the tomato seeds in cloth bags.
- Pour hot water into a thermos.
- Dip the seed bags in a thermos of water and leave overnight.
- Plant the seeds in the ground (purchased or from the garden). Sow in furrows no deeper than 1 cm.
- Water thoroughly and cover the seeds with soil.
- Wrap the container with seeds in plastic bags, creating the effect of a greenhouse.
- Before the seedlings germinate, air the pots with earth daily by removing the bag.
Method number 3
 Dwarf varieties of tomatoes - ideal for growing on balconies
 - Fill a plastic 200-gram glass (preferably transparent) with earth and pour boiling water over it. Wait until the soil cools down.
- Using a pencil, make a depression in the ground and place a few seeds (if already germinated, then one per cup).
- Cover the containers with foil and put in a warm place.
- After the appearance of sprouts (on the 3rd day), put the containers in a cool place (windowsill).
- It is desirable to illuminate with artificial light, water only when the topsoil dries.
Growing seedlings
To grow tomato seedlings, you can use both a purchased mixture and soil from the garden, preferably from a garden bed where nightshade crops have not grown before. It is also easy to prepare the soil yourself by mixing equal parts peat, soddy soil and manure humus.
With the advent of seedling gatherings, wait until the plants get stronger and become stronger, then transplant into a larger container for a permanent "place of residence". Planting tomatoes is an important process, so we will pay attention to all stages.
 Containers for seedlings can be made independently
 First of all, prepare containers for the subsequent planting of nightshade crops on balconies. These can be conical buckets, large pots, wooden or plastic boxes. But it is worth considering: one plant will need about 3 liters of soil.
The next step is the preparation of the drainage layer. Since tomatoes do not tolerate excess water, drainage is indispensable. The easiest way is to cover the bottom of the pot with 2 centimeters of small pebbles or pieces of expanded clay. And only after that you can fill the container with soil or earthen mixture. The form should be filled no more than three-quarters.
When planting tomatoes, deepen the plants 2 cm lower than they grew in the previous form. Gently sprinkle with earth on all sides and pour plenty of warm water under the root. In the sun, put pots with tomatoes no earlier than a week later - wait until the plants take root.
Important: balcony tomatoes do not like an excess of moisture and a lack of fresh air, which means that on cold nights it is advisable to take containers with plants into a warm room. But in the heat, one should not forget to ventilate the room, in particular, this applies to glazed balconies.
Top dressing of tomatoes
Experienced agronomists advise watering nightshade on balconies only when necessary - when the topsoil dries. It is better to do this in the morning using warm water (more than 20 degrees). Pour the liquid not under the bush itself, but around it.
 Tomatoes need not only to be watered, but also to be periodically fed.
 But even the best varieties of tomatoes growing on the balcony need to be fed. Experienced gardeners use different mixtures as fertilizer. For example, someone prefers exclusively organic products and waters tomatoes with a solution of chicken manure or mullein (dilute with water 1: 5). But more often they use mineral fertilizers, which are sold in specialized stores. 30 g of a ready-made mixture of mineral fertilizers and 10 liters of water - this is quite enough for watering a fairly large balcony garden. For the first time, such top dressing should be made about a week after planting the tomatoes on the balcony. In the future, feed the "bed" every 10 - 12 days. In order for the tomatoes on the balcony to develop more quickly, foliar fertilizers can also be used.
Experts call a urea solution a good option for feeding (add 1 teaspoon of urea to 3 liters of water). You can also mix a tablespoon of superphosphate and wood ash with 3 liters of water, or use nitroammophoska dissolved in water for irrigation (1 tablespoon per 3 liters of liquid).
How to form a beautiful bush?
 Ways to form bushes
 Beautiful bushes of tomatoes can also serve as a decorating element of the balcony. But a beautiful tomato "crown" does not form by itself. To make the bushes look aesthetically pleasing and give as much yield as possible, it is better to grow undersized plants in two stems. If there was a place on the balcony for tall tomato plants, then leave only one shoot - it is better to get rid of all stepchildren. Also, do not forget from time to time to remove the shoots coming from the axils of the leaves, but at the same time try not to damage the main stem. This is done in order to "clear" the bush from extra branches, making room for inflorescences and better lighting of the plant. In order to avoid the development of diseases, it is necessary to clean the bush in time from yellowed, fallen or already diseased leaves.
The main enemies of tomatoes
The most common problem when growing tomatoes on balconies is fungal diseases caused by excess moisture. You can defeat the problem by increasing the lighting of the balcony and frequent ventilation of the room. Bordeaux mixture gives good results in the fight against tomato fungi.
Mixing Ingredients:
- copper sulfate (10 g) diluted in water (0.9 l);
- slaked lime (20 g) diluted in 100 g of water.
Mix ingredients. Keep the finished mixture for no more than a day.
The most common tomato diseases:
- late blight, or brown rot of tomatoes;
- blackleg;
- anthracnose, or root rot;
- phomosis, or brown rot;
- top rot.
If we talk about pests, then spider mites and whiteflies cause the most trouble to tomatoes. They get rid of the first one by spraying the bush with an infusion of onion and garlic husks (200 g pour a liter of water). The whitefly is destroyed by means of the Confidor type.
Growing tomatoes at home on a balcony cannot be called a difficult task, but any details are important in this process - from the size of the dishes and variety to the need to regularly rotate the cups with seedlings (for uniform illumination of the sprouts). It is enough to harvest tomatoes at home a couple of times and you will want to teach your neighbors and friends how to grow tomatoes on the balcony. A very large varietal diversity allows you to choose types of tomatoes that are suitable not only in appearance and growing technique at home, but also in taste.
Tomato varieties: conditional division according to ripening time and natural indicators
Among the numerous types of tomatoes, it is necessary to choose tomatoes that have the appropriate characteristics for growing a house on a balcony.
Tomatoes on the balcony are not only delicious fruits, but also decoration
The main popular requirement for tomatoes when cultivating at home is a low stem. Although tall varieties (“Rapunzel”) are very interesting and promising in terms of harvest. Regarding the ripening time of the crop, the varieties are conditionally divided into early, medium and late-ripening. It is quite practical to simultaneously plant tomatoes on the balcony with different fruit ripening periods.
The most popular varieties:
- "Balcony Miracle" is an ultra-early crop, the time for full ripening of fruits is 84-89 days, the stem grows up to 50 cm tall. From one bush, the harvest can be up to 2 kg.
- "Minibel" is an early ripe variety, the fruits ripen in 90-100 days, the bushes are compact, growing up to 50 s, the tomatoes ripen weighing 20-25 grams.
- "Pinocchio" - an early ripening tomato (ripening time - 85-95 days), bush height - up to 30 cm.
- "F1 Balkoni Elou" - mid-early hybrid (ripening period - 100-110 days), the stem grows up to 45 cm in height, the fruits are spherical in shape, yellow in color, the taste is sweetish with a slight sourness.
Preparatory moments for growing balcony tomatoes
Tomatoes can be called unpretentious plants, but it is advisable to withstand certain care requirements in order to get a full and plentiful harvest at home.
- Placing and growing tomatoes on the sunny side of the house will contribute to the normal development of seedlings and the production of early ripe fruits.
- Tomatoes for a glazed balcony should not interfere with opening window sashes for ventilation; containers for planting crops must be selected taking into account the size of the window sill / table on the balcony, and it should be taken into account that the root system of tomatoes is highly developed. It is recommended to install 30-40 cm plastic pots, as they are light, they are easy to unfold and they already have special holes in the bottom. You can, of course, use cut plastic bottles (but when the roots become crowded, this can affect the quality and quantity of the crop). For undersized varieties "Balcony Miracle", "Pinocchio" enough land in flowerpots with a capacity of 4.5-5.5 liters.
- Soil quality is of particular importance for seedlings. It is not advisable to use country lands (they may contain harmful insects or bacteria). You can buy soil in specialized stores. Suitable universal soil mixed with fertilizers or ready-made soil mixture "Tomatoes".
Technology for growing tomatoes on balconies
Balcony tomatoes ("Pinocchio", "Balcony Miracle") have planting and care stages similar to soil varieties. Tomatoes "Balcony Miracle", "Pinocchio" on the windowsill or insulated balcony can be grown at home all year round.
Germination of tomato seeds: rules and useful tips
Preparing seedlings is a mandatory step when growing tomatoes at home on a loggia. Seeds are checked for germination before sowing - they are poured into a glass of water and left for 30-40 minutes. Floated seeds are empty and discarded. The rest of the planting material is disinfected - soaked in a solution of potassium permanganate for 15-20 minutes. Then the seeds are thoroughly washed and left for two to three days in a warm place in a damp cloth. During this period, it is important to ensure constant humidity of the matter and a warm temperature.

Tomatoes can be grown immediately in beautiful pots, without seedlings
Sprouted tomato seeds (varieties "Balcony Miracle" and cherry tomatoes) are planted in plastic cups with soil. Such planting of seeds will be justified during subsequent planting in large flowerpots, since the sprouts will be transferred with the ground and the root system will not be damaged. A hole is made 1-1.5 cm deep and gently moistened. Seeds (one or two) are planted in each cup, covered with soil and everything is slightly moistened. All cups are placed in one container (tray), covered with paper or cloth and kept in a warm place until seedlings emerge.
The first sprouts appear in two or three days. Now it is important to provide sufficient lighting for seedlings. If the plants are kept on the north side of the building or the weather is not sunny, it is necessary to provide artificial lighting (three hours in the morning and in the evening). Seedlings are best watered with warm, settled water once every four to five days. A container with seedlings can be covered at night.
Tomato seedling care
Planting seedlings on a permanent place of growth is carried out when the sprouts reach a height of 8-12 cm. In order not to damage the plant during transplantation, it is recommended to pre-moisten the ground. The glass is turned over and lightly tapped on the bottom. To carefully remove the sprouts from the cup, they are held by holding them between the fingers. The longest central spine is dived. This is done in order to form a branched root system in plants in the future. The soil mixture in a large pot is poured to a level of 3/4 of the height of the container (so that it can be added later).
The soil in the container with sprouts is added gradually, which will contribute to the formation of a strong root system and a strong green stem.
A hole in the ground is made according to the height of the cup, moistened. Transplanted seedlings are carefully watered and left in a warm shaded place. Watering cherry tomatoes on the balcony is better in the morning. When watering, it is important to maintain water balance - the earth should not be dry, but waterlogging also harms plants.
Seedlings can be fertilized two weeks after picking. The first top dressing is carried out with a solution of copper (1 teaspoon of the substance per 10 liters of water) to protect plants from late blight. Two weeks later, urea is used (1 tablespoon of the substance is diluted in 10 liters of water) to recruit green mass sprouts. The third top dressing is carried out in order to provide tomatoes with nutrients. Apply a solution of "Nitrophoska" - 50 grams of fertilizer per 10 liters of water. In general, there are a lot of compositions for feeding tomatoes. For the correct procedure, follow the instructions on the packaging.

Young tomatoes need a lot of light
For proper care and feeding of seedlings, the Balcony Miracle tomato should be monitored for the appearance of the sprouts. The pale color of the leaves indicates a lack of iron, a purple hue indicates a lack of phosphorus. Light yellow sheets may appear from a lack of nitrogen or from a lack of light, large temperature fluctuations
As soon as constant climatic indicators are established (the optimum temperature regime is +24 during the day and not less than +10 at night), you can take the seedlings to the open balcony. On glazed balconies in hot weather, it is necessary to provide ventilation for the tomato and carefully monitor the humidity of the air and the need for watering the soil.
Stepchildren that germinate in the axils of the leaves and grow out of the ground must be plucked, as they will absorb a lot of nutrients. Cut tomatoes for an open / glazed balcony in such a way that two or three strong trunks are preserved. During this period, a tomato garter should be arranged - a peg is inserted into the pot or a trellis is equipped. What type of support to apply depends on the stems of the tomato.

Small-fruited varieties of tomatoes grow well on the balcony
Tomato blossom and harvest
When the Balcony Miracle tomato blooms, it is correct to leave the glazed balcony open for pollination of plants. When it is undesirable to open the window sashes, tomatoes for a glazed balcony are pollinated by hand - for this, it is enough to shake each bush slightly.
At air temperatures above +35 degrees, fruits do not set (pollen becomes sterile). Therefore, in hot weather, additional ventilation and evening watering of plants is necessarily provided.
For the full ripening of tomatoes, it is advisable to remove the flowers near the formed fruit brushes.
When frost occurs, green fruits are plucked and left to ripen in a warm place (provided that the plant cannot be brought into rooms from an open balcony).
The selection is evolving all the time. New types of tomatoes are being developed, and some are specifically for growing in apartment conditions. Which variety to choose - everyone decides individually. Someone loves small tomatoes on the balcony (varieties "Balcony Miracle", "Pinocchio"), and some will like the tall variety "Rapunzel" - a kind of balcony-tomato vine. Attentive care is the main requirement for growing any plants at home. If you follow all the procedures step by step and correctly, then the tomatoes on the balcony of the Balcony Miracle variety will reward the owners with a well-deserved abundant harvest.
Who said that it is impossible to create your own mini-garden on a balcony or loggia? It is absolutely real, besides it is useful and extraordinary. Here I would like to note that tomatoes take root remarkably on the balcony.
Tomatoes can be combined with flowers, and you get a great composition that will set the mood throughout the entire period of its growth and development.
Varieties of tomatoes for balcony conditions
Growing tomatoes on the balcony, of course, involves some nuances. Now we will talk about this.
Important: The main task is to choose the right variety of tomatoes - this is 50% luck.
Please note: Since the seats (pots, boxes) will be with a limited amount of land, the varieties should be chosen undersized.
Tomatoes should have a compact root system and small fruits.
Some of the most common varieties and hybrids are:
- Max;
- Gina;
- Balcony miracle;
- Cascade Red;
- The pearl is yellow;
- Florida petite;
- Balcony Red;
- Bonsai micro etc.
Note that this is only a small part of the varieties that exist. These varieties and many others are bred by breeders specifically for growing in balcony conditions. Let's take a closer look at one of the popular varieties. For example, Balcony Miracle - tomatoes that grow well and bear fruit on balconies.

Characteristics of the tomato variety Balcony miracle
- This type of tomato belongs to the determinant varieties of tomatoes, that is, the growth height of the plant is limited (no more than 50 centimeters).
- This is an ultra-early crop.
- Intended for growing on loggias, balconies, verandas. However, it is also suitable for growing in open ground.
Please note: This tomato variety is suitable for both salads and pickling. In addition, the above-ground system is particularly decorative, and the fruits are of wondrous beauty.
- Each bush can please you with a crop of 2 kg of tomatoes.
- This variety does not require a garter.
- The period until full ripening averages 85-90 days;
- It has not large fruits, their weight is about 65 grams, the shape is round, the color is bright red.
Please note: Balcony miracle tomatoes - growing this variety is great at home.
Especially if you take into account the main advantage - the possibility of harvesting an early harvest.

Please note: Tomatoes can be grown both on a sunny balcony and on a shaded one. The main point is good lighting of the balcony.
It is desirable that the sun appears on the balcony for at least 3 hours.
Highlights in growing tomatoes for balconies or loggias
Sowing seeds
- Sow tomato seeds in February - March.
- The soil mixture is poured into cups and watered some time before planting the seeds in water.
- Seeds do not need to be soaked, they can be sown dry. Place 2 grains in plastic or paper cups.
The depth of laying the seed is about 1 - 1.5 centimeters. - After the seedlings have appeared, the stronger plant is left, while the other is pinched, but not removed.
soil for tomatoes
For growing seedlings of future tomatoes, there are several options for the soil mixture, for example, you can take:
- Ready-made substrate called "Living Earth";
- Soil mixture "Tomatoes";
- One part of peat + sod land + manure humus.
Seedling care
Watering
Seedlings are not watered often: about once a week, or even once every 10 days. In this case, the water should not be cold (room temperature) and separated.
Air temperature
In the room where seedlings are grown, the air temperature should not exceed: during the day - 20-22 degrees, and at night - not lower than 16 degrees.
Tip: At elevated air temperatures, you should ventilate the room, for example, by opening the window.
It is very important here that the flow of cool air does not fall on the seedlings.

top dressing
Before planting seedlings in a permanent place, it is advisable to feed 3 times. Fertilizers can be purchased at any specialized store.
Dosages can be found on the packaging.
- The first feeding is carried out after the appearance of sprouts on the 12th day.
- The second top dressing is made in 10 days concerning the first.
- The third top dressing is carried out a week before planting seedlings in a permanent place.
Important: If you want to get perfect seedlings, in other words, beautiful and even, you should turn the cups with seedlings every few days to turn the other side to the light.
Planting seedlings
It is best to plant each seedling in a separate pot, but long ones can also be used for this purpose.
Pre-watered seedlings are removed from the cups and transplanted into the middle of the pot.

Caring for tomatoes on the balcony
- Tomatoes, including balcony tomatoes, are sun-loving and light-loving plants. They should be placed in the sun.
- It is necessary to prevent waterlogging of the soil or drying out. Watering tomatoes is carried out in dry weather every other day, only under the root.
Tip: In order to speed up the process of development and formation of fruits, you can perform the following action, it is called "tearing the roots."
You need to take the plant by the lower part of the stem and gently pull it up. How would you try to pull it off the ground, so the small roots break off.
After that, water the plant and spud the earth around it.

Undoubtedly, growing vegetables, including tomatoes, on your site and harvesting your own crop is always pleasant and flattering. But those amateur gardeners who do not have their own suburban area should not despair. With the right approach, it is quite possible to grow tomatoes on the balcony. Let's see how to do it step by step.
Growing tomatoes on the balcony is a simple and enjoyable experience.
Variety selection
Since the balcony is a limited space, it is important to choose the right crop variety. The tomato should have large, abundant fruits and be undersized. Varieties such as Cascade Red, Red Pearl, Micron-NK or Cherry are great for balconies.
Modern hybrid varieties also deserve attention:
- 'F1 Balcony Red' is an early maturing variety. Tomatoes begin to ripen from the time the sprouts appear after 3 months. The fruits are not large, but sugary and with a pleasant taste. The bush does not grow more than 30 cm and does not require a breakage of stepchildren.
- Balcony Elou. This hybrid variety does not exceed 45 cm, is early ripening and has lemon-colored fruits that are suitable for preservation for the winter.
- Excellent balcony tomatoes are represented by the Balcony Miracle variety. It is widely popular among hobbyists for its fecundity and precocity. One bush is able to bring a rich, up to 2 kg, harvest.
- Pinocchio is another popular variety. He is valued for the early ripening of fruits and unpretentiousness in the conditions of detention.
There are many hybrid varieties that are successfully grown in cramped balcony conditions. The main thing is to choose a low and early ripening variety.

Tomato Balkoni Elou - a spectacular balcony variety
Sowing seeds
The second step is to sow the seeds of the chosen variety. Initially, the seeds are soaked for 20-30 minutes in a solution of potassium permanganate. Then they are kept for up to 10 hours in a growth stimulant, it can be an Epin solution.
After that, the seeds are transferred to a flat bowl and covered with a moistened rag. After 2-3 days, after they germinate and roots appear, the seeds are planted in pots with soil for seedlings. The seeds should be deepened by 1 cm, and the distance between them is kept at 3 cm.
The pots are covered with foil and placed in a warm place. As soon as sprouts appear, the dishes can be put on the balcony. It is important to ensure that during the day it is not hotter than +25 ℃, and at night the temperature is not lower than +15 ℃.
Seedlings should be watered with warm water. Excess moisture can lead to the formation of disease and mold. Drafts are also contraindicated.

Tomato seeds are planted in small pots
Conditions for the growth of seedlings
Successful cultivation of tomatoes on the balcony depends on the care of plantings made in accordance with all the rules. If the pots are located on the shaded side of the balcony, then the seedlings must be artificially illuminated for 3 hours in the morning and evening. This will be enough.
If required, the plants are covered at night. It is not permissible to flood or overdry plants. Watering is carried out only with warm water.
As soon as the plant has a second leaf, it can be dived. The soil for picking is taken the same as when planting seeds. The sprouts are carefully removed from the soil and placed in small pots. Seedlings are watered and set aside in a shaded place.

Dive tomato seedlings are carried out after the appearance of the second true leaf
Soil and required care
For high-quality cultivation of tomatoes on the balcony, you should carefully consider the composition of the soil. You can purchase ready-made mixtures - "Live Earth". If you mix the soil yourself, then it should be noted that tomatoes love sandy soils with an acidity not exceeding 6.5 pH. The mixture is prepared from:
- 1 part peat;
- 1 piece of turf;
- 1 part manure humus.
Seedlings should be watered in the morning and in the evening, and morning watering will be the main one. When watering in the evening, it is necessary to take into account the general humidity of the air and do not flood the plants. Watering should be carried out under the root of the plant.
You can feed the seedlings after 40-60 days from the date of sowing the seeds. Before transplanting seedlings into containers for a permanent place, they are fed 3 times. The most ideal top dressing is humus. It can be purchased ready-made. Top dressing consists in pouring humus into a pot to a height of 2 cm. Each top dressing strengthens the roots, they grow, intensively absorb nutrients and receive more and more necessary oxygen.
For the successful growth of seedlings, a temperature in the range from +15 to +20 ℃ is acceptable. If the balcony has glazing, then it must be regularly ventilated.

Tomatoes need constant circulation of fresh air.
Transplanting tomatoes into permanent containers
A month later, when the plant takes root and develops, it is transplanted into larger pots. The distance between plants is maintained at 25 cm. Hanging pots will be an original solution. After a while, the stems will go down, and the tomatoes on the balcony will form a composition unlike anything else.
Expanded clay or broken tiles are placed at the bottom of the container to provide drainage. The soil can be pre-enriched with ready-made organic fertilizer. The dishes are filled with prepared soil by 1/3, then a seedling or several plants are placed there. The roots are straightened to the sides and slightly crushed to the ground. Next, soil is added in small portions, periodically compacting it with your hands. Do not fill the top of the tank 1/3 with earth. After transplanting, the plant is slowly so that the moisture is evenly absorbed into the soil, watered abundantly with warm water.
Low-growing plants can be planted in two or three trunks side by side. To form a bush above the first brush, no more than two stepchildren should be left. The remaining sprouts are removed as they appear. All diseased or dry leaves are also cut off to prevent the development of diseases. It is recommended to remove all flowers from the top during the appearance of the first clusters of fruits. This is necessary so that useful substances and moisture are intended for the development of fruits.
The tomato is a self-pollinating plant, but you can lightly shake the flowers or run a brush over them. This will enhance the effect of pollination.
To avoid the development of various diseases, such as late blight, plants are treated with a composition based on garlic and potassium permanganate. To do this, in 3 liters of water, dilute half a large spoon of garlic and 0.5 g of potassium permanganate. For the same purpose, bushes can be sprayed with a solution of phytosporin.
As soon as the fruits begin to turn pink, they are removed from the bush and placed in a box for further ripening. In this case, they will ripen without losing useful components, and will not take juice from growing tomatoes.
And you can also use a little trick. In order for the plant to develop itself faster and form fruits, you can do the so-called “tearing the roots”. To do this, the plant is taken closer to the root and slightly pulled out of the pot, as if trying to pull it out. So there is a separation of small roots. After the procedure, the plant is watered and sprinkled with earth around the stem.
Thus, the answer to the question of how to grow tomatoes on a balcony is simple. As with anything, it takes work and love. And with the right choice of variety and the consistent implementation of all the actions outlined above, success is guaranteed and you can get a decent harvest in the limited space of the balcony.