How to set up mobile internet on android. How to set up the Internet on Android: step by step instructions
The times when the Internet was available only to a few, and its speed and price left much to be desired, are long gone. Today, every person can, regardless of the services of which mobile operator he uses. Mobile providers provide their customers with the ability to access the Internet through network modes such as EDGE, 3G or 4G. A wide variety of tariff plans and special options allow the subscriber to choose the most optimal offer for himself. Despite the fact that today the Internet is available to all segments of the population, many still do not know how to set up the Internet on their phone.
In principle, no settings as such need to be made. The operators made sure that everything went automatically with minimal participation of the subscriber. As a rule, the operator sends automatic settings to the phone immediately after the first start. That is, if you bought a new phone or a SIM card, then after turning on the device, after a while, you will receive an SMS with automatic settings. Moreover, sometimes accessing the Internet from the phone is possible without accepting these settings. If this did not happen in your case, which is also possible, then you need to order GPRS settings. The methods that allow you to get settings for the Internet will differ depending on which operator you use. Below we provide instructions for setting up the Internet on MTS, Beeline and Megafon phones. These are the most popular operators in Russia and most Russians use their services, so they are included in our review. If you have another provider, then you can get the necessary information on the official website of the operator.
How to set up the Internet on your phone - detailed instructions
Before setting up the Internet on your phone, you should make sure that your device supports the ability to access the global network. Almost all modern phones are now endowed with a similar opportunity. If you have a smartphone or tablet, then Internet access will be possible unambiguously. Internet connection is also provided on regular phones. It is very easy to check this. If your device has a browser, then Internet access from this phone is also possible. Someone will consider this information too banal and redundant, however, among our readers there are those who are just starting to get acquainted with the capabilities of mobile devices, so a small absence should have been made. So, let's consider the process of setting up the Internet using the example of the most popular mobile operators in Russia.
Setting up the Internet on MTS
If, after installing the SIM card and turning on the phone, it was not possible to wait for the automatic settings, and you can’t connect to the Internet, then you need to order the settings yourself. It is quite simple to do this, just send an empty SMS to 1234, after which several service SMS with Internet settings will be sent to your phone. In addition, you can order settings on the MTS website in the "Help and Service" section. You can use the same way.
There is another way to set up the Internet on your phone. Call the customer support center and follow the prompts of the automatic informant to order the settings. If you have a lot of free time, you can also ask him to send service SMS messages with the necessary settings to your phone. If the option with automatic settings for some reason does not suit you, then you can configure the Internet manually. Don't be afraid, there is nothing difficult in this and you can easily cope with this task.
To set up the Internet on mts, go to your phone settings, open the "Wireless Network" section and fill in the fields as follows:
- Profile name - MTS Internet;
- Access point (or APN) - internet.mts.ru;
- Data channel - GPRS;
- Username and password - mts.
Save the settings and restart your phone, after which you can access the Internet.
Setting up the Internet on Beeline
If you don’t know how to set up the Internet on your Beeline phone and the automatic settings didn’t come, then just like in the previous case, you can do everything yourself. First of all, you should check whether you have activated the "Package of three services" service, for this, make a call to 067409. If the service is not connected, then this factor may be the reason for the inability to access the Internet. The service is activated using a USSD request: *110*181#. If the "Package of three services" is connected, then order automatic settings by calling 0117. You can also order settings by calling 0611. Again, you can ask him to send settings for the Internet, but in this case you will have to spend time waiting for a specialist to answer.
To set everything up manually, in the phone settings, open the "Wireless network" section and do everything as follows (usually the information is indicated by default):
- Name - Beeline Internet;
- APN - internet.beeline.ru;
- Login - beeline;
- Password - beeline;
- Network type - IPv4;
- Authentication type - PAP;
- APN type is default.
Setting up the Internet on Megaphone
To order automatic Internet settings on Megafon, send an SMS message with the number "1" to 5049. After a while, you will receive an SMS with profile settings. It remains only to accept them and you will be able to use the global network. You can get settings. But of course you can also use the help desk. To do this, call 0500 and follow the prompts of the automatic informant. In addition, you can connect with a specialist. allows you to get answers to any questions, including Internet settings, but before using this method, do not forget that it can take a long time to wait for a specialist to answer.
To set everything up manually, go to your phone's settings and open the "Wireless Network" section, then fill in the fields as follows:
- Profile name - MegaFon Internet;
- Home page - http://www.megafon.ru/;
- Access point - internet;
- Authentication type - normal;
- Login and password are not filled.
This is where we will end this article. Now you know how to set up the Internet on your phone. If you have any questions, you can ask in the comments.
It is difficult to imagine a modern owner of mobile technology in the form of a smartphone or tablet without taking advantage of all the opportunities that such devices offer today. And first of all, we are talking, of course, about access to the Internet. Next, let's talk about how to set up the Internet on Android, since it is the devices running this operating system that are the most popular all over the world. By and large, for Apple gadgets, the methods for setting connection parameters through operator services are identical and differ only in the ways to access them and the menu names.
How to set up the Internet on Android: general techniques
First of all, let's take a look at the connection options. The parameters and options to be set will directly depend on which connection method is selected in each specific case. There are only two options:
- use of Wi-Fi access points;
- connection through a mobile operator.
Despite the limited number of methods for organizing a connection, for each of the proposed options, some additional methods can be applied, each of which, as the description of general issues, is proposed to be discussed in as much detail as possible.
How to connect the Internet on "Android" via Wi-Fi?
So, the very first and easiest way to access the World Wide Web is to connect to an access point created on a router (router or ADSL modem operating in the appropriate mode). A wireless connection of this type, however, has a number of significant restrictions on the number of simultaneously connected devices, as well as on the range of the routers themselves, exceeding which leads to a weakening or even complete loss of the signal.
But the advantage of such a connection is that the Internet speed on Android, subject to the recommended distance to the router and the minimum number of connected devices, can be quite high. And this applies not only to normal browsing of sites, but also to currently activated downloads.
But how to connect the Internet on Android in this way? As easy as pie! Turn on Wi-Fi in the settings (you can also use the top panel on the main screen).
Tap on the connection string to display all available networks, select the one you need, if required - enter the password and click the connect button.
By the way, today many cafes and entertainment establishments practice providing their visitors and customers with such services.

It is clear that to enable free Internet on Android, it is enough to know only the password combination, which can be clarified, for example, from the administrator or bartender. Sometimes this is not even required, since a password is not initially set for the login.
WPS activation
Along with a wireless Wi-Fi connection, it is worth considering how to set up the Internet on Android in such a way that you do not need to enter a password and network name, even for a secure connection. Yes Yes! This is also possible!

To do this, you must first activate the corresponding function on your mobile device, using the transition in the Wi-Fi connection settings to additional settings by pressing the button marked with an ellipsis in the upper right corner.

Then you need to tap on the WPS button item, after which you will receive a notification that the button of the same name must be pressed on the router within one minute. The result will be absolutely free Internet on Android, connected in passwordless mode.
Automatic setup of an Internet connection through a telecom operator
However, the matter is not limited to such methods. After all, not on every corner you can find free distribution of Wi-Fi. You can also use mobile internet. "Android" is used or another operating system on a smartphone or even the most primitive phone that has the function of accessing the Web - it does not matter at all. In this case, we are talking about connecting to the Internet using standard services provided by a mobile operator.
Immediately pay attention to the supported connection type (GPRS, EDGE, 2G / 3G, LTE-4G). The essence of the automatic is to submit a connection request to the operator servicing the SIM card by dialing the appropriate combination of numbers to access the voice menu, followed by a call. A few minutes after sending the request, a special Push message will be sent to the device, on which you just need to tap to save the automatic settings.
Note: for Android, the best Internet connection is 4G (only if the operator supports this standard). On some phone models, the permission to receive and activate automatic push notifications must be configured manually. In addition, to get quick settings, you can use not the voice menu, but sending SMS messages with special codes, which you can find out from the operator.
Manual setting of Internet access parameters
Finally, let's see how to set up the Internet on Android if automatic parameters are not set or the use of such a mode on a mobile device is not provided. To perform such actions in the options menu, you must use the connection item or go to the line of other networks, turn on data transfer and enter the parameters in the section for creating a new access point.

The main ones here are the authentication type and APN settings. They must be installed as shown in the image above. The name of the operator is usually entered in the connection name, and the Internet address of the corresponding server is prescribed for the access point. Next, the login and password are entered, after which the connection can be used.
Note: Proxies are usually not used. The specified APN type is not selected from the list, but entered manually. If the port settings are not provided, the fields for filling them can be left untouched. to establish a more stable connection, it is better to turn it off. All the necessary parameters can be found directly on the official website of the operator or in the appropriate support service.
Nuances of setting up a 3G connection
It would seem that this type of connection is also configured automatically. Alas, not always, and some parameters must be set independently.

In the network mode selection settings, you should set GSM / WCDMA, and on some device models and in different versions of the Android operating system itself, uncheck the box to use to connect only 2G mode.
Questions about using a VPN
Another important issue is not only to properly configure the Internet connection, but also to get full access to resources that for some reason can be blocked (for example, at the state level, as in Ukraine, North Korea or China).
To bypass such restrictions, you can install special software in the form of a VPN client. Three types of applications can be used:
- browser extension;
- TOR browser;
- client for the entire system.
The third option is the most preferable, because it allows not only to surf the Internet, but also to ensure the performance of applications that require a connection to work, but the sites of their developers or the main functionality can be blocked. For example, this concerns the performance of the Mail.Ru Agent client, for which the main Mail.Ru service resource in Ukraine is blocked.
Instead of an afterword
Actually, that's all for the basic methods of setting up Internet access from a mobile device. As for practical use, of course, preference should be given to connections based on 3G / 4G, since they have the maximum access speed and stability, but again, only if the operator supports such technologies.
The downside is that with such a connection, traffic fees may be charged, but many operators offer starter packages that initially include the use of some specific free limit. In this regard, connecting via Wi-Fi seems to be more acceptable.
A phone or tablet ceases to be so useful and interesting if you no internet access, social networks, fresh news and the ability to get an answer to any question. If, nevertheless, there is a problem with accessing the Internet on an Android device (tablet or phone), you can always find out the cause and fix it.
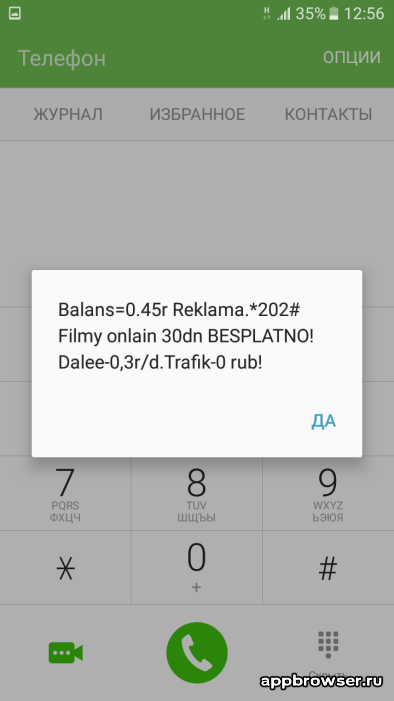
The very first action that must be taken if it is impossible to use the global network is check balance, often the operator limits access to the Internet with a zero or minimal negative balance, even if there is free Internet traffic. If the balance is positive, but there is no access, we check the device further.
Most phones provide having two sim cards, in the phone settings there is an item "SIM card manager", there you need to select which of the cards will be responsible for accessing the Internet (a situation may arise when it is set in the phone that SIM card number two is responsible for accessing the Internet, and its not there at all).


If the balance is positive, the desired SIM is selected, but there is no access, check if it is enabled data transfer, for this we lower the top curtain on the working screen of the device and turn on mobile data, if the miracle did not happen, then the phone does not have settings.

The easiest way to get automatic settings is to call your mobile operator. There you can also clarify whether you have all the necessary services for accessing the Internet (data transfer service) in your room. The operator number is most often indicated on the SIM card itself or in the service agreement.
There is another simple way to get automatic settings - remove the SIM card from the phone and install it again, the mobile operator reacts to the new SIM registration on the network and sends the settings in the form of SMS messages on its own. Settings are enough install and reboot device. It happens that the device does not support automatic settings (for example, the device is not certified).

If for some reason the automatic settings did not come to you or did not suit you, you must register manual settings.
Manual Internet setup
Open the phone menu and look for "Settings"

Select in the menu “Wireless networks” (or “More ...”, or “Advanced”) → “Mobile network” (or “Mobile networks”, or other similar name) → “Access point” (or “Access points”, or “ APN").

Press the soft key (touch key) with the image of a square (or the + icon in the upper right corner of the screen), select "Create" or "New access point"

We register the operator settings (access point name, APN, password, username). Video on manually setting up mobile Internet for the main operators of Russia, Ukraine, Kazakhstan, Belarus can be found by Settings are written in Latin. Each operator has its own settings, which can be found on the official website.

Press the soft key (touch key) with the image of a square (three dots in the upper right corner of the screen can also perform this function), select "Save".
Mark the access point with a checkmark.

We reboot the device. An internet icon should appear at the top of the screen.

The settings for tablets and phones are identical.
If you correctly followed all the instructions, then most likely you already use this blessing of civilization and are aware of the latest events. If, nevertheless, difficulties arose and you are unable to cope with them on your own, contact a communication salon or an Internet provider, they will certainly help you.
Connecting your tablet or phone to the Internet is quite simple - this can be done using WI-FI, 2G, 3G or 4G (LTE) wireless connections, or you can use a USB cable and connect through a computer.
Internet on Android phone via
Instructions on how to connect the Internet to Android on a phone or tablet differ only in the location of the settings and (sometimes) their name, but the algorithm is exactly the same.
WIFI
The easiest way to access the Internet is through wireless WI-FI connections. First you need to turn on the wireless networking module on your phone - it is usually located in the quick access widget or “hidden” behind the curtain - just swipe down the screen to find it.
The WI-FI module icon looks like three or four curved stripes. To enable it, you need to drag the slider to change the inscription to On or simply touch the module icon - it will be highlighted, which means that the module is enabled.
Important! Even if all further instructions are followed, but the WI-FI module is not enabled, the Internet connection will not be available!
After turning on the module, the phone itself should search for all available networks. They can be viewed through the settings - just touch the WI-FI inscription itself in the settings and the phone will show a list of available connections, and whether they are password protected or not.
Select a network - if it is free (not password protected), the smartphone will connect automatically. If there is protection, a password entry window will appear.
After it is entered, you need to click the "Connect" button and the connection will be completed.
Important! The password includes letters of the Latin alphabet in different registers (large and small), numbers, and sometimes punctuation marks. You have to be careful not to make a mistake.
If all the steps are completed and the password is entered correctly, the phone will connect to the WI-FI access point and you can start working on the Internet.
Video: Internet setup
Telecom operator
Connecting through the wireless networks of a telecom operator is somewhat more complicated due to the fact that you need to register access points that are different for each operator. If the user experiences difficulties with the settings, you can always contact the operator for help.
In general, when you turn on your smartphone for the first time with a new SIM card, the network settings should automatically come inside, after which the Internet connection occurs via 4 (LTE), 2 or 3G.

Important! If the SIM card is new and just purchased, an employee of the communication salon must activate it, without which it is impossible to make calls or access the Internet.
Connecting the Internet to Android via 3g is quite simple (all other networks are connected in the same way).
This can be done without WI-FI, anytime and anywhere:
- go to the settings of the smartphone;
- further - the section "Wireless networks";
- subsection "Mobile communications";
- in the “Communication operators” item, turn on “Select automatically” or from the list.
Important! If yours is not among the presented operators or the settings are not suitable (have changed), they can always be found on the official website of the operator or received by calling or sending a short SMS message with the appropriate command to the technical support service.

If it was not possible to set the settings automatically, you need to go to the mobile networks settings in the “Access points” or “APN” item.
Select the line "New access point" and enter the data corresponding to your operator:

MTS
To connect from an MTS SIM card, you need to enter the following data:

TELE 2
If your operator is TELE2, some lines in the setting are not filled in any way.
- APN - internet.tele2.ru;
- Password is not filled.
It remains only to confirm and select this access point to connect.
Beeline
Beeline transmits all settings automatically at all times and manual entry is required only if the settings have been knocked down.

It remains only to confirm and select this access point to connect. Sometimes you need to additionally enable CHAP authorization, for this, in the mobile network settings, go to APN, "Beeline internet" and enable authentication.
Megaphone
Megafon subscribers most often have to connect manually.
To do this, you need to enter data:
- Name - any, at the choice of the user;
- APN - internet;
- Username - not filled;
- Password is not filled.
It remains only to confirm and select this access point to connect.
Life
The Ukrainian operator Life requires the following information to connect:

It remains only to confirm and select this access point to connect.
We connect the Internet on Android - tablet via usb - cable
If it suddenly happened that a smartphone without a WI-FI module, then you can always connect the Internet to an android from a computer via usb.

First you have to install a special program on your phone - for example, Reverse Tether. After that, it will be possible to connect to the network via a PC. After installing the wire on the device, lower the curtain (swipe down the screen and get into the quick access menu). In the window that opens, select the item "Connect to the Internet", the sub-item "Connect via USB". Instead, there can only be the inscription "Connection", which must be confirmed.
Now on the computer you need to go to the control panel and select "Network and Sharing Center", where to change the adapter settings.

Photo: Network and Sharing Center
To do this, select the name of the network, right-click on it and in the "Properties" uncheck the first line on the "Access" tab, confirm. Then again we go to the properties, in the same tab we put the first checkmark and select "Local Area Connection" or just put a checkmark in front of this item. We confirm again.

Photo: local connection status
After a couple of minutes, the phone will connect. If an error occurs, the algorithm of actions must be repeated.
Important! Your best bet is to turn off Windows Firewall, reboot your phone before connecting, allow root permissions when prompted from your phone.
Sometimes you may need to install drivers for your smartphone model on your computer.
What's better
The easiest way to connect is to use WI-FI wireless networks - they give the best signal and are the easiest to set up.
Mobile Internet is available everywhere, but there may be problems with its connection. But access via USB should be used when there is no other choice - for example, there is no WI-FI module, and there is no network access service in the selected operator's tariff.

Any way to connect an android to the network is good in its own way. But, if you suddenly failed to connect, you should not try to use another method first, but simply carefully repeat the previous one - most of the errors are associated with inattentive data entry, especially passwords.
Android is a very “Internet-loving” operating system and for comfortable work, installation of applications and synchronization, you will need a connection to the World Wide Web. Consider the two main ways to do this - through Wi-Fi and cellular networks.
WiFi


To connect to a wireless network, select “Settings” from the list of all programs on the device, and, as a rule, Wi-Fi will be the first switch in this menu. When you click on it, the device will automatically offer to connect to the network if it is open, but if it is password protected, you will need to go to the Wi-Fi menu (by clicking on this word), select the desired network and enter your login and password.
Mobile Internet (LTE, 3G and EDGE)


Usually, the smartphone itself automatically configures the necessary access points after it is first turned on with a new SIM card, but if for some reason this did not happen, you can do it manually. To do this, go to settings, click “More” in the “Wireless networks” section, then “Mobile network” and “Access points (APN)”. Here you can create a new access point or change an existing one according to the operator's settings.
Internet setup manually
1 Go to " Main menu"- choose " Settings"
2 Find in the settings " Mobile Internet" or " Wireless networks". In this case, " Mobile Internet". We go into it 
3 Select " Internet access points" or " Access Points (APN). In this case, we have written " Internet access points". We go there. 
4 Click on " Menu"and select there" Create an APN". "Menu" - "Create an APN"

5 Fill in the fields. In field " Name"We write the name of our connection. In the field" APN"We prescribe the APN according to your operator (see information below). In the field" Login"We write the login according to your operator (see information below). In the field Password similarly, enter the password that your telecom operator provides you with (see information below). The rest of the fields do not need to be touched. 
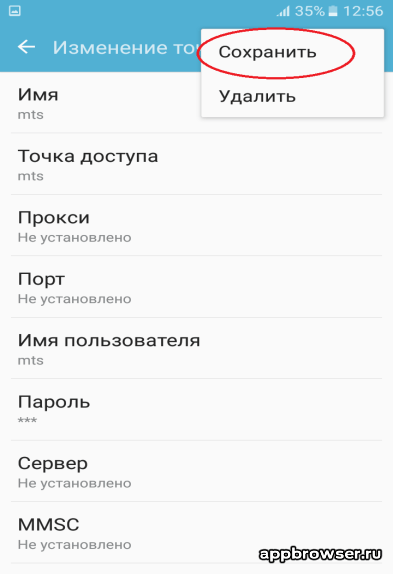
6 After we have entered the data, we need to save our settings. To do this, click on " Menu" - "Save".
7 Close these settings. After we turn on the Internet and use it. To do this, go back to " Main menu" - "Settings". In field " Mobile Internet"click on" OFF". Upon successful connection, the slider will switch to " ON" as shown in the figure below. 
Click on "OFF". The slider will change to "ON" status

Information to fill in the fields
Name - any
APN (access point)
- for MTS: internet.mts.ru
- for BeeLine: internet.beeline.ru
- for Megafon: internet
- for Tele2: internet.tele2.ru
- for NSS: internet
- for Utel: internet.usi.ru
- for Smarts: internet.smarts.ru
Username
- for MTS: mts
- for BeeLine: beeline
- for Megafon: not entered
- for tele2: not entered
- for NSS: not entered
- for Utel: not entered
- for Smarts: not entered
Password:
- for MTS: mts
- for BeeLine: beeline
- for Megafon: not entered
- for tele2: not entered
- for NSS: not entered
- for Utel: not entered
- for Smarts: not entered
If your operator is not in the list, the settings can be found on its official website. If you did everything according to the instructions above, but the Internet did not work, restart your device.